LCI Power Tongue Jack User manual

Power Tongue Jack
OEM INSTALLATION MANUAL

Rev: 10.23.19 Page 2 CCD-0001562
Introduction
The Power Tongue Jack is used with travel trailer A-frame applications. The textured casing helps protect
from chips and cracks. Four LED lights provide excellent illumination while reducing power consumption.
Helical cut gears reduce noise and improve operating efficiency. Enhanced rocker switch improves its
durability. The Power Tongue Jack has a 30AMP, 18" Stroke with a 3,500 lb capacity.
For information on the assembly or individual components of this product, please visit:
https://support.lci1.com/tongue-jacks-support-power-tongue-jack.
NOTE: Images used in this document are for reference only when assembling, installing and/or operating
this product. Actual appearance of provided and/or purchased parts and assemblies may differ.
Safety
Read and understand all instructions before installing or operating this product. Adhere to all safety labels.
This manual provides general instructions. Many variables can change the circumstances of the instructions,
i.e., the degree of difficulty, operation and ability of the individual performing the instructions. This
manual cannot begin to plot out instructions for every possibility, but provides the general instructions,
as necessary, for effectively interfacing with the device, product or system. Failure to correctly follow the
provided instructions may result in death, serious personal injury, severe product and/or property damage,
including voiding of the LCI limited warranty.
The "WARNING" symbol above is a sign that a procedure has a safety risk involved and may cause death or
serious personal injury if not performed safely and within the parameters set forth in this manual.
Failure to follow instructions provided in this manual may result in death, serious personal injury
and/or severe product and property damage, including voiding of the component warranty.
The trailer MUST be supported per OEM specifications before working underneath. Failure to do so
may result in death or serious injury.
TABLE OF CONTENTS
Introduction 2
Safety 2
Resources Required 3
Preparation 3
Installation 4
Operation 5
Unhitching From Tow Vehicle 5
Hitching to Tow Vehicle 5
Manual Operation 6
Notes 7
Rev: 10.23.19 Page 3 CCD-0001562
Preparation
1. Support the trailer according to OEM instructions.
2. Remove the footpad from the Power Tongue Jack (if necessary).
3. Remove the hairpin cotter pin (Fig.1D) and clevis pin (Fig. 1B) holding the footpad (Fig. 1C) to the jack
leg (Fig. 1A). Set the pins and the footpad aside.
Fig. 1
A
B
C
D
The “CAUTION” symbol above is a sign that a safety risk is involved and may cause personal injury
and/or product or property damage if not safely adhered to and within the parameters set forth
in this manual.
Resources Required
Moving parts can pinch, crush, or cut. Keep clear at all times.
• Cordless or Electric Drill or Screw Gun
• Appropriate Drive Bits
• ½" Socket
• Three ⁄" - 16 x 1” hex head bolts
• Appropriate loom, size cut to length

Rev: 10.23.19 Page 4 CCD-0001562
Installation
1. Carefully slide the jack leg (Fig. 2A) through the hole in the coupler (Fig. 2B) on the trailer A-frame
(Fig. 2C).
2. Align the three holes in the Power Tongue Jack mounting plate (Fig. 3A) with the three holes in the
coupler (Fig. 3B).
3. Secure the Power Tongue Jack to the coupler plate with the three required 3/8" - 16 x 1” hex bolts (Fig. 4A).
4. Connect the red power wire from the Power Tongue Jack housing to a grounded 12V power supply
on the trailer.
NOTE: The Power Tongue Jack must be wired through a 30 amp fused circuit.
Fig. 3 Fig. 4
A
B
A
Fig. 2
A
C
B
D
All electrical wiring harnesses shall be loomed and secured to prevent possible damage and
installed in accordance with RVIA electrical standards.
5. Loom the harness wires (Fig. 2D) with the appropriate size and length to protect the wires from damage.
6. Reattach the footpad to the jack leg by sliding the foot pad back over the bottom of the jack leg and
securing it with the clevis pin and hairpin cotter pin previously removed (Fig. 1).

Rev: 10.23.19 Page 5 CCD-0001562
Operation
NOTE: The ON and OFF light switch (Fig. 6) controls the power tongue jack's light only. If left on for
an extended period of time, the light will drain the trailer's battery.
NOTE: The power tongue jack is designed for vertical movement of the trailer only.
Unhitching From Tow Vehicle
1. Chock the tires of the trailer.
2. Make sure the footpad of the power tongue jack is pinned securely in place with the clevis pin and
hairpin cotter pin (Fig. 5B).
3. Make sure the ground surface under the power tongue jack is firm and level.
4. Push EXT (Fig. 6B) to extend the power tongue jack until the footpad touches the ground and the
coupler clears the hitch ball.
5. Disconnect all electrical and mechanical connections between the trailer and tow vehicle.
6. Move the tow vehicle away from the trailer.
7. Push RET (Fig. 6A) as needed to return the front of the trailer to level.
Hitching to Tow Vehicle
1. Chock the tires of the trailer.
2. Press EXT (Fig. 6B) if needed to allow the coupler to clear the hitch ball.
3. Push RET (Fig. 6C) to retract the power tongue jack until the coupler properly mounts the hitch ball
and the leg of the power tongue jack is fully retracted.
NOTE: Make sure the leg of the power tongue jack (Fig. 5A) is fully retracted prior to moving the tow vehicle.
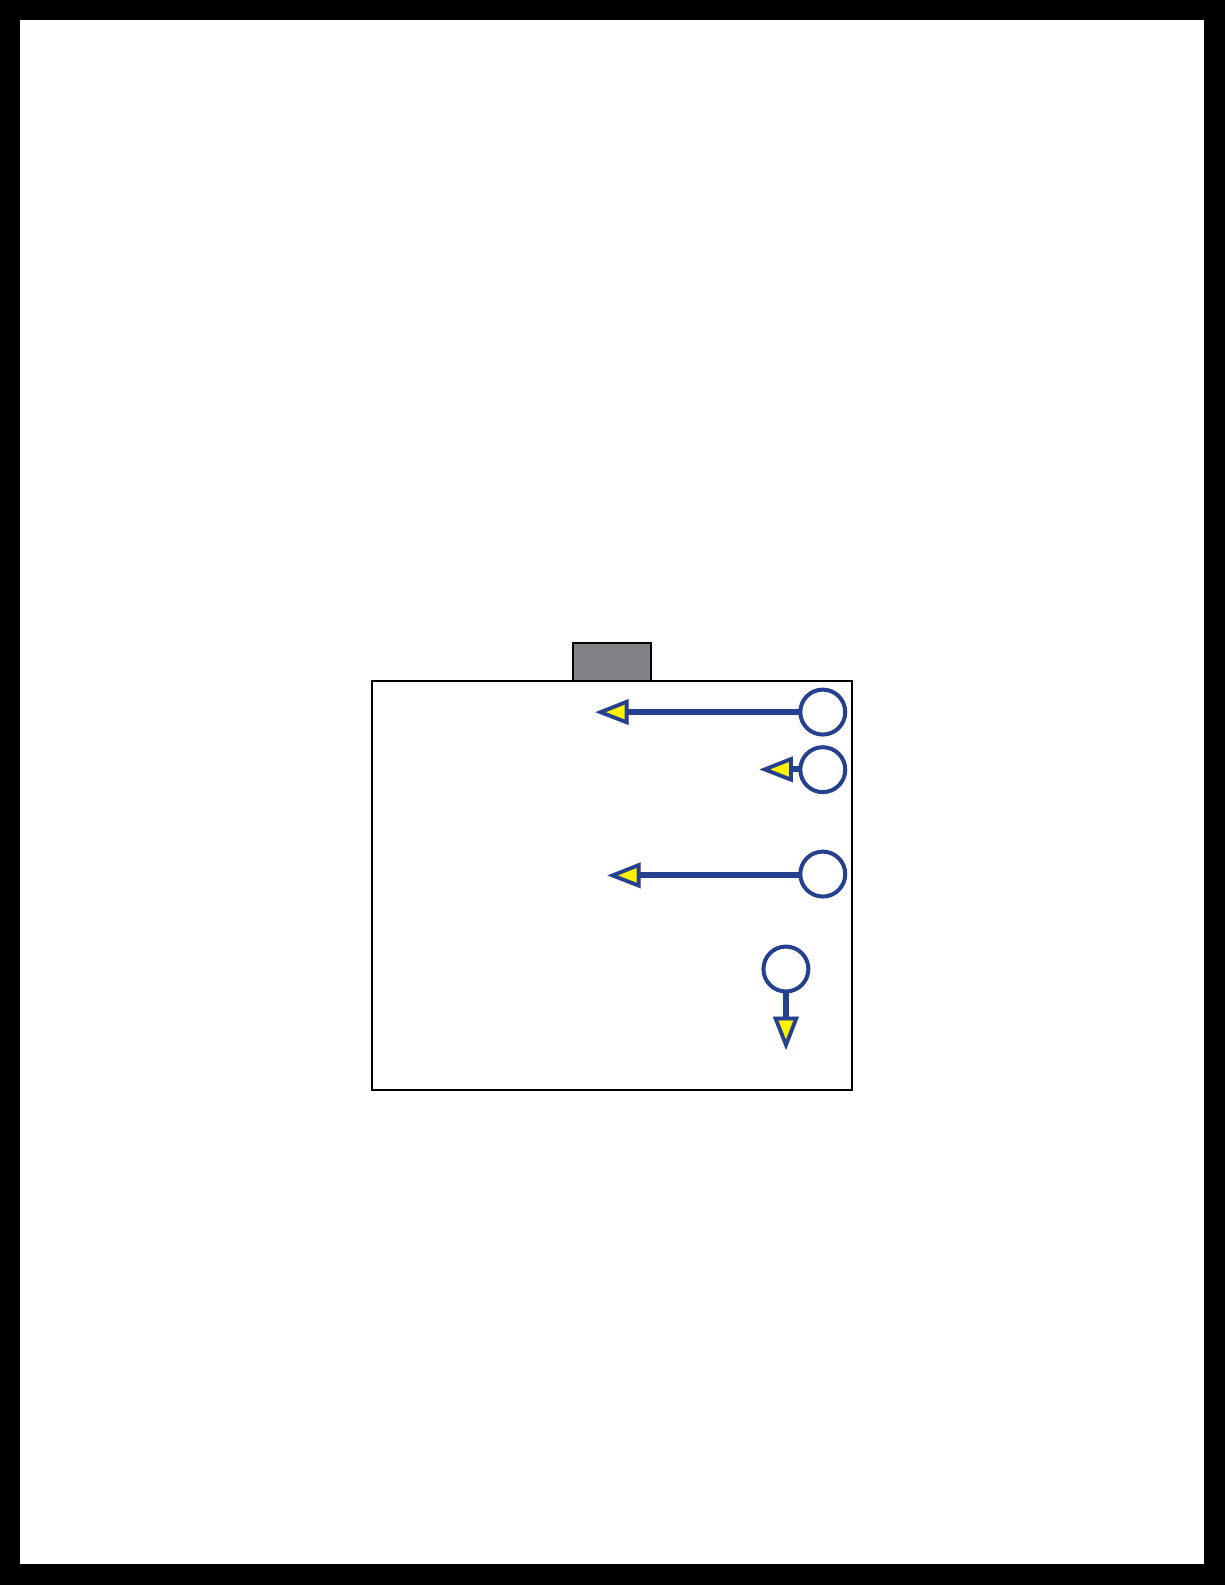
A
B
Light
Switch
B
A
Fig. 5 Fig. 6

Rev: 10.23.19 Page 6 CCD-0001562
Manual Operation
NOTE: In the event of loss of power, the power tongue jack can be operated manually.
1. Manually unhitching from tow vehicle:
A. Chock the tires of the trailer.
B. Be sure the footpad of the power tongue jack is pinned securely in place with the clevis pin and
hairpin cotter pin (Fig. 7B).
C. Make sure the ground surface under the power tongue jack is firm and level.
D. Open the rubber plug (Fig. 8A) on top of the power tongue jack's gearbox to expose the manual
drive shaft.
E. Insert the manual crank handle (Fig. 9).
F. Turn the handle clockwise until the trailer is supported and the coupler clears the hitch ball.
G. Move the tow vehicle away from the trailer.
H. Lower the trailer until it is level by turning the crank handle counterclockwise.
I. Remove the crank handle (Fig. 9).
J. Replace the rubber plug (Fig. 8A).
2. Manually reconnecting to tow vehicle:
A. Chock the tires of the trailer.
B. Be sure the footpad of the power tongue jack is pinned securely in place with the clevis pin and
hairpin cotter pin (Fig. 7B).
C. Open the rubber plug (Fig. 8A) on top of the power tongue jack’s gearbox to expose the manual
drive shaft.
D. Insert the manual crank handle (Fig. 9).
E. Turn the crank handle counterclockwise until the coupler properly mounts the hitch ball and the
leg of the power tongue jack is fully retracted.
F. Remove the crank handle (Fig. 9).
G. Replace the rubber plug (Fig. 8A).
NOTE: Be sure the leg (Fig. 7A) of the power tongue jack is fully retracted prior to moving the tow vehicle.
B
A
Fig. 7
A
Fig. 8 Fig. 9

Rev: 10.23.19 Page 7 CCD-0001562
Notes

The contents of this manual are proprietary and copyright protected by Lippert Components, Inc. (LCI).
LCI prohibits the copying or dissemination of portions of this manual unless prior written consent from an
authorized LCI representative has been provided. Any unauthorized use shall void any applicable warranty.
The information contained in this manual is subject to change without notice and at the sole discretion of LCI.
Revised editions are available for free download from lci1.com.
Please recycle all obsolete materials.
For all concerns or questions, please contact
Lippert Components, Inc.
Table of contents
Other LCI Jack manuals

Popular Jack manuals by other brands

AllTrade
AllTrade POWERBUILT 647504 Operating and maintenance instruction manual

Enerpac
Enerpac GBJ Series instruction manual

Daytona
Daytona 64241 Owner's manual & safety instructions

Torin BIG RED
Torin BIG RED T830023 owner's manual

Enerpac
Enerpac POW'R RISER PR Series instruction sheet

Black Hawk Automotive
Black Hawk Automotive BH2300 Operating instructions & parts manual


