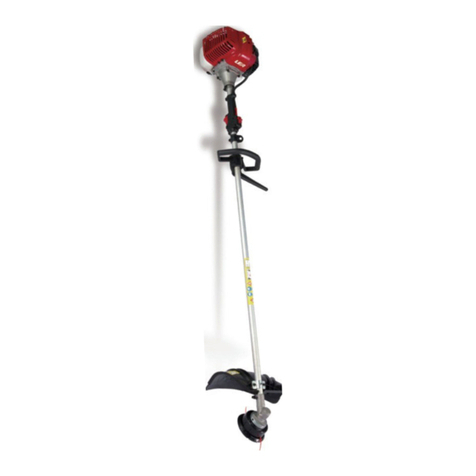
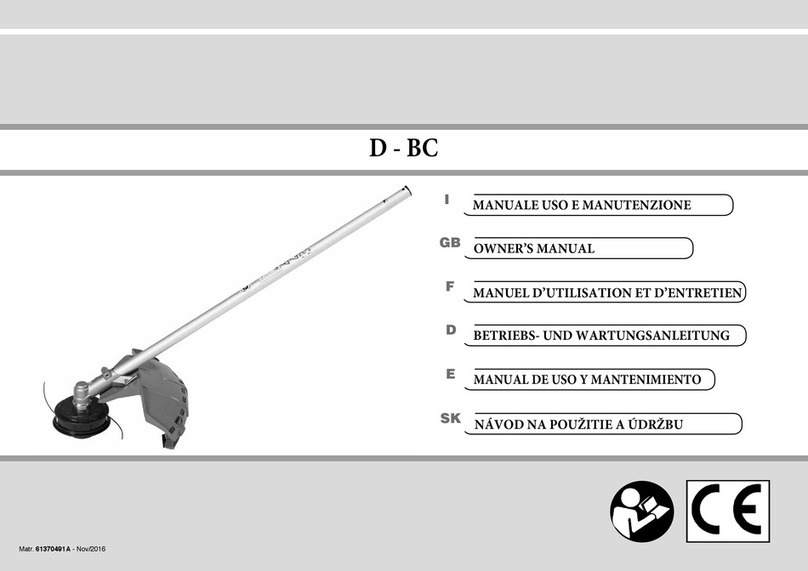
Lea LE25254 DP User manual

BRUSHCUTTER
DECESPUGLIATORE
LE25254 DP
Original instructions
Istruzioni originali

2
INDEX (GB)
INDICE (IT)
DETAILED DESCRIPTION OF THE PRODUCT……………………………………… 3
TECHNICAL CHARACTERISTICS……………………………………………………... 3
DESCRIPTION OF SYMBOLS………………………………………………………….. 4
SAFETY INSTRUCTIONS……………………………………………………………….. 5
SPECIAL SATETY WARNING………………………………………………………….. 6
ASSEMBLY………………………………………………………………………………... 7
OPERATION………………………………………………………………………………. 9
MAINTENANCE AND CARE……………………………………………………………. 13
TROUBLESHOOTING…………………………………………………………………… 14
CONFORMITY DECLARATION………………………………………………………… 15
DESCRIZIONE DEL PRODOTTO………………………………………………………. 17
CARATTERISTICHE TECNICHE……………………………………………………….. 17
DESCRIZIONE DEI SIMBOLI…………………………………………………………… 18
ISTRUZIONI DI SICUREZZA…………………………………………………………….. 19
AVVERTENZE SPECIALI………………………………………………………………... 21
MONTAGGIO……………………………………………………………………………… 21
UTILIZZO…………………………………………………………………………………… 24
MANUTENZIONE………………………………………………………………………….. 28
RISOLUZIONE DEI PROBLEMI………………………………………………………… 30
DICHIARAZIONE CE DI CONFORMITÀ……………………………………………….. 33

3
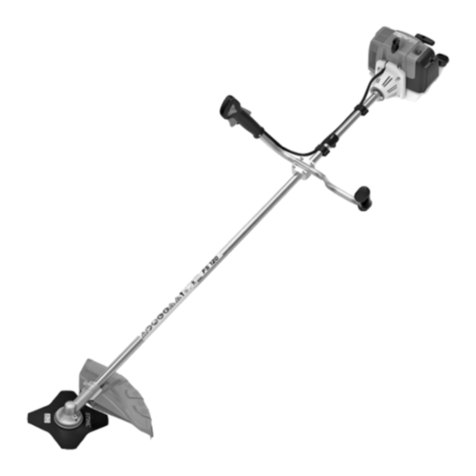
DETAILED DESCRIPTION OF THE PRODUCT
1. Transmission.
2. Throttle trigger.
3. Switch ON/OFF.
4. Safety lever.
5. Ratchet.
6. Starter handle.
7. Choke.
8. Primer.
9. Handlebar.
10. Air filter cover.
11. Fuel cap.
12. Fuel tank.
13. Guard support.
14. Protector.
15. Nylon head.
16. Nylon cutting blade.
17. Blade.
18. Gear Box.
19. Hitch of harness.
20. Adapter
TECHNICAL CHARACTERISTICS
Model LE25254 DP
Displacement (cm3) 25,4
Maximum power (kW) 0,7
Engine/Fuel ratio 2Stroke /Gasoline 40 : Oil 1
Maximum engine speed(min-1) 9000
Maximum rotaion of the head tool(min-1) 6700
Idle speed (min-1) 3000
Fuel tank capacity . L 0,65
Unit mass (empty tanks without cutting
attachment) 5,6
Vibration level (ISO 22867) (m/s2) 7,2 K=1,5m/s2
Sound pressure level (dB(A)) 89,8
Guaranteed sound power level (dB(A)) 112

4
DESCRIPTION OF SYMBOLS
Symbols are used in this manual to attract your attention to possible risks. The safety
symbols and the explications which accompany them must be perfectly understood. The
warning themselves do not prevent the risks and can not be a substitute for proper
methods of avoiding accidents.
This symbol, before a safety comment, indicates a precaution, a warning or a danger.
Ignoring this warning can lead to an accident for yourself or for others. To limit the risk of
injury, fire or electrocution always apply the recommendations indicated.
Before any use, refer to the corresponding paragraph in the present manual. Read the
instruction handbook and follow all warnings and safety instructions
Conforms to relevant safety standards.
Keep all children, bystanders and helpers 15 meters away from the brush cutter.
The exhaust and other parts of the engine will get very hot during use, do not touch.
Gasoline is very flammable. Avoid smoking or bringing any flame or sparks near fuel.

5
Beware of thrown objects hit by cutting attachments. Never use without properly mounted
blade guard.
Wear head protection, hearing protection and eye protection when using the device.
Wear robust footwear when using the device.
Wear protective gloves when using the device.
The part to refuel the “MIX GASOLINE” on fuel tank.
Choke
“O” stop/Off “I” run/On
Cutting device rotation direction
SAFETY INSTRUCTIONS
This appliance is not intended for use by persons (including children) with reduced physical,
sensory or mental capabilities, or lack of experience and knowledge, unless they have been
given supervision or instruction concerning use of the appliance by a person responsible for
their safety.Children should be supervised to ensure that they do not play with the appliance.

6
1) Training
-Read the instructions carefully. Be familiar with the controls and the proper use of the
appliance.
-This product has been designed for use in cutting grass, and it should never be used for
any other purpose.
-Never allow children or people unfamiliar with these instructions to use the appliance.
Local regulations may restrict the age of the operator.
-Never mow while people, especially children, or pets are nearby.
-The operator or user is responsible for accidents of hazards occurring to other people or
their property.
-Avoid running the engine indoors. The exhaust gases contain harmful carbon monoxide.
2) Preparation
-While cutting, always wear substantial footwear and long trousers.
-Do not operate the appliance when barefoot or wearing open sandals.
-Thoroughly inspect the area where the appliance is to be used and remove all stones,
sticks, wires, bones, and other foreign objects.
-Before using, always visually inspect to see that the blades, blade bolts and cutter
assembly are not worn or damaged. Replace worn or damaged blades and bolts in sets
to preserve balance.
-On multi-bladed appliances, take care as rotating one blade can cause other blades to
rotate.
3) Operation
-Operate only in daylight or in good artificial light.
-Avoid operating the appliance in wet grass, where feasible.
-Always be sure of your footing on slopes.
-Walk, never run.
-Exercise extreme caution when changing direction on slopes.
-Do not cutting excessively steep slopes.
-Use extreme caution when reversing or pulling the appliance towards you.
-Never operate the appliance with defective guards or shields, or without safety devices.
-Switch on the motor according to instructions and with feet well away from the blade(s).
-In this case, do not tilt it more than absolutely necessary and lift only the part which is
away from the operator. Always ensure that both hands are in the operating position
before returning the appliance to the ground.
-Do not put hands or feet near or under rotating parts.
-Never pick up or carry an appliance while the motor is running.
-Pull the spark from the socket:
· whenever you leave the machine;
· before clearing a blockage;
· before checking, cleaning or working on the appliance;
· after striking a foreign object. Inspect the appliance for damage and make repairs as
necessary;

7
· if the appliance starts to vibrate abnormally (check immediately).
4) Maintenance and storage
-Keep all nuts, bolts, and screws tight to be sure the appliance is in safe working condition.
-Check the grass catcher frequently for wear or deterioration.
-Replace worn or damaged parts for safety.
-For rotary mowers, ensure that only replacement cutting means of the right type are used.
-Never store the equipment with petrol in the tank inside a building where fumes can reach
-an open flame or spark;
-Allow the engine to cool before storing in any enclosure;
-To reduce the fire hazard, keep the engine, silencer, battery compartment and petrol
storage area free of grass, leaves, or excessive grease;
-If the fuel tank has to be drained, this should be done outdoors.
SPECIAL SATETY WARNING
1. Grip the handles of the brush cutter firmly with both hands. If you
suspend the work, Place the throttle into the idling position.
2. Always be sure to maintain a steady, even posture while working
3. Maintain the speed of the engine at the level required to perform
cutting work and never raise the speed of the engine above the
level necessary.
4. If the grass gets caught in the blade during operation , or if you
need to check the unit of refuel the tank always be sure to turn
off the engine.
5. If the blade touches a hand object like a stone immediately stop
the engine and check it something is wrong with the blade. If
so,replace the blade by new one .
6. If someone calls out white working , always be sure to turn off the
engine before turning around.
7. Never touch the spark plug or plug cord while the engine is in
operation .Doing so may result in being subjected to an electrical
shock .
8. Never touch the muffler, spark plug or other metallic parts of the engine while the engine
is in operation or immediately after shutting down the engine. Doing so may result in
serious burns.
9. When you finish cutting in one location and wish to continue work inanother
spot, turn off the engine and turn the until as the blade faces away from your body.
10. Check the cutting attachment stop turning under the engine idle before start to use the
machine.
ASSEMBLY
When assembling this machine, please follow the instructions for assembly steps.
1.
Assemble the handle on the machine. First release the inner hex screws, second
take underside handle on the shaft, last assemble the unperside handle tighten the inner

8
screws enough.
2. Assemble the safe guard. Fix the safe guard with hex key and wrench enclosed as
stardard accessories for tighting the nuts enough. Please see the below pictures showing.
Warning!
Use only original manufacturer's replacement parts, accessories and attachments. Failure to
do so can cause poor performance, possible injury and may void your warranty. Never use
the machine without the guard assembled!
3.Guide shaft assembly
Put the lower shaft (2) into the shaft coupling and concurrently pull out the locking pin (1). Slide the lower shaft
in as far as it will go and let go of the locking pin. The locking pin must engage into the opening (3) located
laterally in the lower shaft. Of necessary, slightly move the lower shaft to-and-fro until the locking pin safely
locks in place. Then tighten the fly nut (4).

9
4.Assemble the cutting head.
4.1Release the nut. Line up the two holes of flange and shield, use one hex kep to hold the
flange as below and turn the socket wrench clockwise, the nut will be released.
4.2 Fit the Nylon cutting head. Remove another shield after release the nuts as picture
showing. Still hold the flange, take the Nylon cutting head on the shaft and rotate
counter-clockwise, the Nylon cutting head is fitted.

10
4.3 Release the Nylon cutting head.
Use screw driver to hold flange and then rotate the Nylon cutting head clockwise, it will be
replaced.
4.4 Fit the blade.
Keep hex key holding on the flange then release the nuts as picture showing, then put the
blade, holder B, cover and left nut according to priority as below picture.
Note the blade rotation direction needs be same as below picture. Use screw driver to hold
flange and tighten nut counter-clockwise, ensure the nut is tightened enough
4.5 Release blade.
Use screw driver to hold flange and release nut, the blade can be took off.
Warning!
Please make sure the cutting head has been assembled correctly before use!
Note: The packaging material is made of recycle materials. Dispose of packaging materials in
accordance with regulations.
5. Fit the belt. According to picture showing, fit the belt well.

11
OPERATION
When operating this machine, please follow the instructions for operations steps
Filling with fuel
Never use oil for 4-cycle engine use or water cooled 2-cycle engine. If can cause spark plug
fouling exhaust port blocking or piston ring sticking.
Mixed fuels, which have been left unused for a period of one month or more may clog the
carburetor or result in the engine failing to operate properly. Put remained fuel into an airtight
container and keep it in the dark and cool room.
Mix a regular grade gasoline (leaded or unleaded, alcohol-free) and a quality-proven
motor oil for air-cooled 2 cycle engines.
RECOMMENDED MIXING RATIO GASOLINE 40: OIL 1
Warning! Take care of the emission of exhaust gases.
Always shut off engine before fueling. Never add fuel to a machine with a running or
hot engine. Take care of fire!
– Unscrew the tank cap and remove it.
– Pour in the fuel carefully, Avoid spilling
Danger of injury!
Fuel is explosive!
DANGER! - Turn off and cool the motor down before filling the tank with fuel.
- You must observe all safety instructions relating to handing fuel.
Risk of device damage!
The device is supplied without motor or gearbox oil.
ATTENTION! Before operating, you must fill it with fuel.

12
– Screw the tank cap on firmly by hand.
Draining fuel
-Hold a collection container beneath the fuel drain bolt.
-Unscrew the tank cap and remove it.
-Allow the fuel to run out completely.
-Screw the tank cap on firmly by hand.
Start on the unit
Do not start the unit until it has been completely assembled. Before switching on the unit,
always checking the oil
Check before use!
Check the safe condition of the device:
-Check the device for leaks.
-Check the device for visual defects.
-Check that all parts of the device have been securely fitted.
-Check that all safety devices are in proper condition.
Once the machine has been set up properly, start the engine as follow:
1. Press the fuel pump more than 10 times.
Danger of injury!
Do not operate the device unless you did not find any faults. If a part has
DANGER! became defective, make sure to replace it before you use the device again.
Danger of injury!
Before starting work, always check the ground and remove all objects which
DANGER! could be thrown by the device.

13
2. Turn the engine switch to the "I"position.
3. Put the choke lever on the A (OFF) position
4. Pull the recoil starter handle 3-5times to start the engine, as following picture.
5. Adjust the choke leverl to B(half open) position.

14
6. Pull the rope until engine starts
7. When the engine is running and idling. The throttle lever on handle is as below picture.
First press the lock off lever and then switch the throttle lever on, the machine will be
working.
8. If use Nylon cutter, before cutting, need bump to feed line on hardness area
9. If meet any problems, press the engine switch"O", the machine will stop running. If
need stop cutting head working, release the throttle lever.
1
2

15
10. If meet any problem, pull the pin of safety belt, then release the brush cutter soon.
11. If the machine is hot, the throttle level can be adjusted to ON position directly when re
start the machine.
MAINTENANCE AND CARE
Before performing any maintenance or cleaning work, Always turn off the engine.
1. Do not spray the unit with water. Ingress of water may damage the engine and electrical
connection.
2. Clean the unit with a cloth, hand brush, etc.
Maintenance schedule
12 hours of use 24hours of use 36hours of use
Air filter clean clean replace
Spark plug check clean replace
Expert inspection is required:
a) If the brush cutter strikes an object.
b) If the motor stops suddenly
c) If the blade is bent (do not align!)
d) If the gears are damaged.
Replacing and resharpening the cutting blade at the end of the mowing season always
resharpen the cutting blade or, if required, replace the cutting blade with a new one. Always
have the cutting blade resharpened or replaced by a customer service centre (measurement
of imbalance).
Unbalanced blades will cause the lawn mower to vibrate violently-risk of accident!
Change and clean the spark plug
1) Once the engine has cooled, remove the spark plug using the socket spanner supplied.
2) Clean the plug with a wire brush.
3) Using a feeler gauge; set the gap to 0.6-0.7 mm.
4) Install the spark plug carefully by hand, to avoid cross-threading.

16
5) After the spark plug is seated, tighten with spanner to compress the washer.
Clean the air filter
Unclip the air filter cover and remove the sponge filter element. To avoid objects falling into
the air tank, replace the air filter cover. Wash the filter element in warm soap water, rinse and
allow drying naturally.
Warning!
Never run the engine without the air filter element installed.
Storing the unit
After cutting, clean the unit thoroughly. Store the unit in a dry room allow the motor to cool
down beforehand.
TROUBLESHOOTING
Before performing any maintenance or cleaning work, always turn off the engine and
wait until the cutter has come to a standstill
1) Engine does not run:
---Reassemble the blade or Nylon cutter.
---check the fuel weather use out or not.
2) Engine power drops:
---Have cutting blade resharpened /replaced (customer service centre)
3) If the temperature of machines is too high:
---insure the machines have rest at regular time.
Faults which cannot be rectified with the aid of this table may be rectified by a specialist
company only (customer service centre).

17
…………………………………………………………………………………………………………….
CONFORMITY DECLARATION
The
undersigned, DUNSCH EUROPE SrL, Via dell’Artigianato nr. 10, GRAGNANO
TREBBIENSE (Italy). hereby
certifies that the units
described
below:
BRUSHCUTTER
Model LE25254 DP(PNBC260B-3B)
Power 0,7kW
Brand:
LEA
Batch 20160201
Sound pressure level: 89.8dB (A)
Guaranteed
soundpowerlevel: 112dB (A)
conformity assessment procedure concerning
directive
2000/14/EC
:AnnexV
Is in
compliance
with the
provisions
of the
following European
directives:
2006/42/EC
"Machinery"
2004/108/EC
“Electro
Magnetic
Compatibility”
2000/14/EC
"Noise outdoor"
97/68/EC As amended by 2004/26 "Emissions
of pollutants”
And to the
following
standards:
EN ISO 11806-1:2011
EN ISO 14982:2009
.........................................................................................................................................................
Person authorized to compile the technical file:
Aurelio de Michele- Managing Director-Dunsch Europe SRL.,
Via dell'Artigianato n. 10 ,I-29010 GRAGNANO TREBBIENSE-ITALY
Made in China
Serial number and year of production are marked on the machine
Gragnano Trebbiense 04.01.2016

18
DESCRIZIONE DEL PRODOTTO
1. Albero di trasmissione.
2. Grilletto dell’acceleratore
3. Interuttore ON / OFF.
4. Leva di sicurezza.
5. Bottone blocca acceleratore
6. Maniglia di avviamento.
7. Leva choke.
8. Primer.
9.Impugnatura.
10. Tappo del filtro dell’aria.
11. Tappo del serbatoio carburante.
12. Serbatoio del carburante.
13. Supporto della protezione.
14. Protezione.
15. Testa di filo di Nylon.
16. Lametta taglio del filo di nylon.
17. Lama d’acciaio.
18. Scatola coppia conica.
19. Gancio dell’imbracatura.
20. Adattatore
CARATTERISTICHE TECNICHE
Modello LE25254 DP
Cilindrata (cm3) 25,4
Potenza massima (kW) 0,7
Motore/ rapporto di carburante 2 tempi/Benzina 40: Olio 1
Velocità massima de giro del motore (min-1) 9000
Velocità massima di giro dell’asse dell′utensile
(min-1) 6700
Velocità de giro del motore al minimo (min-1) 3000
Capacità del serbatoio . L 0,65
Peso (kg) (senza gas, senza utensili di taglio e
senza protezione) 5,6
Livelli di vibrazione (ISO 22867) (m/s2) 7,2 K=1,5m/s2
Livello di pressione sonora (ISO 22868) (dB(A)) 89,8
Livello di potenza sonora garantito (ISO 22868)
(dB(A)) 112

19
DESCRIZIONE DEI SIMBOLI
Questo manuale utilizza una serie di simboli per avvertirvi dei possibili rischi. È
necessaria un’adeguata comprensione dei simboli di sicurezza e delle spiegazioni
correlate. Le stesse avvertenze non prevengono i rischi e non possono sostituire le
corrette misure da prendere per evitare gli incidenti.
Questo simbolo, posizionato prima di un’osservazione sulla sicurezza, indica attenzione,
avvertenza o pericolo. Ignorare questa avvertenza potrebbe causare incidenti a voi stessi
o ad altre persone. Seguire sempre i suggerimenti offerti, per limitare il rischio di lesioni,
incendio o elettrocuzione.
Prima dell’uso, leggere il paragrafo attinente del presente manuale. Leggere la guida e
seguire tutte le avvertenze e le istruzioni di sicurezza.
Conforme agli standard di sicurezza rilevanti.
Tenere i bambini, i passanti e gli aiutanti a una distanza di 15 metri dal decespugliatore.
Lo scarico e altre parti del motore diventano molto calde durante l’uso, non toccare.
La benzina è molto infiammabile. Evitare di fumare o portare fiamme o scintille vicino al
carburante.

20
Attenzione agli oggetti che possono essere lanciati se toccati con gli accessori di taglio.
Non utilizzare mai senza la protezione della lama correttamente montata.
Attenzione a non ferirvi con gli accessori di taglio
Durante l’uso della macchina indossare accessori di protezione per testa, orecchie e
occhi.
Indossare scarpe solide durante l’uso della macchina.
Indossare guanti protettivi durante l’uso della macchina.
Simbolo per il rifornimento con “MISCELA DI BENZINA” sul serbatoio.
Leva starter (Starter)
Table of contents
Languages:
Other Lea Brush Cutter manuals

