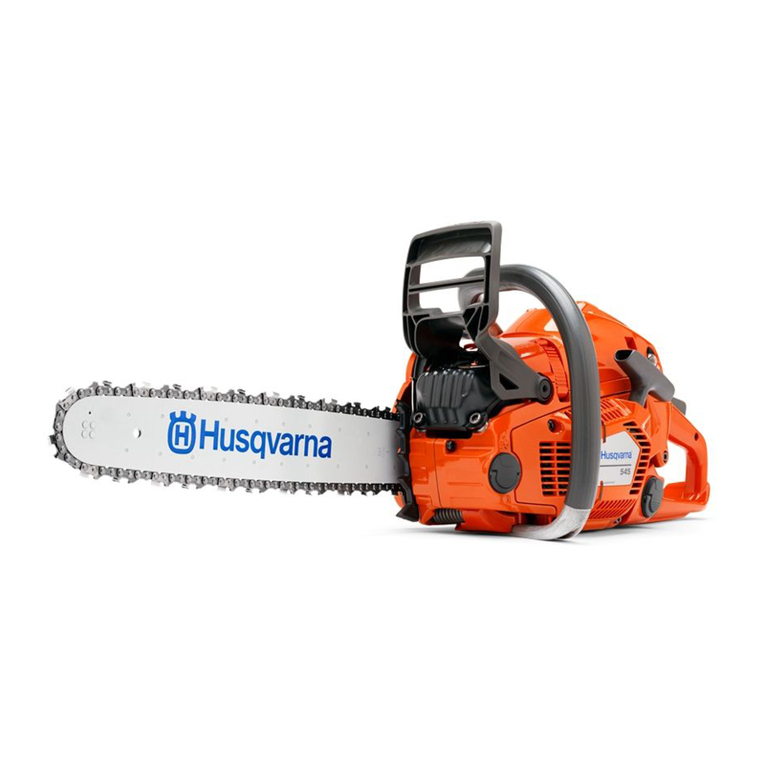
Lea LE32458-45A User manual

1
Original Instructions
PETROL CHAIN SAW
LE32458-45A
Read this operator manual carefully before the first use.

2
LIST OF MAIN PART

3
TECHNICAL SPECIFICATIONS
Model
LE32458-45A
Equipment mobility
hand-held
Unit mass
5,4 kg
Volumes of fuel tank
550 cm³
Volumes of oil tank
260 cm³
Cutting length
450mm18''
Chain pitch
0.325” (8.255mm)
Chain gauge
0.058” (1.47mm)
Sprocket
7Teeth x 8.255 mm
Displacement:
45.8cm³
1. Rear handle
2. Throttle interlock
3. Throttle trigger
4. Primer
5. Choke knob
6. Air filter cover screw
7. Filter cover
8. Air filter
9. Spark plug
10. Front handle
11. Front hand guard brake lever
12. Spiked bumper
13. Guide bar
14. Saw chain
15. Sprocket nose
16. Retaining nut
17. Chain catcher
18. Cover
19. Cylinder fins
20. Rear hand safeguard
21. Bolts
22. a. Tension screw b. Tension
pin
23. Oiling port
24. Drive sprocket
25. Clutch
26. Silencer
27. Ignition switch
28. Chain oil tank cap
29. Fuel tank cap
30. Recoil starter handle
31. Air vents
32. Spark plug wrench
33. Screwdriver
34. Chain file
35. Fuel mixing bottle
36. Guide bar cover

4
Max. Engine speed
12000 min-1
Clutch engagement speed
4500 min-1
Engine idling speed
3000±500 min-1
Max. chain speed
19.3m/s
Maximum shaft brake power of the
engine
1.6kW /8000min-1
A-weighted sound pressure level at
the operator position according to
ISO 22868 .
LpA: 96 dB(A) K=3,0 dB(A)
A-weighted emission sound power
level according to noise directive
2000/14/EC
LwA:110 dB(A)
Vibration emission levels according to
ISO 22867
afront_ hv,eq: 6,5 m/s2K=1,5 m/s2
arear _hv,eq: 6m/s2K=1,5 m/s2
Type of the engine
1E43F-2
Net weight
5.4 kg
Noise Information
Measured sound values determined according to ISO 22868.
The noise figures quoted are emission levels and are not
necessarily safe working levels. Whilst there is a correlation
between the emission and exposure levels, this cannot be used
reliably to determine whether or not further precautions are
required. Factors that influence the actual level of exposure of
work-force include the characteristics of the work room, the other
sources of noise, etc. i.e. the number of machines and other
adjacent processes, and the length of time for which an operator
is exposed to the noise. Also the permissible exposure level can
vary from country. This information, however, will enable the user
of the machine to make a better evaluation of the hazard and risk.
Wear hearing protection
Vibration total values (triax vector sum) determined according to
ISO 22867:

5
The vibration emission level given in this information sheet has
been measured in accordance with a standardized test given in
ISO 22867:2003 and may be used to
compare one tool with another.
It may be used for a preliminary assessment of exposure.
The declared vibration emission level represents the main
applications of the tool. However if the tool is used for different
applications, with different accessories or poorly maintained, the
vibration emission may differ. This may significantly increase the
exposure level over the total working period.
An estimation of the level of exposure to vibration should also
take into account the times when the tool is switched off or when it
is running but not actually doing the job. This may significantly
reduce the exposure level over the total working period.
Identify additional safety measures to protect the operator from
the effects of vibration such as: maintain the tool and the
accessories, keep the hands warm, organization of work patterns.
DESCRIPTION OF THE SYMBOLS
The use of symbols in this manual is intended to draw your
attention to possible risks. The safety symbols and the
explanations that accompany them must be perfectly understood.
The warnings in themselves do not remove the risks and cannot
replace correct actions for preventing accidents.
WARNING
This symbol, before a safety comment, indicates a precaution, a
warning or a danger. Ignoring this warning can lead to an accident
for yourself or for others. To limit the risk of injury, fire, or
electrocution always apply the recommendations indicated.

6
Read the operator’s manual
Before any use, refer to the corresponding paragraph in the
present manual.
Conform to relevant safety standards.
Do not use in the rain or leave outdoors while it’s raining.
Start engine creates sparking. Sparking can ignite nearby
flammable gases.
Remove the ignition cable before all maintenance work, and read
the instructions for use.
Take care when handling fuel and lubricants!
For outdoor use only
Strictly no naked flames or smoking near the appliance!
Engines give off carbon monoxide, an odorless, colorless, poison

7
gas.
Breathing carbon monoxide can cause nausea, fainting or death.
Danger of injury from flying parts! Always maintain a sufficiently
safe distance.
These symbols indicates the requirement of wearing ear
protection, eye protection when using the product.
Push the bubble 7 times before use to make sure the petroleum
spirit full of the oil way.
Engine- manual start
The port to refuel the chain oil.
Operate the engine switch; pull the switch to the "O" position,
immediately the engine stops.
Choke closed

8
Choke open
The screw under the "H" stamp is The High-speed adjustment
screw.
The screw under the "L" stamp is The Slow-speed adjustment
screw.
The screw up the "T" stamp is the idle adjustment screw.
Shows the direction of the saw chain installation.
Chain oil adjuster nut.
Chain brake positions (white arrow) and activated (black arrow).
GENERAL SAFETY WARNINGS
The machine shall always be used in accordance with the
manufacturer’s instructions laid down in the instruction handbook.
The manufacturer will not be liable in cases of inappropriate use
or modifications of the appliance. Also, follow the safety advice,
the installation and operation manual and also to the valid
accident prevention regulations.
Do not use the machine if you are tired or distracted or your
reactions are impaired due to the consumption of alcohol or

9
medication. Inattention can result in serious injuries.
If you use the petrol chainsaw for lengthy periods of time, you
may suffer circulation problems caused by vibrations (white finger
disease) and noise.
It is not possible to provide precise details on the duration of use
in each case since it may differ from person to person. The
following factors may effect this phenomenon: Circulation
problems in the hands of the user, low outdoor temperatures and
lengthy periods of use. We therefore recommend that you wear
warm work gloves / ear protector and take regular breaks.
The lubrication oil mist, exhaust gases and saw dust will be
created during working, to reduce your exposure to them: work in
a well ventilated area, and work with approved safety equipment,
such as those dust masks that are specially designed to filter out
microscopic particles and mist.
Appliances with incorrect or missing parts or without a security
case are not to be operated. The service center provides you with
information concerning replacement parts.
Training
a) Read the instruction carefully. Be familiar with the controls
and proper use of the equipment.
b) Never allow children or people unfamiliar with these
instructions to use the machine. Local regulations can restrict
the age of the operator.
c) Never work while people, especially children, or pets are
nearby.
d) Keep in mind that the operator or user is responsible for
accidents or hazards occurring to other people or their
property.
e) Major repair work shall be carried out only by specifically
trained personnel.

10
Preparation
a) WARNING-Petrol is highly flammable:
- store fuel in containers specifically designed for this purpose;
- refuel outdoors only and do not smoke while refueling;
- add fuel before starting the engine. Never remove the cap of fuel tank
or add petrol while the engine is running or when the engine is hot;
- if petrol is spilled, do not attempt to start the engine but move the
machine away from the area of spillage and avoid creating any source
of ignition until petrol vapours have dissipated;
- replace all fuel tank and container caps securely.
b) Replace faulty silencers;
c) Before using, always visually inspect to see that the tools are not worn or
damaged. Replace worn or damaged elements and bolts in sets to
preserve balance.
d) Do not smoke near the machine.
e) Do not wear loose clothing, jewellery, or similar items that could be caught
in the starter or other moving parts.
f) Never put any items into the ventilation openings. Non-observance may
lead to injury, or damage to the machine.
g) It is necessary reduction in power due to use in higher temperatures,
altitudes and humidity as below conditions.
1) Max Working Temperature: 40°C
2) Max altitudes: 1000 m
3) Max humidity: 95%
Operation
a) Do not operate the engine in a confined space where dangerous carbon
monoxide fumes can collect
b) Keep the machine free of oil, dirt and other impurities.
c) Please always place the appliance on even and stable surfaces.
d) Never operate the appliance inside buildings or in an environment without
proper ventilation. Pay attention to air flow and temperature.
e) Do not operate or store the appliance in wet or humid surroundings.
f) Ensure the sound absorber and air filter work properly. These parts serve

11
as flame protection in case of misfire.
g) To avoid possible burn injuries, do not touch the exhaust system or other
parts that become hot during operation. Pay attention to the warnings on
the machine.
h) The engine must not be operated with excessive rotary speed. The
operation of the engine with excessive rotary speed raises the risk of injury.
Parts which affect the rotary speed must not be altered or replaced.
i) Regularly check for leakage or traces of abrasion in the fuel system, such
as porous pipes, loose or missing clamps and damage to the tank or tank
cap. Before use all defects must be repaired.
j) Work only in daylight or in good artificial light.
k) Never pick up or carry a machine while the engine is running
l) Stop the engine:
whenever you leave the machine
before refueling
m) Before checking or adjusting the machine, the ignition plug and the ignition
wire respectively must be removed to prevent accidental starting.
Maintenance and storage
a) Keep all nuts and screws tight to be sure the equipment is in safe working
condition.
b) Never store the equipment with petrol in the tank inside a building where
fumes can reach an open flame or spark.
c) Allow the engine to cool before storing in any enclosure.
d) To reduce the fire hazard, keep the engine, silencer and petrol storage
area free of vegetative material and excessive grease.
e) Replace worn or damaged parts for safety.
f) If the fuel tank has to be drained, this should be done outdoors.
g) Always clean and maintenance before storage.
h) Never disassembly the guards for cutting attachments.
i) Always store the metal elements in cool and dry place, never use rusted
chain or guide. It may cause serous injure during working.
SPECIAL SAFETY WARNINGS FOR THE TOOL

12
Keep all parts of the body away from the saw chain when the chain saw is
operating.
Before you start the chain saw, make sure the saw chain is not
contacting anything.
A moment of inattention while operating chain saws may cause entanglement
of your clothing or body with the saw chain.
Always hold the chain saw with your right hand on the rear handle and
your left hand on the front handle. Holding the chain saw with a reversed
hand configuration increases the risk of personal injury and should never be
done.
Wear safety glasses and hearing protection. Further protective
equipment for head, hands, legs and feet is recommended. Adequate
protective clothing will reduce personal injury by flying debris or accidental
contact with the saw chain.
Do not operate a chain saw in a tree. Operation of a chain saw while up in a
tree may result in personal injury.
Always keep proper footing and operate the chain saw only when
standing on fixed, secure and level surface. Slippery or unstable surfaces
such as ladders may cause a loss of balance or control of the chain saw.
When cutting a limb that is under tension be alert for spring back. When
the tension in the wood fibres is released the spring loaded limb may strike the
operator and/or throw the chain saw out of control.
Use extreme caution when cutting brush and saplings. The slender
material may catch the saw chain and be whipped toward you or pull you off
balance.
Carry the chain saw by the front handle with the chain saw switched off
and away from your body. When transporting or storing the chain saw
always fit the guide bar cover. Proper handling of the chain saw will reduce
the likelihood of accidental contact with the moving saw chain.
Follow instructions for lubricating, chain tensioning and changing
accessories.
Improperly tensioned or lubricated chain may either break or increase the
chance for kickback.

13
Keep handles dry, clean, and free from oil and grease. Greasy, oily handles
are slippery causing loss of control.
Cut wood only. Do not use chain saw for purposes not intended. For
example: do not use chain saw for cutting plastic, masonry or non-wood
building materials. Use of the chain saw for operations different than intended
could result in a hazardous situation.
KICKBACK SAFETY PRECAUTIONS FOR CHAIN SAW USERS
•How to read symbols and colors (Fig. 1)
Fig. 1
Warning: RED Used to warn that an unsafe procedure should not
be performed.
WARNING
1. Avoid bar nose contact
2. Beware of kick back.
3. Do not attempt to hold saw with one hand
4. Hold saw properly with both hands.
DANGER! BEWARE OF KICKBACK!
Kickback may occur when the nose or tip of the guide bar touches
an object, or when the wood closes in and pinches the saw chain
in the cut.
Tip contact in some cases may cause a lightning fast reverse
reaction, kicking the guide bar up and back towards the operator.

14
Pinching the saw chain along the top of the guide bar may push
the guide bar rapidly back towards the operator.
Either of these reactions may cause you to lose control of the saw
which could result in serious personal injury.
Kickback is the result of tool misuse and/or incorrect operating
procedures or conditions and can be avoided by taking proper
precautions as given below:
Fig, 2A Fig. 2B
BEWARE OF: ROTATIONAL KICKBACK (Fig. 2A)
A = Kickback path
B = Kickback reaction zone
THE PUSH (PINCH KICKBACK) AND PULL REACTIONS (Fig. 2B)
A = Pull
B = Solid objects
C = Push
Maintain a firm grip, with thumbs and fingers encircling the chain saw
handles, with both hands on the saw and position your body and arm to
allow you to resist kickback forces. Kickback forces can be controlled by the
operator, if proper precautions are taken. Do not let go of the chain saw.
Do not overreach and do not cut above shoulder height. This helps prevent
unintended tip contact and enables better control of the chain saw in
unexpected situations.
Only use replacement bars and chains specified by the manufacturer.
Incorrect replacement bars and chains may cause chain breakage and/or

15
kickback.
Follow the manufacturer’s sharpening and maintenance instructions for
the saw chain. Decreasing the depth gauge height can lead to increased
kickback.
INTENDED USE
The chain saw is intended for sawing of trees, tree trunks,
branches, wooden beams, planks, etc. Cuts can be sawed with or
across the grain. This product is not suitable for sawing mineral
materials.
ASSEMBLY
Installing guide bar and saw chain
Open the box and install the guide bar and the saw chain on the
power unit as follows.
WARNING!
The saw chain has very sharp edges. Use protective gloves for
safety.
The saw chain and bar are packed separately in the carton.
Chain and guide bar
Use only the guide bar (13) and saw chain (14) according to the
technical data of the product.
1. Set the product on a suitable flat surface.
2. Before removing, ensure the chain brake is disengaged. If in the engaged
position, pull the front hand guard/brake lever (11) backwards until it ‘clicks’
into position.
3. Use the provided spark plug wrench (32) to remove the two retaining nuts
(16) from the side of the cover (18).
4. If necessary adjust the tension pin (22b) by moving the tension screw (22a)
with the screwdriver (33) in or out until it reaches a position where the pin
can be inserted into the lower hole on the guide bar (13) (Fig. 3).
5. The guide bar (13) should be fitted with the saw chain ‘cutter’ symbol at the
top of the bar (Fig. 4).

16
Fig.3 Fig. 4
6. Place the slot in the guide bar (13) over the two bolts (21). Push the guide
bar (13) to the left towards the sprocket (24) (behind the clutch (25)). Make
sure the tension pin (22b) is inserted into the lower hole on the guide bar
(Fig. 5).
7. Place the saw chain (14) over the sprocket (24) behind the clutch (25) and
fit around the guide bar (13). Make sure the chain is placed above the
chain catcher (17) (Fig. 6).
Fig.5 Fig. 6
8. The saw chain movement is as indicated by the arrow (Fig. 7). Make sure
the chain is properly placed over the sprocket nose (15) of the guide bar
(13).
9. Pull the guide bar (13) carefully towards the right to tighten the saw chain
(14) (Fig. 8).

17
Fig. 7 Fig. 8
10. Refit the cover (18). Fix it with the retaining nuts (16) (Fig. 9).
Fig. 9
WARNING!
Always carry out a test run before starting work and after every
tool change! Always ensure that the tools are in good condition,
correctly mounted and able to turn freely. The trial run should be
at last 30 sec.
Adjusting chain tension
WARNING!
The saw chain has very sharp edges. Use protective gloves for
safety.
Saw chain tensioning
1) Always check the saw chain tension before use, after the first cuts and
regularly during use, approx. every five cuts. Upon initial operation, new
chains can lengthen considerably. This is normal during the break-in period
and the interval between future adjustments will lengthen quickly.
2) Lift up the tip of the guide bar (13) and keep it there as you adjust the

18
tension (Fig. 10).
Fig. 10
3) Turn the tension screw (22a) until the chain ‘tie straps’ are just touching the
bottom edge of the guide bar (13) (Fig. 11, 12).
Fig. 11 Fig. 12
4) Lift up the tip of the guide bar (13) and tighten the rear retaining nut (16)
first followed by the front retaining nut (16) (Fig. 9).
5) By hand, pull the saw chain (14) along the top of the guide bar (13) from
one end to the other, several times. The chain should feel tight but still
move freely.
Tension test
Check the chain tension using one hand to lift the saw chain (14) against the
weight of the product. The correct chain tension is achieved when the saw
chain can be lifted by approximately 2 - 4 mm from the guide bar (13) in the
centre (Fig. 13, 14).
22a

19
Fig. 13 Fig. 14
Adjust the tension if you find that the chain saw is too loose or tight.
WARNING!
Do not over tension the chain as this will lead to excessive wear
and will reduce the life of bar and chain. Over tensioning also
reduce the amount of cuts you should get.
OPERATION
Before use
Please always read the instruction manual carefully and check the machine
before operating.
WARNING!
Ensure that the engine has oil. When leaving the factory. This
machine has NO OIL in the engine.
Check the saw chain, never use chain that are dull, cracked or
damaged.
Make sure the handle and safety features are in good working
order. Never use a machine that lacks a part or has been modified
outside its specifications.
The enclosures must be correctly fitted and undamaged before
you start the machine.
WARNING!
Please always use quality gloves, foot, ear and eye protector.
They should with CE mark and tested according to PPE (Person
Protective Equipment) directive.
The poor equipments may reduce the protection and result in
person injure during working.
Engine fuel
WARNING!
The chain saw is fitted with a two-stroke engine; use fuel

20
mixed with oil only.
Only fuel the machine in well-lit areas. Avoid fuel spillage. Never refuel the
machine during operation. Let the engine cool down for about two minutes
before refueling.
Refueling must not be carried out near naked flames, control lamps or spark
producing electrical equipment such as electric tools, welders or sanders.
1. Make sure the machine is turned off, by turn the ignition switch to the “off”
position.
2. Check the fuel by a visual check , remove the fuel tank cap and reviewing
the fuel level.
3. Full unleaded fuel mixed with oil from an approved fuel container into the
fuel tank, because of fuel expands, please fill the tank to the neck of tank
only.
4. Turn the fuel cap clockwise to assembly it in position.
WARNING.
Do not refill fuel while engine is running or hot.
Make sure fuel is not leaking.
Use quality two-stroke oil and make a mixture of 40 parts petrol to one
part oil only (2,5% oil mixed in fuel).
Never use two-stroke oil intended for water-cooled engines.
Never use oil intended for four-stroke engines.
A poor oil quality and/or too high oil/fuel ratio may jeopardize
function and decrease the life time of catalytic converters.
Shake the container well to obtain a correct mixture before filling
the tank.
Table of contents
Other Lea Chainsaw manuals
