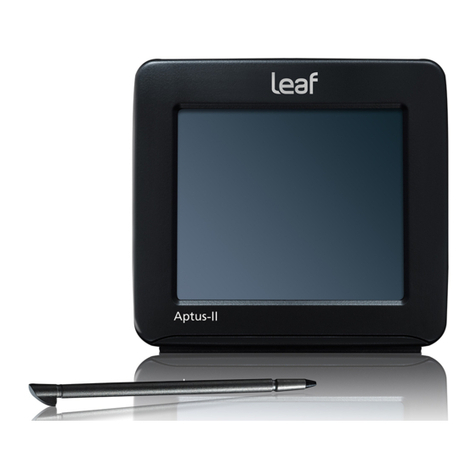
Leaf Aptus-II Use and care manual

Lens Calibration Guide
for Leaf Aptus-II Digital Backs

Lens Calibration Guide
2
Table of Contents
Lens Calibration Guide......................................................................................................3
Introduction .................................................................................................................................. 3
What is lens cast and how is it recognized? ................................................................................ 3
Why is Lens falloff associated with lens cast?............................................................................ 3
Creating a Lens Calibration in the studio............................................................................ 4
Setting up to take the Calibration Shot ......................................................................................... 4
Creating and Loading the Lens Calibration File ........................................................................ 4
While shooting to CF card................................................................................................................... 8
Applying a Lens Calibration..................................................................................................... 9
After shoot –Leaf Capture.................................................................................................................. 9
Creating a Lens Calibration in the field .............................................................................10
After shoot - Capture One .......................................................................................................11
Brightness compensation .......................................................................................................12
Creating the calibration shot in low light .........................................................................12

Lens Calibration Guide
3
Lens Calibration Guide
Introduction
Shooting images with wide angle lenses and exploiting large format camera
movements often results in lens fall-off and color cast effects. Another effect is
the so-called centerfold effect where lines may appear in the image.
Lens Calibration corrects all three of these effects.
The following shots show the same image with and without lens calibration:
What is lens cast and how is it recognized?
Why is Lens falloff associated with lens cast?
Lens cast results when light from the lens strikes the digital sensor at shallow
angles causing areas of the image to have color casts ranging from green to
magenta. This occurs mainly with non-retrofocus wide-angle lenses.
Most non-retrofocus wide-angle lenses do not have sufficient lens coverage for
wide image sensors. Shifting and tilting such a lens adds to the lens falloff.
See: Leaf Technical Notes/Cast Effects in Wide Angle Photography (PDF)

Lens Calibration Guide
4
Creating a Lens Calibration in the studio.
Setting up to take the Calibration Shot
What you will need: a Leaf diffuser or any white diffusing sheet that will fully
cover the lenses to be used.
1. Connect the camera back to the Leaf Capture software.
2. Place the camera in front of a uniform light source.
Tip: A studio flash with a soft box is recommended.
With this setup, you can now create the lens calibration file using Leaf Capture’s
calibration wizard.
Creating and Loading the Lens Calibration File
Create files wizard
1. In the Camera menu, select Lens Calibration>Create Files Wizard.
2. Follow the steps in the lens calibration wizard.

Lens Calibration Guide
5
Note: The warning message may or may not appear depending on the lens in
use.
3. Select the Load lens calibration check box to load the lens calibration file to
your camera back after it is created. This enables you to take shots while
using the lens calibration file.
4. Click OK.
5. A small icon appears in the bottom left corner of the Leaf Capture window to
remind you that a Lens Calibration is loaded. The name of the Lens
Calibration is displayed next to the icon.

Lens Calibration Guide
6
Notes:
In the example above Leaf Capture has limited the lens falloff correction
to 60%. You can reduce this number as desired.
The falloff correction is applied for this load only.
The name and path of the Lens Calibration and the % Falloff correction used, will
appear in the Image Info of images shot with the Lens Calibration.

Lens Calibration Guide
7
Load Lens Calibration
When shooting tethered, previously created Lens Calibrations can be loaded to
the back to be used for shooting.
1. Start the Leaf Capture software.
2. Connect the back to the computer.
3. Click Camera/Lens Calibration File/Load File to open the Load Lens
Calibration dialog box.
4. Select Use Lens Calibration File and click the browse icon to select the
appropriate lens calibration file and click OK.
The lens calibration file is loaded and fall off correction is applied. You can now
shoot using the lens calibration file.

Lens Calibration Guide
8
While shooting to CF card
A lens calibration can be loaded to the back for using when shooting to CF card.
Preparing a Lens Calibration file for CF card
1. Quick format a CF card in the Aptus II back.
2. Create a Lens Calibration for tethered use.
3. Click Camera/Lens Calibration File/CreateFile for CF card…
4. Browse to the Lens Calibration file from step 2.
5. Give a meaningful name to the lens calibration for CF and specify its location.
6. Copy the Lens Calibration for CF to the following folder on the CF card:
CF/LEAFDM SYS/Lens_Calibration
7. Insert the CF card into the back.
8. Load the Lens Calibration file:
Tap CameraCamera SettingsLens CalibrationSelect desired lens
calibrationTap OK.

Lens Calibration Guide
9
Applying a Lens Calibration
After shooting youcan applya Lens Calibration to images that were shot without
one. You can do this in both Leaf Capture and in Capture One.
After shoot –Leaf Capture
1. In Leaf Capture, select the images you would like to process.
2. In the Process panel, select Leaf Mosin the Format list.
3. Click Settings.
4. The Leaf Mos Settings dialog box opens.
5. To save the mos file with lossless compression, checkSave Compressed.
6. CheckLens Calibration Adjustment.
7. Select Select Calibration File and click the browse icon.
8. Select the lens calibration file for the lensused to create the image(s).
Tip: Click Lens Calibration Folder to access the default lens calibration files
folder directly.
9. In the Falloff Correction box, type the desired correction percentageto
adjust the fall off.
Note: There is no limitation to the amount of falloff correction that can be
entered in this box. It can be anything between 0 and 100%. If the resulting
image is not satisfactory, you will need to reduce the amount of falloff
correction.
10.Click OK.
Your lens calibration settings are saved.
11.Process your images to apply the lens calibration file.

Lens Calibration Guide
10
Creating a Lens Calibration in the field
1. Before a shoot, prepare the Leaf diffuser or any white diffusing sheet that will fully cover
the lenses to be used.
2. Set up and shoot your image(s).
3. Place the white diffuser in front of the lens so that it covers the entire surface, and take a
shot.
Note: To achieve good results, do not move the camera or lens position, orchange the
aperture before taking the diffuse calibration shot.
4. On the imaging module, display the diffused calibration image in Shoot view.
5. Tap histog to open the histogram.
Your overall exposure should be between -0.8 and +0.4. The exposure meter shows
the overall exposure in f-stops.

Lens Calibration Guide
11
If the calibration image is over or underexposed, adjust your shutter speed. Do not adjust the
aperture setting.
Note: It is recommended that you renamethe calibration shot to include the lens and
exposure information in the file name.
After shoot - Capture One
To create and apply a Lens Cast Correction (LCC) the images must meet the
following condition:
The image must have been shot portably and not saved in Leaf Capture.
1. In Capture One, select the reference imagethat you shot through the diffuser.
2. In the Lens panel open Lens Correction.
3. In the LCC drop down menu select Analyze.
4. The software will analyze the image and then create a LCC file.
5. Select the image to be corrected and then select the LCC file made in the
previous step.
6. You can activate Color Cast, Light Falloff and Dust Removal by checking the
appropriate checkbox.
7. The image will be corrected.

Lens Calibration Guide
12
Brightness compensation
Using Lens Falloff correction tends to create images that seem brighter.
You can adjust brightness or the develop curve to compensate for this or shoot
the images at a lower exposure level.
Creating the calibration shot in low light
In some conditions, you may not be able to create an optimally exposed
calibration file as described above because the required exposure time is greater
than the maximum. This could happen when you are shooting using indoor
lighting, under a low sun, and so on.
In these casestake the calibration shot at the maximum permitted exposure, even
if it will be underexposed.
Note: It is important that the illumination of the calibration shot be as close as
possible in color temperature to that of the scene. Therefore don’t use additional
lighting when taking the calibration shot.
Other manuals for Aptus-II
4
Table of contents
Other Leaf Camera Accessories manuals
Popular Camera Accessories manuals by other brands

HYBRID POWER
HYBRID POWER POWER TOWER BATTERY 3.9 user manual

UPOWER
UPOWER Ecoline UE-48Li80 manual

Westcott
Westcott 1888 Setup instructions

American Dynamics
American Dynamics ADCPWMCRNR Installation sheet

Nikon
Nikon AF Zoom-Nikkor 24-85mm f/2.8-4D IF user manual

Vello
Vello AF EXTENSION TUBE SET user manual