rear
bl
a
de
"
filter guides
•
•
•
•
• •
• •
•
• •
II
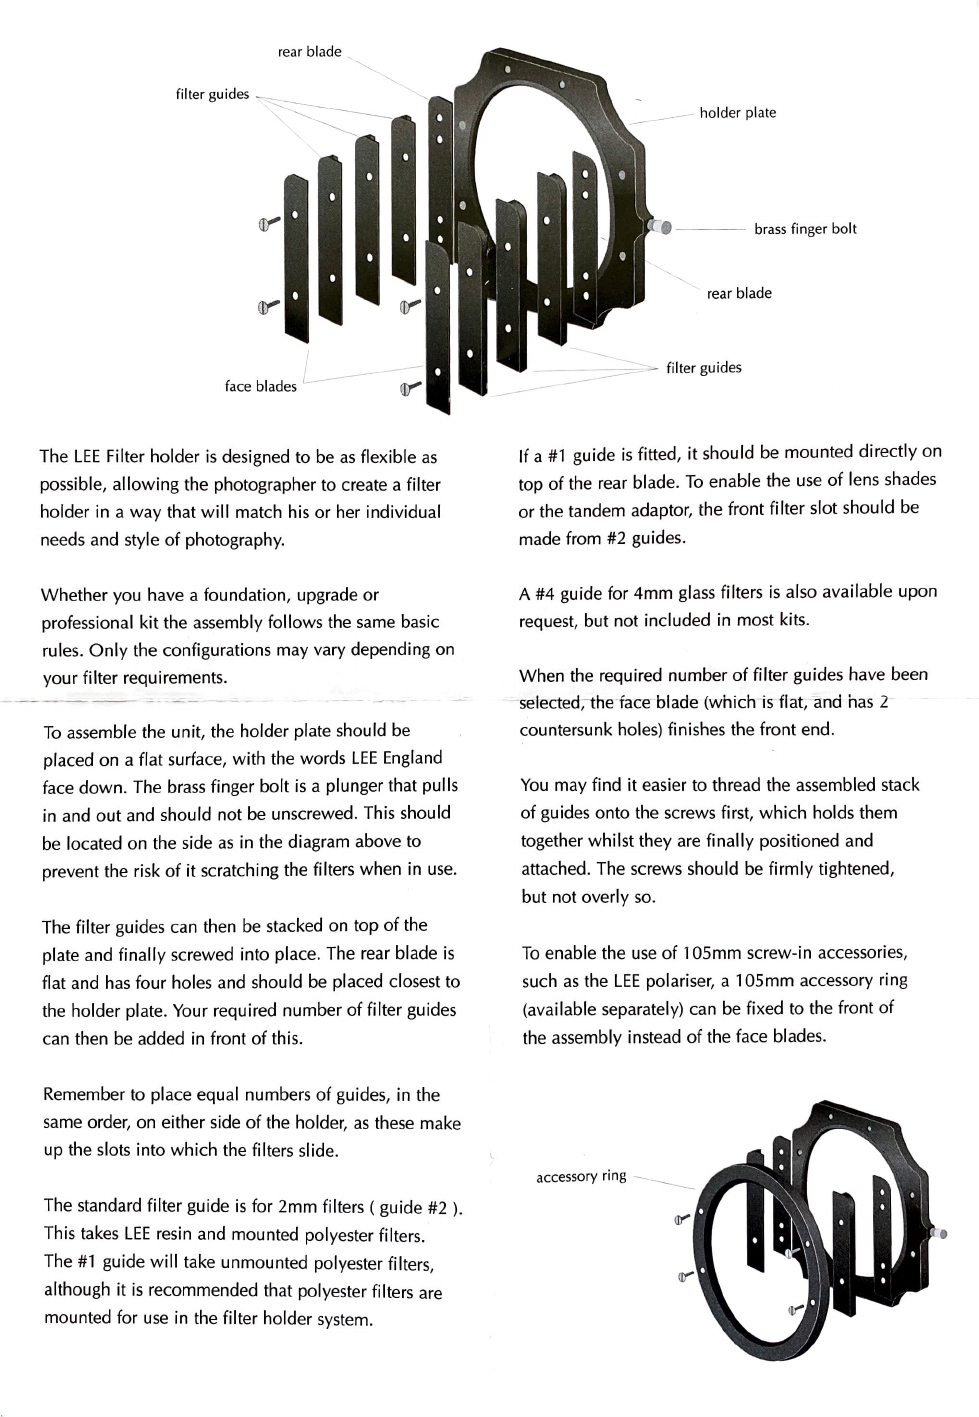
The
LEE
Filter holder
is
designed to be
as
flexible
as
possible, allowing the photographer to create a filter
holder in a way that
will
match his or her individual
needs
and style
of
photography.
Whether you have a foundation, upgrade or
professional kit the assembly follows the
same
basic
rules.
Only
the configurations may vary depending on
your filter requirements.
To
assemble the unit, the holder plate should
be
placed on a flat surface, with the words
LEE
England
face down. The
brass
finger bolt
is
a plunger that pulls
in and out and should not
be
unscrewed. This should
be
located on the side
as
in the diagram above to
prevent the risk
of
it scratching the filters when in
use
.
•
•
The filter guides can then
be
stacked on top
of
the
plate and finally screwed into place. The rear blade
is
flat
and
has
four holes
and
should
be
placed closest to
the holder plate. Your required number
of
filter guides
can
then
be
added in front
of
this.
Remember to place equal numbers
of
guides, in the
same
order, on either side
of
the holder,
as
these make
up the slots into which the filters slide.
The standard filter guide
is
for 2mm filters ( guide
#2
).
This
takes
LEE
resin and mounted polyester filters.
The
#1
guide
will
take unmounted polyester filters,
although it
is
recommended that polyester filters
are
mounted for
use
in the filter holder
system
.
• •
•
I ., . .. .
'-
•
·l
• brass finger bolt
e
•
• • rear blade
---
- -
____::::.-"'-
filter guides
----
If a
#1
guide
is
fitted,
it
should
be
mounted directly on
top
of
the rear blade.
To
enable the
use
of
lens
shades
or the tandem adaptor, the front filter slot should be
made from
#2
guides.
A #4 guide for 4mm
glass
filters
is
also available upon
request, but not included in most kits.
When the required number
of
filter guides have been
-selected;-
thdace
-blade (which
is
flat, and
has
2
countersunk holes) finishes the front end .
You
may find
it
easier to thread the assembled stack
of
guides onto the screws first, which holds them
together whilst they
are
finally positioned and
attached. The screws should
be
firmly tightened,
but not overly
so
.
To
enable the
use
of
105mm screw-in accessories,
such
as
the
LEE
polariser, a 105mm accessory ring
(available separately)
can
be
fixed to the front
of
the assembly instead
of
the face blades.
accessory
rin
g
-------
ID""
•


