Leeds PTZPRO 12 User manual

INSTRUCTION MANUAL
Please read this manusl thoroughly before use and keep it handy for future reference
700TVL Mini Speed Dome Camera
User Manual

WARNINGS and CAUTIONS
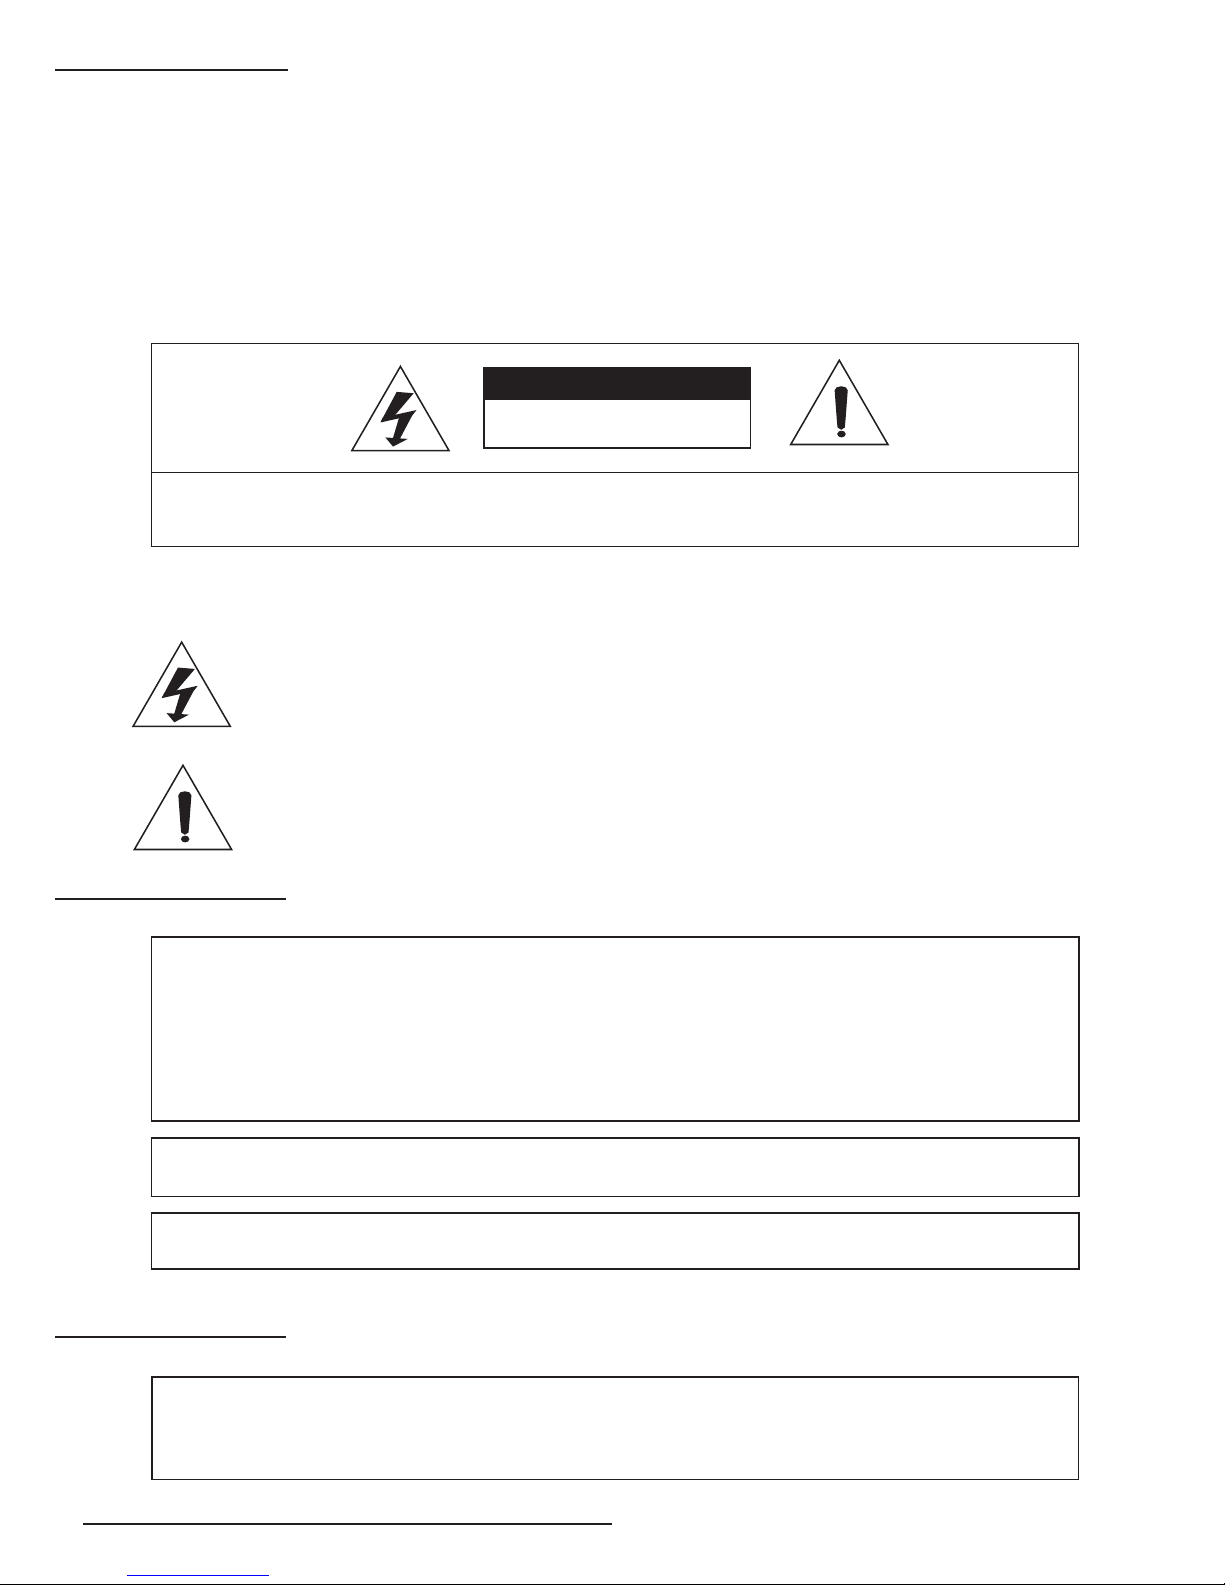
EXPLANATION OF GRAPHICAL SYMBOLS
TO REDUCE THE RISK OF ELECTRIC SHOCK, DO NOT REMOVE COVER(OR BACK).
NO USER-SERVICEABLE PARTS INSIDE. REFER SERVICING TO QUALIFIED SERVICE PERSONNEL.
RISK OF ELECTRIC SHOCK
DO NOT OPEN
2
WARNINGS
TO REDUCE THE RISK OF FIRE OR ELECTRIC SHOCK.
DO NOT EXPOSE THIS PRODUCT TO RAIN OR MOISTURE.
DO NOT INSERT ANY MEALMETALLIC OBJECTS THROUGH THE VENTILATION GRILLS OR OTHERS
OPENINGS ON THE EQUIPMENT.
The lighting ash with arrowhead symbol, within a triangle, is intended to alert the user
to the presence of un insulated dangerous voltage within the product enclosure that
may be of sucient magnitude to constitute a risk of electric shock to persons.
The exclamation point within an equilateral triangle is intended to alert the user to the
presence of important operating and maintenance (servicing) instruction in the literature
accompanying the product.
CAUTIONS
CE COMPLIANCE STATEMENT
FCC INFORMATION :
THIS EQUIPMENT HAS BEEN TESTED AND FOUND TO COMPLY WITH THE LIMITS FOR A CLASS A DIGITAL
DEVICE, PURSUANT TO PART 15 OF THE FCC RULES. THESE LIMITS ARE DESIGNED TO PROVIDE REASONABLE PROTECTION
AGAINST HARMFUL INTERFERENCE WHEN THE EQUIPMENT IS OPERATED IN A COMMERCIAL ENVIRONMENT.
THIS EQUIPMENT GENERATES, USES, AND CAN RADIATE RADIO FREQUENCY ENERGY AND IF NOT INSTALLED AND USED IN
ACCORDANCE WITH THE INSTRUCTION MANUAL, MAY CAUSE HAARMFUL INTERFERENCE TO RADIO COMMUNICATIONS.
OPERATION OF THIS EQUIPMENT IN A RESIDENTIAL AREA IS LIKELY TO CAUSE HARMFUL INTERFERENCE IN WHICH CASE THE
USER WILL BE REQUIRED TO CORRECT THE INTERFERENCE AT HIS OWN EXPENSE.
CAUTION : CHANGES OR MODIFICATIONS NOT EXPRESSLY APPROVED BY THE PARTY RESPONSIBLE FOR
COMPLIANCE COULD VOID THE USER’S AUTHOURITY TO OPERATE THE EQUIPMENT.
THIS CLASS A DIGITAL APPARATUS COMPLIES WITH CANADIAN ICES-003.
CET APPAREIL NUMERIQUE DE LA CLASSE A EST CONFORME A LA NORME NMB-003 DU CANADA.
WARNING
THIS IS A CLASS A PRODUCT. IN A DOMESTIC ENVIRONMENT THIS PRODUCT MAY CAUSE RADIO
INTERFERENCE IN WHICH CASE THE USER MAY BE REQUIRED TO TAKE ADEQUATE MEASURES.
COMPLIANCE STATEMENT

3
IMPORTANT SAFEGUARDS/
TABLE of CONTENTS
- WARNINGS AND CAUTIONS
- IMPORTANT SAFEGUARDS
- PACAGE CONTENTS
- Indoor - Packge Contents
- INSTALLATION & CONFIGURATION
-- Switch settings / Before Installtion
-- Before Installation
-- Surface Mount Installation
-- Interface Cable Wiring
-- In ceiling Installation
-- DIMENSION
- Outdoor - Packge Contents
- INSTALLATION & CONFIGURATION
-- Swith settings / Before Installtion
-- Wall Mount Installtion
-- Ceiling Mount Installtion
-- Interface Cable Wiring
-- DIMENSION
- SPECIFICATION
- OPERATION & PROGRAMMING
-- Getting Started
-- Basic Operations
-- Menu Tree
-- System : Information
Reboot
Factory
Event Log
Password
-- Display : OSD Setup
Area Title
Privacy Zone
Image Setup
-- Dome : General Setup
Motion
Home
Preset
Tour
Pattern
Scan
-- Camera : Focus / Zoom
White Balance
Exposure
Advanced Setup
Motion Detec
--Alarm
2
3
3
4
5
5
6
7
8
8
9
10
11
12
14
14
15
16
16
17
19
19
20
20
21
22
23
23
24
25
26
27
27
28
28
29
29
30
31
31
32
32
• Read all of the safety and operating instructions before using the product.
•
Keep the temperature from -
50˚C to 50˚C (Outdoor)
•
IP67 (Waterproof) (Outdoor)
•
That avoid ammability material or oil.
•
Do not avoid the installation from electrical supplied pole.
• If the camera have some problem, please stop the operating.
• Do not attempt to disassemble the appliance.
• Always use the recommended power.
• Do not pull the cable.
• Never touch un-insulated parts with wet hands.
• Do not use the appliance where there is excessive dust smoke or moisture.
• Please install the product on a completely at oor.
TABLE CONTENTS
IMPORTANT SAFEGUARDS

4
PACKAGE CONTENTS
Dome camera unit User’s manual
Manual
Screws
(M3x15 TAPPING SCREW-4)
(M3x8 TAPPING SCREW-3)
Interface cable
(RJ45 connector) Alarm IN/OUT cable Pie-shaped template
12
3
6
5
4
The following parts are supplied with the mini speed dome system.
1. Dome camera
2. User’s manual
3. M3 x 15mm self tapping screws for surface mount installation
M3 x 8mm self tapping screws for surface mount installation
4. Interface cable with a male RJ45 connector
5. Alarm IN/OUT cable
6. Pie-shaped template
1
1
4
3
1
1
1
INSTALLATION & CONFIGURATION
1
2
3
5
4
6
Model/Power Label
Pin description
Dip switch for protocol and band rate
1
2
3
5
4
6
Address switcher
Alarm in/out
RJ-45 female connector

5
INSTALLATION & CONFIGURATION
Switch Settings
Before installation, please set
the switches as described in this manual.
Baud rate :
If default baud rate is 2400 bps. See Table B for details.
Termination :
See Table C for details.
< Figure 1. Switches >
<Table A. Protocols >
ON
12345
*Address setting from 1 to 99 using rotary swith. (For example)
If you want address setting for No. 8
Please make a both rotary switch by left No. 0 and right No. 8
In case of over 99 address, you can use virtual address
Protocols : If you are going to use pelco-D, pelco-P or standard protocols to communicate with the
dome system, you do not have to set any switches. The unit automatically detects these protocols.
See Table A for details.
Switch 1
Off
Off
On
On
Switch 2
Off
On
Off
On
Protocols
Standard, Pelco-D, Pelco-P, etc. Auto detect.
Reserved
Reserved
Reserved
<Table B. Baud rate >
Switch 3
Off
Off
On
On
Switch 4
Off
On
Off
On
Baud rate (bps)
2400 *default
4800
9600
38400
<Table C. Baud rate >
Switch 5
Off
On
Termination
Not Terminated
Terminated
ON
12345
ON
12345
Mini Speed Dome system supports termination
free RS485 impedance matching.
Before Installation
Before installation, please remove the pan/tilt holder screw. Use the following steps.
1. Remove the dome bubble with trim ring shown as Figure 2.
2. Remove the pan/tilt holder screw shown as Figure 3.
remove the
pan/tilt
holder screw
<Figure 2> <Figure 3>

6
INSTALLATION & CONFIGURATION
Ceiling Concrete ceiling
5/32 Toggle Bolt(Not supplied) or
#6x1inch self Tapping screw
5/32 Toggle Bolt(Not supplied) or
#6x1inch self Tapping screw
Surface Mount Installation
<Figure 4> Drill holes using the pie-shaped template
<Figure 5> Drill holes for toggle bolts or studs <Figure 6> Drill holes for studs
2. In case of ceiling mount, drill holes for toggle bolts or studs Refer to Figure 5 In case of concrete
ceiling mount, drill holes for studs. Refer to Figure 6.
1. Punch out the pie-shaped section from the supplied templates (See Figure 4).
Using the pie-shaped template, either cut a hole through the ceiling or make a hole
with a depth of 0.25 inches (6mm).
<Figure 3> Wiring Attached to Ceiling
3. Connect the wiring. Refer to Figure 7.
You can plug the male RJ45 connector on the supplied interface cable (refer to Figure 6) into the mating
connector on top of the dome dirve and then connect your wiring to the other end of the cable. Or you can
connect the supplied RJ45 connector to your wiring and the plug the connector into the dome drive.
Refer to Table D, Table E, and Table F for wiring connections.
Note that you can connect video using either an unshielded twisted pair (UTP) of wires (refer to Table D)
or coaxial cable (refer to Table E) A BNC connector for coaxial cable is attached to the dome drive.

7
INSTALLATION & CONFIGURATION
<Figure 8> Snap the bubble and trim ring into place
4. Line up the tabs on the trim ring with the slots in the dome drive. Snap the trim ring and bubble into
place. Refer to Figure 8 & Figure 11.
Wire Gauge
<Table D> Interface Cable Wiring
<Table E Video Coaxial Cable Requirements>
Color
WHITE/ORANGE
ORANGE
WHITE/GREEN
BLUE
WHITE/BLUE
GREEN
WHITE/BROWN
BROWN
* Cable requirements : 75-ohm impedance.
* All-copper center conductor.
* All-copper braided shield with 95% braid coverage
The following are the recommended maximum distances for 24 VAC applications and are calculated with a
10 percent voltage drop. (Ten percent is generally the maximum allowable voltage drop for AC-powered
devices. Power consumption is 21 VA per unit. Use a power source with a minimum of 21 VA per unit.
<Table F Wiring Distances>
Voltage
18 16 14 12
(1.0mm)
24VAC 215ft 341ft 542ft 863ft
*Supports up to 770g
1
2
12
3
5
4
6
7
8
Cable Type
RG 59/U
RG 6/U
RG 11/U
Maximum Distance
750 ft (229m)
1,000ft (305m)
1,500ft (457m)
Function
VIDEO
V-GND
AC-/DC-GND
AC+/DC 12V+
AC+/DC 12V+
AC-/DC-GND
TRX-
TRX+
Pin

8
INSTALLATION & CONFIGURATION
IN CEILING INSTALLATION
1. Using the supplied template, cut holes in the ceiling for the dome drive and mounting hardware.
Pull the wiring for power, video, and control through the ceiling.
2. Remove the surface mount ring from the dome drive as follows. Refer to Figure 2.
a. Place ngers on the circular marks located on the sides of the surface mount ring.
b. Pinch the sides.
c. Lift and remove the surface mount ring from the dome drive.
3. Connect the wiring.
You can plug the male RJ45 connector on the supplied interface cable(refer to Figure 7) into the mating
connector on top of the dome drive and then connect your wiring to the other end of the cable. Or you can
connect the supplied RJ45 connector to your wiring and then plug the connector into the dome drive.
Refer to Table D, Table E, and Table F for wiring connections. Note that you can connect video using
either an unshielded twisted pair (UTP) of wires (refer to Table D) or coaxial cable (refer to Table E).
A BNC connector for coaxial cable is attached to the dome drive.
<Figure 9>
4. Attach the dome drive to the ceiling with the
three 1-8 toggle bolts (not supplied). Refer to Figure 10.
<Figure 10> In-Ceiling Installation to a Fixed Ceiling
<Figure 11>
5. Line up the tabs on the trim ring with the slots in the dome drive.
Snap the trim ring and bubble into place.
Refer to Figure 11.
DIMENSION
Ø88.9
(3.5)
Ø125.0
(4.92)
129.4
(5.0)
83.5
(3.28)
46.0
(1.8)

9
PACKAGE CONTENTS
Dome camera unit Mount Housing
(W/O Senshield)
Set Anchor (4SET) Wrench - 2mm
Wrench - 4mm
User Manual
12
35
4
The following parts are supplied with the mini speed dome system.
1. Dome camera Unit
2. Mount Housing(W/O Sunshield) or
Mount Housing(With Sunshield)
3. Set Anchor(4 SET)
4. Wrench-2mm
5. Wrench-4mm
6. User’s manual
1
1
1
4
1
1
1
or
Mount Housing
(With Sunshield)
Manual
INSTALLATION & CONFIGURATION
Serial Number
Pin description
Dip switch for protocol and band rate
1
2
3
5
4
6
Address switcher
Alarm in/out
RJ-45 female connector
1
2
3
5
4
6

10
INSTALLATION & CONFIGURATION
Switch Settings
Before installation, please set
the switches as described in this manual.
Baud rate :
If default baud rate is 2400 bps. See Table B for details.
Termination :
See Table C for details.
< Figure 1. Switches >
<Table A. Protocols >
ON
12345
*Address setting from 1 to 99 using rotary swith. (For example)
If you want address setting for No. 8
Please make a both rotary switch by left No. 0 and right No. 8
In case of over 99 address, you can use virtual address
Protocols : If you are going to use pelco-D, pelco-P or standard protocols to communicate with the
dome system, you do not have to set any switches. The unit automatically detects these protocols.
See Table A for details.
Switch 1
Off
Off
On
On
Switch 2
Off
On
Off
On
Protocols
Standard, Pelco-D, Pelco-P, etc. Auto detect.
Reserved
Reserved
Reserved
<Table B. Baud rate >
Switch 3
Off
Off
On
On
Switch 4
Off
On
Off
On
Baud rate (bps)
2400 *default
4800
9600
38400
<Table C. Baud rate >
Switch 5
Off
On
Termination
Not Terminated
Terminated
ON
12345
ON
12345
Mini Speed Dome system supports termination
free RS485 impedance matching.
<Figure 2> <Figure 3>
Before Installation
Before installation, please remove the pan/tilt holder screw. Use the following steps.
1. Hold up the dome bubble with trim ring as shown in Figure 2.
2. Remove the pan/tilt set screw as shown in Figure 3.
remove the
pan/tilt
holder screw

11
INSTALLATION & CONFIGURATION
Wall Mount Installation (INDOOR / OUTDOOR)
<Figure 4>
<Figure 5>
1. Feed the cables from the pass-through hole
in the mounting surface through the pipe as
shown in Figure 4.
2. Securely mount the pipe to the mounting bracket.
3. Mark the mounting holes onto the mounting surface.
Drill and prepare the mounting holes appropriately according
to the type of surface as shown in Frgure 5.
4. Position the wall mount bracket over the mounting holes,
and then secure with four stainless steel fasteners
(supplied).
4-SET ANCHOR 6mm(SUPPLIED)
WRENCH 2mm(SUPPLIED)
①
②
③
④
<Figure 7>
<Figure 6>
5. Connect the cables as shown in Figure 6.
6. Securely mount the top housing to the wall pipe.
7. Plug the male RJ45 connector and ALARM connector
into the mating connector on the top of the
dome drive as shown in Figure 7.
WRENCH 2mm(SUPPLIED)
⑦
⑤
⑥

12
INSTALLATION & CONFIGURATION
<Figure 8>
<Figure 9.2>
Wall Mount
Installation without
Sun Shield
<Figure 9.1>
Wall Mount
Installation with
Sun Shield
8. Secure with three stainless steel fasteners
(attached to the trim ring) using the
supplied hex wrench as shown in Figure 8.
9. Wall Mount Installation
WRENCH 4mm(SUPPLIED)
⑧
<Figure 10> <Figure 11>
1. Feed the cables from the pass-through hole
in the mounting surface through the pipe as
show in Figure 10.
2. Securely mount the pipe to the mounting bracket.
3. Mark the mounting holes onto the mounting surface.
Drill and prepare the mounting holes appropriately
according to the type of surface as shown in Figure 11.
4. Position the ceiling mount bracket over the mounting
holes, and then secure with four stainless steels
fasteners(supplied)
CEILING MOUNT INSTALLATION (INDOOR/OUTDOOR)
WRENCH 2mm(SUPPLIED)
4-SET ANCHOR 6mm(SUPPLIED)
①
②
③
④

13
INSTALLATION & CONFIGURATION
<Figure 12> <Figure 13>
5. Connect the cable as shown in Figure 12.
6. Securely mount the top housing to the ceiling pipe.
7. Plug the male RJ45 connector and ALARM connector
into the mating connector on the top of the dome
drive as shown in Figure 13.
WRENCH 2mm(SUPPLIED)
⑤
⑥⑦
<Figure 14>
8. Secure with three stainless steel fasteners
(attached to the trim ring) using the supplied
hex wrench as shown in Figure 14.
<Figure 15.1>
Ceiling Mount
Installation
with Sun Shield
<Figure 15.1>
Ceiling Mount
Installation
without Sun Shield
9. Ceiling Mount Installation
WRENCH 4mm(SUPPLIED)
⑧

14
INSTALLATION & CONFIGURATION
Wire Gauge
<Table D> Interface Cable Wiring
<Table E Video Coaxial Cable Requirements>
* Cable requirements : 75-ohm impedance.
* All-copper center conductor.
* All-copper braided shield with 95% braid coverage
The following are the recommended maximum distances for 24 VAC applications and are calculated with a
10 percent voltage drop. (Ten percent is generally the maximum allowable voltage drop for AC-powered
devices. Power consumption is 21 VA per unit. Use a power source with a minimum of 21 VA per unit.
<Table F Wiring Distances>
Voltage
18 16 14 12
(1.0mm)
24VAC 215ft 341ft 542ft 863ft
Cable Type
RG 59/U
RG 6/U
RG 11/U
No
1
2
3
4
5
No
6
7
8
9
10
Maximum Distance
750 ft (229m)
1,000ft (305m)
1,500ft (457m)
DIMENSION
Ø131.0 Ø149.7 Ø149.7
Ø131.0
302.0
302.0
230.0
163.5
163.5
230.0
TINT
COLOR
BRIGHT
CONT.
V1
VOLUMEUNDER
SCAN
S-VIDEO
POWER
V2
PMC14H
Monitor
Power
Wire Color
Brown
Red
Orange
Yellow
Black
Wire Color
Green
Bule
Violet
White/Brown
Brown
Name
Alarm 1
Alarm 2
Alarm 3
Alarm 4
GND
Name
NO
COM
NC
TRX-
TRX+

15
SPECIFICATION
1/4" Sony Super HAD II(Double Scan) CCD
x12 Day & Night Zoom Lens
f =3.8mm~45.6mm
F1.6(wide)~F2.7(tele)
more tha 50dB (AGC o)
Day / Night / Auto / Ext
Max 700TV lines in color @HR 7mode(750TVL lines in B/W @ 7mode)
Color : 0.5 lux, BW : 0.2 lux
Color DSS : 0.001 lux, BW DSS : 0.0004
Horizontal : 53.44°(Wide) to 4.04°(Tele)
Vertical : 40.42°(Wide) to 3.32°(Tele)
32x (Total 384x)
O/On
ATW / One Push / Indoor / Outdoor / Manual / Auto
PAN : 360˚ (Endless) / TILT : -2˚ ~ 90˚
0.1˚/sec ~ 360˚/sec
Max. 400˚/sec
256 Positions
8 Group Tours (Max 30 Entries for each Group)
8 Scans
8 Patterns (Approx. 2 Minutes for each Pattern)
Auto Flip(On/O)
Total 32 Zones ( 8Group x 4 Zone)
RS485(2400bps(Default), 4800, 9600bps, 38400)
99
On/O
RS-485 for PTZ Control
STD , Pelco-D, Pelco-P
4 Alarm Inputs
1-Relay Out(N.O)
Ø131 x 162.05mm(3.5" Bubble)
CE, FCC, RoHS, KC, IP67
Approx. 1.4Kg
Ivory
SET : DC12V 1.5A,
Heater : DC12V 1.2A, Heater DC Only
IP67(Waterproof)
OSD Control (Auto/ On/O mode)
4°C(39.2°F) ~ 10°C(50°F)
Up to 90% RH
-20°C ~ 50°C(-4°F ~ 122°F)
-50°C ~ 50°C(-58°F ~ 122°F)
Image Sensor
Lens
Focal Length
Minimum Focus Distance
S/N Ratio
Day & Night
Resolution
Minimum Illumination
View of Angle
Digital Zoom
Wide Dynamic Range
White Balance
Pan/Tilt angle
Pan Speed
Preset Speed
Preset Position
Tour
Scan
Pattern
Flip
Privacy Zone
Communication
Camera ID
OSD
Port
Protocol
Alarm Input
Alarm Output
Dimensions
Certications
Weight
Color
Power Source
IP Rating
Fan
Heater
Operating Humidity
Storage Temperature
Operating Temperature
Camera
Dome
Remote Control
Alarm
Physical
Outdoor Indoor
Ø125 x 129.4mm (3.5" Bubble)
CE, FCC, RoHS, KC
Approx. 780g
Ivory
DC12V 1.5A
-
-
-
-
Up to 90% RH
-20°C ~ 50°C(-4°F ~ 122°F)
0°C ~ 50°C(32°F ~ 122°F)

16
OPERATION & PROGRAMMING
GENTTING STARTED
This manual designed to be a reference tool for the installaton, programming and
operation of your system.
You need to install system before using this manual. Refer to <installation> part of this manual.
Once installed, apply power to the dome. The system will start a conguration sequence.
This information will remain on the monitor until dome operation begins. Refer to the following pages
to operate and program your dome system.
Note
1. Version can be changed as system evolves.
2. Address chagens with respect to ‘address switching setting’
3. Temperature can be changed as environment change.
How to Control
Pan and Tilt Move the joystick or press the direction keys left / right and up / down.
*Zoom Wide Press the [WIDE] button or trun the joystick counterclockwise.
Preset Refer to <Presset> part of this manual.
Tour Refer to <Tour> part of this manual.
Pattern Refer to <Patten> part of this manual.
Scan Refer to <Scan> part of this manual.
Privacy Zones Refer to <privacy zones> part of this manual.
* Zoom operation can be changed with respect to camera specification
ACCESSING MAIN MENU (Menu / Preset 95)
When you use PD or PP protocol with your controller, you can access the main menu
on your monitor by programming (saving or calling) preset 95.
When you use STANDARD or any other protocols, do the followings :
1. Enter the number of the dome and press the CAM key.
2. Press the MENU key. The main menu appears.
TITLE EDIT
This title edit menu can be used in OSD Setup / Pattern / Scan / Preset / Area Title commonly.
To edit a title :
1. Use the joystick to position the cursor beside TITLE.
2. Move the joystick right. The following appears on the monitor.
3. Use the joystick right, left, up and / or down to select a character.
Press [TELE] button or twist the joystick clockwise to input a character.
4. Press [WIDE] button or twist the joystick counterclockwise to delete a character.
5. Follow the directions displayed on the monitor.
6. When the label is completed, press [ENT] or [IRIS OPEN] to return to the previous menu.
7. To cancel editing a title, press [ESC] or [CLOSE] to return to the previous menu.
TITLE :
ABCDEFGHIJKLMNOP
QRSTUVWXYZabcdefg
hijklmnopqrstuvwxyz
0123456789<>/-:
■ Select : <MOVE>
■ Set/Clear : <TELE/WIDE>
■ Save : <ENT><OPEN>
■ Exit : <CLR><CLOSE>

17
OPERATION & PROGRAMMING
Value
S/N :0-00-00-000-00000
MODEL :XXX-XXXX
VERSION :XXX-XXXX
VIDEO :NTSC or PAL
PROTOCOL :STANDARD
COMM. : RS485/02400
ADDRESS : XXX
TEMP. : XXX.XC/XXX.XF
: <ENT> <OPEN>
: <CLR> <CLOSE>
: ON/OFF
: ON/OFF
: ON/OFF
: ON/OFF
: ON/OFF
: ON/OFF
: <CLR> <CLOSE>
: 4digit, 0~9(UNDEFINED)
: ENABLED/DISABLED
: ON/OFF
: ON/OFF
: ON/OFF
: ON/OFF
: ON/OFF
: ON/OFF/3~9SEC (Default : 3SEC)
: 1~8(UNDEFINED)
: NULL
: NULL/0~360
: NULL/0~360
: 1~4 (UNDEFINED)
: BLOCK/DISABLE
: OFF/H.MIRROR, V.MIRROR, REVERSE
: OFF, 0,1....
: OFF/ON
: OFF/LEVEL1~10
: OFF/NEGA/B.W
: OFF/ON
: 1~255 (Default : 1)
: ON/OFF
: ON/OFF
: ON/OFF
: ON/OFF
: (Default ON)
The 2nd screen
Reboot
Exit
ALL
CAM
PRESET
TOUR
PATTERN
SCAN
Exit
CURRENT
NEW
CONFIRM
ENABLE
TITLE
TIME
ZOOM
ID
MODE
ANGLE
NO.
TITLE
START
STOP
NO.
: 1~8
GROUP
MODE
MIRROR
HI-RES
HLC
DNR
EFFECT
FREEZE
VIRTUAL ADDR.
BACKUP TASK
TURBO SPEED
PRESET SPEED
SELF TEST
FAN CONTROL
The 1st screen
INFO
REBOOT
FACTORY
EVENT LOG
PASSWORD
OSD SETUP
AREA TITLES
PRIVACY ZONE
IMAGE SETUP
GENERAL
ROOT MENU
SYSTEM
DISPLAY
DOME

18
OPERATION & PROGRAMMING
ROOT MENU
DOME
CAMERA
ALARM
EXIT
The 1st screen
HOME
PRESET
TOUR
PATTERN
SCAN
FOCUS/ZOOM
W-BALANCE
EXPOSURE
X128,X64,X32,X24,X16,X14,X12,X10,X8,X6,X4,X2,1/60,1/120,1/250,1/500,1/700,1/1000,1/1600,1/2500
1/5000,1/7000,1/10000,1/30000,1/60000,1/120000
ADVANCED
MOTION DIECTION
The 2nd screen
ACTION
NUMBER
TIME
MODE
NO.
TITLE
DWELL
NO.
NO.
TITLE
NO.
TITLE
SPEED
DWELL
FOCUS
Z.SPEED : FAST/SLOW
: OFF, 2x,.....32x
Z.LIMIT
MODE
R-GAIN
B-GAIN
MODE
IRIS
SHUT.
SHARPNESS
BACKLIGHT
DAY & NIGHT
WDR
WINDOW 1~4
NO.
IN
OUT
PRIORITY
ACTION
NUMBER
DWELL
Value
: HOME
: NULL
: 0~240 min (Default : 120)
: AUTO/MANUAL
: 0~255
: NULL
: 3~240 (Default : 5)
: 1~8 (Default : 1)
: 1~8 (Default : 1)
: NULL
(Default TIME: NULL) : 3
: 1~8 (Default : 1)
(Default : NULL) : NULL
(Default : NULL) : 1~9 (Default : 5)
(Default : NULL) : 3~240 (Default : 5)
(Default MODE: NULL) : COMING.GOING
(Default START: NULL) : Angle
(Default STOP: NULL) : Angle
: AUTO/TRIGGER/MANUAL
: AUTO/INDOOR/OUTDOOR/ONE PUSH/ATW/MANUAL
(Default : NULL) MANUAL:0~99(Default:30)
: AUTO/MANUAL/SHUTTER PRI/IRIS PRI
FULL AUTO MODE : NULL MANUAL MODE : 1~100
FULL AUTO MODE : NULL MANUAL MODE : AUTO,FLICKERLESS
: 0~15 (Default : 10)
: ON/OFF
: AUTO/COLOR/B/W
: ON/OFF
: ON/OFF
: 1~4 (UNDEFINED)
(Default : NULL) : NULL/1/NC/NO
(Default : NULL) : NULL/001/OFF
(Default : NULL) : NULL/1~4
(Default : NULL) : HOME/PRESET/TOUR (Default : NULL)
: NULL/001
(Default : NULL) : 02~99 (Default : 5)
(Default : NULL) MANUAL:0~99(Default:40)
: ON/OFF
: ON/OFF
: ON/OFF
: OFF/0~360
: ON/OFF
(Default OFF: NULL) ON : 0~360
PROP. PAN/TILT
AUTO FLIP
OVER TILT
AZIMUTH ZERO
LIMIT STOP
-LEFT LIMIT
-RIGHT LIMIT
MOTION

19
OPERATION & PROGRAMMING
SYSTEM : INFO
The systemInformationdisplays serialnumber/model name/ Running /version/
Protocol/Communication Type/Address switch No./Temperature.
System settings cannot be edited in this menu. This screen is for reference only.
Use the following steps to display the system information screen:
1. Push the MENU key
2. Use the joystick to position the cursor beside SYSTEM.
3. Move the joystick right.
4. Select INFO using joystick.
Note
-Version can be changed as system evolves.
-Address changes with respect to ‘address switching setting
-Temperature can be changed as environment change
<< SYSTEM INFORMATION >>
██████████████████████████
S/N:0-00-00-000-00000
MODEL : XXX-XXXX
VERSION : XXX-XXXX
VIDEO : 1.06EM
PROTOCOL : STANDARD
COMM. : RS485/02400
ADDRESS : 001
TEMP. : 044.0C/111.2F
██████████████████████████
■Exit: <CLR> <CLOSE>
██████████████████████████
►SYSTEM > INFO
DISPLAY > REBOOT
DOME > FACTORY
CAMERA >
ALARM
EXIT
<<<<< Main MENU >>>>>
██████████████████████████
►SYSTEM >
DISPLAY >
DOME >
CAMERA >
ALARM
EXIT
<<<<< Main MENU >>>>>
SYSTEM : REBOOT
Rebootthe systemifitisnotoperatingorifthere is no control.
Rebooting the system will cycle power without changing programmed dome
settings.
Use the following steps to display the System Information screen:
1. Press the MENU key
2. Select SYSTEM using joystick.
3. Select REBOOT using joystick in the sub menu of SYSTEM.
4. To Reboot the system, Press [ENT] or [OPEN].
To cancel reboot, Press [CLR] or IRIS [CLOSE] key
■Reboot: <ENT> <OPEN>
■Exit: <CLR> <CLOSE>
██████████████████████████
►SYSTEM > INFO
DISPLAY > ►REBOOT
DOME > FACTORY
CAMERA >
ALARM
EXIT
██████████████████████████
►SYSTEM >
DISPLAY >
DOME >
CAMERA >
ALARM
EXIT
<<<<< Main MENU >>>>> <<<<< Main MENU >>>>>

20
OPERATION & PROGRAMMING
SYSTEM : FACTORY
Use this function to reset all camera settings to factory
default parameters. You can reset a specic setting to factory default parameters.
Use the following steps to display the System Information screen:
1. Press the MENU key (refer to‘Accessing main menu’)
2. Select SYSTEM using the joystick.
3. Select FACTORY in the sub menu of SYSTEM using the joystick.
4. Select items to be reset.
5.
Press [ENT] button or move the cursor to <SAVE and exit> and then move the joystick right.
ALL : Restores all save items
(CAM/PRESET/TOUR/PATTERN/SCAN)
CAM : Reset Camera related settings.
PRESET : Reset Saved presets.
(To reset specic preset, refer to Preset part of this manual)
TOUR : Reset Saved Tours.
PATTERN : Reset Saved pattern.
SCAN : Reset Saved Scan items.
██████████████████████████
►SYSTEM >
INFO
DISPLAY
>
>
REBOOT
DOME
> ►FACTORY
CAMERA
EVENT LOG
ALARM PASSWORD
EXIT
██████████████████████████
►SYSTEM >
DISPLAY >
DOME >
CAMERA >
ALARM
EXIT
<<<<< Main MENU >>>>>
<< FACTORY SETUP >>
██████████████████████████
►ALL : OFF
CAM : OFF
PRESET : OFF
TOUR : OFF
PATTERN : OFF
SCAN : OFF
██████████████████████████
<Save and Exit>
<Exit without Saving>
SYSTEM : EVENT LOG
Event Log shows the current dome status and dome event logs.
If the dome nds some problems, it displays error signal and save
the log to EEPROM. Turn SELF TEST on to monitor the dome’s
status and save all event logs. See <DOME : GENERAL> for
SELF TEST descriptions.
Use the following steps to display the EVENT LOG screens:
1. Press the MENU key (refer to‘Accessing main menu’)
2. Select system using the joystick.
3.
Select EVENT LOG in the sub menu of SYSTEM using the joystick.
4. <Code> means the type of error.
<CNT> means the number of error occurred during
camera operation.
When you scroll up and down using the joystick, you can nd
what kind of errors has occurred during operation.
5. Press the [CLR] or [CLOSE] key to return previous menu.
<<<<< Main Menu >>>>>
██████████████████████████
►SYSTEM >
DISPLAY >
DOME >
CAMERA >
ALARM
EXIT
<<<<< Main Menu >>>>>
██████████████████████████
►SYSTEM > INFO.
DISPLAY > REBOOT
DOME > FACTORY
CAMERA > ►EVENT LOG
ALARM PASSWORD
EXIT
<<<< EVENT LOG >>>>
██████████████████████████
Code:0000,Cnt:00,Drp:000
Current Status
-----------------------
██████████████████████████
Exit: <CLR> <CLOSE>
<<<< EVENT LOG >>>>
██████████████████████████
Code:0000,Cnt:00,Drp:000
None............
-----------------------
►01.00 Empty...........
02.00 Empty...........
03.00 Empty...........
04.00 Empty...........
05.00 Empty...........
██████████████████████████
Exit: <CLR> <CLOSE>
Table of contents
Other Leeds Security Camera manuals