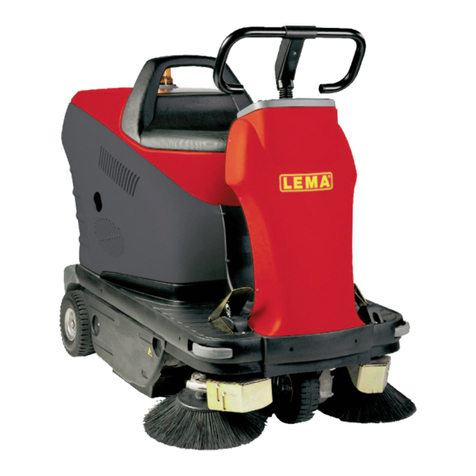
LEMA RED POWER 280E User manual

So entspannt kann Hochdruck sein.
PREMIUM IN DER
HOCHDRUCKTECHNIK
Mehr von LEMA Reinigungstechnik www.le a.at
Art.-Nr. 63951
Spannung 36V
Schrubb-Breite 280
Arbeitsbreite 370
Tan Frischwasser 5l
Tan Schmutzwasser 5l
Flächenleistung 900
2/
h
Laufzeit 50 in
Gewicht 20kg
(inkl. Batt.)
Dimension B/L/H 75/37/39c
Bedienungsanleitung
RED POWER 280E (Batterie)
Schrubbsauger

EN
(Translated instructions)
IMPORTANT SAFETY PRECAUTIONS .................................................................2
MEANING OF SYMBOLS.......................................................................................7
TECHNICAL SPECIFICATIONS.............................................................................8
MACHINE DIMENSIONS........................................................................................9
GENERAL INFORMATION....................................................................................10
Purpose of this manual ................................................................................................................. 10
Identifying the machine ................................................................................................................. 10
Documentation/equipment accompanying the machine ............................................................... 10
TECHNICAL INFORMATION.................................................................................11
General description....................................................................................................................... 11
Parts of the machine ..................................................................................................................... 11
Accessories................................................................................................................................... 12
HANDLING AND INSTALLATION .........................................................................12
Lifting and transporting the palletized machine............................................................................. 12
Delivery checks............................................................................................................................. 12
Unpacking ..................................................................................................................................... 12
Selection of parking position ......................................................................................................... 13
Lifting and transporting the machine............................................................................................. 13
Transport on wheels...................................................................................................................... 13
Winding and unwinding the power cable (mains powered version) .............................................. 14
Adjusting the handle rake angle.................................................................................................... 14
Fitting the brush/pad driver ........................................................................................................... 14
Brush/pad driver release............................................................................................................... 14
Battery: preparation / installation / recharging............................................................................... 14
Battery: removal............................................................................................................................ 15
Battery: disposal............................................................................................................................ 15
PRACTICAL GUIDE FOR THE OPERATOR.........................................................16
Preparing the machine for work .................................................................................................... 16
Controls......................................................................................................................................... 17
Working......................................................................................................................................... 18
Removal of dirty water tank lid...................................................................................................... 19
Installation of dirty water tank lid................................................................................................... 19
Filling the water/detergent tank..................................................................................................... 19
Emptying the water/detergent tank ............................................................................................... 19
Emptying the dirty water tank........................................................................................................ 20
Drive adjustment ........................................................................................................................... 20
PERIODS OF INACTIVITY ....................................................................................21
MAINTENANCE INSTRUCTIONS.........................................................................21
Maintenance - General rules......................................................................................................... 21
Cleaning the suction oat.............................................................................................................. 22
Cleaning the water/detergent tank lter ........................................................................................ 22
Cleaning the suction lter.............................................................................................................. 22
Cleaning the front squeegee suction hose.................................................................................... 22
Cleaning the rear squeegee suction hose..................................................................................... 22
Cleaning the diverter valve............................................................................................................ 23
Cleaning the squeegee ................................................................................................................. 23
Squeegee adjustment ................................................................................................................... 23
Replacing the brush ...................................................................................................................... 24
TROUBLESHOOTING...........................................................................................25
ALARMS ................................................................................................................26
1
EN
IMPORTANT SAFETY
PRECAUTIONS
• Read the operating instructions carefully before using the
machine for the rst time.
• Keep the instructions handy, in a safe place. They constitute
an important component of the machine and must be handed
over together with the machine in the event of its being sold or
transferred.
WARNINGS
Whilst the machine is manufactured to a high standard
of safety, safety in operation can be guaranteed only by
complying with the instructions in this manual.
Correct use
The machine is not designed for use by persons (including children)
with reduced physical, sensory or mental capabilities, or lack of
experience and knowledge.
Use of the machine as a toy is prohibited: make certain this does
not happen.
Children should be supervised to ensure they do not play with the
machine.
Cleaning and maintenance of the machine must in any event be
carried out exclusively by adults in full possession of the requisite
mental and physical faculties.
The machine is designed to operate in temperatures between
+4°C and +40°C. It can be stored in temperatures between +0°C
and +50°C when not in use.
The machine is designed to operate at relative humidity levels
between 30% and 95%.
The machine can operate at altitudes up to 2000 m maximum.
This machine is intended for commercial use, for example in
hotels, schools, hospitals, factories, shops, oces and business
premises generally.
2

EN
The machine must only be used indoors.
The machine must be kept indoors at all times.
Do not use the machine on surfaces with a gradient steeper than
2%.
Danger of electric shock
• Switch o the machine, and remove the plug from the mains
socket (mains powered version), or disconnect the battery
(battery powered version), before commencing any cleaning or
maintenance work.
• When using the mains powered version, turn o at the main
switch and pull the plug from the power socket before leaving
the machine unattended.
• When using the mains powered version, do not pull the plug
from the socket by tugging the power cable. Take hold of the
plug directly, not the cable, before pulling.
• When using the mains powered version, never pull or move the
machine around by dragging the power cable.
• When using the mains powered version, never use the power
cable as a handle, and ensure it is not pinched by a closed
door or pulled over sharp edges or around corners.
• When using the mains powered version, do not run the machine
over the power cable.
• When using the mains powered version, keep the power cable
well away from heated surfaces.
• When using the mains powered version, do not use adaptors
on the mains plug.
• When using the mains powered version, take care to prevent
the brush from coming into contact with the power cable.
• When using the mains powered version, inspect the power
cable periodically and if damaged, do not on any account
use the machine until the cable has been replaced; contact
a specialist technician approved by IP Cleaning or take the
machine to any IP Cleaning service centre.
• When using the mains powered version, never touch the
machine with wet hands.
• If the machine is not working as it should, or if it has suered a
3

EN
heavy impact, or been dropped, damaged, left out in the open
or fallen into water, do not use it until it has been checked out;
contact a specialist technician approved by IP Cleaning or take
the machine to any IP Cleaning service centre.
• Battery charger: inspect the battery charge cable periodically
for possible damage. If damage has occurred, do not use the
battery charger until the cable has been replaced; contact a
specialist technician approved by IP Cleaning or take the
machine to any IP Cleaning service centre.
• Make certain the power sockets used for mains powered models
and battery chargers are properly earthed and protected by a
2-pole thermal magnetic switch with dierential circuit-breaker:
• rated current 10-16A
• IΔn dierential current: 0.03A
• Icn breaking capacity: 6000 A
• AC dierential breaker trip
• This machine (mains powered model) must be earthed. In the
event of a malfunction or failure, the earth connection provides
the path of least resistance for electrical current, reducing
the risk of electric shock. Mains powered versions come with
a three-core cable and a three-pin plug for connection to a
suitable earthed power socket. The earth wire is yellow and
green. Never connect this wire to anything other than the earth
terminal of the socket. The plug must be inserted into a suitable
socket, correctly installed and wired in accordance with local
building regulations. Incorrect wiring or failure to connect the
earth wire of the machine may lead to the risk of electric shock.
If in doubt about the proper earthing of the power socket, have
it checked by a qualied electrician. Do not tamper with the
plug tted to the machine, and use only sockets compatible
with this same plug. If the power socket needs to be replaced,
have the job done by a professional electrician.
• Do not clean the machine with water or a high pressure hose.
4

EN
• Never attempt to carry out repairs on the machine. Should
the need arise, contact a specialist technician approved by
IP Cleaning or take the machine to any IP Cleaning service
centre.
Fire risk
• Do not use the machine to clean up ammable or combustible
liquids such as petrol, and do not operate the machine in areas
where these liquids may be present.
• Do not use the machine to pick up burning or smoking material
like cigarettes, matches or hot ashes.
• Do not position the machine on or in close proximity to a
cooker or any other hot surface, as the battery could catch re
or explode.
Risk of injury
• Use only batteries supplied by the manufacturer ( BAAC00192
or BAAC00193 code), as other types of battery could explode,
causing injury to persons and damage to property.
• Keep hair, loose garments, ngers and all other parts of the
body well clear of slots and moving parts.
• Avoid any contact with moving parts of the machine (brushes
and pad drivers).
• Take particular care when cleaning steps and stairs.
• Do not use the machine if plastic parts are damaged as a result
of a fall or impact; avoid contact with broken pieces and sharp
edges.
• Never use detergents other than those specied. Follow the
instructions on the relative safety data sheet. Always keep
detergents out of the reach of children. In the event of detergent
making contact with the eyes or the skin, wash immediately
and copiously with water, and if swallowed, consult a doctor
immediately.
Risk of damage caused by improper use
• When recharging the battery, use only the battery charger
(BACA00263 code),supplied by the manufacturer.
• Use only original spare parts supplied by the manufacturer.
• The mains powered machine requires an alternating current
5

EN
electricity supply and must be plugged into a power socket
installed by a professional electrician.
• Make certain that the electrical specications of the machine specications of the machine
(voltage, frequency and power consumption) indicated on the (voltage, frequency and power consumption) indicated on the
data plate are compatible with those of the mains electricity data plate are compatible with those of the mains electricity
supply.supply.
• Do not insert objects of any kind into the ventilation slots. Do
not operate the machine with blocked ventilation slots. Remove
all dust, dirt, hair and debris that might be blocking the air ow.
6

EN
MEANING OF SYMBOLS
NEGOTIABLE GRADIENT
OPERATOR MANUAL, INSTRUCTIONS FOR USE
READ THE MANUAL BEFORE USING THE MACHINE
DIRECT CURRENT
CLASS III APPLIANCE. AN APPLIANCE IS IDENTIFIED AS CLASS III WHEN ITS EXPLOSION-
PROOF PROTECTION IS BASED ON THE FACT THAT THERE ARE NO VOLTAGES HIGHER
THAN THE ULTRA-LOW SAFETY EXTRA-LOW VOLTAGE (SELV). THIS MEANS IN PRACTICE
THAT THE APPLIANCE IS POWERED BY A BATTERY OR A SELV TRANSFORMER.
EARTH SYMBOL, IDENTIFIES ANY TERMINAL INTENDED FOR CONNECTION TO AN EXTERNAL
EARTH CONDUCTOR AND PROTECTING AGAINST ELECTRIC SHOCK IN THE EVENT OF A
MALFUNCTION.
BRUSHES ON/OFF.
DETERGENT SOLUTION FLOW ON/OFF AND REGULATION.
SUCTION ON/OFF.
“ECO” OPERATING MODE.
MACHINE ON/OFF.
SPECIAL WASTE. DO NOT DISPOSE OF AS NORMAL WASTE.
CAUTION, RISK OF ABRASION.
MINIMUM AND MAXIMUM TEMPERATURE OF LIQUID IN TANK.
4°C
35°C
7

EN
TECHNICAL SPECIFICATIONS
Cleaning width mm 280
inches 11,02
Squeegee width mm 380
inches 14,96
Cleaning capacity per hour m2/h 980
ft2/h 10548,6
Number of brushes no. 1
Brush diameter mm 280
inches 11,02
Maximum brush pressure g/cm230
kPa 3,4
Brush rotation speed rpm
rpm 160
Rated brush motor power W 100
HP 0,134
Rated suction motor power W 160
HP 0,21
Overall power of the machine in operation PM
W 248
HP 0,33
Maximum speed km/h 3,5
mph 2,17
Solution tank l 5
galls. 1,32
Dirty water tank l 5
galls. 1,32
Rear wheel diameter mm 200
inches 7,87
Maximum slope % 2
Gross weight (GVW) kg 26
lbs 57,32
Weight of the machine in transit without battery kg 18,3
lbs 40,34
Weight of the machine in transit with battery kg 19.8 - 20.2
lbs 43.65 - 44.53
Number of batteries no. 1
Machine / battery voltage VMV 36
Battery capacity (2 versions) Ah 5.5 - 8.25
Battery recharge supply voltage, V V 42
8

EN
Max battery charging current, I A 4
Battery charging current (battery charger
included) A 2
Machine dimensions (X, Y, Z) mm X= 615, X1= 770, Y= 399, Y1= 1049, Z= 412,5
inches X= 24.21, X1= 30.31, Y= 15.7, Y1= 41.29, Z= 16,24
Battery compartment dimensions mm Custom battery compartment
Packing Size
mm 800 x 400 x 470
inches 31.49 x 15.74 x 18.5
Sound pressure - Annex DD (Emission of
acoustical noise) EN 60335-2-72: 2012 LpA (dBA) 63
Measurement uncertainty K(dBA) 3
Vibration level (hand) - IEC 60335-2-72 ahv
m/sec2<=2,5
Measurement uncertainty, K m/sec2/
Vibration level (body) - IEC 60335-2-72 HBV
m/sec2/
Measurement uncertainty, K m/sec2/
Maximum water and detergent temperature °C 40
°F 104
Degree of protection IP IPX3
Gross weight (GVW): maximum permissible weight with the machine fully loaded and ready for use.
The gross weight of the machine comprises the detergent tank lled with clean water, the dirty water
tank, empty, the largest recommended battery pack and all accessories, namely cables, hoses,
detergents and brushes.
V, I: charging / supply values
VM , PM : machine in operation (all active functions)
MACHINE DIMENSIONS
X-Y-Z: See “TECHNICAL SPECIFICATIONS” table
Y1
X1
X
Z
Y
9

EN
GENERAL INFORMATION
Purpose of this manual
This manual has been written by the Manufacturer and is an integral part of the equipment package
making up the machine1.
It denes the purpose for which the machine has been designed and built and contains all the
information needed by operators2.
In addition to this manual, containing information intended essentially for users, other publications
are available providing specic information for technicians entrusted with maintenance3.
The terms “right” and “left”, “clockwise” and “anti-clockwise” refer to the forward movement of the
machine.
Constant compliance with the instructions provided in this manual guarantees the safety of the
operator and the machine, ensures low running costs and high quality results and extends the
working life of the machine. Failure to follow these instructions may lead to injury to the operator or
damage to the machine, oor and environment.
Consult the table of contents at the beginning of the manual to nd the section of interest withou
delay.
Parts of the text requiring special attention are printed in bold and preceded by the symbols
illustrated and described here.
! DANGER
Indicates the need for attention in order to avoid a series of consequences which could
cause death or serious injury to personnel.
! WARNING
Indicates the need for attention in order to avoid a series of consequences which could
cause injury to personnel or damage to the machine or work environment or nancial loss.
! INFORMATION
Important information
In line with the company’s policy of constant product development and updating, the Manufacturer
reserves the right to make modications without prior notice.
Whilst the machine in your possession may dier appreciably from the illustrations in this document,
the safety and the information regarding the product are guaranteed reliable.
Identifying the machine
The nameplate provides the following information:
• Model
• Battery voltage.
• Rated current draw.
• Serial number.
• Year of manufacture.
• IP degree of protection.
• Gross weight.
• Maximum negotiable gradient
• Name of manufacturer.
Documentation/equipment accompanying the machine
• Operator’s manual
• Battery charger manual;
• Certicate of warranty;
• CE certicate of conformity.
1 The denition "machine" replaces the trade name “CT5” of the product to which this manual refers.
2 Persons responsible for using the machine without performing any operations requiring precise technical skills.
3 Persons with experience, technical training and a knowledge of legislation and standards, able to perform all the
necessary operations and to recognise and avoid possible risks in handling, installation, use and maintenance of this
machine.
10

EN
TECHNICAL INFORMATION
General description
This machine is a scrubber dryer for sweeping, washing and drying at, horizontal, smooth or
moderately rough, uniformly structured and obstacle-free oors in civil and industrial premises.
The scrubber dryer spreads a solution of water and detergent in the correct concentration on the
oor and then scrubs it to remove the dirt. By carefully choosing the detergent and brushes (or
abrasive disks) from the wide range of accessories available, the machine can be adapted to a wide
range of combinations of types of oor and dirt.
The machine incorporates a wet vacuuming system which dries the oor immediately after washing.
The drying action is produced by the suction motor, which generates a partial vacuum in the dirty
water tank. Squeegees mounted beneath the tank are designed to collect the lm of dirty water with
the machine moving in both forward and reverse directions.
Parts of the machine
Below is the description of the machine main parts:
• The water/detergent tank (g. 1, ref. 1) contains and carries the mixture of clean water and
cleaning product.
• The dirty water tank (g. 1, ref. 2) collects the dirty water picked up from the oor after washing;
• Control panel (g. 1, ref. 3).
• Head assembly (g. 1, ref. 4), the main element comprises the brush that spreads the detergent
solution over the oor and washes the surface, bringing about the removal of the dirt.
• Front squeegee assembly (g. 1, ref. 5), which wipes and dries the oor when the machine is
pulled toward the operator.
• Rear squeegee assembly (g. 1, ref. 6), which wipes and dries the oor when the machine is
pushed forward by the operator.
• Battery (g. 1, ref. 7).
3
7
Fig.1
2
1
546
11

EN
Accessories
• Soft and hard brushes, abrasive pads.
• Pad Holder.
• Standard battery (BAAC00192 code).
• Uprated battery (BAAC00193 code).
• Battery charger (BACA00263 code).
HANDLING AND INSTALLATION
Lifting and transporting the palletized machine
The machine comes packed in a cardboard box by the manufacturer.
Handle with care to avoid impact and ensure the machine is not overturned.
Delivery checks
On taking delivery of the machine, check carefully that the packing and machine it contains are
both intact.
Unpacking
When unpacking the machine, proceed as follows:
• Cut and remove the plastic straps using scissors or nippers;
• Open the box:
• Remove the following items from the packaging:
• operating and maintenance manual, declaration of conformity, certicate of warranty;
• battery charger manual;
• bumper wheel;
• front squeegee:
• brush;
• battery charger.
• Lift the machine out of the box by the handle (g. 2, ref. 1) and set it down on the oor.
• Pull the handle up at right angles to the machine, referring to the section “Adjusting the handle
rake angle”
• Remove the dirty water tank and the detergent tank and set them on the oor, referring to the
section “Emptying the water/detergent tank” and “Emptying the dirty water tank”.
• Tilt the machine backwards and rest the handle on the oor.
• Cut the ties applied to the rear squeegee.
• Install the front squeegee (g. 2A, ref. 1).
• Install the bumper wheel (g. 2B, ref. 1).
! WARNING
Keep the packaging materials and store in a safe place: in the event of relocation or shipment
to authorized workshops, the original packaging will ensure that the machine and battery
pack remain undamaged.
Fig.2 Fig.2A Fig.2B
1
1
1
12

EN
Selection of parking position
! DANGER
The machine must be unplugged from the power socket (mains
powered model).
! WARNING
Before placing the machine in the parking position, empty the
detergent tank and the dirty water tank, referring to the relative
sections “Emptying the water/detergent tank” and “Emptying the
dirty water tank”.
! WARNING
The machine must always be parked standing on end (vertical);
if left in the normal operating position (horizontal), the weight of
the machine can cause the bristles of the brush, and the squeegee
blades, to bend out of shape.
• Turn o the machine o at the main switch (g. 3, ref. 1).
• Wind the power cable around the storage hooks (mains powered
model), referring to the section “Winding and unwinding the power
cable (mains powered model)”.
• Raise the squeegee by operating the lever (g. 3, ref. 2).
• Fold the handle fully forward toward the head assembly, referring to
the section “Adjusting the handle rake angle”
• Pull the machine up into the vertical position (g. 4).
• Wipe dry the front squeegee, rear squeegee and brush with a cloth.
Lifting and transporting the machine
! DANGER
Risk of injury if handle is not properly locked in position.
! WARNING
Empty the detergent tank and the dirty water tank, referring to
the relative sections “Emptying the water/detergent tank” and
“Emptying the dirty water tank”.
• Turn o the machine o at the main switch (g. 6, ref. 1).
• Unplug the machine from the power socket (mains powered model).
• Wind the power cable around the storage hooks (mains powered
model), referring to the section “Winding and unwinding the power
cable (mains powered model)”.
• Raise the squeegee by operating the lever (g. 5, ref. 1).
• Fold the handle fully forward toward the head assembly.
• Lift the machine by the grip on the shaft of the handle (g. 6, ref. 2).
Transport on wheels
The machine can be moved from one place to another on its wheels and
steered in all directions:
• Set the angle of the handle so that it stands perpendicular to the
machine.
Tilt the machine backwards (g. 7), and it can be wheeled backwards or
forwards as required.
Fig.3
Fig.4
2
1
1
Fig.5
Fig.6
2
1
Fig.7
13

EN
Winding and unwinding the power cable (mains
powered version)
! WARNING
Unplug the machine from the power socket before winding the
cable.
! WARNING
Check that no damage occurs either to the machine or to the power
cable during the winding procedure.
When the machine is not in use, the power cable must be wound around
the storage hooks (g. 8)
When the machine is in use, the power cable must be unwound
completely.
Adjusting the handle rake angle
Pull the adjustment lever (g. 9, ref. 1) and hold, then set the handle at
the desired angle. Releasing the lever, the handle will remain locked in
the position selected.
Fitting the brush/pad driver
• Plug the machine into the power socket (mains powered model).
• Press the main switch (g. 10, ref. 1) to turn on the machine.
• Press the brush control button (g. 11, ref. 1).
• Rest the brush on the oor in front of the machine.
• Pull back on the handle to elevate the front part of the machine,
position the brush cowling directly over the brush, and proceed to
lower the machine (g. 12).
• Jog the brush control lever (g. 11, ref. 2) repeatedly; this will enable
the brush to engage automatically with the hub of the ange. If the
operation is not successful, reposition the machine as before, then
repeat the steps of aligning the brush and jogging the control lever.
Brush/pad driver release
• Plug the machine into the power socket (mains powered model).
• Press the main switch (g. 10, ref. 1) to turn on the machine.
• Pull back on the handle to elevate the front part of the machine
(g. 12).
• Press the brush control button (g. 11, ref. 1) and hold for 3
seconds; the machine will activate the brush release mechanism
automatically.
Battery: preparation / installation / recharging
! DANGER
When installing or carrying out any kind of maintenance on the
battery, keep a safe distance from naked ames and heat sources,
do not short-circuit the battery poles, avoid creating sparks and do
not smoke.
! DANGER
Use only batteries supplied by the manufacturer of the machine:
code BAAC00192 or BAAC00193.
Fig.9
1
Fig.10
Fig.11
Fig.12
1
1
2
14

EN
! WARNING
When recharging the battery, use only the battery charger (BACA00263 code), supplied by
the manufacturer of the machine.
Should it become necessary to replace the battery, contact a specialist technician approved by IP
Cleaning or take the machine to any IP Cleaning service centre.
The battery is a sealed unit and guaranteed safe under normal circumstances; in the unlikely event
of uid leaking from the battery, do not touch the uid and be sure to take the following precautions:
• Contact with the skin can cause irritation; wash with soap and water.
• Inhalation of vapours can cause irritation to the airways; stay out in the open air and consult
a doctor.
• Contact with the eyes can cause irritation; ood the eyes with water immediately and thoroughly
for at least 15 minutes, and consult a doctor.
The battery used in this machine could pose a risk of re or chemical burns if treated carelessly or
improperly; it must not be dismantled, and should be kept well clear of children.
Whilst the battery will normally come fully charged and ready for use, it is good policy nonetheless
to run a recharge cycle before the machine is put into service, proceeding as indicated below:
• Insert the jack plug of the battery charger into the socket on the battery (g. 13).
• Plug the battery charger into the mains power socket.
• Wait for the recharge cycle to nish; the Led on the battery charger will turn green.
• Disconnect the battery charger from the power socket and from the battery.
Battery: removal
! DANGER
When removing the battery from the machine, keep a safe distance from naked ames and
heat sources, do not short-circuit the battery poles, avoid creating sparks and do not smoke.
! DANGER
The battery can be removed only with the machine switched o.
Press the two sliding release catches and remove the battery from its housing (g. 13A, ref. 1).
Battery: disposal
Ensure the battery is disposed of correctly, in compliance with current local environmental
regulations. Do not throw the battery away as household refuse.
Fig.13 Fig.13A
1
15

EN
PRACTICAL GUIDE FOR THE OPERATOR
! INFORMATION
If the machine is being used by an operator for the rst time, it should be tried out initially
in a spacious and obstacle-free area to acquire the necessary familiarity with the functions
and controls.
! WARNING
To avoid damaging the surface of the oor being cleaned, do not leave the brushes rotating
with the machine stationary.
! WARNING
Always dilute the detergent according to the manufacturer’s instructions. Do not use
sodium hypochlorite (bleach) or other oxidants, particularly in strong concentrations. Do
not use solvents or hydrocarbons. The water and detergent temperature must not exceed
the maximum indicated in the “Technical specications”. There must be no sand and/or
other impurities in the solution.
! INFORMATION
The machine has been designed for use with low-foam biodegradable detergents made
specically for scrubber dryers.
For a complete and up-to-date list of detergents and chemicals available, contact the
manufacturer
! INFORMATION
Use only products suitable for the oor and dirt to be removed.
Follow the safety regulations on the use of detergents given in the section “Risk of injury”.
! DANGER
Before starting work, put on overalls, non-slip shoes, gloves and all other personal protection
devices recommended by the supplier of the detergent used or appropriate for the type of
work environment.
Preparing the machine for work
Proceed as follows before starting work.
• Check the battery charge indicator lights to ensure that the battery is fully charged (battery
powered model), and if not, run the recharge cycle, referring to the section “Battery: preparation
/ installation / recharging”.
• Unwind the power cable from the storage hooks (mains powered model), referring to the
section “Winding and unwinding the power cable”.
• Plug the machine into the power socket (mains powered model).
• Make certain that the dirty water tank is empty, and if not, empty it, referring to the section
“Emptying the dirty water tank”.
• Make certain that the detergent solution tank is full, and if not, proceed to ll it, referring to the
section “Filling the water/detergent tank”.
• Adjust the position of the handle, referring to the section “Adjusting the handle rake angle”.
• Fit the brush, referring to the section “Fitting the brush/pad driver”.
16

EN
Controls
The machine has the following controls and indicator lights:
• Main switch (g. 14, ref. 1): connects and disconnects electrical power to and from all functions
of the machine.
• Power on light (mains powered model) (g. x, ref. x): colour yellow, indicates that the power
cable of the machine is connected to the mains supply and the main switch has been depressed
(g. 14, ref. 1).
• Battery charge indicator (battery powered models only) (g. 15, ref. 1): consists of 3 Leds, red,
yellow and green, showing the battery charge level. Possible charge level indications:
• 100% battery: red, yellow and green LED on.
• 30% battery: red and yellow LED on.
• 10% battery: red LED on steadily.
• 5% battery: red LED on blinking, battery completely at, after a few seconds the brush
and suction motors will be shut o;
• Brush control button (g. 15, ref. 2): enables (Led alight) and disables (Led dark) operation
of the “Brush” function; the brush does not start rotating until the “Brush control lever”(g. 15,
ref. 2) is operated.
! INFORMATION
Pressing the brush control button also has the eect of automatically enabling the suction
and detergent solution ow functions, which can then be controlled and adjusted by way of
the respective single buttons on the console.
• Suction control button (g. 15, ref. 3): switches on (“Led alight”) and switches o (“Led dark”)
the suction motor, which generates the vacuum needed to dry the oor after scrubbing. The
motor comes into operation only when activated by way of the “Brush control lever”.
• Detergent ow button (g.15, ref. 5): enables (Led alight) and disables (Led dark) the ow of
detergent solution, with three levels of delivery available. Flow is enabled only with the brush
in operation.
• ECO button (g.15, ref. 4): enables (Led alight) and disables (Led dark) ECO operating mode.
! INFORMATION
In ECO operating mode, the power of the brush motor and suction motor is reduced
automatically and the ow of detergent solution defaults to delivery level 1.
1
21
2
Fig.14 Fig.15
3 45
17

EN
Working
• Press the main switch (g. 16, ref. 1).
• Press the brush button or the ECO button (g. 17, ref. 1), in addition
to activating the brush, this will also enable the vacuum function
and the ow of detergent solution.
• Lower the squeegee by operating the lever (g. 16, ref. 2).
• Depress the brush control lever (g. 16, ref. 3).
• Begin working.
! INFORMATION
This machine can dry the oor moving both forward and in reverse.
To operate the drying function in reverse, pull the lever upwards
(g. 18, ref. 1).
• When work is in progress, check the thoroughness of the wash and
regulate the ow of detergent solution accordingly, with the relative
button (g. 17, ref. 3).
! INFORMATION
Check periodically that the detergent solution is reaching the
brush, and take care to ll the tank when empty.
! WARNING
Should the red Led of the battery charge indicator light up when
work is in progress, this means that the battery is almost out of
power, and after a few seconds the brush and vacuum functions will
shut o automatically. Proceed to recharge the battery, referring to
the section “Battery: preparation / installation / recharging”.
In cases where oors are soiled with particularly stubborn dirt, scrubbing
and drying operations can be performed in two separate stages.
Prewashing with brushes or pads:
• Plug the machine into the power socket (mains powered model).
• Raise the squeegee by operating the lever (g. 16, ref. 2).
• Press the main switch (g. 16, ref. 1).
• Press the brush control button (g. 17, ref. 1).
• Switch o the vacuum function by pressing the suction control
button (g. 17, ref. 2).
• Depress the brush control lever (g. 16, ref. 3).
• When scrubbing particularly dirty areas, give the detergent sucient
time to perform its chemical action of detaching and suspending
the dirt in the lm of water, and allow the brushes time to exert an
eective mechanical action.
Drying
• Lower the squeegee by operating the lever (g. 16, ref. 2).
• Press the suction control button to activate the vacuum function,
and pass over the area washed previously: this will produce an
eect similar to a thorough scrub, with the result that subsequent
routine maintenance work on the oor will be less time-consuming.
2
1
1
2
3
1
3
Fig.16
Fig.17
Fig.18
18

EN
Removal of dirty water tank lid
• Release the lid of the dirty water tank by pressing the two sliding
catches toward one another (g. 19, ref. 1).
• Lift o the lid.
Installation of dirty water tank lid
! INFORMATION
INCORRECT positioning of the lid on the dirty water tank will cause
the machine to malfunction when the oor is being dried.
• Place the lid on the tank.
• Apply downward pressure to the lid, sucient to make certain that
the two sliding release catches spring outwards and engage with
the top of the dirty water tank (Fig.20).
! INFORMATION
The lid is correctly installed when the RED background presented
by the recesses of the two catches can NOT be seen (g. 20).
Filling the water/detergent tank
! DANGER
Unplug the machine from the power socket (mains powered model).
! INFORMATION
Remember to empty the dirty water tank every time the clean water
and detergent tank is lled.
The tank can be lled in two dierent ways:
Tank installed on the machine:
• Turn o the machine at the main switch.
• Remove the cap of the detergent tank (g.21, ref. 1).
• Fill the tank.
Tank removed from the machine:
• Turn o the machine o at the main switch.
• Press in the two lateral tank retaining catches (g. 22, ref. 1),
separate the dirty water tank from the frame and set it down on
the oor.
• Remove the cap of the detergent tank.
• Separate the detergent tank from the frame.
• Fill the tank (g. 23).
Emptying the water/detergent tank
! DANGER
Unplug the machine from the power socket (mains powered model).
The tank can be emptied by proceeding as follows:
• Turn o the machine o at the main switch.
• Take the machine to the designated disposal area.
• Press in the two lateral tank retaining catches (g. 22, ref. 1),
separate the dirty water tank from the frame and set it down on
the oor.
• Separate the detergent tank from the frame.
• Remove the cap of the detergent tank.
• Empty the contents of the tank by way of the front opening (g. 24).
Fig.19
Fig.20
1
1
1
1
Fig.21
Fig.22
Fig.23
Fig.24
19
This manual suits for next models
1
Table of contents
Other LEMA Scrubber manuals
Popular Scrubber manuals by other brands

Dustbane
Dustbane Hurricane 450 XTT quick guide

ServiceMASTER Clean
ServiceMASTER Clean SOLUS-500-CSA Information & operating instructions

American-Lincoln
American-Lincoln 56515851 Instructions for use

Nobles
Nobles Anser Operator and parts manual

Raytheon
Raytheon UY75 Installation and maintenance manual

Amano
Amano Pioneer Eclipse 310AS Operator's manual