LeMaker Guitar User manual

LeMaker Guitar User Manual
( The first edition )

LeMaker Guitar User Manual - 2 -
Copyright © 2014-2015 LeMaker. All Rights Reserved.
Table of Contents
1 Introduction.........................................................................................................................................4
1.1 What is LeMaker Guitar?.........................................................................................................4
1.2 What is Linux...........................................................................................................................4
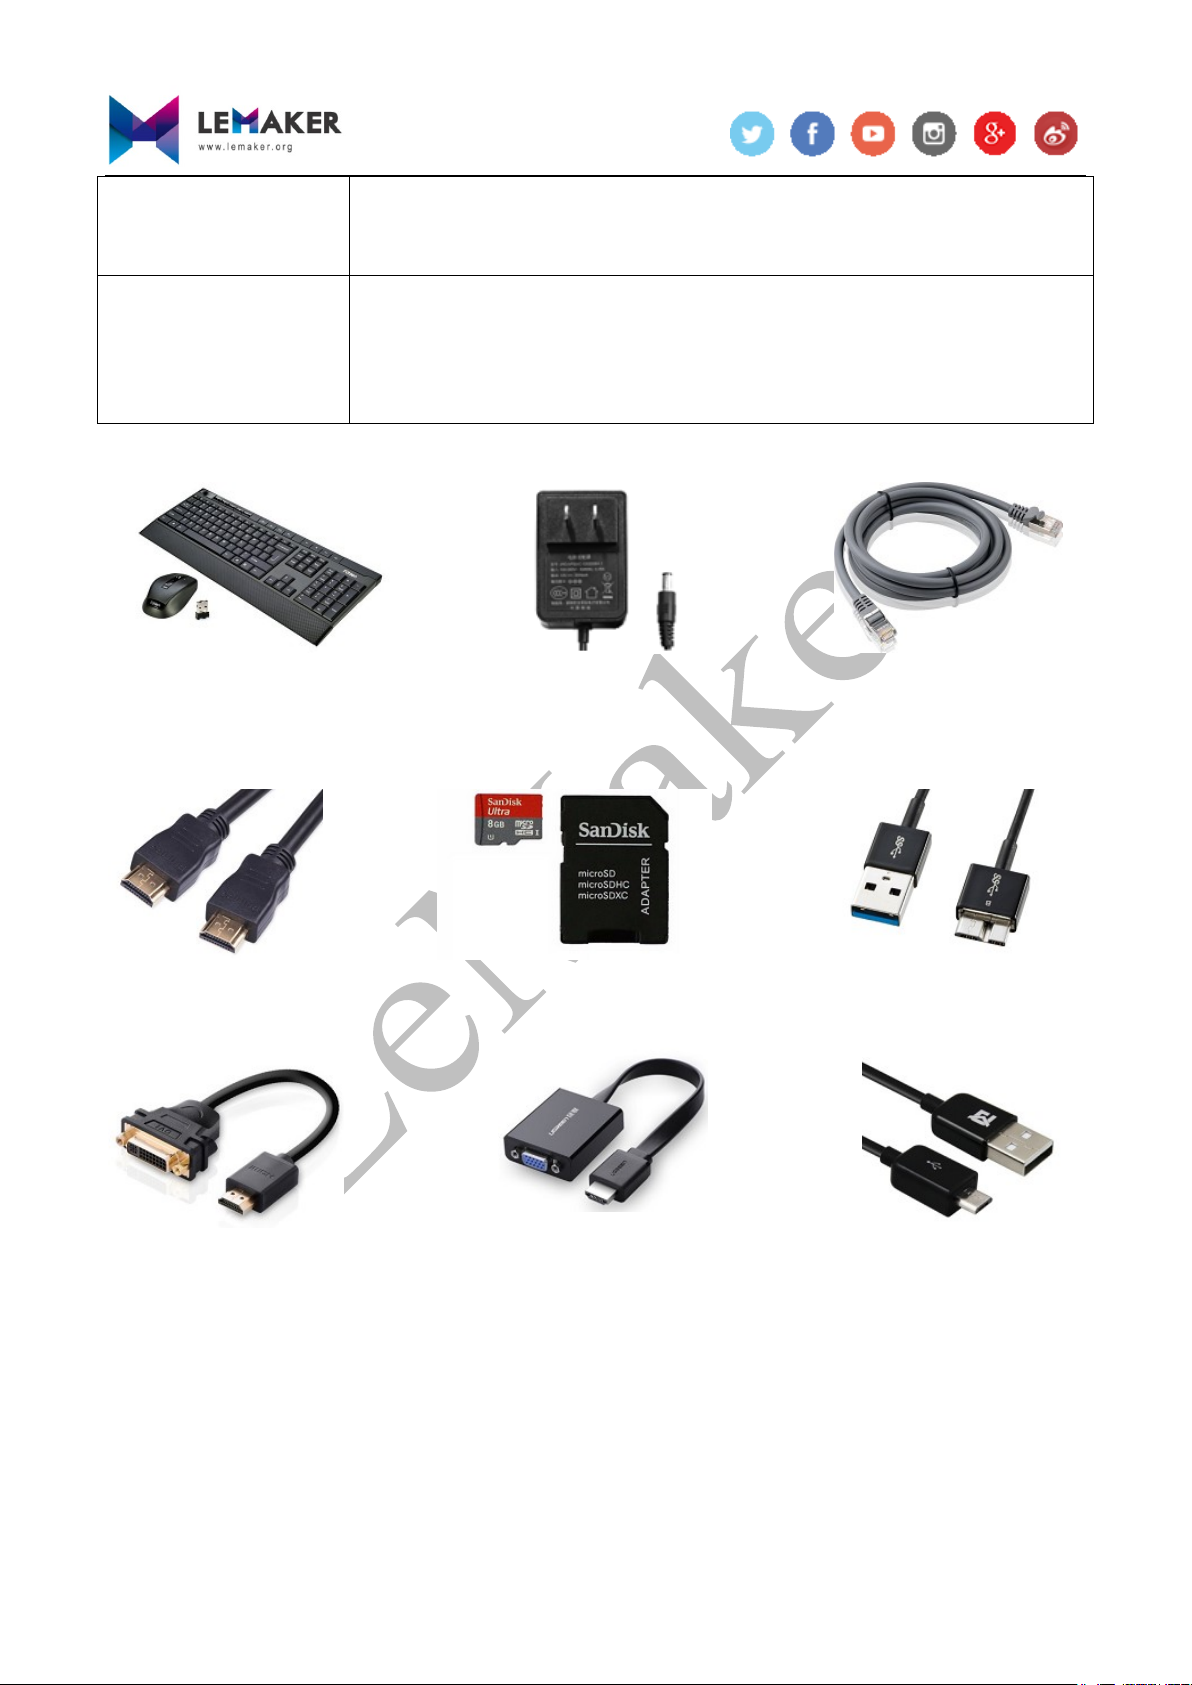
1.3 What accessories you need?.....................................................................................................6
1.4 How to connect the accessories ...............................................................................................8
1.5 See also ....................................................................................................................................8
2 Install OS image................................................................................................................................10
2.1 Write OS image into MicroSD card on Windows.................................................................. 11
2.2 Write OS image into MicroSD card on Linux .......................................................................12
2.3 Write OS firmware into EMMC on Windows .......................................................................13
2.4 Write OS firmware into EMMC on Linux.............................................................................15
2.5 OS image partitions description.............................................................................................16
2.6 See Also .................................................................................................................................16
3 Basic Usage.......................................................................................................................................17
3.1 Display ...................................................................................................................................17
3.1.1 HDMI..........................................................................................................................17
3.1.2 LVDS ..........................................................................................................................19
3.2 Audio......................................................................................................................................23
3.3 WI-FI......................................................................................................................................23
3.3.1 Use WI-FI as the station mode....................................................................................23
3.3.2 Use WI-FI as the ap mode ..........................................................................................28
3.4 Bluetooth................................................................................................................................31
3.5 Camera ...................................................................................................................................34
3.6 Storage ...................................................................................................................................36
3.6.1 USB.............................................................................................................................36
3.6.2 Micro SD card and EMMC NAND Flash...................................................................38
3.7 ADC .......................................................................................................................................38
3.8 See also ..................................................................................................................................39
4 Resize root filesystem partition ........................................................................................................40
5 CPU...................................................................................................................................................42
5.1 Scale CPU frequency .............................................................................................................42
5.2 Read the CPU&PMU temperature.........................................................................................44
5.3 See also ..................................................................................................................................45
6 Remote login.....................................................................................................................................46
6.1 Use ssh to login......................................................................................................................46
6.1.1 Remote login on Windows..........................................................................................46
6.1.2 Remote login on Linux ...............................................................................................48
6.2 Use vnc to login .....................................................................................................................48

LeMaker Guitar User Manual - 3 -
Copyright © 2014-2015 LeMaker. All Rights Reserved.
6.3 Use RDP to login ...................................................................................................................50
6.4 See also ..................................................................................................................................52
7 Video .................................................................................................................................................53
7.1 GPU hardware acceleration ...................................................................................................53
7.1.1 Install GPU hardware acceleration libraries ...............................................................53
7.1.2 Use glmark2 tool to test GPU .....................................................................................54
7.2 Video decoder engine.............................................................................................................56
7.3 See also ..................................................................................................................................57
8 IO controlling....................................................................................................................................58
8.1 Use sysfs control gpio............................................................................................................58
8.2 WiringLMK............................................................................................................................60
8.3 LMK.GPIO ............................................................................................................................61
8.4 LeScratch ...............................................................................................................................62
8.5 See also ..................................................................................................................................62
9 Back up OS image ............................................................................................................................63
9.1 Use Win32Diskimager to back up .........................................................................................63
9.2 Use dd command to back up..................................................................................................63
9.3 See also ..................................................................................................................................64
10 Android ...........................................................................................................................................65
10.1 Basic desktop .......................................................................................................................65
10.2 Basic Setting ........................................................................................................................66

LeMaker Guitar User Manual - 4 -
Copyright © 2014-2015 LeMaker. All Rights Reserved.
1Introduction
1.1 What is LeMaker Guitar?
LeMaker Guitar is a high cost-effective SBC (single-board computer) designed by LeMaker team,
which enables you to build your own individual and versatile system. In fact, it is a complete
mini-computer, including all the required elements such as processor, memory, network, and other
interface. LeMaker Guitar adapts actions S500 SOC, quad-core ARM® Cortex™-A9 CPU, 1GB/2GB
DDR3 SDRAM and 8GB EMMC.
In order to make the users be more convenient to DIY their own platform. LeMaker team designed
LeMaker Guitar by core board & base board, which significantly reduce the redesign period of
personalized customization. If you don’t want spend any time and any effort to design your base
board, fortunately LeMaker team also offers three types of base board: Base Board Rev.B, Base
Board Rev.C and Base Board Rev.D. Base Board Rev.B is also called standard revision; Base Board
Rev.C is also called enhanced revision; Base Board Rev.D is also called fever-level revision. We
recommend using the core board & Base Board Rev.B.
LeMaker Guitar has an excellent compatibility with multiply software support. Basically all
mainstream Linux-based operating system can run on LeMaker Guitar, Such as Lemuntu, Android,
Ubuntu-mate, LeMedia, Arch Linux and so on.
1.2 What is Linux
Linux is the operating system (OS) used for your LeMaker Guitar. Its role is exactly the same as
Windows, Mac OS X, Android (in fact, Android is based on a Linux kernel), iOS or any other OS
you care to mention. That role is to provide a platform for everything else to run on. It talks to the
hardware and it talks to you, the user.
But what makes Linux different to any other OS out there? Well, for a start it’s free, immensely
powerful, high customisable and the best bit is it’s been created for users by users. However to call
Linux ‘an operating system’ is a bit of an understatement. It’s not ‘one operating system’ in the same

LeMaker Guitar User Manual - 5 -
Copyright © 2014-2015 LeMaker. All Rights Reserved.
way that Windows 8 or Mac OS X is. No, it is many operating systems… hundreds even!
Linux consists of different components, each of which has many different variants. These have all
been wrapped into easy-to-install distributions to meet different needs. Want a simple desktop
replacement? There’s a Linux distribution for that. Want a home media server? There’s a distribution
for that too. If you can think of it, someone in the Linux community is probably already developing
for it.
Lemuntu
Lemuntu is a free operating system based on Debian Jessie optimized for LeMaker SBC and an
official Linux distribution of LeMaker community. In order to take full advantage of SBC hardware
resources and improve the user experience of SBC, it is necessary to optimize the operating system.
Lemuntu is a running more stable, using less memory and lightweight Linux operating system.
Android
Android is a mobile operating system based on the Linux kernel and currently developed by Google.
With a user interface based on direct manipulation, Android is designed primarily for touchscreen
mobile devices such as smartphones and tablet computers, with specialized user interfaces for
televisions (Android TV), cars (Android Auto), and wrist watches (Android Wear). The OS uses
touch inputs that loosely correspond to real-world actions, like swiping, tapping, pinching, and
reverse pinching to manipulate on-screen objects, and a virtual keyboard. Despite being primarily
designed for touchscreen input, it has also been used in game consoles, digital cameras, regular PCs,
and other electronics.
Ubuntu-mate
Ubuntu MATE is a free and open source Linux distribution and an official derivative of Ubuntu. Its
main differentiation from Ubuntu is that it uses the MATE desktop environment as its default user
interface, based on GNOME 2 which was used for Ubuntu versions prior to 11.04, instead of the
Unity graphical shell that is the default user interface for the Ubuntu desktop.
LeMedia
LeMedia is a multimedia operating system customized with Debian and Kodi for LeMaker SBC.
LeMedia was created by LeMaker Team that embraces the idea of “Share, Innovation, Opensource,

LeMaker Guitar User Manual - 6 -
Copyright © 2014-2015 LeMaker. All Rights Reserved.
Education and Commonweal”, LeMedia can runs on LeMaker SBC as a media center to play games
and view most videos, music, pictures, and other digital media files from local and network storage
media or the Internet.
Arch Linux
Arch Linux is a Linux distribution for computers based on IA-32 and x86-64 architectures. It is
composed predominantly of free and open-source software, and supports community involvement.
The design approach of the development team follows the KISS principle ("keep it simple, stupid")
as the general guideline, and focuses on elegance, code correctness, minimalism and simplicity, and
expects the user to be willing to make some effort to understand the system's operation. A package
manager written specifically for Arch Linux, pacman, is used to install, remove and update software
packages. Arch Linux uses a rolling release model, such that a regular system update is all that is
needed to obtain the latest Arch software; the installation images released by the Arch team are
simply up-to-date snapshots of the main system components.
Note that in this user manual, all the operations and tutorials are based on LeMaker Guitar Base
Board Rev.B and Lemuntu.
1.3 What accessories you need?
To enjoy playing your LeMaker Guitar, you will need some necessary accessories as below:
Table 1.1: Accessories table
Micro SD card
We recommend a 4GB or greater class 10 MicroSD card
Display and
connectivity cables
Any HDMI/DVI/VGA monitor or TV should work as a display. If the
display uses DVI or VGA as input interface, we need a HDMI-to-DVI
cable or HDMI-to-VGA cable.
Keyboard and mouse
Any standard USB keyboard and mouse should work
Power supply
Use a 5~12V@2A power adapter supply to power your LeMaker Guitar.
Plug specification is inner diameter 2.1mm and outer diameter 5.5mm with
standard center-positive.

LeMaker Guitar User Manual - 7 -
Copyright © 2014-2015 LeMaker. All Rights Reserved.
Internet connection
To update or download software, we recommend that you connect to the
internet either via an Ethernet cable or a WI-FI adapter.
USB3.0/2.0 cable
To boot OS from EMMC NAND Flash, we connect to LeMaker Guitar via
USB3.0/2.0 cable (A/M-Micro-B) to write the firmware into EMMC
NAND Flash.
The photos of accessories are showed as below:
Figure 1.1: List of the accessories
Wireless keyboard
mouse
Ethernet cable
Power adapter
MicroSD card
HDMI cable
USB 3.0 cable
HDMI-to-DVI cable
HDMI-to-VGA cable
USB2.0 cable

LeMaker Guitar User Manual - 8 -
Copyright © 2014-2015 LeMaker. All Rights Reserved.
1.4 How to connect the accessories
Figure 1.2: The accessories connected to LeMaker Guitar
(Notice: Please pay attention that do not hot pull out or insert the core board when it is
powered on, otherwise the SOC maybe be burnt down!)
1.5 See also
[1] LeMaker Guitar product home page: http://www.lemaker.org/product-guitar-index.html.
[2] LeMaker Guitar specification: http://www.lemaker.org/product-guitar-specification.html.
[3] Arch Linux community: https://www.archlinux.org/.
[4] Ubuntu-mate: http://ubuntu-mate.org/.

LeMaker Guitar User Manual - 10
-
Copyright © 2014-2015 LeMaker. All Rights Reserved.
2Install OS image
There are two ways to boot the operating system for LeMaker Guitar, one way is booting from
MicroSD card, another way is booting from EMMC NAND Flash on core board. Assume that Linux
OS has been successfully installed on a MicroSD card and the EMMC NAND Flash. When you have
inserted the MicroSD card into MicroSD card slot, the operating system will preferentially boot from
MicroSD card. But if you want to boot operating system from EMMC NAND Flash, you must
remove the MicroSD card from MicroSD card slot. There are two OS image file formats for
LeMaker Guitar: .img file for writing to a MicroSD card, .fw file for writing to EMMC NAND Flash.
You can download the OS image files from LeMaker Guitar Resource and use the tool 7-Zip in
Windows or the command 7za in Linux to extract the archive file.
Windows:
Install the 7-zip tool and then decompress and extract the archive file.
Linux:
sudo apt-get install p7zip-full
7za x [imagefilename].7z
If you want to boot operating system from MicroSD card, you will need to install an operating
system into a MicroSD card. But if you want boot operating system from EMMC NAND Flash on
core board, you need to install an operating system into EMMC NAND Flash. There are a hardware
“ADFU” (Actions Device Firmware Upgrade) button on core board and a software “ADFU”button
on base board to enter the ADFU mode, but we recommend using the software “ADFU” button on
base board to enter the ADFU mode. The instructions below will teach you how to write an OS
image into a MicroSD card or EMMC NAND Flash.
Note that the hardware “ADFU” can be explained that when we cut off the data line between EMMC
and NAND Flash by the hardware “ADFU” button, as a result, the controller can’t find the external
storage medium, and then enter the ADFU mode. The software “ADFU” is explained that u-boot will
detect the state of this the software “ADFU”button on boot, and then call related functions to enter

LeMaker Guitar User Manual - 11
-
Copyright © 2014-2015 LeMaker. All Rights Reserved.
ADFU mode. If something has wrong in u-boot, you can use the hardware ADFU button to enter
ADFU mode for writing OS firmware into EMMC NAND Flash.
2.1 Write OS image into MicroSD card on Windows
Step 1: Insert your MicroSD card into your computer or card reader. The size of the MicroSD card
should be larger than the OS image size, generally 4GB or greater.
Step 2: Format the MicroSD card. You should download and install a MicroSD card format tool:
SDFormatter. Start the tool as Administrator, In the "Options" menu, set "FORMAT TYPE" option to
QUICK, set "FORMAT SIZE ADJUSTMENT" option to "ON". And then click “OK” to finish
options setting and click “Format” to format SD card.
SDFormatter Download Link: http://mirror.lemaker.org/SDFormatter_v4.zip
Figure 2.1: SDFormatter

LeMaker Guitar User Manual - 12
-
Copyright © 2014-2015 LeMaker. All Rights Reserved.
Figure 2.2: SDFormatter Setting
Step 3: Write OS image to MicroSD card. You should download and install OS image writing tool:
Win32Diskimager. Start the tool as Administrator. Open the unzipped image file, and then click the
“write” button to write the OS image into the MicroSD card. Wait patiently to successfully complete
the writing.
Win32Diskimager Download Link: http://mirror.lemaker.org/Win32DiskImage_v0.9.5_install.zip
Figure 2.3: Win32 Disk Imager
2.2 Write OS image into MicroSD card on Linux
Step 1: Insert your MicroSD card into your computer or card reader. The size of the MicroSD card
should be larger than the OS image size, Generally 4GB or greater.
Step 2: In the commad terminal, check the MicroSD card node
sudo fdisk –l
Step 3: Install the ddrescue tool for writing OS image into the MicroSD card

LeMaker Guitar User Manual - 13
-
Copyright © 2014-2015 LeMaker. All Rights Reserved.
Debian / Ubuntu Linux:
sudo apt-get install ddrescue
RedHat /Fedora /CentOS Linux:
yum -y install ddrescue
Step 4: Write OS image into MicroSD card
sudo dd_rescue –A [path]/[imagename].img dev/sdx
sync
Wait patiently to successfully complete writing.
2.3 Write OS firmware into EMMC on Windows
Step 1: Download and install the firmware burning tool: IH FW Burning Tool, and the start the tool as
Administrator.
Download Link: http://mirror.lemaker.org/IH_FW_Burning_Tool_For_Windowns_V2.01.03.zip
Figure 2.4: IH FW Burning Tool

LeMaker Guitar User Manual - 14
-
Copyright © 2014-2015 LeMaker. All Rights Reserved.
Step 2: Press and hold “ADFU”button, Connect to LeMaker Guitar via USB3.0/USB2.0 cable.
Release “ADFU”button when LeMaker Guitar is powered on and enters the ADFU mode. You will
find IH FW Burning Tool detects 1 USB Device (ADFU).
Figure 2.5: Detect USB Device
Step 3: Open the firmware .fw file, and then click the “DOWN” button to write the firmware file to
EMMC. Wait patiently to successfully complete the writing.

LeMaker Guitar User Manual - 15
-
Copyright © 2014-2015 LeMaker. All Rights Reserved.
Figure 2.5: Writing the OS image
2.4 Write OS firmware into EMMC on Linux
Step 1: Download the firmware burning tool such as FWBurning Tool from
http://mirror.lemaker.org/FW_Burning_Tool_For_Linux_V1.0_01.tar.gz
wget http://mirror.lemaker.org/FW_Burning_Tool_For_Linux_V1.0_01.tar.gz
Step 2: In the command terminal, extract the archive file and install FWBurning Tool.
sudo tar -zxvf FWBurning_Tool_For_Linux_V1.0_01.tar.gz
cd FWBurning_Tool_For_Linux_V1.0_01
sudo ./FWBurningTool-1.0.run
Step 3: Press and hold “ADFU”button, Connect to LeMaker Guitar via USB3.0/USB2.0 cable.
Release “ADFU” button when LeMaker Guitar is powered on and enters the ADFU mode. You can
use the command “lsusb”to list the USB devices.
sudo lsusb
…

LeMaker Guitar User Manual - 16
-
Copyright © 2014-2015 LeMaker. All Rights Reserved.
Bus 001 Device 002: ID 10d6:10d6 Actions Semiconductor Co., Ltd
…
Step 4: Write the firmware .fw file into EMMC
sudo python ./ActionsFWU.py --fw=firmware_name.fw
2.5 OS image partitions description
Table 2.1: Linux OS image partitions table
MicroSD Card Layout
Name
Start
Usage
Mbr
0
The first bootable partition of MicroSD card
Gpt
0x200
gtb partition table
Environment
0x5000
Saving uboot environment variables
Bootloader
0x200200
The first stage boottraps (bootloader.bin)
Uboot
0x300000
uboot bootloader (u-boot-dtb.img)
Misc
0x800000
fat parttions, including kernel, initramfs, kernel configure
files, uEnv.txt etc…(misc.img)
Rootfs
0x3800000
filesystem(rootfs.img)
2.6 See Also
[1] 7za(1) - Linux man page: http://linux.die.net/man/1/7za
[2] 7-Zip - a file archiver with a high compression ratio: http://www.7-zip.org/
[3] SDFormatter: http://www.sdcard.org/downloads/formatter_4/
[4] Win32 Disk Imager - a tool for writing images to USB sticks or SD/CF cards:
http://sourceforge.net/projects/win32diskimager/
[5] How to make OS image:
http://wiki.lemaker.org/LeMaker_Guitar:How_to_make_LeMaker_Guitar_OS_image

LeMaker Guitar User Manual - 17
-
Copyright © 2014-2015 LeMaker. All Rights Reserved.
3Basic Usage
3.1 Display
3.1.1 HDMI
HDMI (High-Definition Multimedia Interface) is a proprietary audio/video interface for transferring
uncompressed video data and compressed or uncompressed digital audio data from an
HDMI-compliant source device, such as a display controller, to a compatible computer monitor,
video projector, digital television, or digital audio device. HDMI is a digital replacement for analog
video standards.
There has a HDMI interface on LeMaker Guitar, you can connect the display to LeMaker Guitar via
the HDMI cable. But if the display use DVI or VGA as input interface, we need a HDMI-to-DVI
cable or HDMI-to-VGA cable in the photo below:
LeMaker Guitar supports a variety of resolutions for HDMI outputting, you can configure the HDMI
outputting resolution according to the display you use.
Table 3.1: HDMI resolution table
HDMI Resolution Table
VID
Resolution
1
VID640x480P_60
4
VID1280x720P_60
16
VID1920x1080P_60
17
VID720x576P_50
Pictrue 3.1: HDMI-to-DVI cable
HFigure 3.2: HDMI-to-VGA cable

LeMaker Guitar User Manual - 18
-
Copyright © 2014-2015 LeMaker. All Rights Reserved.
19
VID1280x720P_50
31
VID1920x1080P_50
126
VID1280x720P_60_DVI
View HDMI output resolution
cat /sys/devices/b02c0000.hdmi/vid
16 #Resolution is 1920x1080
Set HDMI output resolution, for exmaple VID1280x720P_50
Step 1: Edit the dts file: linux-actions-bsp/linux-actions/arch/arm/boot/dts/lemaker_guitar_bbb.dts
Set default_resolution = “720P50HZ”.
Step 2: Edit the dts file: linux-actions-bsp/u-boot-actions/arch/arm/dts/lemaker_guitar.dts. Set
default_resolution = “720P50HZ”.
Step 3: Recompile LeMaker Guitar BSP
You can refer to http://wiki.lemaker.org/LeMaker_Guitar:How_to_use_LeMaker_Guitar_BSP to
download LeMaker Guitar BSP that includes the above two files.
cd linux-actions-bsp/
make
Step 4: Replace kernel.dtb and u-boot-dtb.img
Copy linux-actions-bsp/build/s500/misc/kernel.dtb and
linux-actions-bsp/build/s500/u-boot/u-boot-dtb.img to /tmp directory of LeMaker Guitar. And then:
cd /tmp/
sudo cp kernel.dtb /media/lemaker/misc #or sudo cp kernel.dtb /media/misc
sudo dd if=u-boot-dtb.img of=/dev/mmcblk0 bs=512 seek=6144
sync
sudo reboot

LeMaker Guitar User Manual - 19
-
Copyright © 2014-2015 LeMaker. All Rights Reserved.
3.1.2 LVDS
LVDS (Low-voltage differential signaling), also known as TIA/EIA-644, is a technical standard that
specifies electrical characteristics of a differential, serial communications protocol. LVDS operates at
low power and can run at very high speeds using inexpensive twisted-pair copper cables. LeMaker
Guitar supports 7.0 inch LCD module by default. If you want to use other size LCD module, you
should configure the resolution of LCD like configuring HDMI, for example 1024*600_60.
Figure 3.3: LCD module
Step 1: Edit the dts file: linux-actions-bsp/linux-actions/arch/arm/boot/dts/lemaker_guitar_bbb.dts,
and set refresh = 60, xres = 1024, yres = 600.
lcd0: lcd0@b02a0000 {
pinctrl-names = "default";
pinctrl-0 = <&lvds_state_default>;
lcd_power_gpios = <&gpio 36 0>; /*GPIOB4*/
lcd_reset_gpios = <&gpio 49 0>; /*GPIOB17*/
port_type = "lvds";
data_width = <0>; /* 0:24bit ,1:18bit */
Table of contents
Other LeMaker Motherboard manuals