Lenoxx BT9399 User manual

BT9399
Model no: BT9399
Batch Number: PR4594
PLEASE READ AND RETAIN INSTRUCTIONS FOR FUTURE REFERENCE

The illustrations used in this manual are to illustrate the operation method and structure of
the product. Where there is a small difference between the purchased product and the
illustrations, please take the actual purchased product as the standard.
ABOUT THE PRODUCT:
This phenomenal Bluetooth party speaker is packed with features and endless compatibility it would
be “The life of the party”. Boasting a 5 different colour-changing LED light show, an impressive 120
watts powerful sound, Bluetooth connectivity, TWS, EQ mode, 8 sound effects, karaoke mode, built-
in rechargeable battery, and a remote control for endless entertainment anywhere and everywhere.
An incredible night of karaoke would be an experience to remember, corporate speeches and event
announcements would be heard clearly with the UHF professional wireless microphone included
with the party speaker.
FEATURES:
1. Ultra-large magnetic circuit high-sensitivity speaker with high penetrating power. Low-
frequency shock and perfect medium-/high-frequency representation.
2. Bluetooth connectivity
3. Full panel LED lighting system
4. EQ Mode
5. 8 Sound Effects
6. The latest decoding chips supporting stable playback of MP3 in up to 32GB USB/TF
card/TWS (true wireless stereo).
7. 3. 5mm AUX audio input for each connection to a wide range of sound sources.
8. 2 Mic Jack
9. Built-in 11.1v 8000Mah high-capacity battery for continuous playback.
10. Connect the UHF Professional wireless microphone and use the adjustable
reverberation, voice and Karaoke function for outstanding performance.
11. Battery with built-in recharging protection to present a long and stable service life.
12. Built-in low battery and full recharging indication.
13. Microphone input recording
14. Remote Control

IMPORTANT SAFETY INSTRUCTIONS:
CAUTION:
To reduce the risk of fire or electric shock, do not expose this equipment, it’s charger and remote to
rain or moisture; do not use it anywhere near water or where water splashes or drips; do not touch
the plug with wet hands.
In the event of water or other liquids entering the device, unplug it immediately, clean and dry it as
best as possible. Then have it checked for damage by a qualified technician or contact the after-sales
support line.
Important safeguards:
•Read the instructions carefully before use
•Remove and safely disregard any packaging material and labels before using this product
for the first time. Ensure children and babies do not play with plastic bags or any
packaging materials.
•Before installing this equipment, make sure your outlet voltage corresponds to the
voltage stated on the appliance rating label.
•To prevent contact with high voltage components inside, do not attempt to open the
equipment.
•When connecting the equipment, align the plug properly and insert it fully to prevent
electric shock.
•Only use this equipment with the charger supplied, and do not overload the power
outlet.
•If the charger becomes damaged, do not use the equipment. The charger must be
replaced by the manufacturer or similarly qualified personnel to avoid a hazard. Contact
the after-sales support line for advice.
•Do not repair the unit yourself. This product has no user-serviceable parts. Only have it
serviced by qualified personnel. Contact Lenoxx customer service on 1300 666 848 for
any advice
•Unplug the unit from the power outlet after use to avoid possible damage during
electrical storms, or when the equipment is left unattended or unused for an extended
period.
•Do not let the chargers cord hang over the edge of a table or counter or touch any hot
surface. Do not allow anything to rest on or roll over the charger’s cord and run any cords
so that no one steps on or trips over them.
•Do not run the charger’s cord near heat-producing appliances such as radiators, stoves or
irons. Excessive heat could melt insulation and expose live wires.
•Always grasp the plug, not the cord, when disconnecting the charger from the unit.
Pulling the cord can damage the internal wires and may cause a fire.
Installation:
When installing the unit, make sure to place it:
•Away from heat sources, radiators or other products that produce heat.
•Always operate the unit on a flat level surface
•Away from areas with hot temperatures, high humidity or direct sunlight.
•Away from excess dirt and dust.

•Away from open windows and any place where water may get into the unit and damage
it.
•Make sure there is free circulation of air around the unit. Do not place it on a thick
carpet, a bed or any place where ventilation holes are obstructed. Leave at least 10cm
clearance around the unit.
•Make sure the mains socket is always readily accessible.
Usage conditions and restrictions:
•Do not place heavy objects on top of the equipment or step on it.
•Do not place objects filled with water (such as vases) or any naked flame sources (such as
lit candles, incense sticks or cigarettes) on top of the unit.
•The equipment is not intended for use by persons (including children) with reduced
physical, sensory or mental capabilities, or lack of experience and knowledge, unless they
have been given supervision or instruction concerning use of the equipment by a person
responsible for their safety.
•Close supervision is always necessary when an appliance is used by or near children.
•We assume no liability for any damage caused by noncompliance with these instructions
or any other improper use or mishandling of the equipment.
•Usage of controls, adjustments, or performance of procedures other than those specified
herein may result in hazardous radiation exposure. Repairs may not be carried out by
anyone except qualified service personnel.
Getting Started
Before First Use:
• The unit may become hot during operation. Always leave sufficient space around the unit
for ventilation.
• The voltage supplied to the unit should match the voltage that is printed on the charger’s
panel. If you have any doubts concerning this matter, consult an electrician or call Lenoxx
customer service on 1300 666 848
• Avoid placing the unit in direct sunlight or close to any sources of heat. Also avoid
locations subject to vibrations and excessive dust, heat, cold or moisture.
• Do not expose the unit to water.
• Do not place the unit on an amplifier or receiver.
• Do not open the cabinet as this might result in damage to the circuits or an electric shock.
If a foreign object gets into the unit, contact your dealer or service company.
Power supply/ Recharging the speakers built in battery:
• The unit operates on an internal rechargeable Li-ion battery and mains power.
• The battery can be recharged with the provided charger. Before first plugging the
appliance check that voltage indicated on the rating label corresponds
• Insert the charging cable into the DC in socket on the unit.
• Plug the charger to the power source.
• For best results, try to fully charge the battery before each use. If the battery is drained,
please allow it to recharge for a few hours.
• Full re-charge time is 5 Hours.
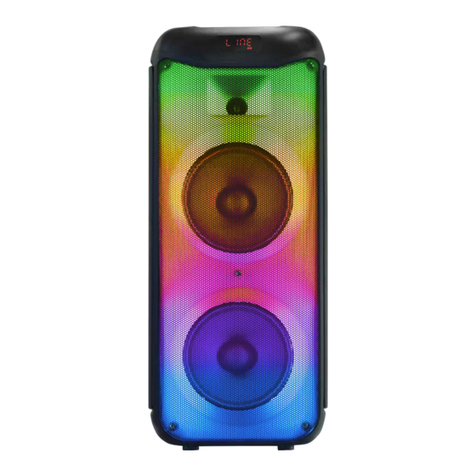
• Playback time is 5 Hours when the speaker is at half volume and 1.5 hours when it is at full
volume.
• Re-charge the speaker when the sound is weak or distorted.
• Charge indicator is red while charger is connected, and unit is charging. Charge indicator is
off when battery is full, or the speaker is no longer connected to the charge cable.
Accessories:
•1 x Adaptor
•1 x Wireless mic
•1 x Remote control, takes 2 x AAA batteries (not included)
•1 x Aux cable
•1 x Manual

Controls:
1. LED Screen.
2. Master Volume for MP3/AUX/Bluetooth mode, use it to regulate volume output from
the speaker.
3. TF Port: Reads audio files in MP3 format. TF card capacity up to 32G.
4. USB Port: Read audio files in MP3 format. USB capacity up to 32G.
5. : In the play status of USB/TF Card/Bluetooth, short press it to select the previous channel. In
FM receiving status, short press it to select the previous channel after a full station search has been
done.
6. : In USB/TF card/Bluetooth reading status, short press it to play/pause. In USB/TF
card reading status, long press it to select one of four playback sequencing modes. (ALL will
play all tracks in sequence. RAND will play tracks random. ONE will repeat one track. FOL will
repeat all tracks in folder)
7. : In USB/TF card/Bluetooth reading status, short press it to go to the next song.

8. MODE/TWS: short press it to toggle between USB/TF.
9. Recording/DEL: Short press it to enable recording. During recording, reverberation
should be tuned to the minimum. Long press it to delete a recording file. Recording function
is only available with the microphone working together.
10. Vocal Cut: Decrease the original vocal sound of music when you use microphone for
Karaoke.
11. MIC PRIORITY: Connect the microphone, short press the key into the microphone
priority mode. When you sing a song, the voice from the microphone will drown out the
music sound playing.
12. Indoor/outdoor: short press to switch between indoor and outdoor modes for different
EQ.
13. : Short press: is light mode button.
14. E-music: short press is the special sound of Electric sound effect for microphone.
15. Control the Mic sound effect from different roles. (Normal sound | man sound | girl
sound | Kids sound | old man sound).
16. SCENE MODE: short press is switching from different scene mode of microphone.
(Include profession/popular/KTV/recording studio/host).
17. BASS: Bass control regulating knob.
18. TREBLE: Treble control regulating knob.
19. Microphone volume: Microphone volume regulating knob.
20. Reverberation: Microphone reverberation regulating knob.
21. Microphone bass: Microphone bass regulating knob.
22. Microphone input: Microphone input jack. MIC1/MIC 2 socket: Insert a wired mic with
6.3mm socket here for Microphone function.
23. AUX IN: External sound source input port (plug-and-play). Insert a port of 3.5mm AUX cable
into this socket to use external sound source device.
24. DC 13.5V recharging: DC 13.5V recharging port.
25. Recharging indicator light: When recharger is connected, the red light turns on. When
the device is fully recharged, the blue light turns on.
26. Power: Power switch.
27. “Open” - Short press is the special sound of open show or party.
28. “Pls focus” - Short press is the special sound of pls focus.
29. “Laughter” - Short press is the special sound of laughter.
30. “Applause” - Short press is the special sound of applause.
31. “Kiss” - Short press is the special sound of kiss.
32. “Muah” - Short press is the special sound of muah.
33. “Awkward” - Short press is the special sound of awkward.
34. “Gunshot” Short press is the special sound of gunshot.
35. Remote Control Receiver.

Remote control:
1. Power Button: Short press it to enter standby mode; short press it again to resume. If
no device is connected, the system goes to " BT ".
2. : In USB/TF/AUX/Bluetooth mode; short press it to mute the device.
3. Cycle key: In USB/TF card reading status, short press it to toggle among four playback
sequencing modes (All - play all tracks in sequence; RAND - play in random; ONE -
repeat one track; FOL - repeat all tracks in a folder).
4. MODE: Functions as “Mode" on the master device.
5. Vocal Cut: Cancel the original sound of music.
6. MIC PRIORITY: Connect the microphone, short press the key, into the microphone
priority mode.
7. TWS: In bluetooth mode, Short press the TWS button to enter bluetooth
interconnection mode.
8. EQ: In USB/TF/AUX/Bluetooth reading status short press it to select an environment
mode (between indoor and outdoor modes toggle).
9. VOL+/VOL-: In USB/TF/AUX/Bluetooth mode, press them to volume up/down.
10. : Functions as “ ” on the master device.
11. : Functions as “ ” on the master device.
12. : Functions as “ ” on the master device.
1
2
13
4
3
7
6
5
10
9
8
12
11

13. Numeric Keys 0-9: In USB/TF card reading status; it plays tracks. To play Track 12, just
input numbers "1" and "2", and in 2 seconds the system will go to Track 12 and start
playback. Any input of number larger than number of the total available tracks is invalid.
Modes:
TWS MODE: Bluetooth feature that will let you enjoy true stereo sound quality without
the use of cables or wires. TWS works by pairing a primary Bluetooth speaker to your
preferred Bluetooth-enabled audio source.
1) Turn on all speakers to Bluetooth mode
2) Long press the TWS button on the BT9399 to pair the other one speaker. A voice prompt
will let you know that the connections has been successful
3) After pairing is successful, go to your smart device’s bluetooth mode to pair one of the
speakers. Both speakers will now start to play for a full stereo sound experience
4) Long press again the TWS button and it will disconnect the TWS mode.
Remark: Once you disconnect the TWS mode, you would need to repeat the process 1 - 3
BLUETOOTH:
1. Press the “MODE” key to and select Bluetooth function. Display screen will show “BLUE”.
2. Switch on the Bluetooth function on your smart device and and pair with “BT9399”. If a
password is needed, please input “0000” to go on pairing. After successfully pairing the unit,
a voice promt will confirm connection
Recording via External Microphone:
Connect a storage device (USB/TF card) and short press RECORD key to start recording for a
time depending on the storage capacity. During recording, tune the “-ECHO+” knob to the
minimum.
Notes: This product starts recording from the time as displayed on the LED screen.
To prevent and/or eliminate microphone feedback
•Do not position the microphone in front of the speaker. Provide space between
microphone and speakers
•Do not cup the microphone
•Position microphone close to the desired/intended sound source

Troubleshooting:
Issue
Solution
The BT9399 is not starting
Charge Unit for at least 4 Hours
The BT9399 sound is distorted
The Audio sound is cutting from the
Bluetooth function
Disconnect and reconnect the device to the
unit.
Microphone is not connecting properly
USB/TF card is not playing
Check that there is only audio files stored in
the USB/TF – MP3 format
Unplug USB/TF and re-plug
•If problems still persist, please contact service. DO NOT OPEN the speaker cover.
Maintenance and cleaning:
Switch off the unit, unplug from the power supply.
The outside of the speaker can be cleaned with a soft slightly damp cloth.
Never submerge the speaker, remote control or charger into water or other liquids.
Specifications:
1.Dual 8” inch driver unit
2.Output power:120W (you advertise it on gift box)
3.Support Bluetooth/TWS/USB/TF card/AUX
4.Full panel Led lighting system
5.With Karaoke function and include a UHF cordless Mic
6.With remote control
7.Built in rechargeable battery 11.1V/8000Mah
8.Power supply: DC adapter 13.5V
This manual suits for next models
1
Table of contents
Other Lenoxx Speakers manuals

Lenoxx
Lenoxx BT9388 User manual

Lenoxx
Lenoxx BTD200 User manual

Lenoxx
Lenoxx BTR862 User manual

Lenoxx
Lenoxx BT9330 User manual

Lenoxx
Lenoxx BT9340 User manual

Lenoxx
Lenoxx BT9377 User manual

Lenoxx
Lenoxx PR4350 User manual

Lenoxx
Lenoxx PR3840 User manual

Lenoxx
Lenoxx SR285 User manual

Lenoxx
Lenoxx BT9378 User manual