Lervia KH 1282 User manual

KH 1149
3
SSTTEEAAMM
IIRROONN
Operating Instructions
HHÖÖYYRRYYSSIILLIITTYYSSRRAAUUTTAA
Käyttöohje
ÅÅNNGGSSTTRRYYKKJJÄÄRRNN
Bruksanvisning
DDAAMMPPSSTTRRYYGGEEJJEERRNN
Betjeningsvejledning
DDAAMMPPSSTTRRYYKKEEJJEERRNN
Bruksanvisning
ÁÁôôììïïóóßßääååññïï
Ïäçãßá ÷ñÞóçò
DDAAMMPPFFBBÜÜGGEELLEEIISSEENN
Bedienungsanleitung
KOMPERNASS GMBH · BURGSTRASSE 21 · D-44867 BOCHUM
www.kompernass.com
ID-Nr.: KH1282-09/06-V5
KH 1282
CV_KH1282_E554_LB3.qxd 11.09.2007 10:01 Uhr Seite 1

KH 1282
CV_KH1282_E554_LB3.qxd 10.09.2007 16:49 Uhr Seite 4

- 3 -
Content Page
Basic Safety Instructions 4
Intended use 5
Unpacking 5
Before the first use 5
Operating Elements 6
Preparation 6
Plugging in and ironing 6
Steam ironing 7
Ironing with steam blast 8
Ironing with the spray function 8
Temporarily setting the steam iron aside 8
Taking the steam iron out of service 8
Cleaning and Care 9
Troubleshooting 9
Technical data 10
Disposal 10
Warranty and Service 10
Importer 11
Read the operating instructions carefully before using the appliance for the first time and preserve this booklet
for later reference. Pass this booklet on to whoever might acquire the appliance at a future date.
IB_KH1282_E5554_UK_3 10.09.2007 16:20 Uhr Seite 3

- 4 -
Steam Iron KH 1282
Basic Safety Instructions
Danger of Burns!
• Do not allow individuals (including children) to
use the appliance whose physical, sensorial or
mental abilities or lack of experience and know-
ledge hinder their safe usage of it if they have
not previously been supervised or instructed in its
correct usage.
• Tell children about the appliance and its potenti-
al dangers so that they do not play with it.
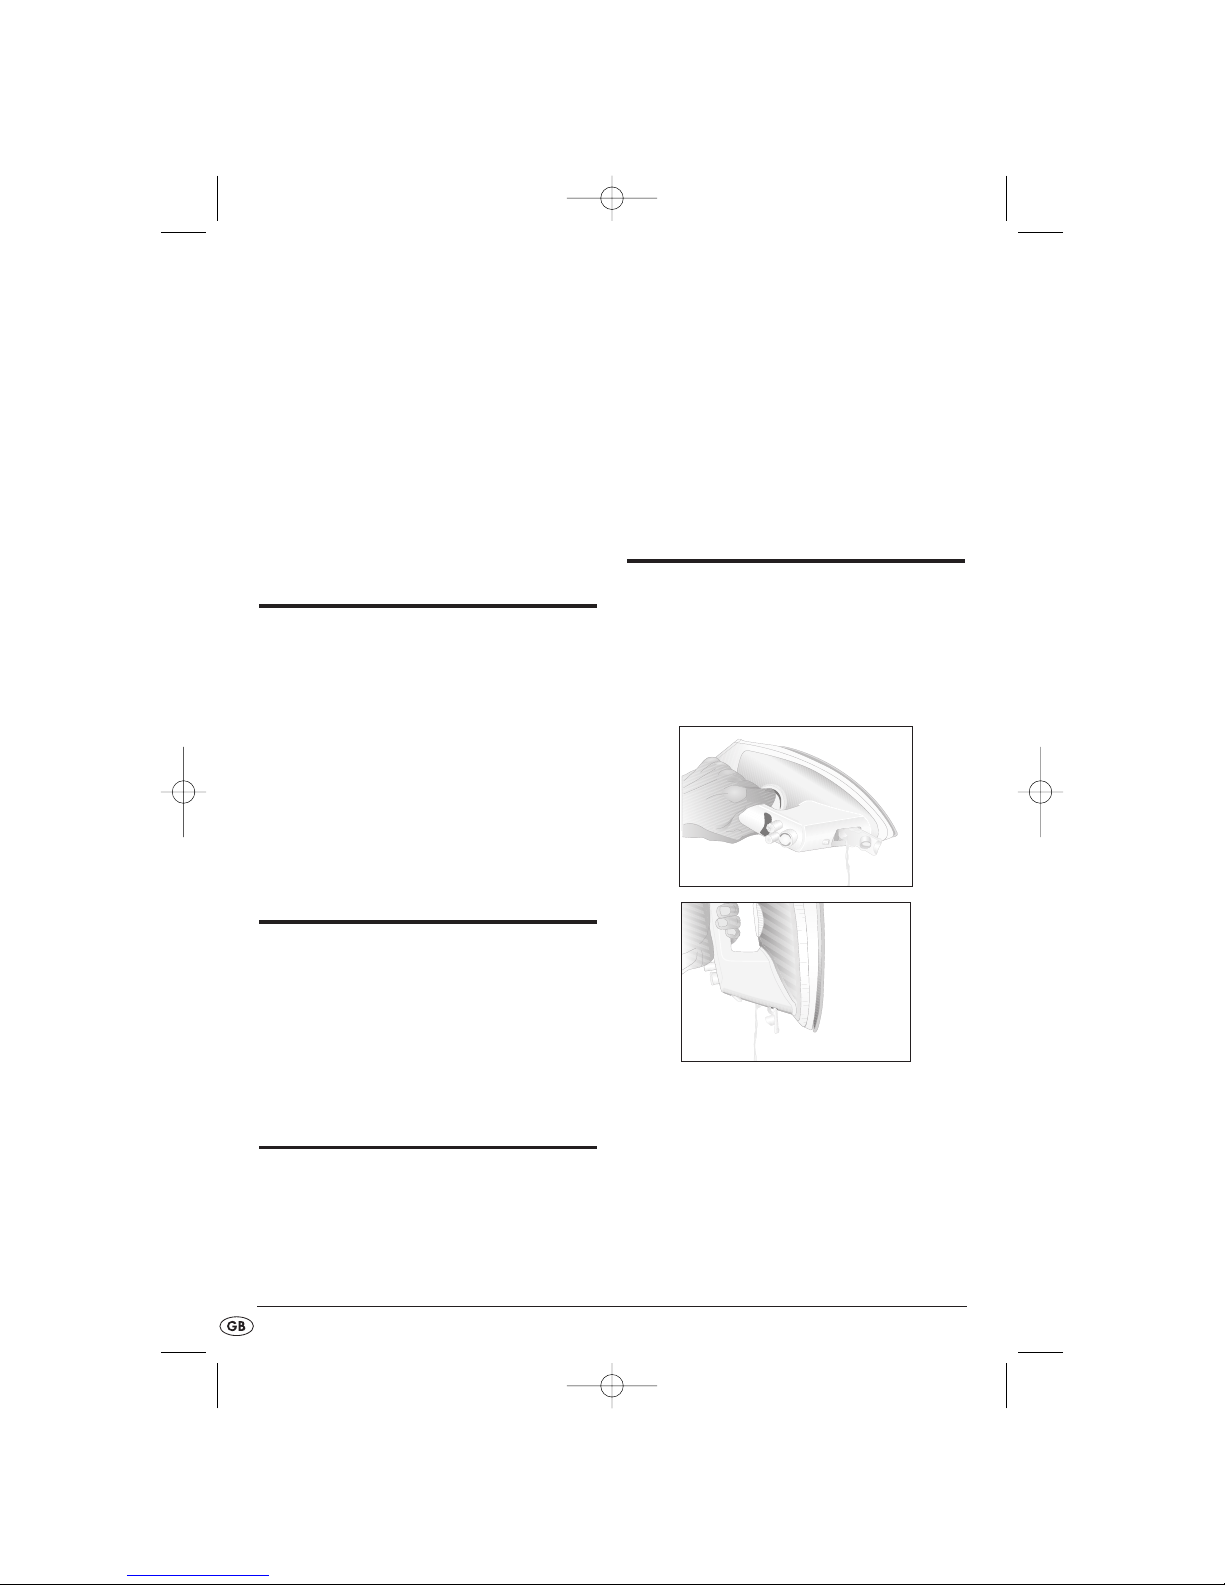
• Never touch the sole-plate of the iron when it is
hot. Take hold of the steam iron with the handle
only.
• Never hold your hand over the steam spray or
on hot metal parts.
• Never direct the steam blast at people or other
living creatures.
• You should not open the filler opening of the
water reservoir while the iron is in use. First
remove the plug from the power socket and al-
low the steam iron to cool down before refilling
it.
Fire hazard!
• Never leave the steam iron unattended when it is
hot or switched on. You and others can be easily
injured through a still hot iron.
• Never place the steam iron in the close vicinity of
inflammable materials, such as curtains and dra-
pes. They could catch fire.
• Use only the ironing temperatures given in the
care instructions for the material and those suita-
ble for it. Otherwise, you could damage the texti-
les. Should care instructions for the item be neit-
her known nor available, begin ironing with the
lowest temperature setting.
• Put the steam iron into storage only when it has
cooled down completely.
• Never place the steam iron on edges, for exam-
ple table edges. It could tip and fall down.
• Stand the steam iron only on its back end, or lay
it in the support tray provided on the ironing bo-
ard. Never lean the hot iron against walls or
other objects. There could be a risk of fire
breaking out.
Danger of electrical shock!
• Connect the steam iron only to correctly installed
wall power sockets.
• To avoid possible dangers, arrange for a defecti-
ve appliance to be checked and possibly repai-
red by qualified techni-cians, or contact our
Customer Service Department.
• Arrange for defective power cables to be repla-
ced immediately by qualified technicians, or
contact our Customer Service Department.
• To disconnect from the power source, pull only
on the plug itself, not on the cable.
• Never direct the steam jets or the water-spray jets
at electrical appliances or at objects sensitive to
heat or moisture.
• Never bend (kink) or crush the power cable.
Arrange it in such a way that it can not come into
contact with hot surfaces and such that no-one
can step on it or trip over it.
• After every use, before cleaning and when refil-
ling with water, remove the plug from the power
socket.
• Always unroll the power cable fully before
switching on and do not use an extension cord.
• Never touch the power cable or the power plug
with wet hands.
IB_KH1282_E5554_UK_3 10.09.2007 16:20 Uhr Seite 4

- 5 -
• Under no circumstances should you submerge
the steam iron in any liquid or permit liquids to
penetrate into the housing of the steam iron. You
should never expose the appliance to moisture or
use the device outdoors. Should liquids penetrate
into the appliance housing , immediately remove
the plug from the power source and arrange for
the appliance to be repaired by a qualified spe-
cialist workshop or by the Customer Service
Department.
• Never use the steam iron adjacent to water
contained in a bath, shower, wash basin or other
vessels. The proximity of moisture presents a
danger, even when the appliance is switched off.
• You may not open the housing of the steam iron.
Arrange for a defective steam iron to be repaired
only by a qualified specialist workshop or by the
Customer Service Department.
• Arrange for defective power plugs and/or
cables to be replaced as soon as possible by a
qualified technician or by our Customer Service
Department to avoid the risk of injury.
Important!
• Should the clothing care instructions forbid iro-
ning, (Symbol ), the clothing item may not be
ironed. If you ignore this warning, the item could
be damaged.
• Do not fill the water tank with a liquid other than
water. You will otherwise damage the steam iron.
• You may not clean the steam iron with solvents,
alcohol or abrasive cleaning agents. You could
otherwise cause damages.
Intended use
The steam iron is intended exclusively for the ironing
of textiles. The iron may only be used indoors and in
a private household. All other use is deemed impro-
per use.
Unpacking
Plastic bags can present a danger. To avoid
fatalities through suffocation, keep plastic bags
out of the reach of children.
• Remove the steam iron from the packaging.
• Remove all protective coverings and protective
foils from the steam iron and from sole of the iron
i.
Before the first use
• Fill the steam iron with water (see Chapter
„Filling with water“).
• Insert the power plug into a wall socket with
220-240 V~/50 Hz.
• Set the temperature controller uto "Max".
• Heat the steam iron for several minutes at the
highest setting.
• Then iron a handtowel or other piece of old
material (suitable for heat level •••) to remove
any impurities from the sole of the iron i.
• Activate the steam blast button da few times to
remove any possible impurities in the steam jets.
Note: On the first use, a light odour develop-
ment - caused by manufacturing residues - may
occur. This odour is not damaging to health.
Provide for sufficient ventilation, for example,
open a window.
IB_KH1282_E5554_UK_3 10.09.2007 16:20 Uhr Seite 5

- 6 -
Operating Elements
qSpray button
wHeating control lamp
ePower cable with plug
rFlexible cable restrainer
tBack end
yWater tank
uTemperature controller
iSole of the iron
oWater fill opening
aWater jet
sSteam controller/Self Clean
dSteam blast button
fMeasuring beaker
Preparation
Filling with water
You require water to be able to use the steam and
spray functions. Water is not needed for dry ironing.
• Place the cooled down iron in an upright position
on its back end t.
• Open the water fill opening ofor the water tank
y.
• Using the measuring beaker f, pour in water to
no further than the "Max" marking in the water
tank y.
• Close the water fill opening ofor the water tank
y.
Should the mains water at your locality be rated as
hard, it is recommended that you mix mains water
with some distilled water. Otherwise, the jets for the
steam blast function could calcify (become blocked)
prematurely.
To extend the optimal steam blast function, mix
mains water with distilled water according to the
table.
The water hardness level can be queried at your lo-
cal water works.
Plugging in and ironing
Ironing tips
Sort the laundry in accord with the type of material.
Always observe the ironing and care instructions
given for the material. Start with the materials that
require the lowest heat settings.
If you are not sure what material has been used in
the garment, first of all carefully iron a small area
(hem-piece or an inner edge). In cases of serious
doubt, start with a low iron temperature. If creases
remain, slowly increase the heat level in steps.
When you have found the temperature which gives
the best ironing results, do not increase the
temperature further. Never raise the temperature so
high that the material of the garment could be
damaged.
local water
hardness
Ratios - distilled
water to mains water
very soft / soft 0
medium 1: 1
hard 2: 1
very hard 3: 1
IB_KH1282_E5554_UK_3 10.09.2007 16:20 Uhr Seite 6

- 7 -
Connection
• Insert the power plug into a power socket.
Ironing
During use, lay the steam iron aside only on its
back end tor in the support tray provided on
the ironing board. Never lean the hot iron
against walls or other objects. There could be a
risk of fire breaking out.
Dry ironing is possible at all temperatures, steam iro-
ning is first possible from the level ••.
Important!
If the clothing care instructions forbid ironing
(Symbol ), the clothing item may not be ironed.
Should you do so, you could damage the item.
• Check the care instructions on the labels in the
garment to see if it is suitable for being ironed,
and at which temperature setting.
• Select the best suitable temperature setting with
the temperature controller u
MIN MAX
Setting of the
Steam Iron Type of Material
•Silk, Nylon
•• Wool
••• Cotton
Max Linen
The heating control lamp wglows. When the
heating control lamp wextinguishes, the selected
temperature has been reached.
• Wait until the heating control lamp wextinguis-
hes at the set temperature.
• Allow the steam iron to slide over the material
under light pressure.
Avoid ironing over zippers and studs, as these
can scratch the sole of the iron i. Pass around
them when ironing.
Steam ironing
• Programme the steam controller sto the desired
steam setting:
If you have adjusted the temperature controller uto
the setting ••, always move the steam controller s
to the small steam symbol.
If you have adjusted the temperature controller uto
the setting •••, always move the steam controller
sto the large steam symbol.
Note: Steam ironing is first possible from
setting ••.
Notice: Should steam no longer be required,
or the setting be adjusted to a temperature lo-
wer than ••, always turn the steam controller
sto position “0”! Otherwise, water could
leak from the ironing sole i.
IB_KH1282_E5554_UK_3 10.09.2007 16:20 Uhr Seite 7

- 8 -
Drip-Stop Function
This iron is fitted with a Drip-Stop function. It prevents
the dripping of water from the ironing sole iwhen
the iron is switched off and when steam ironing.
When steam ironing, the iron must be set to at least
level ••. Consequently, first set the steam controller
sto "Steam" when the temperature control knob u
is set to at least level •• and the temperature has
been reached. Otherwise, water could leak from the
ironing sole i.
Ironing with steam blast
The steam blast is especially suitable for smoothing
difficult to reach parts of a garment.
Note: Steam-blast is first possible from level
•••.
• Slightly raise the steam iron.
• For one steam blast, press the steam blast button
donce.
Ironing with the spray
function
• To moisten the laundry, press the spray button
q.
This function is suitable for very dry and very crum-
pled garments.
Temporarily setting the
steam iron aside
Fire hazard!
Never leave the steam iron unattended when it is
hot or switched on.
• Adjust the temperature controller uto "Min".
• Stand the steam iron on its back end t.
or
• Lay the steam iron in the support provided on the
ironing board.
Important: NEVER place the steam iron on
unsuitable surfaces. Risk of fire!
Taking the steam iron out
of service
• Remove the power plug from the wall socket.
• Allow the steam iron to cool down.
• Drain the water tank yin that you open up the
water fill opening oand either tip the contents
out to the side (see Fig.1) or empty it by tipping it
up to the front (see Fig.2).
• Clean the sole of the iron i(see chapter
"Cleaning and care").
• Coil the power cable earound the power cable
retainer at the back end of the iron t.
• Place the cooled down steam iron horizontally
onto a soft and clean surface.
Fig.1
Fig.2
✓
✓
IB_KH1282_E5554_UK_3 10.09.2007 16:20 Uhr Seite 8

- 9 -
Cleaning and Care
• Avoid ironing over zippers and studs, as these
can scratch the sole of the iron i. Pass around
them when ironing. Take steps to ensure the sole
of the iron iremains smooth.
• The composition of water and its minerals varies
very much from place to place. If the water in
your locality is very hard, we recommend the use
of commercially available distilled water in order
to ensure the optimal functional capability of
your steam iron (see chapter "Filling with water").
Do not use acids (for example, vinegar) or
decalcification products to clean your steam
iron.
• Clean the housing with a soft, dry cloth only.
• Do not use aggressive cleaning materials.
Warning: NEVER submerse the steam iron
in water or other fluids.
• Clean the metal parts with a soft cloth lightly moi-
stened with water. Dry all parts thoroughly.
• Do not use abrasive cleaning materials.
• Allow the appliance to dry completely before
taking it back into use.
Self-cleaning function (Self-Clean)
• Fill the water tank yto the marking MAX.
• Insert the plug einto a power socket.
• Set the temperature controller uto the level
Max.
• Allow the steam iron to heat up until the heat
control lamp wextinguishes and once again
glows.
• Hold the steam iron horizontally over a
catchment receptacle.
• Adjust the steam controller sto the position Self
Clean . In this position the steam controller
knob lifts itself slightly. Thereby, steam exits the
holes in the sole of the iron i. Impurities that
may be present are washed out.
Attention
There is a danger of being scalded!
• Release the steam controller sas soon as all of
the water in the water tank yhas drained away.
• Do ensure that no water remains in the steam
chamber, dry the sole of the iron ithoroughly.
To do this, slide the sole of the iron iback and
forth several times over a hand towel or an old
piece of material (suitable for temperature setting
•••).
• Allow the steam iron to cool down before
placing it in storage.
Troubleshooting
The steam iron blows out no or very litt-
le steam:
The reserves of water in the steam iron are depleted.
Fill the water tank ywith water.
The steam iron sprays no or very little
water with the spray function:
The reserves of water in the steam iron are depleted.
Fill the water tank ywith water.
The steam iron does not get hot:
The steam iron is not plugged in or is not switched
on. Insert the plug ein a power socket and adjust
the temperature controller uto the desired tempera-
ture.
Water drips from the ironing sole i:
The temperature setting is too low for steam ironing.
Adjust the temperature control knob uto at least
level ••.
IB_KH1282_E5554_UK_3 10.09.2007 16:20 Uhr Seite 9

- 10 -
Should the measures described above not solve the
problem, then the steam iron is defective. Arrange
for it to be repaired by a qualified specialist work-
shop or the Customer Service Department.
Technical data
Power Supply Voltage: 220-240 V~/50 Hz
Output: 1800 W
Disposal
Do not dispose of the appliance in your nor-
mal domestic waste.
Dispose of the appliance through an approved di-
sposal centre or at your community waste facility.
Observe the currently applicable regulations. In
case of doubt, please contact your waste disposal
centre.
Dispose of packaging materials in an envi-
ronmentally responsible manner.
Warranty and Service
This appliance is guaranteed for 3 years from the
date of purchase. It has been carefully produced
and meticulously checked before delivery. Please
keep your receipt as proof of purchase. Contact
your service centre by telephone in case of ques-
tions pertaining to the warranty.
Your goods can be transmitted free of cost only in
this manner.
The warranty covers only material or manufacturing
faults, not normal wear or damage to fragile parts
such as switches or rechargeable batteries.
The appliance is intended solely for private, not
commercial, use. If this product has been subjected
to improper or inappropriate handling, abuse, or
interventions not carried out by one of our authori-
sed sales and service outlets, the warranty will be
considered void. This warranty does not affect your
statutory rights.
DES Ltd
Units 14-15
Bilston Industrial Estate
Oxford Street
Bilston
WV14 7EG
Tel.: 0870/787-6177
Fax: 0870/787-6168
e-mail: [email protected]
IB_KH1282_E5554_UK_3 10.09.2007 16:20 Uhr Seite 10

- 11 -
Kompernass Service Ireland
c/o Irish Connection
41 Harbour view
Howth Co. Dublin
Tel: 087-99 62 077
Fax: 18398056
e-mail: [email protected]
Importer
KOMPERNASS GMBH
BURGSTRASSE 21
D-44867 BOCHUM
www.kompernass.com
IB_KH1282_E5554_UK_3 10.09.2007 16:20 Uhr Seite 11

- 12 -
IB_KH1282_E5554_UK_3 10.09.2007 16:20 Uhr Seite 12

- 13 -
Sisällysluettelo Sivu
Tärkeitä turvallisuusohjeita 14
Määräystenmukainen käyttö 15
Purkaminen pakkauksesta 15
Ennen ensimmäistä käyttöä 15
Osat 16
Esivalmistelut 16
Kytkentä ja silitys 16
Höyrysilitys 17
Silittäminen höyrypaineella 18
Silittäminen suihketoiminnolla 18
Höyrysilitysraudan väliaikainen pois asettaminen 18
Höyrysilitysraudan käytöstä otto 18
Puhdistus ja hoito 19
Toimintahäiriöiden korjaaminen 19
Tekniset tiedot 20
Hävittäminen 20
Takuu ja huolto 20
Maahantuoja 20
Lue käyttöohje ennen ensimmäistä käyttökertaa huolellisesti läpi ja pidä sitä lähettyvillä myös myöhemmissä käytöissä.
Jos myyt laitteen, anna ohje myös seuraavalle omistajalle.
IB_KH1282_E5554_FIN_3 10.09.2007 16:22 Uhr Seite 13

- 14 -
Höyrysilitysrauta KH
1282
Tärkeitä turvallisuusoh-
jeita
Palovaara!
• Älä anna laitetta sellaisten henkilöiden (mukaan
lukien lapset) käyttöön, joiden fyysiset, aistilliset
tai henkiset kyvyt tai kokemuksen ja tiedon puute
estävät heitä käyttämästä laitetta turvallisesti, jol-
lei heitä ole aikaisemmin valvottu tai opastettu
laitteen käytössä.
• Selvitä lapsille laite ja sen vaarat, jotta he eivät
leikkisi laitteella.
• Älä koskaan kosketa raudan pohjaa laitteen olles-
sa kuuma. Tartu höyrysilitysrautaan ainoastaan
sen kahvasta.
• Älä milloinkaan pidä käsiäsi höyryssä tai kuumis-
sa metalliosissa.
• Älä koskaan suuntaa höyryä henkilöitä tai muita
eläviä kohden.
• Älä milloinkaan avaa vesisäiliötä käytön aikana
täyttötarkoituksessa. Anna höyrysilitysraudan en-
sin jäähtyä ja irrota verkkopistoke pistorasiasta
laitteen täyttöä varten.
Tulipalon vaara!
• Älä milloinkaan jätä kuumaa tai päällekytkettyä
höyrysilitysrautaa ilman valvontaa. Voit loukata
itseäsi tai kanssaihmisiäsi vielä kuumalla silitys-
raudalla.
• Älä koskaan aseta höyrysilitysrautaa palavien
materiaalien, kuten verhojen lähettyville. Nämä
saattavat syttyä palamaan.
• Silitä ainoastaan hoito-ohjeissa annetuilla ja ma-
teriaalille soveltuvilla lämpötiloilla. Muutoin teksti-
ilit saattavat vahingoittua. Mikäli et tunne hoito-
ohjeita, aloita alimmalla lämpötila-asetuksella.
• Aseta höyrysilitysrauta pois vain kylmänä.
• Älä koskaan aseta höyrysilitysrautaa reunoille,
kuten esimerkiksi pöydän reunalle. Se voi kaatua
ja pudota.
• Aseta höyrysilitysrauta ainoastaan tukijalalle tai
silityslaudan tätä varten tarkoitetulle alustalle.
Älä nojaa kuu-malla silitysraudalla seiniin tai muihin
esineisiin. Muutoin on olemassa tulipalon vaara.
Sähköiskun vaara!
• Liitä höyrysilitysrauta ainoastaan määräysten mu-
kaisesti asennettuun verkkopistorasiaan.
• Jotta vaaroilta vältyttäisiin, anna vaurioitunut laite
välittömästi pätevän ammattikorjaamon korjatta-
vaksi tai käänny huoltopalvelumme puoleen.
• Vaidata viallinen virtajohto välittömästi uuteen tai
käänny huoltopalvelumme puoleen, jotta vaaroilta
vältyttäisiin.
• Vedä aina pelkästä pistokkeesta, älä koskaan
johdosta.
• Älä suuntaa höyry- tai suihkesuuttimia koskaan säh-
kölaitteita tai kosteudelle herkkiä esineitä kohti.
• Älä taita tai purista virtajohtoa, ja asenna se niin,
ettei se joudu kosketukseen kuumien pintojen
kanssa tai ettei kukaan voi astua sen päälle tai
kompastua siihen.
• Irrota verkkopistoke ennen puhdistusta, ennen veden
täyttämistä ja jokaisen käytön jälkeen.
• Kierrä aina virtajohto kokonaan auki ennen
kytkemistä äläkä käytä jatkojohtoja.
• Älä milloinkaan koske johtoon tai
virtapistokeeseen kosteilla käsillä.
• Älä upota höyrysilitysrautaa missään tapaukses-
sa nesteeseen äläkä päästä mitään nesteitä höy-
rysilitysraudan koteloon. Laitetta ei altistaa ko-
steudelle, eikä sitä saa käyttää ulkona.
Jos laitteen koteloon sattuu kuitenkin pääsemään
nestettä, irrota välittömästi laitteen verkkopistoke
pistorasiasta ja anna pätevän ammattikorjaamon
tai huoltopalvelun korjata laite.
IB_KH1282_E5554_FIN_3 10.09.2007 16:22 Uhr Seite 14

- 15 -
• Älä käytä höyrysilitysrautaa missään tapaukses-
sa lähellä vettä, jota voi olla kylpyammeessa, su-
ihkussa, pesual-taassa tai muissa astioissa. Veden
läheisyys aiheuttaa aina vaaran, mikäli laite on kiin-
ni sähköverkossa.
• Höyrysilitysraudan koteloa ei saa avata. Anna vialli-
nen höyrysilitysrauta aino-astaan pätevän am-
mattikorjaamon tai huoltopalvelumme korjatta-
vaksi.
• Anna valtuutetun ammattihenkilöstön vaihtaa
vaurioitunut verkkojohto tai verkkopistoke välittö-
mästi uuteen vaarojen välttämiseksi.
Huomaa!
• Mikäli vaatetuksen hoito-ohje kieltää silittämisen
(symboli ), ei vaatekappaletta saa silittää.
Muutoin vaatekappale saattaa vahingoittua.
• Älä täytä vesisäiliötä millään muulla nesteellä
kuin vedellä. Muuten voit vahingoittaa höyrysili-
tysrautaa.
• Höyrysilitysrautaa ei saa puhdistaa
liuotinaineella, alkoholilla tai hankaavalla puhdi-
stusaineella. Muussa tapauksessa se voi vahingo-
ittua.
Määräystenmukainen
käyttö
Höyrysilitysrauta on tarkoitettu ainoastaan tekstiilien si-
littämiseen. Sitä saa käyttää ainoastaan suljetuissa ti-
loissa ja yksityis-talouksissa. Kaikkia muita käyttöjä
pidetään määräystenvastaisena.
Purkaminen pakkauksesta
Muovipussit saattavat olla vaarallisia. Tukehtumis-
vaaran välttämiseksi tulee muovipussit säilyttää po-
issa vauvojen ja pikkulasten ulottuvilta.
• Poista höyrysilitysrauta pakkauksesta.
• Poista kaikki tarrat ja kalvot höyrysilitysraudasta
ja raudan pohjasta .
Ennen ensimmäistä käyt-
töä
• Täytä höyrysilitysrautaan vettä (katso luku
"Veden täyttäminen").
• Liitä verkkopistoke 220-240 V~/50 Hz:n
pistorasiaan.
• Säädä lämpötilan kierresäädin asentoon
"Max".
• Anna höyrysilitysraudan lämmetä muutamia
minuutteja korkeimmalla asetuksella.
• Silitä sitten pyyhkeen tai vanhan kangaspalan
(lämpöasetukselle ••• soveltuva) yli poistaakse-
si mahdolliset epäpuhtaudet raudan pohjasta .
• Käytä sitten muutamia kertoja höyrysuihku-painiketta
poistaaksesi mahdolliset epäpuhtaudet höyrysuut-
timista.
Ohje: Enimmäisellä käyttökerralla saattaa val-
mistuksesta johtuvien jäänteiden vuoksi esiintyä lievää
hajua. Tämä haju ei ole terveydelle haitallista. Huo-
lehdi riittävästä ilmanvaihdosta, avaa esimerkiksi ik-
kuna.
IB_KH1282_E5554_FIN_3 10.09.2007 16:22 Uhr Seite 15

- 16 -
Osat
Suihkepainike
Lämmityksen merkkivalo
Virtajohto ja pistoke
Liikkuva johdonohjain
Tukijalka
Vesisäiliö
Lämpötilan kierresäädin
Raudan pohja
Täyttöaukko
Vesisuutin
Höyrysäädin/Self Clean
Höyrypainike
Mitta-astia
Esivalmistelut
Veden täyttäminen
Tarvitset vettä käyttääksesi höyry- tai suihketoimin-
toa. Kuivasilitykseen ei tarvita vettä.
• Aseta höyrysilitysrauta jäähtyneenä pystyyn tuki-
jalan varaan.
• Avaa vesisäiliön täyttöaukko .
• Täytä mitta-astialla vettä korkeintaan vesisäiliön
"Max"-merkintään saakka.
• Sulje vesisäiliön täyttöaukko .
Jos asuinpaikkakuntasi vesijohtovesi on liian kovaa,
suosittelemme tislatun veden sekoittamista vesijohto-
veteen. Muutoin höyrytoiminnon suuttimet saattavat
kalkkeutua ennen aikojaan.
Ihanteellisen höyrytoiminnon pidentämiseksi tulee vesi-
johtoveteen sekoittaa tislattua vettä taulukon
mukaisesti.
Veden kovuuden saat selville paikallisesta vesilaitokse-
sta.
Kytkentä ja silitys
Silitysvinkkejä
Lajittele tekstiilit kangaslaaduittain. Noudata aina
tekstiileissä olevia silitys- ja hoito-ohjeita. Aloita niillä
kankailla, jotka vaativat alhaisimman lämpöasteen.
Jos et ole varma tekstiileissä käytettyjen kankaiden
koostumuksesta, silitä ensin varovasti pientä kohtaa
(sauma tai sisäreuna). Aloita epävarmassa tapauk-
sessa alhaisella silityslämpötilalla. Jos kankaaseen jää
ryppyjä, nosta lämpötilaa asteittain. Kun olet löytä-
nyt lämpötilan, jossa sili-tystulos on paras, älä nosta
lämpötilaa enempää. Älä koskaan nosta lämpötilaa
niin korkeaksi, että silitettävän tuotteen kudos vau-
rioituu.
Liittäminen virtalähteeseen
• Työnnä verkkopistoke pistorasiaan.
Veden kovuus Tislatun veden suhde vesi-
johtoveteen
erittäin pehmeä/
pehmeä 0
keskinkertainen 1: 1
kova 2: 1
erittäin kova 3: 1
IB_KH1282_E5554_FIN_3 10.09.2007 16:22 Uhr Seite 16

- 17 -
Silittäminen
Aseta silitysrauta käytön aikana ainoastaan
tukijalan varaan tai silityslaudan tätä varten
varatulle alustalle. Älä nojaa kuumalla silitys-
raudalla seiniin tai muihin esineisiin. Muutoin on
olemassa tulipalonvaara.
Kuivasilitys ilman höyryä on mahdollista kaikissa
lämpötiloissa, höyrysilittäminen on mahdollista vasta
tasosta •• alkaen.
Huomaa!
Mikäli tekstiilien hoito-ohjeet kieltävät silittämisen
(symboli ), ei tekstiileitä saa silittää. Muutoin saa-
tat vaurioittaa tekstiilejä.
• Tarkasta tekstiilien hoito-ohjeista, soveltuuko
tekstiili silitettäväksi ja millä lämpötila-asetuksella.
• Säädä soveltuva lämpötila lämpötilan kierresääti-
mellä .
MIN MAX
Silitysraudan asetus Kangaslaatu
•Silkki, nailon
•• Villa
••• Puuvilla
Max Pellava
Lämmityksen merkkivalo palaa. Kun lämmityksen
merkkivalo sammuu, säädetty lämpötila on saa-
vutettu.
• Odota, kunnes lämpötilan lämmityksen merkkivalo
sammuu.
• Anna höyrysilitysraudan liukua tekstiileillä kevye-
sti painaen.
Vältä vetoketjujen ja niittien yli silittämistä,
koska nämä naarmuttavat raudan pohjaa .
Kierrä ne silittäessäsi.
Höyrysilitys
• Säädä höyrysäätimellä höyryn haluttu
voimakkuus:
Kun lämpötilan kierresäädin on asetettu lämpöa-
setukselle ••, säädä höyrypainike aina pienen
höyrysymbolin kohdalle.
Kun lämpötilan kierresäädin on asetettu lämpöa-
setukselle •••, säädä höyrypainike aina suu-
ren höyrysymbolin kohdalle.
Ohje: Höyrysilitys on mahdollista vasta tasolta
•• alkaen.
Ohje: Käännä höyrynsäädin aina 0-asen-
toon, kun höyryä ei enää tarvita tai kun lämpö-
tila on säädetty matalammaksi kuin tasolle ••.
Muussa tapauksessa silitysraudan pohjasta
saattaa valua vettä.
IB_KH1282_E5554_FIN_3 10.09.2007 16:22 Uhr Seite 17

- 18 -
Pisaranestotoiminto
Tässä silitysraudassa on tippalukkotoiminto. Se
estää vesipisaroiden vuotamisen silitysraudan pohja-
sta höyrysilityksen aikana ja silloin kun silitysrau-
dan virta on katkaistu. Höyrysilityksen ajaksi läm-
mönsäädin on kytkettävä vähintään tasolle ••.
Säädä siksi höyrynsäädin asentoon ”höyry” va-
sta sitten, kun lämmönsäädin on kytketty vähin-
tään tasolle •• ja lämpötila on saavutettu. Muussa
tapauksessa silitysraudan pohjasta saattaa vuo-
taa vettä.
Silittäminen höyrypai-
neella
Höyrypaine soveltuu erityisesti vaatteiden vaikeapääsy-
isten alueiden silittämiseen.
Ohje: Höyryä suihkuaa vasta lämpötilasta
••• lähtien.
• Nosta höyrysilitysrautaa hieman.
• Paina höyrypainetta varten höyry-painiketta
kerran.
Silittäminen suihketoi-
minnolla
• Paina pyykin kostuttamiseksi suihkepainiketta .
Tämä toiminto soveltuu erittäin kuiville, erittäin ryppy-
isille tekstiileille.
Höyrysilitysraudan väli-
aikainen pois asettami-
nen
Tulipalon vaara!
Älä koskaan jätä kuumaa tai päällekytkettyä höyrysi-
litysrautaa ilman valvontaa.
• Säädä lämpötilan kierresäädin asentoon
"Min".
• Aseta höyrysilitysrauta tukijalalle .
tai
• Aseta höyrysilitysrauta silityslaudan tätä varten
varatulle alustalle.
Huomaa: Älä koskaan aseta silitysrautaa so-
pimattomille alustoille. Palovaara!
Höyrysilitysraudan
käytöstä otto
• Vedä verkkopistoke irti pistorasiasta.
• Anna höyrysilitysraudan jäähtyä.
• Tyhjennä vesisäiliö avaamalla täyttöaukko
ja kääntämällä höyrysilitysrautaa joko sivulle
(katso kuva 1) tai eteenpäin kallistaen (katso
kuva 2).
✓
kuva 1
kuva 2 ✓
IB_KH1282_E5554_FIN_3 10.09.2007 16:22 Uhr Seite 18

- 19 -
• Puhdista raudan pohja (katso luku "Puhdistus
ja hoito").
• Kierrä virtajohto tukijalustan johtopidikkee-
seen.
• Aseta jäähtynyt höyrysilitysrauta vaakasuoraan
pehmeälle, puhtaalle alustalle.
Puhdistus ja hoito
• Vältä vetoketjujen ja niittien yli silittämistä, koska
nämä naarmuttavat raudan pohjaa . Kierrä ne
silittäessäsi.
Varmista, että raudan pohja pysyy tasaisena.
• Veden ja sen sisältämien mineraalien koostumus
poikkeaa huomattavasti paikkakunnittain. Jos
alueesi vesi on erittäin kovaa, suosittelemme
lisäksi tislatun veden käyttöä, jotta silitysraudan
ihanteellinen toimintakyky varmis-tettaisiin (katso
luku "Veden täyttäminen").
Älä käytä höyrysilitysraudan puhdis-tamiseen
happoja (esimerkiksi etikkaa) tai kalkinpoistoai-
netta.
• Puhdista kotelo ainoastaan pehmeällä, kuivalla lii-
nalla.
• Älä käytä voimakkaita puhdistusaineita.
Varoitus: Älä koskaan upota höyry-silitysrau-
taa veteen tai muihin nestei-siin.
• Puhdista metalliosat kevyesti vedellä kostutetulla
liinalla. Kuivaa kaikki osat perusteellisesti.
• Älä käytä hankaavia puhdistusaineita.
• Anna laitteen kuivua kokonaan, ennen kuin otat sen
uudelleen käyttöön.
Itsepuhdistustoiminto (Self-Clean)
• Täytä vesisäiliö MAX-merkintään saakka.
• Työnnä verkkopistoke pistorasiaan.
• Säädä lämpötilan kierresäädin tasolle Max.
• Anna silitysraudan kuumentua, kunnes lämmityksen
merkkivalo sammuu ja syttyy uudelleen.
• Pidä silitysrautaa vaakasuorassa keräilyastian
yläpuolella.
• Aseta höyrysäädin asentoon Self Clean
. Höyrysäädin kääntyy Self Clean -asen-
toon hieman ulospäin. Tällöin raudan pohjassa
olevista aukoista tulee höyryä ja kiehuvaa
vettä. Mahdolliset epäpuhtaudet huuhdellaan täl-
löin ulos.
Huomaa!
On olemassa palovammavaara!
• Kierrä höyrysäädin jälleen sisään heti, kun ve-
sisäiliössä oleva vesi on käytetty.
• Varmistaaksesi, ettei höyrykammioon jää vettä,
kuivaa raudan pohja perusteellisesti. Kuljeta
tätä varten raudan pohjaa muutamia kertoja
pyyhkeen tai vanhan kangaspalan (lämpöasteel-
le ••• soveltuva) yli edes-takaisin.
• Anna silitysraudan jäähtyä, ennen kuin asetat
sen sivuun.
Toimintahäiriöiden kor-
jaaminen
Höyrysilitysraudasta ei tule lainkaan höy-
ryä tai ainoastaan erittäin vähän:
Höyrysilitysraudan vesisäiliö on tyhjä. Täytä vesisäi-
liö vedellä.
Höyrysilitysrauta ei ruiskuta suihketoi-
minnossa lainkaan vettä tai ainoastaan
erittäin vähän:
Höyrysilitysraudan vesisäiliö on tyhjä. Täytä vesisäi-
liö vedellä.
IB_KH1282_E5554_FIN_3 10.09.2007 16:22 Uhr Seite 19

- 20 -
Höyrysilitysrauta ei kuumene:
Silitysrautaa ei ole liitetty virtaan tai sitä ei ole kytket-
ty päälle. Työnnä verkkopis-toke verkkopistora-
siaan ja säädä lämpötilan kierresäätimellä
haluttu lämpötila.
Silitysraudan pohjasta vuotaa vesipisa-
roita:
Lämpötila on liian matala höyrysilitykseen. Säädä
lämmönsäädin vähintään tasolle ••.
Jos kuvatut toimenpiteet eivät auta, höyrysilitysrauta
on rikki. Anna se pätevän ammattikorjaamon tai hu-
oltopalvelumme korjattavaksi.
Tekniset tiedot
Syöttöjännite: 220-240 V~/50 Hz
Teho: 1800 W
Hävittäminen
Älä hävitä laitetta tavallisen talousjätteen
mukana.
Hävitä laite hyväksytyn jätehuoltoyrityksen tai kun-
nallisen jätelaitoksen avulla. Noudata ajankohtaisia
voimassa olevia määräyksiä. Ota epävarmoissa
tilanteissa yhteyttä jätelaitokseen.
Hävitä kaikki pakkausmateriaalit ympäris-
töystävällisellä tavalla.
Takuu ja huolto
Laitteen takuu on 3 vuotta ostopäivästä lukien. Laite
on valmistettu huolella ja tarkastettu perusteellisesti
ennen toimitusta. Säilytä ostokuitti tositteeksi ostosta.
Ota takuutapauksessa puhelimitse yhteyttä lähimpään
huoltopisteeseen. Vain näin voidaan taata tuotteesi
maksuton lähettäminen huoltoon.
Takuu koskee ainoastaan materiaali- ja tuotantovirheitä,
ei kuitenkaan kuluvia osia tai helposti rikkoutuvien
osien, esim. kytkinten tai akkujen vaurioita. Tuote on
tarkoitettu ainoastaan yksityiseen, ei kaupalliseen
käyttöön. Väärä tai asiaton käyttö, väkivallan käyttö
ja muut kuin valtuutetun huoltopisteen suorittamat
korjaukset aiheuttavat takuun raukeamisen. Tämä
takuu ei rajoita kuluttajan lakisääteisiä oikeuksia.
Kompernass Service Suomi
Petäjäksentie 19
FIN - 26100 Rauma
Tel: 02 822 28 87
Fax: 010 293 02 63
e-mail: [email protected]
Maahantuoja
KOMPERNASS GMBH
BURGSTRASSE 21
D-44867 BOCHUM, GERMANY
www.kompernass.com
IB_KH1282_E5554_FIN_3 10.09.2007 16:22 Uhr Seite 20
Other manuals for KH 1282
1
Table of contents
Languages:
Other Lervia Iron manuals