Lervia KH 368 Quick guide

graphic design, photos and translations by
ORFGEN · Essen / Germany
www.orfgen.net
Autopolierer 02.02.2004 14:43 Uhr Seite 1

KH 368
www.kompernass.com
Autopolierer 02.02.2004 14:43 Uhr Seite 1

Kompernaß Handelsgesellschaft mbH
Burgstraße 21 · D-44867 Bochum (Germany)
Stand der Informationen 01/2004 · Ident.-No.: KH368-122003-1
DBedienungs- und Sicherheitshinweise Seite 4 - 7
GB Operating and safety instructions Page 08-11
FMode d'emploi et instructions de sécurité Page 12 -15
IInformazioni di sicurezza e istruzioni per l‘uso Pagina 16 -19
EInstrucciones para el manejo y la seguridad Página 20-23
PInstruções de utilização e de segurança Página 24-27
NL Bedienings- en veiligheidsaanwijzingen Pagina 28 -31
GR Àԉ›ÍÂȘ ¯ÂÈÚÈÛÌÔ‡ Î·È ·ÛÊ·Ï›·˜ ™ÂÏ›‰· 32 -35
PL Wskazówki dotyczàce obs∏ugi i bezpieczeƒstwa Strona 36 -39
CZ Pokyny k ovládání Strana 40 -43
FIN Käyttö- ja turvaohjeet Sivu 44 -47
SAnvändar- och Säkerhetsanvisning Sidan 48 -51
Autopolierer 02.02.2004 14:43 Uhr Seite 2

A
B
Autopolierer 02.02.2004 14:44 Uhr Seite 3

Technische Daten
Typenbezeichnung: KH 368
Betriebsspannung: 230V ~50 Hz
Leistungsaufnahme: 230W
Leerlaufdrehzahl: n = 3000 min
-1
Schalldruckpegel: 80 dB(A)
Schwingungspegel: 14 m/s
2
(Vibration)
Überlastschutz
Bestimmungsgemäßer Gebrauch
Der Autopolierer ist ausschließlich zum Einwachsen und
Polieren/Entwachsen von üblichen Fahrzeuglacken geeignet.
Jede andere Verwendung oder Veränderung gilt als nicht
bestimmungsgemäß und birgt erhebliche Unfallgefahren.
Das Gerät ist nicht für den gewerblichen Einsatz bestimmt.
Bedienelement
Schalter
Sicherheitshinweise
UM SCHÄDEN AN PERSONEN ODER SACHWERTEN ZU
VERMEIDEN, MACHEN SICH VOR DER ERSTEN VERWEN-
DUNG DER POLIERMASCHINE UNBEDINGT MIT DEN
SICHERHEITSHINWEISEN UND DER BEDIENUNGS-
ANLEITUNG VERTRAUT!
Um Lebensgefahr durch elektrischen Schlag
zu vermeiden:
· Das Gerät nicht mit beschädigter Anschlussleitung oder
Netzstecker betreiben. Lassen Sie Anschlussleitungen bzw.
Geräte, die nicht einwandfrei funktionieren oder beschädigt
wurden, sofort vom Kundendienst untersuchen und
reparieren. Die zuständige Servicestelle Ihres Landes
entnehmen Sie bitte der Garantiekarte.
· Setzen Sie das Gerät nicht dem Regen aus und benutzen Sie
es auch niemals in feuchter oder nasser Umgebung. Achten
Sie darauf, dass das Gerätekabel während des Betriebs
niemals nass oder feucht wird.
· Lassen Sie gebrochene oder schadhafte Teile ausschließlich
durch Original-Ersatzteile ersetzen.
Um Verletzungsgefahr zu vermeiden:
· Das Gerät während des Betriebs niemals unbeaufsichtigt
lassen.
· Halten Sie Ihren Arbeitsbereich stets sauber.
· Vorsicht! Halten Sie Kinder von Anschlussleitung und Gerät
fern. Kinder unterschätzen häufig die Gefahren von
Elektrogeräten.
· Verwenden Sie das Gerät nicht im Bereich brennbarer
Flüssigkeiten oder Materialien oder explosiver Gase.
· Bevor Sie das Gerät reinigen oder Zubehörteile austauschen,
ziehen Sie stets den Netzstecker.
· Vermeiden Sie versehentliches Einschalten des Gerätes.
So verhalten Sie sich sicher:
· Ziehen Sie bei Gefahr sofort den Netzstecker aus der
Steckdose.
· Verwenden Sie das Gerät niemals zweckentfremdet.
Gebrauchsanleitung für Auto-Poliermaschine Lervia KH 368
4D
0
Autopolierer 02.02.2004 14:44 Uhr Seite 4

· Seien Sie stets aufmerksam! Achten Sie immer darauf was Sie
tun und gehen Sie stets mit Vernunft vor. Benutzen Sie das
Gerät in keinem Fall, wenn Sie unkonzentriert sind oder sich
unwohl fühlen.
· Ziehen Sie bei Nichtgebrauch stets den Netzstecker.
· Tragen Sie das Gerät niemals so, dass der Schalter unbeab-
sichtigt betätigt werden könnte.
· Arbeiten Sie wachsam und besonnen. Achten Sie auf eine
sichere, stabile Arbeitshaltung.
· Halten Sie beim Arbeiten das Gerät fest.
· Achten Sie auf ausreichende Beleuchtung.
· Bewahren Sie das Gerät stets an einem sicheren Ort und
unter Verschluss auf. Verhindem Sie den Zugriff von Kindern.
· Überlasten Sie das Gerät nicht. Es ist nur für den
spezifizierten Betrieb geeignet.
· Tragen Sie bei der Arbeit stets geeignete Kleidung.
Verwenden Sie feste Schuhe mit rutschfesten Gummisohlen.
Langes Haar schützen Sie durch eine geeignete Kopf-
bedeckung.
· Überprüfen Sie die Maschine regelmäßig auf Beschädi-
gungen. Achten Sie dabei besonders auf Beschädigungen der
Anschlussleitung (Risse, blanke Stellen, Brüche).
· Ziehen Sie die Anschlussleitung immer am Stecker aus der
Dose, nie am Kabel selbst.
· Sollte die Länge des montierten Netzkabels nicht ausreichen,
so verwenden Sie ausschließlich geeignete, geprüfte und
zugelassene Verlängerungskabel für mind. 10 A Belastbarkeit.
Achten Sie auf das Vorhandensein einer entsprechenden
normgerechten Kennzeichnung des Verlängerungskabels.
· Reparieren Sie das Gerät niemals selbst. Übergeben Sie
defekte Geräte immer einer Fachwerkstätte oder der
Serviceabteilung des Importeurs (siehe Garantiehinweise).
· Lagern Sie das Gerät nicht bei Temperaturen unter O°C oder
über 50°C.
· Tragen Sie bei der Arbeit stets eine Schutzbrille.
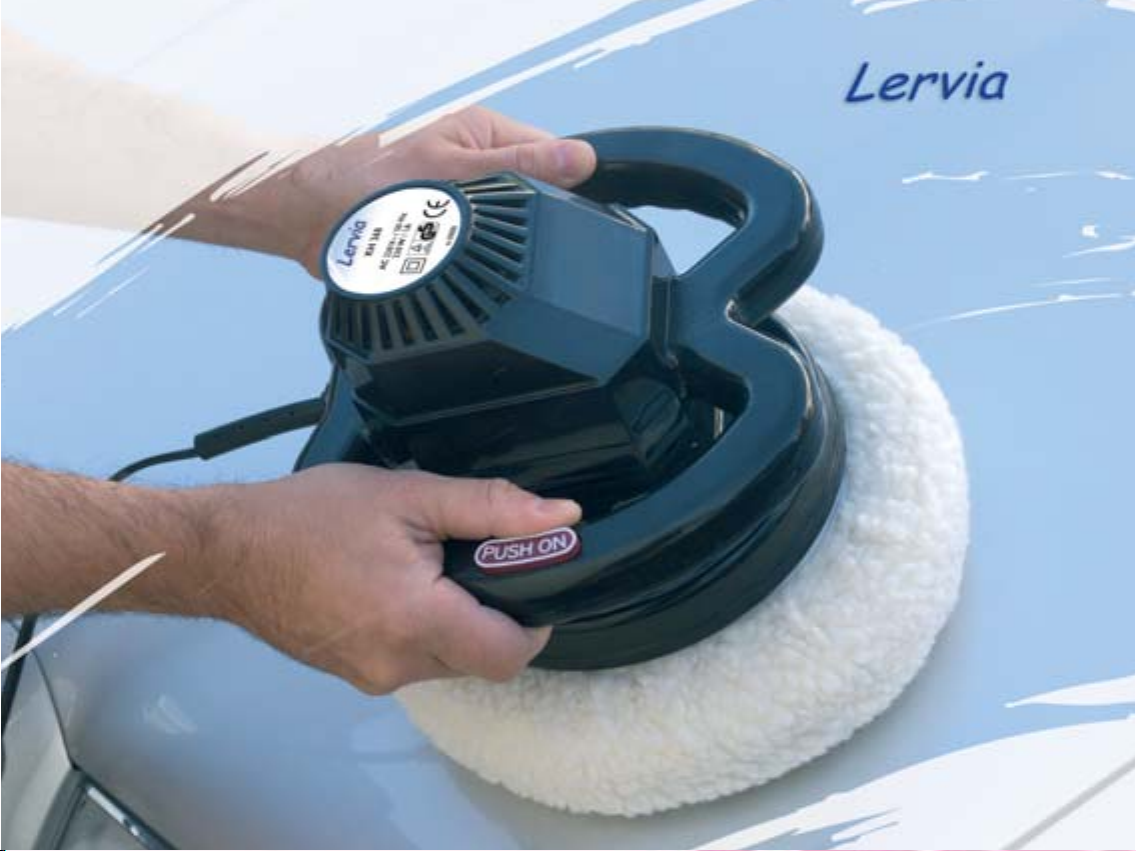
· Achten Sie stets darauf, dass die verwendete Haube gut auf
dem Kissen befestigt ist.
· Berühren Sie keine rotierenden Teile!
Vergewissern Sie sich vor dem Einschalten, dass das Kissen
nicht blockiert ist und gefahrlos anlaufen kann.
· Kontrollieren Sie die verwendeten Hauben immer auf
Unversehrtheit. Tauschen Sie gerissene oder beschädigte
Hauben sofort aus.
· Schalten Sie die Poliermaschine erst dann ein, wenn das
Kissen gut auf der zu polierenden Fläche aufliegt. Seien Sie
besonders vorsichtig beim Polieren von Ecken und unebenen
Flächen.
· Verwenden Sie keine Schleifmittel; diese können den Lack
zerstören.
Inbetriebnahme und Gebrauch
· Beachten Sie stets die folgenden Bedienungshinweise und
heben Sie diese Bedienungsanleitung für den späteren
Gebrauch auf. Geben Sie bei Weitergabe des Gerätes auch die
Anleitung an Dritte weiter.
· Kontrollieren Sie, ob die Netzspannung der am Typenschild
angegebenen Versorgungsspannung des Gerätes entspricht.
Geräte mit 230 V Versorgungsspannung sind auch für 220 V
geeignet.
5D
Autopolierer 02.02.2004 14:44 Uhr Seite 5

Anwenden
• Haube auf das Drehkissen aufsetzen:
01. Drehen Sie die Poliermaschine um, so dass das Kissen nach
oben gerichtet ist.
02. Setzen Sie eine Haube auf das Drehkissen. Achten Sie darauf,
dass die Haube zentriert und straff auf dem Kissen sitzt und
dass sie nicht am Gehäuse schleifen kann .
• Wachs-/Polierpaste auftragen:
03. Verwenden Sie zum Wachsen ausschließlich qualitativ hoch-
wertige Produkte.
· Beachten Sie die auf der Verpackung angegebenen
Verarbeitungshinweise.
04. Tragen Sie das Wachs/Polierpaste direkt auf die Arbeitsfläche
der Haube auf.
· Verwenden Sie geringfügig mehr Material als unbedingt
erforderlich, um eine durchgehende, dünne Beschichtung
zu erzielen. Zuviel Wachs allerdings verbessert das
Ergebnis nicht, sondem erschwert nur das spätere
Entfernen der Schicht.
05. Verteilen Sie das Wachs gleichmäßig auf der Haube. Es
sollten auch die Ränder der Haube bedeckt sein.
• Einschalten und Lack einwachsen/-polieren:
Hinweis: Der zu bearbeitende Lack muss sorgfältig gereinigt
und vollkommen trocken sein.
Verwenden Sie ggf. im Handel erhältliche Lackreiniger.
Je nach Beanspruchung und Zustand Ihres Lackes erhalten
Sie entsprechende Produkte. Stark oxidierte Lacke erfordern
den Einsatz eines speziellen Reinigers. Verwenden Sie dafür
ein Kombinationsprodukt (Reiniger + Wachs).
06. Drehen Sie die Poliermaschine wieder um und setzen Sie sie
auf die zu polierende Fläche auf.
· Achten Sie darauf, dass das Netzkabel nicht mit der
Poliermaschine in Kontakt kommen kann. Führen Sie es
sicherheitshalber über Ihre Schulter.
07. Überprüfen Sie nochmals, ob alle Sicherheitsvorschriften
erfüllt sind.
08. Nehmen Sie beide Griffe des Gerätes fest in Ihre Hände und
schalten Sie das Gerät durch Niederdrücken des Schalters
ein (siehe auch Abb. A).
09. Führen Sie die Poliermaschine gleichmäßig über den Lack
(siehe auch Abb. B).
· ACHTUNG! Üben Sie keinen Druck auf die Polier-
maschine aus! Das Eigengewicht des Gerätes reicht als
Anpressdruck während des Arbeitsvorganges völlig aus.
· Nicht erreichte Ecken und Vertiefungen müssen mit der
Hand nachgearbeitet werden. Verwenden Sie dafür die
von der Poliermaschine abgenommene Haube.
• Entwachsen bzw. Polieren:
10. Verwenden Sie für den folgenden Polier- bzw. Entwachsungs-
vorgang die zweite Haube.
· Richten Sie sich bei der Verarbeitung nach den
Anwendunghinweisen des Wachses / Poliermittels.
Reinigen
· Ziehen Sie vor jeder Reinigung den Netzstecker aus der
Steckdose.
· Reinigen Sie das Gehäuse mit einem leicht befeuchteten
Tuch und ggf. mit einem milden Reinigungsmittel.
· Reinigen Sie die Hauben per Handwäsche in
einer Seifenlauge.
Anwenden / Reinigen
6D
Autopolierer 02.02.2004 14:44 Uhr Seite 6

Entsorgen
· Die Verpackung besteht ausschließlich aus
umweltfreundlichen Materialien. Sie kann in
den örtlichen Recyclebehältern entsorgt
werden.
· Möglichkeiten zur Entsorgung des ausge-
dienten Gerätes / der Hauben erfahren Sie bei
Ihrer Gemeinde- oder Stadtverwaltung.
Konformitätserklärung / Hersteller
Wir, Kompernaß Handelsgesellschaft mbH, Burgstr. 21, D-44867
Bochum, Deutschland, erklären hiermit für dieses Produkt die
Übereinstimmung mit folgenden EG-Richtlinien:
Maschinenrichtlinie: (98/37 EC)
EG-Niederspannungs-
richtlinie: (73/23/EEC)
Elektromagnetische
Verträglichkeit: (89/336 EEC)
Angewandte Harmonisierte
Normen: EN 50144-1, EN 50144-2-3,
EN 61000-3-2, EN 61000-3-3
Typ/Bezeichnung: Auto-Poliermaschine KH 368
Bochum, 31.01.2004
Hans Kompernaß
- Geschäftsführer -
Entsorgen / Konformitätserklärung / Hersteller
7D
Autopolierer 02.02.2004 14:44 Uhr Seite 7

Technical information
Model number: KH 368
Operating voltage: 230V ~50 Hz
Power consumption: 230W
No load speed: n = 3000 rpm/orbital
Sound pressure level: 80 dB(A)
Vibration: 14 m/s
2
Overload fuse
Proper use
The car waxer/polisher is intended exclusively for waxing and
polishing/dewaxing of ordinary vehicle paintwork. Any other
use or modification shall be considered as improper use and
could give rise to considerable dangers. The tool is not
intended for commercial use.
Controls
Switch
Safety advice
BEFORE USING YOUR CAR WAXER/POLISHER FOR THE
FIRST TIME, TO AVOID DAMAGE TO PROPERTY OR
PERSONAL INJURY PLEASE MAKE YOURSELF FAMILIAR
WITH THE SAFETY ADVICE AND OPERATING
INSTRUCTIONS.
To avoid danger to life from electric shock:
· Do not operate the tool if it has a damaged mains lead or
plug. Have any tools or mains leads that do not work properly
or are damaged examined and repaired at a service centre.
The service centre for your country can be found on the
guarantee card.
· Do not leave the tool out in the rain and never use it in a
moist or damp environment. Make sure that the tool’s mains
lead never gets wet or damp during operation.
· Any broken or damaged parts must be replaced with original
spare parts only.
To avoid danger of injury:
· Never leave the tool unattended whilst working.
· Always keep your working area clean.
· Caution! Keep the mains lead and the tool out of reach of
children. Children often underestimate the dangers associated
with electrical equipment.
· Do not use the equipment near inflammable liquids or
materials or explosive gases.
· Before you clean the tool or fit accessories, always pull out
the mains plug from the socket.
· Make sure that the tool cannot be inadvertently switched on.
Working safely:
· If danger arises, pull the mains plug immediately out of the
mains socket.
· Never use the tool for a purpose for which it was not
intended.
· Remain alert at all times! Always watch what you are doing
and proceed with caution. Never use the tool if you cannot
concentrate or you are feeling unwell.
Operating instructions for the Lervia KH 368 car waxer/polisher
8GB
0
Autopolierer 02.02.2004 14:44 Uhr Seite 8

· If you are not using the tool, pull the plug out of the mains
socket.
· Do not carry the tool in such a way that the switch could be
inadvertently operated.
· Exercise care when using the tool and remain alert.
Adopt a safe, stable working position.
· Hold the tool firmly when working.
· Ensure that you have adequate light.
· Always keep the tool in a safe place and under lock and key.
Ensure that children cannot get access to it.
· Do not overload the tool. It is only to be used for the specified
purpose.
· When using the waxer/polisher, always wear suitable
clothing. Wear stout footwear with non-slip rubber soles.
Keep long hair out of the way by wearing suitable head-
wear.
· Check the tool regularly for damage.
Look out in particular for any damage to the mains lead
(cracks, exposed wires, breaks).
· Always disconnect from the socket by pulling the plug and
never the lead itself.
· If the original mains lead is not long enough, use an
extension cable that is suitable for the purpose, tested and
approved, with a current rating of at least 10 A. Look for the
presence of an appropriate marking in accordance with the
applicable standards on the extension lead.
· Do not repair the tool yourself. Take or send a defective tool to
a specialist repair centre or to the importer’s service
department (see guarantee information).
· Do not store the tool to temperatures below 0°C or
above 50°C.
· When using the waxer/polisher, always wear protective
glasses.
· Always make sure that the bonnet used is firmly attached to
the cushion.
· Do not touch any moving parts. Before you switch on the tool,
check that the cushion is not restrained and can move
without causing any danger.
· Always check that the bonnet is safe to use.
Replace a torn or damaged bonnet immediately.
· Wait until the cushion is in good contact with the surface to
be polished before switching on the waxer/polisher. Be
particularly careful when polishing edges and uneven
surfaces.
· Do not use any abrasive as this can ruin your paintwork.
First use/ normal use
· Always follow this operating advice and keep the operating
instructions safe in case you need them later. If you pass the
tool on to anyone else, please ensure that you also pass on
the instructions.
· Check that the mains voltage corresponds with that given on
the rating plate. Devices suitable for 230 V supplies can also
be used with 220 V supplies.
9GB
Autopolierer 02.02.2004 14:44 Uhr Seite 9

Use
• Placing the bonnet on to the cushion:
01. Turn the waxer/polisher over so that the cushion points
upwards.
02. Place a bonnet on to the cushion. Ensure that the bonnet is
central, sits tightly on the cushion and cannot rub on the
housing .
• Applying the wax/polish:
03. Always use a high quality product for waxing.
· Follow the working methods given on the packaging.
04. Apply the wax/polish directly to the contact surface of the
bonnet.
· In order to achieve a thin complete covering do not use
more material than is absolutely necessary. Too much
wax does not achieve a better finish and you will have
spent more time later removing the coating.
05. Spread the wax evenly over the bonnet. It should also cover
the bonnet edges.
• Switching on and waxing /polishing the paintwork:
Note: The paintwork to be polished must be first thoroughly
cleaned and fully dry.
If necessary use a commercially available paintwork cleaner.
Use a product suitable for the demands on and condition of
your paintwork. Heavily oxidised paintwork requires a special
cleaner. You should use a combined product (cleaner + wax)
for this task.
06. Turn the waxer/polisher over again and place it on the
surface to be polished.
· Make sure that the mains lead cannot come into contact
with the waxer/polisher. Work more safely by guiding the
mains lead over your shoulder.
07. Check again that all the safety requirements have been
fulfilled.
08. Using both hands firmly grasp the two handles and switch on
the waxer/polisher by pushing down the switch
(see Fig. A).
09. Guide the waxer/polisher evenly over the paintwork
(see Fig. B).
· ATTENTION: Do not press on the waxer/polisher! The
self-weight of the waxer/polisher applies sufficient
pressure for the waxing/polishing process.
· Any difficult to reach corners or recesses may have to be
completed later by hand. Take the bonnet off the waxer /
polisher and use this bonnet for the corners and recesses.
• Removing wax or polishing:
10. Use the second bonnet for final polishing or removing the
wax.
· When working, always follow the instructions given for
the wax/polish.
Cleaning
· Before cleaning the tool, pull out the plug out of the
mains socket.
· Clean the housing with a slightly moist cloth. If necessary
use a mild cleaning agent.
· Clean the bonnet by washing by hand in soapy water.
Use / Cleaning
10 GB
Autopolierer 02.02.2004 14:44 Uhr Seite 10

Disposal
· The packaging consists completely of
environmentally-friendly materials. It can be
disposed of in your local recycling
containers.
· Ask at your local council offices about
the disposal of your worn-out tool / bonnet.
Statement of conformity
We, Kompernaß Handelsgesellschaft mbH, Burgstr. 21, D-44867
Bochum, Germany, hereby declare that this product conforms
with the following EC regulations:
Machinery Directive: (98/37 EC)
EU Low Voltage Directive: (73/23 EEC)
Electromagnetic compatibility: (89/336 EEC)
Applicable harmonised standards: EN 50144-1, EN 50144-2-3,
EN 61000-3-2, EN 61000-3-3
Type/Description: car wax/polisher KH 368
Bochum, 31.01.2004
Hans Kompernaß
- Managing Director -
Disposal / Statement of conformity
11GB
Autopolierer 02.02.2004 14:44 Uhr Seite 11

Données techniques
Numéro type KH 368
Tension de service 230V ~50 Hz
Puissance absorbée 230W
Vitesse de rotation à vide n = 3000 tr./mn./
mouvement orbital
Niveau de pression acoustique: 80 dB(A)
Vibration bras-main: 14 m/s
2
Protection surcharge
Utilisation conforme
La polisseuse pour automobiles est exclusivement conçue
pour cirer et polir/poncer des peintures automobiles
courantes. Toute autre utilisation est considérée comme non
conforme et peut être source de graves dangers.
Cet appareil n’est pas destiné à une utilisation industrielle.
Éléments de commande
Commutateur
Instructions de sécurité
AFIN DE PRÉVENIR TOUS DÉGÂTS PERSONNELS OU
MATÉRIELS, IL EST INDISPENSABLE DE PRENDRE
CONNAISSANCE DES CONSIGNES DE SÉCURITÈ ET DE LIRE
LA NOTICE D’UTILISATION AVANT D’UTILISER LE
POLISSEUR !
Pour prévenir tout danger de mort par
électrocution :
· Ne pas utiliser l’appareil si le câble de raccordement ou la
fiche secteur sont endommagés. Si un câble de raccordement
ou un appareil ne fonctionne pas correctement ou est
endommagé, il doit être immédiatement et exclusivement
inspecté et réparé par notre S.A.V. La filiale compétente est
indiquée sur le bon de garantie ci-joint.
· Ne pas exposer l’appareil à la pluie et ne jamais l’utiliser
dans un environnement humide. Veiller à ce que le câble
secteur ne prenne pas l’eau ou l’humidité durant l’utilisation.
· Exclusivement faire remplacer les composants cassés ou
défectueux par des pièces de rechange d’origine.
Pour prévenir tous risques de blessures :
· Ne jamais laisser l’appareil fonctionner sans surveillance.
· Toujours veiller à la propreté de la zone de travail.
· Attention ! Tenir les enfants à l’écart du câble de
raccordement et de l’appareil. Les enfants sous-estiment
souvent les dangers émanant des appareils électriques.
· Ne jamais utiliser l’appareil à proximité de liquides ou de
matières inflammables ou de gaz explosifs.
· Toujours débrancher la fiche secteur avant de nettoyer
l’appareil ou de changer des pièces.
· Éviter toute mise en marche involontaire de l’appareil.
Pour utiliser l’appareil en toute sécurité :
· Immédiatement débrancher la fiche secteur de la prise de
courant en cas de danger.
· Prescrire toute utilisation non conforme de l’appareil.
Mode d’emploi pour la lustreuse de carrosserie Lervia KH 368
12 F
0
Autopolierer 02.02.2004 14:44 Uhr Seite 12

· Soyez vigilant ! Vous devez être concentré et procéder avec
prudence. Ne jamais utiliser l’appareil si vous n’êtes pas
concentré ou en cas de malaise.
· Par principe, débrancher l’appareil s’il n’est pas utilisé.
· Toujours saisir l’appareil de manière à exclure tout
actionnement involontaire de l’interrupteur.
· Travailler avec soin et sans hâte. Veiller à avoir une posture
sûre et stable.
· Tenir fermement l’appareil lors de l’utilisation.
· Assurer un éclairage convenable.
· Toujours ranger l’appareil dans un endroit sûr et verrouillé.
Tenir hors de portée des enfants.
· Ne pas surcharger l’appareil. Il est exclusivement conçu pour
l’emploi spécifié.
· Porter des vêtements adéquats pour travailler. Porter des
chaussures stables avec semelle en caoutchouc antidérapante.
Couvrir les cheveux longs de manière adéquate pour les
protéger.
· Contrôler régulièrement le bon état de l’appareil. Vérifier
particulièrement l’état des câbles de raccordement (fissures,
parties dénudées, ruptures).
· Toujours débrancher le câble de raccordement retirant sur la
fiche de la prise de courant et non pas en tirant sur le câble.
· Si la longueur du câble secteur ne suffit pas, exclusivement
utiliser un câble de rallonge adéquat, certifié et homologué
pour une charge d’au moins 10 A. Contrôler la présence d’un
certificat conforme sur le câble de rallonge.
· Ne jamais réparer l’appareil soi-même. Toujours confier les
appareils défectueux à un atelier qualifié ou au service
compétent de l’importateur (voir Remarques relatives à la
garantie).
· Ne pas ranger l’appareil à des températures inférieures à O°C
ou dépassant 50°C.
· Toujours porter des lunettes protectrices pour travailler.
· Toujours vérifier que la housse utilisée est correctement fixée
sur le coussinet.
· Ne pas toucher les pièces en rotation ! Avant la mise en
marche, vérifier que le coussinet ne bloque pas et puisse
tourner sans danger.
· Contrôler si la housse utilisée est intacte. Remplacer
immdiatement la housse si elle est fissurée ou endommagée.
· Uniquement allumer la polisseuse lorsque le coussinet est
correctement appliqué sur la surface à traiter. Tre
spécialement vigilant pour polir les coins et les surfaces
inégales.
· Ne pas utiliser de produits abrasifs ; ceux-ci peuvent
fortement endommager la peinture.
Mise en service et utilisation
· Respectez obligatoirement les instructions de service ci
dessous et conservez le présent mode d’emploi pour tout
usage ultérieur. Ne pas oublier de remettre aussi la notice
d’utilisation lorsque vous prêtez l’appareil.
· Contrôlez que la tension du réseau corresponde bien à la
tension d’alimentation mentionnée sur la plaque signalétique
de l’appareil. Les appareils avec une tension d’alimentation
de 230 V sont également adaptés pour 220 V.
13F
Autopolierer 02.02.2004 14:44 Uhr Seite 13

Utilisation
• Placer la housse sur le coussinet rotatif :
01. Tourner la polisseuse de manière à ce que le coussinet soit
dirigé vers le haut.
02. Placer la housse sur le coussinet. Veiller à ce que la housse
soit centrée et cintrée sur le coussinet, et qu’elle ne frotte pas
contre le boîtier .
• Application de la pâte à lustrer/polir :
03. Pour le lustrage à la cire, utilisez uniquement des produits de
qualité.
· Tenez compte des instructions d’utilisation mentionnées
sur l’emballage.
04. Appliquez la cire/la pâte à polir directement sur la surface de
travail du bonnet.
· Utilisez un tout petit plus de matériel que nécessaire pour
obtenir un revêtement mince et régulier. Trop de cire
n’améliore pas le résultat, mais rend difficile l’élimination
ultérieure de la couche.
05. Répartissez la cire régulièrement sur le bonnet. Les bords du
bonnet doivent également être recouverts de produit.
• Mise en marche et lustrage/polissage de la peinture :
Note : la surface traitée doit être soigneusement nettoyée et
parfaitement sèche. Utiliser au besoin des nettoyants pour
peinture auto vendus dans le commerce.
Vous trouverez des produits adaptés en fonction de la
sollicitation et de l’état de votre peinture. Les peintures
fortement oxydées nécessitent l’utilisation d’un nettoyant
spécial. Utilisez pour cela un produit combiné
(nettoyant + cire).
06. Retournez la lustreuse et posez-la sur la surface devant être
polie.
· Veillez à ce que le cordon ne puisse entrer en contact
avec la lustreuse. Pour plus de sécurité, faites passer le
cordon sur votre épaule.
07. Contrôlez encore une fois si toutes les instructions de sécurité
sont bien respectées.
08. Prenez les deux poignées de l’appareil fermement dans les
mains et mettez l’appareil en marche en appuyant sur le
commutateur (voir aussi image A).
09. Passer régulièrement la polisseuse sur la peinture
(voir aussi image B).
· ATTENTION ! Ne pas appuyer sur la polisseuse ! Le poids
propre de l’appareil suffit parfaitement à exercer la
pression nécessaire pour le processus de travail.
· Les angles et les surfaces en profondeur inaccessibles
doivent être traitées ultérieurement à la main. Utilisez
pour cela le bonnet retiré de la lustreuse.
• Ponçage ou polissage :
10. Pour la procédure de polissage ou d’élimination de la cire
suivante, utilisez le deuxième bonnet.
· Pour le traitement, tenez compte des instructions de
traitement de la cire/du produit.
Nettoyage
· Débrancher la fiche secteur de la prise de courant avant
le nettoyage.
· Essuyer le boîtier avec un chiffon bien essoré, au besoin
imbibé de détergent neutre.
· Laver les housses à la main avec une lessive de savon.
Utilisation / Nettoyage
14 F
Autopolierer 02.02.2004 14:44 Uhr Seite 14

Mise au rebut
· L’emballage se compose exclusivement de matières
recyclables et peut être mis au rebut dans les conteneurs
locaux.
· Veuillez vous renseigner auprès de votre mairie
concernant les mesures de recyclage actuellement
applicables pour les appareils électriques usagés et les
housses.
Certificat de conformite
Le société Kompernaß Handelsgesellschaft mbH, Burgstr. 21,
D-44867 Bochum, Allemagne, certifie par le présent document
que ce produit est conforme aux directives européennes
suivantes:
Directive de la CE concermant
les machines: (98/37 EC)
Directive sur les basses tensions: (73/23 EEC)
Compatibilité électromagnétique: (89/336 EEC)
Normes correspondantes applicables:EN 50144-1, EN 50144-2-3,
EN 61000-3-2, EN 61000-3-3
Type/Description: Lustreuse pour carrosserie
KH 368
Bochum, le 31.01.2004
Hans Kompernaß
- Directeur/Gérant-
Mise au rebut / Certificat de conformite
15F
Autopolierer 02.02.2004 14:44 Uhr Seite 15

Dati tecnici
Tipo n° KH 368
Tensione di lavoro 230V ~50 Hz
Consumo 230 W
N° di giri a vuoto n = 3000 UpM/Movimento orbitale
Livello pressione sonora: 80 dB(A)
Valore oscillazione: 14 m/s
2
Protezione sovraccarico
Utilizzo corretto
La lucidatrice per macchine è destinata solamente alla
ceratura e la lucidatura/togliere la cera di vernici di veicoli,
normalmente in commercio. Ogni utilizzo oppure modifica
dell’apparecchio non è corrispondente al uso corretto e
comporta gravi pericoli di incidenti. L’apparecchio non è
destinato all’uso professionale.
Elemento di comando
Interruttore
Indicazioni per la sicurezza
PER EVITARE DANNI ALLE PERSONE OPPURE COSE
LEGGETE PRIMA DEL PIMO UTILIZZO DELLA
LUCIDATRICE LE INDICAZIONI PER LA SICUREZZA ED IL
MANUALE D’USO!
Per evitare il pericolo di vita causato da colpi
elettrici:
· Non usare l’apparecchio con cavo o spina danneggiati.
Apparecchi e/o cavo che non funzionano in modo ineccepibile
devono essere riprati immediatamente dal servizio clienti
autorizzato. Il servizio clienti del vostro paeseè indicato nella
scheda di garanzia.
· Non mettere l’apparecchio sotto la pioggia e non usarlo mai in
ambienti umidi o bagnati. Fare attenzione che il cavo non si
bagni o si umidisca durante l’esercizio.
· Pezzi rotti oppure danneggiati devono essere sostituiti
solamente con pezzi originali.
Per evitare il pericolo di ferite:
· Non lasciare incustodito l’apparecchio durante il suo
funzionamento .
· Tenere sempre pulita la zona di lavoro.
· Attenzione! Tenere lontani i bambini di cavi e dal apparecchio.
I bambini sottovalutano spesso i pericoli rappresentati da
apparecchi elettrici.
· Non usare l’apparecchio nelle vicinanze di liquidi o materiali
infiammabili o gas esplosivi.
· Prima di pulire l’apparecchio oppure di sostituire gli
accessori, si deve sempre togliere la spina dalla presa.
· Impedite l’accensione involontaria dell’apparecchio.
In questo modo vi comportate in sicurezza:
· In caso di pericolo si deve togliere immediatamente la spina
dalla presa.
· Non usare mai l’apparecchio per altri scopi
Manuale d’uso per Lucidatrice KH 368
16 I
0
Autopolierer 02.02.2004 14:44 Uhr Seite 16

· Fare sempre attenzione! Fate attenzione in tutto quello che
fate e sempre con la testa! Non usare mai l’apparecchio se
non siete concentrati oppure se state male.
· Togliete sempre la spina se non usate l’apparecchio.
· Non portate l’apparecchio mai in modo che si possa azionare
involontariamente l’interruttore di accensione.
· Lavorare sempre con attenzione e concentrazione. Fare
attenzione ad una posizione di lavoro sicura e stabile.
· Tenere l’apparecchio ben saldo durante il lavoro.
· Tenere cura di un’illuminazione sufficiente.
· Conservare l’apprecchio in un luogo sicuro e sotto chiave.
Impedite l’accesso ai bambini.
· Non sovracaricare l’apparecchio. L’apparecchio è adatto
solamente all’uso specifico.
· Portare gli indimenti adatti durante il lavoro.
Usare scarpe antinfortunistiche antiscivolo.
Proteggere i capelli lunghi coprendo la testa in modo
adeguato.
· Controllare periodicamente lì’apparecchio per danni. Fare
specialmente attenzione a danni sul cavo (Screpolature, punti
nudi, rotture)
· Togleire il cavo sempre dalla spina e mai dal cavo stesso.
· Se la lunghezza del cavo montato non dovesse essere
sufficiente, si deve usare solamente prolunghe adatte, testate
ed omologate. Carico 10 A Controllate l’esistenza di una
marcatura a norme sul cavo di prolungamento.
· Non riparare mai da sé l’apparecchio. Consegnare apparecchi
difettosi sempre ad un’officina specializzata oppure ad un
servizio clienti del importatore (vedi indicazioni sul
apparecchio).
· Non conservare l’apparecchio a temperature sotto 0°C oppure
sopra 50°C.
· Portare sempre occhiali protettivi durante il lavoro.
· Fare sempre attenzione che la cuffia usata sia fissata bene sul
cuscino.
· Non toccare parti rotanti! Controllare prima dell’accensione,
che il cuscino non sia bloccato e che possa avviarsi senza
problemi.
· Controllare sempre che le cuffia non presentino danni.
Sostituire immediatamente cuffie rotte o danneggiate.
· Accendere la lucidatrice solamente, quando il cuscino
appoggia bene sulla superficie da lucidare. Fare particolare
attenzione durante la lucidatura di angoli e superfici
irregolari.
· Non usare mezzi abrasivi; questi possono danneggiare la
verniciatura.
Messa in funzione ed utilizzo
· Osservare sempre le istruzioni d’uso e conservare le stesse
per un futuro utilizzo. In caso di passaggio a terzi
dell’apparecchio consegnare anche questo manuale.
· Controllare, se la tensione di rete corrisponda alla tensione di
alimentazione dell’apparecchio. Apparecchi con 230V di
tensione di alimentazione sono adatti anche per 220 V.
17I
Autopolierer 02.02.2004 14:44 Uhr Seite 17

Uso
• Appoggiare la cuffia sul cuscino rotante:
01. Ribaltare la lucidatrice, in modo che il cuscino indica verso
l’alto.
02. Appoggiare la cuffia sul cuscino rotante. Fare attenzione che
la cuffia è centrata e salda sul cuscino e che non possa
strofinarsi contro il carter .
• Applicazione della cera:
03. Applicare la cera/il liquido per lucidare direttamente sulla
superficie di lavoro della calotta.
· Utilizzare poco più materiale del necessario per avere
uno strato fine ed uniforme. Troppa cera non migliora
il risultato, ma complica la rimozione dello strato
superfluo.
04. Distribuire uniformemente la cera sulla calotta.
· Coprire anche i bordi della calotta.
05. Rigirare nuovamente la lucidatrice ed appoggiarla sulla
superficie da lucidare.
• Accensione e lucidare/cerare la vernice:
Nota: La vernice da lavorare deve essere ben pulita e
completamente asciutta. Usare eventualmente detergenti per
la pulizia di vernici reperibili in commercio. A seconda la
condizione della vernice, riceverete i prodotti adatti. Vernici
fortemente ossidanti richiedono l’utilizzo di un detergente
speciale. Utilizzare per questo un detergente combinato
Detergente + Cera.
06. Fare attenzione che il cavo non possa toccare la lucidatrice.
· Per sicurezza farlo passare sulla spalla verso indietro.
07. Controllare nuovamente, se tutte le norme per la sicurezza
sono stati rispettati.
08. Tenere bene entrambe le maniglie dell’apparecchio e
accenderlo premendo l’interruttore (vedi anche Fig. A).
09. Portare la lucidatrice uniformemente sopra la vernice
(vedi anche Fig. B)
· ATTENZIONE! Non esercitare pressione sulla lucidatrice!
Il peso proprio dell’apparecchio è sufficiente per
garantire la pressione d’appoggio durante il lavoro.
· Gli angoli e le scanalature che non sono stati raggiunti
dalla lucidatrice devono essere lavorate manualmente,
utilizzando la calotta utilizzata dalla lucidatrice.
• Togliere la cera e/o lucidare:
10. Per il ciclo di lucidatura e/o per togliere la cera in eccesso,
utilizzare la seconda calotta.
· Attenersi alla descrizione per i lavori con cera / lucidante.
Pulire
· Togliere la spina dalla presa prima di qualsiasi lavoro di
pulizia sull’apparecchio.
· Pulire il carter con un panno leggermente umido ed
eventualmente con un detergente delicato.
· Pulire le cuffie, lavandole a mano con sapone.
Uso / Pulire
18 I
Autopolierer 02.02.2004 14:44 Uhr Seite 18

Smaltimento
··L’imballaggio è composto da materiali ecologici. Esso può
essere smaltito nei contenitori normali per il riciclaggio.
· Per smaltire l’apparecchio dimesso, contattate per favore
il vostro comune.
Dichiarazione di conformità
Noi della Kompernaß Handelsgesellschaft mbH, Burgstr. 21,
D-44867 Bochum, con la presente dichiariamo che il prodotto è
conforme alle seguenti direttive CE:
Direttiva CE macchine: (98/37 EC)
Direttiva CE sulle basse tensioni: (73/23 EEC)
Compatibilità elettromagnetica: (89/336 EEC)
Norme armonizzate applicate: EN 50144-1, EN 50144-2-3,
EN 61000-3-2, EN 61000-3-3
Tipo/Denominazione: Macchina per lucidatura e
ceratura veicoli KH 368
Bochum, 31.01.2004
Hans Kompernaß
- Dirigente -
Smaltimento / Dichiarazione di conformità
19I
Autopolierer 02.02.2004 14:45 Uhr Seite 19
Table of contents
Languages:
Popular Sander manuals by other brands

Dynabrade
Dynabrade Dynafine 57902 manual

Meec tools
Meec tools 003-562 operating instructions

Sinn
Sinn DUOFLEX Assembly instruction

Milwaukee
Milwaukee 6020-21 Operator's manual

Matco Tools
Matco Tools RL400 Operating instructions, warning information, parts breakdown

Makita
Makita PW5000C instruction manual