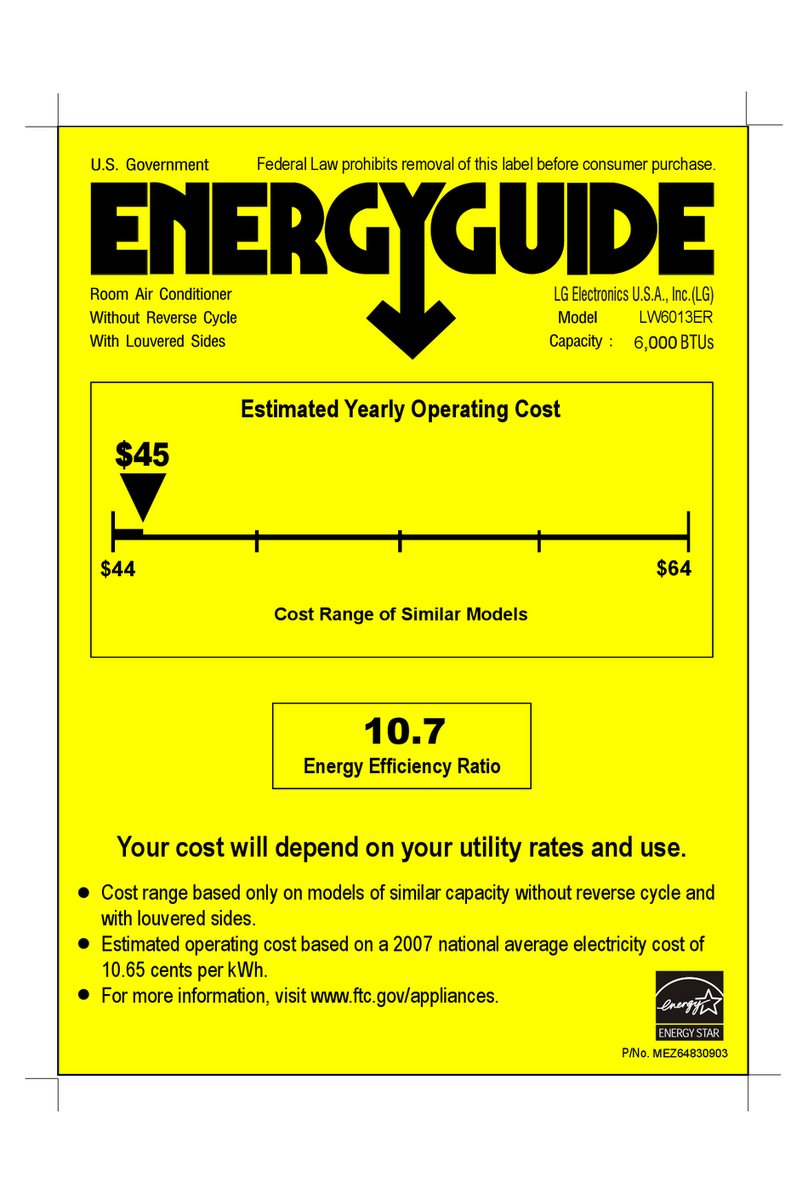
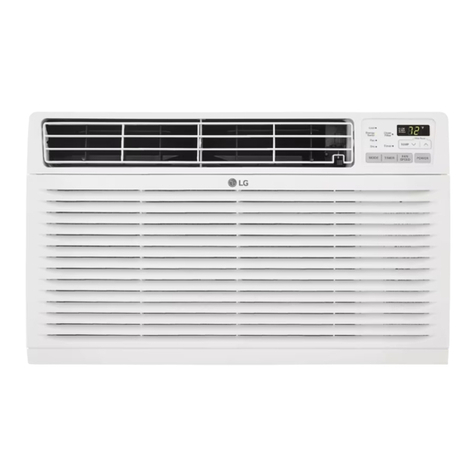
LG LWHD1200FR User manual

www lgappliances.,com,
Window-Type
's Air
MODEL& MODELOS: LWHD12,00FR
ventU!adorde
esta

FOR YOUR RECORDS
Write the model and serial numbers here:
Model #
Serial #
You can find them on a label on the side of each unit,,
Dealer's Name
Date Purchas_t
BStaple your receipt to this page in the event you e_eedit
to prove date of purchase or for warranty issues,
READ THIS MANUAL
Inside you will find many helpful hints on how to use and
maintain your air conditioner propedy Just a little preventive
care on your part can save you a great deal of time and
money over the life of your air conditioner_
You'll find many answers to common problems in the chart
of troubleshootingtips,, It you review our chart of
Troubleshooting Tips first, you may not need to call for
service at all
PRECAUTION
• Contact an Authorized Service Center !or repair or
maintenance of this unit. Call 1-800-243-O000 to
locate the nearest ASC.
•This air conditioner is not intended for use by young
children or invalids without supervision.
•Young children should be supervised Io ensure that
they do not play with the air conditioner..
• If the power cord requires replacement, have an
Authorized Servicer Install an exact replacement part.
• Installation work must be performed in accordance
with the National Electric Code by qualified and
authorized personnel only,
2 Room Air Conditioner

To prevent injury toithe user or other people _d property damage, the bHowing instructions
must be followed,
[] Incorrect ,operati,on due to ignoring instructions will cause harm or ,damage. The s,eri,ous.nes.s
is classifi_ by the bllowing
[] Because of the weight of the product, it is r_ommended that you have a helper to assist in
the installation.
[] Meanings of symbols us,_ in this manu_ are as, shown _low.
iB,e sure not to do. 1
J
Be sure to follow the instruction.
[] Installation
,_mpmper assembly or instaBatbn may cause
in_rre_ o,_ra_on, includinginjury,fire, and
*It may _use explosion or fire.
,It may _u_ {ire_dl e,]e_ric sh_k,
•It may cause electric shock _d failure°
Owner_ Manual 3

1Operation
'i _e_ise, _ will cause el_tdc
shockor fire.
• it willc_se electricshock olr fire.
•It willcause electric sh_k or fire.
•it willcause electric shod_ or fire.
•.It will cause eFectricshock or
fire.
• No grounding my cause eiec#ic
shock.
,,Othe_ise it will cause fire and
el_tdc shock a,cc_elnt,
4 Room Air Conditioner
it may _use fire and electdcm
sho_,, •It may _use electric shock

• The air conditioner must _ operated in a
enc[o_d area to _ most effective,
Sa_tyPr_u#ons
, II may cause expl_,i,o,n, fire and burn,
• It will _use ,electric sho_ or failure of
machine.
[] Installation
•They are sharp and may _use
inju_.
• Water may enter the unit and d_rade the
irlsu[atioiR, it may cau_ an eledric shock.
• litmay cause, failure of
a#p[iance or performan_
deleriorate.
, If the outer case is damaged,
must be repaired or replaced
immediately. Leaving it damaged
could result in the air conditioner
iaBing out of the window, creating
a safety h_ard.
Owner_ Manual 5

SafetyPrecautions
• ff _y cause injury:
[] Operation
Sharp edges
• it may cause e_ectricsh_k and
_mage. • it wiBw_te power consumption
in vain _d it may _use
accidenL
- Sin_ the fan rotates at high
speed during o_raflon, H:may
cause iniury.
•Operation withoutfilters wBI
cause failure,
• This coulid injury the _t or p_ant.
*The appearance of the Mr
_nditJoner may deteriorate,
changie _lor, or develop
surface fla_,
• it is an air conditioner, not a
precision refrigeration system,,
• it is not s_ffary _d _uld
cau_ illness o,rpersonal injury
h_ard,
6Room Air Conditioner

Be_re Ope_tion
i. P_ug in the power cord propedy.
2o Use a dedi circuit. Overloading the line _uld create a fire hazard.
3. Do not use an extension cord. See page 11 for more detail&
4. Do not start/stop o_ration by pluggin_unplugging the power cord.
5. ff the _¢er cord Jsdamaged and requires replacement, have an Authorized
Se_-lcer install an exact replacement part.
iLiii_iii_iiiiiiiii'_iiiiiiiiiiiii!
!iiiH_iii!iiiiiii!!iiiiiiiiiiiitiiiii
!. Being exposed to direct aiflow for an extended period of time could be
hazardous to your heath, Do not expose occupants, pets, or plants to direct
airflow for extended periods of time.
2. Due to the possibili_ of oxygen deficiency, ventilate the room when used
together with stoves or other heating devices.
3. Do not use this air conditioner for non-speci_d special purposes (e.g.
preserving precision devices, food, pets, plan_, and art objects). Such usage
could damage the items.
4. The air conditioner is a consumer comfo_ appliance, not a precision climate
contro_ system.
i. Do not touch the metal parts of the unit when removing the filter, injuries can
occur when handling sharp meta_ edges.
2_ Do not use water to dean inside the air conditioner. Exposure to water can
destroy the insulation, leading to possible electric shock_
& When cleaning the unit, first make sure that the power and breaker are turn_
off. The fan rotates at a very high sp_d during operation. There is a
possibifi_ of injury if the unit's power is accidentally triggered on while
clean_ng _nner parts of the unit.
For repair and maintenance, _ntact an Authorized SepJice Center, See the
warran_ page for devils or _!1 (800) 243-_. Have your model number and
serial number availabie. They should be wri_en on page 2 of this manual.
7

Introduction
This symbol alerts you to the risk _electric shock.
This symbol alerts you to haza_s _could cause harm to the
air conditioner,
This sym_l indicates s_cia| notes.
WARNING: _is appliance should be installed in accordan_ with the
National Ele_tic C_e°
Up_r Guide
Front G_lle
Air Filter
Honzon_l Air Defl_o,r
(Horizontal Louver)
Verti_i Air D_e_or
(Ve_ca! Lo,_er)
-- Air Dis_arge
Air Intake
(Inlet Grille)
Con_ol Board
Re,_te Co_roller _,_':_ ......
Base Pan
Power Cord
8 Room Air Co r

i15V~ 230V~ Power _rd may include 8 ,cu_e_
interrupter ,device, A test and re_t b_l is
provided on _e pl_ case. me de,Jim
should be.tested on a pe_edic bssis by _rst
presstng _e TEST b_ and Den De
_SET bu_on, if the TEST button does not
t_p e,r ff the RESET b,u_n '_ll not s_y
enga_d, dts_,ntJnue use of the air
_dtt]or_r and _tact a qualmed s_lce
technic_n.,
Power Supply
U_ Wall Recepta_Je
Stan_N 125V, 3-wt_ gm_ding
reo_acle r_ t5A, !25V AC
St_a_ 2._V, 3_wira gr_ng
recep_e rated t5A, 250V AC
,.@
S_a_ 2_V, 3-wira gr_ing
r_e rated 20A, 250V AC
U_ i5 _P. time _Jay fuse _ !5 AMP
c_tcattb_ak_.
Use 20 AMP.. _me _lay fu_ o_ 20 AMP.
c_r_ breast.
ELECTRICAL SAF_Y
IMPO_T GRO,UN_NG IN$_UC#ONS'
Air _er h_ a _r_o_ gr_n,dlng _ug on i_ p_ supptycord, wh_ must _ pl_g_g_ into
pr_e_y greu_ three-prong wa_l le _r yo,_/p,rot_ion ag_ns_ _ssible _ h_d..
9

Ele Safety
WARNING: This app|lance must _ p_pody g_unded,
The power cord of _is appliance is equip_d with a three-prong grounding plug.
To minimize the dsk of electric shock, use the plug with a standard three-slot
grounding wall power outlet, if the power outlet does not include a grounding slot,
have a quaLifi_ eiectrician repiace the outlet _fore you use the room air
conditioner.
WARNING: Changing the outlet without making the appropriate wiring
changes wiii create an unsafe condition that couid result in fire or
eiectrical shock. Refer all such work to a ilcens_ and qua|ifi_
el_iclan,
P_ meth_
Ensurep_r grou_
exi_ _f_e use
WARNING: Do n_ cut or remove the grounding prong from the power
plugo
WARNING: Attaching the adapter g_und retinal to the wall
_ceptacle cover _rew does not ground the appliance unless _e
cover screw is metal and not insulted, and the wall receptacle is
grounded though the house widngo
WARNING: if you have any doubt whether the air conditioner is
proporly grounded, have the wall rece_cle and ci_uit choked _a
qualified electrician,
10 Room A# Con r

We strong_ discourage the use of an adapter due to potent_a_ s h_ards.
For temporary connections, u_ on_y a ULolisted adapte5 avaiiable from most
local hard#are Mores. Ensure that the _arge slot in. the adapter is.aligned with
the _arge slot in the r_eptac_e for a pro_r pofari_ connection.
To disconne_ the power cord from the adapter, use one hand on each to avoid
damaging the ground terminal Avoid frequentJy unplugging the power cord as
this can lead to eventual ground termina! damage,
iLiii_iii_iiiiiiiii'_iiiiiiiiiiiii!
!iiii_iiii!iii[ii_i!!iiiiii[i))iitiiiii¸
11!
_Me_J _rew
WARNING: Never u_ the app|lance with abroken adapter.
1iSVOLT UNiT
We _o_ di_oura,_ _e use of an extension _d_ to _e_a_ _ety
h_ards0For t.empo_ _tuations,u_ on_yCSA cert_ed a_ UL I_ 3-_
g_ed e_n_ _ds,mted 15 A,_25V.
N_wiring s_ld _ made i_ a_a_ with Ioca__d_l codes and _u_a_ions,
,_J_minum house winng may pose s_al p_oblems,C_suit a.qualifi_ el_cian,
230,2_, a_ 23,0_8 VOLT UNITS
These un_ are _ipped with a _re_p, rong g_urndi_ ping o_ the p_#er _ppl!'y cord, which
must be !pluggedinto a matting pre_y groun_ _remp._g _ll r_pta_ _ _ur pro_ion
_ai_s[ _siblle sh_ h_. If s_ch an outie| is_t _esen_, _=e mu_ be i_lled by a q_al_i_
e!_d_an i_ a_orda_ _i the N!_o_a_ EI,e_i_ C_e a_ _i _es a_ ordinances.
DO NOT USE AN!E_NS_ON CORD on _,2_, a_ _._ Volt units°
O_er'sMa#uat 11

Installation
To preventvibr_n and n_, make su_ the un_
@isins_il_ _reiy a_ firmly
In_ t_ unit _re the sunlig_ _ not shine
dirty on the unit.
The _tside of the _ must exter_ outwa_ for
at _ast i2' and there _ld _ _ _tactes, _
a fen_ or wa!l,within_" from the back of t_
cabl_t _u_ It willprew_ he_ radiati_ of the
cozener.
Restr_t_ _outsl_ _r willgreatly reduce the
_Iing e_dency ofthe air co_i_r.
Awning
CAU_ON: All side Iouve_ of _e _bi_ must _ain ex_ed to _e _de _ the
_uctu_
in=all _ unit a I_e _t_ so tP__k _ sligh_dyi_r _ thefront(_ 1/2").
This _11fo_ condens_ waterto flow to.the outside,
,_ In_I__ un_ _h _ _om a_t 30_-60 __e the _ level.
:Alilsu_o_ing _sh_=_d_ _ut_ _ fi_mwoo_,m_o,n_, or _'i
. Th_ _n_ isd_i_edi fo_Ins_on iIn_n_ double
hu_ _w_ _ua_ _nlng _hs from _"
_, 39%
.The _ _d _ win_ _h m_t o_n su_e_,
to al!owac!_r ve_ o_ni_ ef !6" _ _ _
the up_r s_ to the_ndow stool
|
interiorw_|!
23 %" rain,,
12 Room Air Co e_

!
2
3
5
NAME _ IPAR_
FRAME CUmAIN
SiLL_JPPO,_'
_LT
NUT
2
2
2
2
16
............................_REW ..............................................................................................................................
7 5
8 FOA_IP 1
9 DRAINPIPE 1
FOAF_IE 1
1! F_AMEGU_ 2
...............................w!NDOW ..............................................._........................................
13 FO,AM_E 1
ii i ii_i
r
PREPARATION OF ,CHASSIS
SCRE_RIVER(PhlIIps and H_d), RULER;, KN|_,, H_IMER, PENCIL, LEVEL
Remove the _r_s wh_h f_en t_ _net at both
sides a_ at:the _ek°
_ide _ unit from _Secabinet _ gdpping _ _ _,n
I_nd_ and pullingforw:ard while bm_r_ |he _binet.
C_ 1he win_' s_h _a! to 'the pr_r len_.
P'ee| offthe _ng and a_ch _e _m-PE @to th_
undets_ ,elt_ w_ndow_sh°
]
®
®
Remove the bac_ng _om _,e t_ ,up_r guide FoamoPE
@_1_ a_ it to _e _:em of the Up_r Gu|_,,
At_h _e upper geide _te _e t_ of the _in_ _ 3
T_e A _ews®.
Inse_ _e Frame GuI_s @ In_ _e bo_m _ the
_binet
insert _e Frame C_n ®into_e U_,er G_ide an_
Frame GUii_S =@ ,,
Fa_ _e cumins _e_ un_'_th 4 Ty_
A _rewe® o
Owner's Manuat 13

O_n tf'_ v,_, Mark a line _ _nter ofthe
Carefullypla_ the _inet on t_ wir_w s_! and
align_cen_r markon thebottom front_.h the
centerline mar_ in the_ndow stY,
Pullthe_m _nd_ sash downb_ind _e Up_r
Gu_e un_l it m_.
Win_ _pper_guide
_ _ pullthewi_w _d_ _9_ _at
_emen_ ofF_e Cu_n is _, F_m-pe _
Cabtn_
F_me CudaJln_ !
Loose_ as_mbie theSiI_Su_rt _ng the,_
_1_ _ _on _at _i p_ce _SilliSup_
r_at the outerm_ _n't _ sllJ
"Be ,_refullwhen you i_ll the _i_
(F_e, Guid_ are broken _tly)_
_A_c_= _Si_lSupport to the _ir_t trackho_ in
re_a_ to_e se_ _tion _i_ 2 T_ A
R_m Air Condi#oner

Ins_i?atlon
TI_ cabin_ _ould [_ in_li_ _ a _r !slight ti[It
(_u_ 1/2°) _wn_a_'d towa_ t_ ou_ide
Adju_ the bolt and the nut of SiIl S,up_d 0 for
b_a_ng the cabi_L
ii_ A_a_ the _bi_ to the _nd_ _1 by ddving
the _rews (_ (Ty_ B: Leith 16ram (5/8 in_)
_d below.) through tf_ front a_lie into win_
stY.
Pull each Fmm_ Cumin 0 fully _ each _nd_
_sh track, andi repeat st_ 2,
Screw_ype B)
Sil_Su_
iiiiiii;;?iii!iii[ii_i!!iii
A_h each Frame Cumin _ _ _ s_h _ing
_ews ® _ C).
CAUTION: Do n_ ddl! _ _|e in the _tt_
pan. _e unR i_ _ign_ to _e w_
approxi_ 1_ _of water in bottom _n,
_em is _ _ _ _ w_er if _e pan is
_ide the unit intothe_ineto
CAU_O_: For _ur_ ipu_, _inmli
_rews _y_ A) at c_in_s _d_.
Cut _e F_m-_p ® _ _e _p_ _r_ and in_
_tween _ _r w_n_owsashand _e lower
_nd_ sash,
Owner's Ma#ua} 15

Ins_flation
A_ t_ Win_' Lo_ng Bracket _w_ a Ty_
bracket
Atta_ _ trot gri_ie to t_ ._i_t _ i_rtJng _
_bs _ _ grilie intotl,_ _s on t_ _m-tt of _e
cabinet. Push _ gdlie in un_l it _ps into _.
Puff_,wn the [nl_ g_l}e and _re it _ a T_e
A screw _th_gh the front gillie.
_n_ inmi!_on of r,_m air condltion_ is
r_ com_Jed, _ _CTRICAL DATA _r
a_Ing _ _ to e!e_caJ out,t,
Room. Air er

Opera,rig Instructions
The controls !ook like this::
I I
iiiiiii;;?iii!iii[ii_i!!iii
Operationsta_ whenthiis_o,n is p,re_ and
stops _en you p_s the bu_3n again,
FANSPEED SELECTOR
Forir_reased _wer _ile _i_,, se_t a hig_r
fans_d,
3 steps: High --L_-- Med
The timer_n _ s_ to s_ and stopthe unitin
h_tliy in_men_ (upto i2 hour),
OPERATIONMODE SELECTOR
Se!_ coolingmodeto_ol ther_.
Select enemy s_er m_e forenergys_ing
Sel_t _n mode for b_ic _ntilaU_ _n o_mtion.
Sel_ dry mode _r dry o_ti_.
TEMiPERA_RE CONTROL
The _ermostat monito_ roomtempera_re to
mai_in _e desired tempe_um.
The _ermostat _n be set between 60_F~8_F
The unit _kes an avem_ of 30'minu_ _ adjust the
_m tempera'_re _ t°E
REMOTE CONTROLSENSOR
Ow,_,r's Mahdi

Operating/ns_tions
CAUTION:The Remote Con_ller will not fun_ion properly if strong
light strikes the sensor window _the air _nd_oner or if them are
ob_cies I_veen the Remote Controller and the air conditioner.
O_ra_on sta_swhenthisbu_ is,press_ and
stopswhenyou _e_ the bu_oin _ain.
Tem_Jm Con_l
The _ermostat rnonito_ _rn _mpe_tum
m_n_in _e desiredt_rature,
The _ermostat ,_n beset _n 60T~_'F
The unk _kes an _¢erage of 30 minutes to adjust_e
r_ tempe_ture by !°F. !
Fan Sp_d
Forin,crea_ power_ile _oling, sel_ ahigher
fan s_d.
3 ste_: I-I_h-Low-Med
V Temp ,L
Mode
ON_ Timer ..............
Thetimer_n beset tosta_ and stop_e unitin
houdyincrernen_(upto,12 _u_),
Oper_on Mo_ Sele_or ................................................................................................................................................................:_" .....
Sei_ _oling m_e _ _ _e room.
Sel_ energysavermodefor energy_ving
Sele_ _n mode for basic ventilaUngfan operaUon,
Sel_ d_ mo_efor _ o_ration..
How to Inse_
i° Retake _cover_m tim,backof_e remote
2. Inse_ _ batteries.
Be s_re _the po_y when ins_lli_ _e
Be s_re _at _th ba._edes a_ new.
3. Re-a_ the _r.
_t _ recharg_e
batte_. Su_ batter, s
differ_m sta_a_ dry _lls
in s_'_pe, dimer_ions, and!
Rem_ _ batteries _m
• e re,re _nt,_er ff _heair
_iti_er is not goingto _,
us_ _ an extend_ len_h
of tim.e.
Room, Air er

Operating Ins
Air Direction
,_fflow c_ be adiu_ted bych_ging the direction of the air
o:_ndit:io_qer's_ouvers_This can a_ increa,_ the oooling
efficiency of'the air conditioner,
Adjusting Horizonta! Air Flow Direction
Adjusting the ve_ical louvers left and right wiBchange
horizon_ _rflow.
Adjusting Medical Air Flow Direction
Adjusting the horizonta_vane up and down willchange
_i_l airflow, The ,Janecan be adjusted by nu_ing
the back o,rup and down o_the vane,,
Adjusting horizontal _r f!ow
R_ommended orientation of louvers
Adiust louvers to,face upwards when co,o,_ingto
maxiimize cooling effidency.
Adjusting vertical aJr f_ow
Vent Control
_r maximum _ling efficiency, CLOSE the vent, This wi!i aJ!owinternai air circulation_
OPEN the vent to, discharge s_le air.
CLOSE _ VENT _ OPEN
Owner_ Manua! 19

OperaUng
Drain Pipe
In Ihumid weather, excess water m_
_use the Base Pan to overflow. To
drain the water, remove the Drain Cap
and secure the Drain Pipe to _e rear
hole of the Ba_ Fan.
Press the drain pipe into _e hole by
pushing down and aw_ from bhe fins
to avoid injury.
_is air _nditioner is equipped _th a
slinger _n. (See drawing, _lc_,,v.)
The _n has an outer dng that runs in
• e water _at _lie_ in _e base pan
if it gets deep. That _ndensate is _en
picked up by the fan and expelled
_rough the _nden_r, making _e air
conditioner more efficient.
Be careful when inse_ing the d_in pi!_, Push away _m
the shma_ 'fin area to avoid slipping injudng youmelf.
Removal From Window
• arn the air _nditioner off,disconn_ the power _rd, iremove the L bracket, the
screws and Support Bra_et installed through the top and bo_om of _e guide
panels, and save _r reins_fla_on later, Close _e guide panels, K_ping a firm grip
on the air _nditioner, raise the sash, and _refulFi tilt _e air _ndiUoner bayard,
draining any _ndensate. Lift the air _nditioner from the _ndow and remove the
sash seal from be_en the windows.
Be sure to drain _L condensate from the air _nditioner. If you don't, it _uId run
out _ile you carry _e unit, ma_ng a mess and creating a slipping hazard. This
simpie step will save you mu_ cleaning and make a safer work e_ironment°
Room Air er
Other manuals for LWHD1200FR
2
Table of contents
Languages:
Other LG Air Conditioner manuals

LG
LG PQDSA1 User manual

LG
LG LSUH1865SU0 User manual

LG
LG LPUC306KA0 User manual

LG
LG SP122CM SY0 User manual

LG
LG ARNU12GTJC1 User manual

LG
LG PDI Premium PQNUD1S40 Operating instructions

LG
LG VM122H6 NJM0 User manual

LG
LG AMNW09GDBL0 User manual

LG
LG ARNU073CEA2 Instruction Manual

LG
LG LW6023IVSM User manual
Popular Air Conditioner manuals by other brands

AAON
AAON HB Series Installation and user manual

Surna
Surna ISOSTREAM SWFC Operating and maintenance manual

Fujitsu
Fujitsu AST18AB operating manual

Airwell
Airwell HDHC-025N-09M25 User & installation manual

Carrier
Carrier WeatherExpert 48N4 installation instructions

Trane
Trane Precedent DSJ150A Installation, operation and maintenance