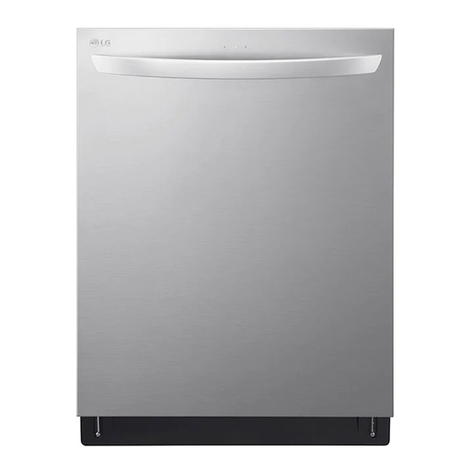
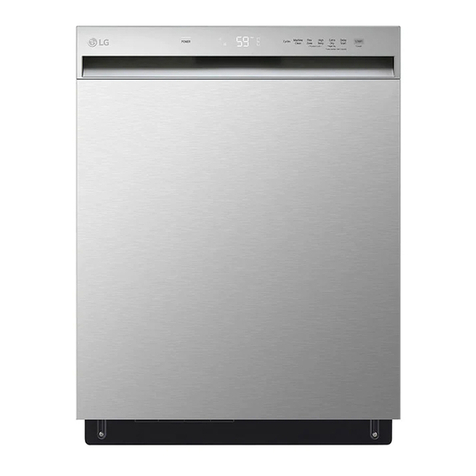
LG LD-05AW2 User manual

DISHWASHER
OWNER'S MANUAL
Please read this manual carefully before operating your
dishwasher and retain it for future reference.
MODEL : LD-05AW2

2
CONTENTS
SAFETY AND CAUTION 3
INSTALLATION INSTRUCTIONS 5
PARTS NAME 7
OPERATING INSTRUCTIONS 8~11
- FUNCTION OF CONTROL BUTTON 8
- HOW TO USE AND OPERATE 9
- HOW TO SAVE ENERGY 10
- DETERGENT SUPPLY 10
- LOADING & UNLOADING DISHES 11
PROGRAM 12
USER MAINTENANCE INSTRUCTIONS 13
TROUBLE SHOOTING GUIDE 14
SPECIFICATION 15

Safety and Caution
3
SAFETY AND CAUTION
• Read all instructions before using the
dishwasher.
• This manual contains very important
notes regarding the installation, use
and maintenance of your dishwasher.
• The manufacturer can not be
responsible for problems caused by
ignoring these safety and caution
instructions.
• Use the dishwasher only for its
intended function.
• This dishwasher is designed for normal
household use.
• Do not use the dishwasher for
industrial and commercial use, or other
purpose.
• Use only detergents or wetting agents
recommended for use in a dishwasher
and keep them out of the reach of
children.
• Do not use the detergent for hand
washing.
The detergent for dishwasher should be
used for normal operation.
• When loading items to be washed:
-locate sharp items so that they are not
likely to damage the door seal; and
-load sharp knives with the handles up
to reduce the risk of cut-type injuries.
• Do not wash plastic items unless they
are marked “dishwasher safe” or the
equivalent. For plastic items not so
marked, check the manufacturer’s
recommendations.
• Only suitable household utensils
should be placed in the dishwasher.
(Please avoid utensils; that are non-
heartresistant, metal decorated, etc.)
• Do not touch the heating element
during or immediately after use.
• Do not operate your dishwasher unless
all enclosure panels are properly in
place.
• Do not tamper with controls.
• Do not abuse, sit on, or stand on the
door or dish rack of the dishwasher.
• To reduce the risk of injury, do not
allow children to play in or on a
dishwasher.
• Under certain conditions, hydrogen gas
may be produced in a hot-water system
that has not been used for two weeks or
more. HYDROGEN GAS IS
EXPLOSIVE. If the hot-water system
has not been used for such a period,
before using the dishwasher turn on all
hot-water faucets and let the water
flow from each for several minutes.
This will release any accumulated
hydrogen gas. As the gas is flammable,
do not smoke or use an open flame
during this time.
• Remove the door to the washing
compartment when removing an old
dishwasher from service or discarding
it.
WARNING - When using your dishwasher, follow basic precautions,
including the following:
IMPORTANT SAFETY INSTRUCTIONS
SAFETY AND CAUTION
4
Safety and Caution
GROUNDING INSTRUCTIONS
This appliance must be grounded. In the event of a malfunction or
breakdown, grounding will reduce the risk of electric shock by providing a
path of least resistance for electric current. This appliance is equipped with a
cord having an equipment-grounding conductor and a grounding plug. The
plug must be plugged into an appropriate outlet that is installed and
grounded in accordance with all local codes and ordinances.
WARNING - Improper connection of the equipment-grounding conductor can
result in a risk of electric shock. Check with a qualified
electrician or service representative if you are in doubt whether
the appliance is properly grounded. Do not modify the plug
provided with the appliance; if it will not fit the outlet have a
proper outlet installed by a qualified electrician.
SAVE THESE INSTRUCTIONS
• Electrical connection must be in
accordance with the rating label.
• If the hot water exceeds 65˚C, adjust
the water heater setting. If the hot
water temperature can not be
maintained below 65˚C, the dishwasher
must be connected to cold water.
• Do not use any kinds of solvent in your
dishwasher. They may cause an
explosion or fire.
• Do not spray water on the appliance. It
may cause the failure of electric parts
or electric shock.
• This appliance must be positioned so
that the plug is accessible.
• Do not expose skin to vapor vent.
During operation, as hot steam may
scald.
• Do not use an extension cable or cord.
• If power supply cord is damaged, it
must only be replaced by the
manufacturer or its service agent or a
similar qualified person in order to
avoid a hazard.
• The appliance is not intended for use
by young children or infirm persons
without supervision.
• Young children should be supervised to
ensure that they do not play with the
appliance.
• Dishwasher detergents are strongly
alkaline. They can be extremely
dangerous if swallowed. Avoid contact
with skin and eyes and keep children
away from the dishwasher when the
door is open.
Check that the detergent receptacle is
empty after completion of the wash
cycle.

INSTALLATION INSTRUCTIONS
5
Installation Instructions
Step 1 :
PREPARE ELECTRICAL WIRING Step 2 :
INSTALLATION
1
1
2
3
2
3
This appliance must be supplied with
correct rating voltage and hertz as shown
on instruction manual, and connected to
an individual, properly grounded branch
circuit, protected by minimum 15 amp
circuit breaker or time delay fuse.
Wiring must be 2 wires with ground.
The power point must be in a accessible
location adjacent to and not behind the
dishwasher and within 1.2 meters of the
dishwasher side.
The power point must be correctly
earthed, if in doubt, have it checked by a
qualified Electrician. No other appliance
should be connected to the same plug
outlet by a double adapter or similar
plug.
CAUTION
For personal safety, remove house fuse or
open circuit breaker before installation. Do not
use an extension cord or adapter plug with
this appliance. Electrical and grounding
connections must comply with the national
electrical code/provincial and municipal code
and/or other local codes.
Connect the water supply hose to the
water faucet. ( The supply water
temperature should be below 65 to
avoid troubles. )
Connect the drain hose to the sink or
drain pipe. The drain height should be
between. 50 ~ 90 cm from the floor. If
not, the water may not be naturally
drained before operating.
Set the machine in the place you want to
install it . Then the machine should be
horizontally leveled.
3cm
Water Supply Hose
Drain Hose

INSTALLATION INSTRUCTIONS
6
Installation Instructions
Step 3 :
CONNECT DRAIN HOSE TO
DISHWASHER
1
2
Turn the drain connector at the back of
dishwasher to drain direction
Connect the drain hose to the drain
connector tightly using hose clamp.
Clamp
Drain Hose Water supply
Hose
Step 4 :
WATER SUPPLY CONNECTION
1
2
Connect the water supply pipe to the
water valve behind dishwasher as
shown in figure.
When connecting, the sealing tape or
sealing compound should be used to
avoid water leaks.
Make sure that the line is not kinked
or sharply bent.
Step 5 :
FINAL CHECK AND
ASSEMBLING
1
2
Securely hand tighten supply hose to
water supply.
Plug power cord into an earthed power
point and switch on.
Operate the dishwasher through one
cycle (Quick cycle is recommended)
to check for water leak and operating
conditions.
Shut off Valve To Dishwasher

Parts Name
7
PARTS NAME
1. Vapor vent
2. Door Handle
3. Control Panel
4. Power Switch
5. Power Cord
6. Cutlery Rack
7. Heater
8. Detergent Chamber
9. Spray Arm
10. Rack ASM
11. Filter ASM
Inlet Hose Drain Hose
Accessories

FUNCTION OF CONTROL BUTTON
8
Operating Instructions
Soak
Quick
Rinse/Hold
Program
1Program
2
Cycle
Start
Pause
Wash Rinse Dry
Heavy
Normal
Economy
Auto Power Off
1. Power
• For operating, press this button first for power on.
• After operating, this button automatically switches off for safety and energy saving.
• If the machine remains in pause mode keeps for over 10 minutes, the power is automatically
switches off for safety and energy saving.
• In case of irregular surge disturbances to the machine, the power may be automatically turned off
for safety.
2. Start / Pause
• With each pressing, start and pause is repeated.
• If the machine remains in pause mode for over 10 minutes, the power is automatically turned off.
3. Process Monitor
• Easy to check the process of the cycle.
- Lamp blinking : running
- Lamp off : finished
4. Program
• When the power is switched on, program is automatically set on normal.
• If you want to change the program, press this button and set the program you want.

HOW TO USE AND OPERATE
9
Operating Instructions
1. Install your dishwasher according to the installation instructions.(see page 5 )
2. Remove all packing or tape materials in the dishwasher carefully.
3. Open the door by pulling the door handle forwards.
4. Pull the rack.
5. Load the dishes to wash on the rack. (see page 11 )
6. Put the detergent into the detergent chamber.
7. Close the door tightly. If not, the machine will not operate.
Check the water supply tap is fully opened.
8. Power on by pressing the power switch button.
9. Press Start/Pause button one time when you want to operate normal program.
If you want to change the program, change the program by using the program button before pressing
Start/Pause button.
When operation is finished, the power switch button is automatically turned off
for safety and energy saving.
10. After operation, unload the dishes when necessary. (see page 11 )
11. Check the filter and if necessary, clean it.

Operating Instructions
10
HOW TO SAVE ENERGY
You can save energy (electricity and water) if you read this page carefully.
• Remove large food particles before loading.
• Run the dishwasher when it is fully loaded if possible.
• When the load is small or the soil is light, use the eco or quick program.
• If connecting the machine to a hot water supply, the total energy consumption will be less than in the
case of cold water supply.
DETERGENT SUPPLY
• Detergent must be put into the detergent chamber before starting every program except the Rinse &
Hold.
• Use the detergent only intended for household dishwashers. (ordinary hand washing detergent should
not be used, because the foam can interfere with proper operation.)
• The amount of detergent depends on the program. Refer to the guide table as below.
Detergent Chamber
Amount of Detergent(g)
16
13
10
16
7
No Detergent
Program
Heavy
Normal
Eco
Soak
Quick
Rinse & Hold

Operating Instructions
11
LOADING DISHES
UNLOADING DISHES
Well arranged dishes on the rack can get the best out of your machine.
As shown in the figure below, you can place dishes for 5 persons.
Rack
• Load dishes such as large plates, small plates, serving dishes, pots, pans, and cutlery. (in the cutlery
basket)
Cutlery Basket
Load the cutlery as spread out as possible.
CAUTION
• Unsuitable items for dishwasher
- Cutlery with wooden or bone handles that are joined by adhesive.
- Plastic, copper or tin items that cannot resist hot water.
- Plastic item that cannot stay in position by water spray.
• Take care to ensure the coated surface of the rack is not be damaged by sharp edges.
• It is recommended to cool the dishes for about 10 minutes after operating because the surface of dishes
is still hot. After operation, please fully open the door until dishes are dry.

Program
12
PROGRAM
• Cycle time can vary slightly due to the temperature of the water supply, etc.
• If you want to change after starting, turn the power switch off and restart from beginning.
Program
Wash
Soak
Drain Main
Wash Rinse1 Rinse2 Rinse3 Rinse4 15(min)
Rinse Dry Cycle
Time
67
60
47
78
22
2
Heavy
Normal
Eco
Soak
Quick
Rinse &
Hold

User Maintenance Instructions
13
USER MAINTENANCE INSTRUCTIONS
To prevent troubles and poor operating, it is important to check and care for
the filters and spray arms at intervals.
Filters
• Remove the rack first.
• Take the filters out with filter handle. • Clean them if necessary.
• Replace them in the reverse order.
Spray Arm
• Check that the water jet holes are not blocked by
food particles.
• When necessary to clean, remove the arm by
pulling up.
• Clean the spray arm and replace it pulling down.

Trouble Shooting Guide
14
TROUBLE SHOOTING GUIDE
When a problem occurs in your machine, call for service.
Before you call for service, check the below instructions to whether the
problem can be solved by yourself first.
• If, in spite of the above checks, the problem could not be solved, please call the service engineer.
Problem
The lamps do not come on when
the power switch on.
The machine does not start.
Water is not pumped away.
(Drain error message )
Overflow error message
Water is not supplied.
The spray arms does not rotate
smoothly.
White deposits are left on the
dishwasher after washing.
Washing results are not
satisfactory.
Possible Causes
¥ Plug is not properly inserted in the socket.
¥ Fuse blown or circuit breaker tripped.
¥ The electricity of the house was cut off.
¥ Door is not fully closed.
¥ The start button is not pressed.
¥ The drain hose is kinked.
¥ The filter is clogged. (Clean the filter.)
¥ The machine is inclined.
¥ The water supply valve is broken.
¥ Water tap is not opened.
¥ The water supply valve is broken.
¥ The mounting of spray arms is blocked by food
particles. (Clean the holes of the spray arm.)
¥ The amount of detergent set incorrectly.
¥ Incorrect amount of detergent.
¥ Utensils incorrectly arranged or overloaded.
¥ Filters are clogged.
¥ Water jet holes of spray arms blocked.
¥ Spray armsÕ rotation obstructed by utensils.
¥ Unsuitable program selected.
Wash Rinse Dry
Wash Rinse Dry
Soak
Quick
Rinse/Hold
Special

Specification
15
SPECIFICATION
Capacity
Dimension
Weight
Power Supply
Power Consumption
Water Consumption
Water Feed Pressure
5 Place settings
502 x 550 x 472 mm (W x D x H)
25 kg
See rating label
See rating label
See energy label
30 ~ 800 kPa
550mm
472mm
502mm

P/No.: 3828ED7001B
Table of contents
Other LG Dishwasher manuals

LG
LG LD-2157WSH User manual

LG
LG STEAMDISHWASHER LDF7932ST User manual

LG
LG LDF8812 User manual

LG
LG LDF9932ST - FULLY INTEGRATED DISHWASHER User manual

LG
LG LDF5678SS/00 User manual

LG
LG WZ-6805WF User manual

LG
LG D1420WF User manual

LG
LG D1444WF User manual

LG
LG LDF9810ST - Fully Integrated 6 Wash Cycles... User manual

LG
LG LDT7797 Series User manual