
- 9 -
• If you select the Sanitary feature, the Sanitary light
will blink until the water is heated to the sanitary
temperature level*. Once the sanitary temperature
level is reached, the light will stay on to indicate
that the sanitary temperature has been reached.
*NOTE: This high-temperature rinse sanitizes
dishware and glassware in accordance with
NSF/ANSI Standard 184 for residential
dishwashers. Certified dishwashers are not
intended for licensed food establishments.
• When you select Extra Rinse, an additional
rinse cycle is added.
• Rinse Only is a wash cycle described on
the previous page.
CHILD LOCK
Lamp will turn on when Child Lock
setting is on.
• To lock/unlock the buttons, press and hold the
Delicate and Rinse Only Buttons simultaneously
for 3 seconds with the door open.
• Lock the control buttons during cycle operation to
prevent settings from being changed.
RINSE AID
Refill with rinse aid when the lamp
turns on.
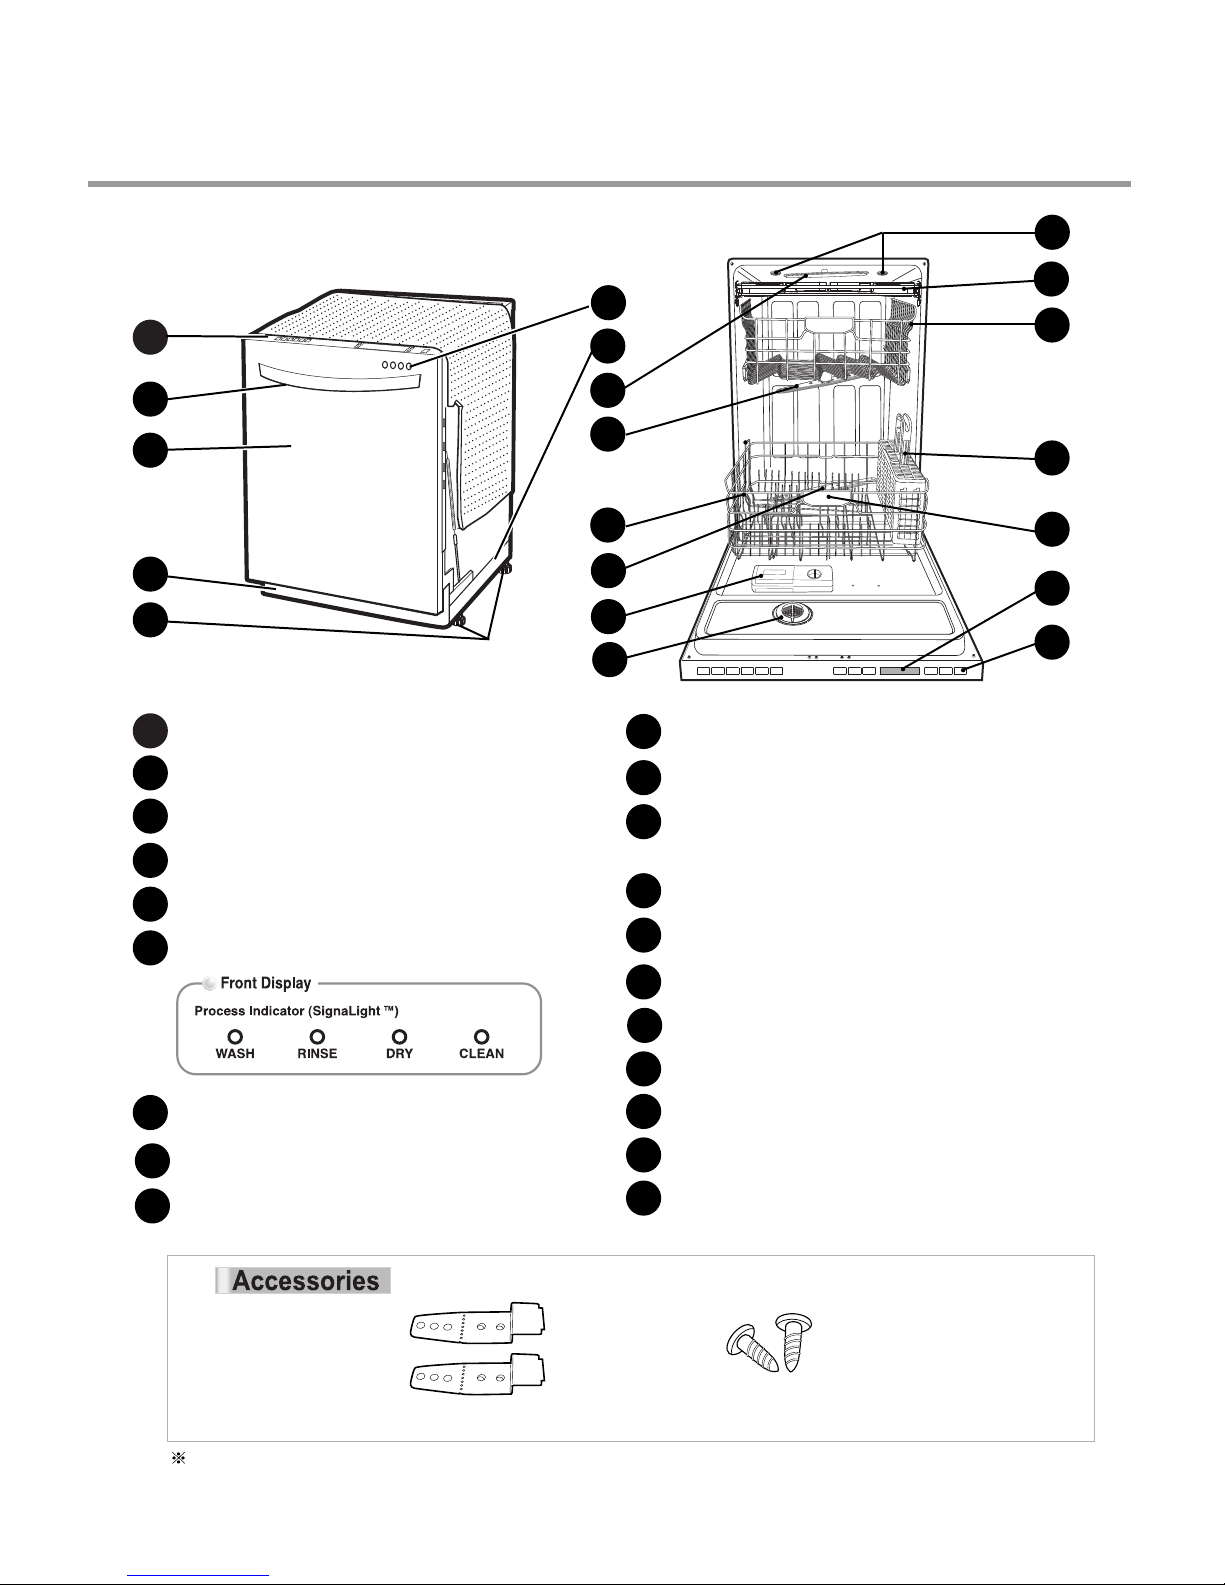
DIGITAL DISPLAY
The Digital Display on the control
panel shows the estimated cycle and
option times.
When the dishwasher is powered up, the display will
be blank. When the cycle and options are selected,
the display will show the total estimated time to
complete those selections. During operation, the
display shows the remaining estimated operating
time.
NOTES:
• The estimated time shown in the display does not
include delay times for heating water, etc.
• If Delay Wash is selected, the display shows the
delay time in hours.
HALF LOAD
• For small loads, you may use just the upper or
lower rack to save energy.
• Each press of the Half Load button cycles
berween upper rack only and lower rack only.
• If Half Load is not pressed, the dishwasher will
run normally, with upper and lower spray arms
operating alternately.
DELAY START
• To delay the start of a selected cycle, press
the Delay Start button.
• Each time Delay Start is pressed will delay
the start of the cycle by one additional hour.
• The delay start time can be set from 1 to 12
hours in one-hour increments.
STEAM
• Press the Steam button to add steam to a
selected cycle.
• The Steam symbol will be lighted on when the
STEAM option has been selected.
• The steam symbol will blink while steam is being
injected into the dishwasher.
POWER
• Pressing the Power button turns on power
to the controls.
• After the cycle is complete, the power
automatically turns off for safety and economy.
• If there is a power surge, power outage,
or disruption of any kind, the power will be
automatically turned off for safety, and the
cycle will need to be restarted.
3 4
wWARNING
Steam can cause burns. Use caution in
the area of the steam nozzle on the left
side of the dishwaher if the door is opened
during the steam portion of a cycle.
Contact with the steam or the steam nozzle
can cause burns.
4
MFL37554808(S/M) 2009.2.5 8:54 AM ˘`9 ‰¯¿ł–•¡˙¨‰”


F(B,U) User manual")


