1918
OPERATING SEQUENCE
Press the “power” button
When you press the “power”button, the
state of default program being set will be
displayed.
Check that there is rinse
aid and salt
The corresponding indicator lights will
illuminate if refilling is necessary.
Open the door and check
the filters
Ensure they are clean and properly
positioned (See “User Maintenance
Instructions”).
Load the dishes
Remove any scraps of food.
Pull the lower rack out and arrange the
dishes and cutlery in it.
Pull the upper rack out and arrange the
cups, glasses, etc. in it.
The indicator lights of the program and all
the phases the program consists of will
come on.
Before starting, the display window shows
the running time and the highest
temperature of the heating wash of the
selected program.
To start, press the “Start/Pause”button
(dial knob).
After starting, the display window shows
the remaining time and current
temperature in the dishwasher.
Select if necessary the washing on only
one rack by pressing the half load button.
Remember to load all dishes into
the selected rack.
The time in the display window will start
to decrease from minute to minute.
If the door is opened during the run of the
program a safety device ensures that the
machine stops.
Once the door is closed the program will
start from the point where it was
interrupted.
At the end of the washing
program
After operating, “end”is displayed on the
digital display for seconds and buzz sound
informs you that the program has ended
and the dishwasher automatically switches
off for safety and energy saving.
Ensure that the spray arms
can rotate freely
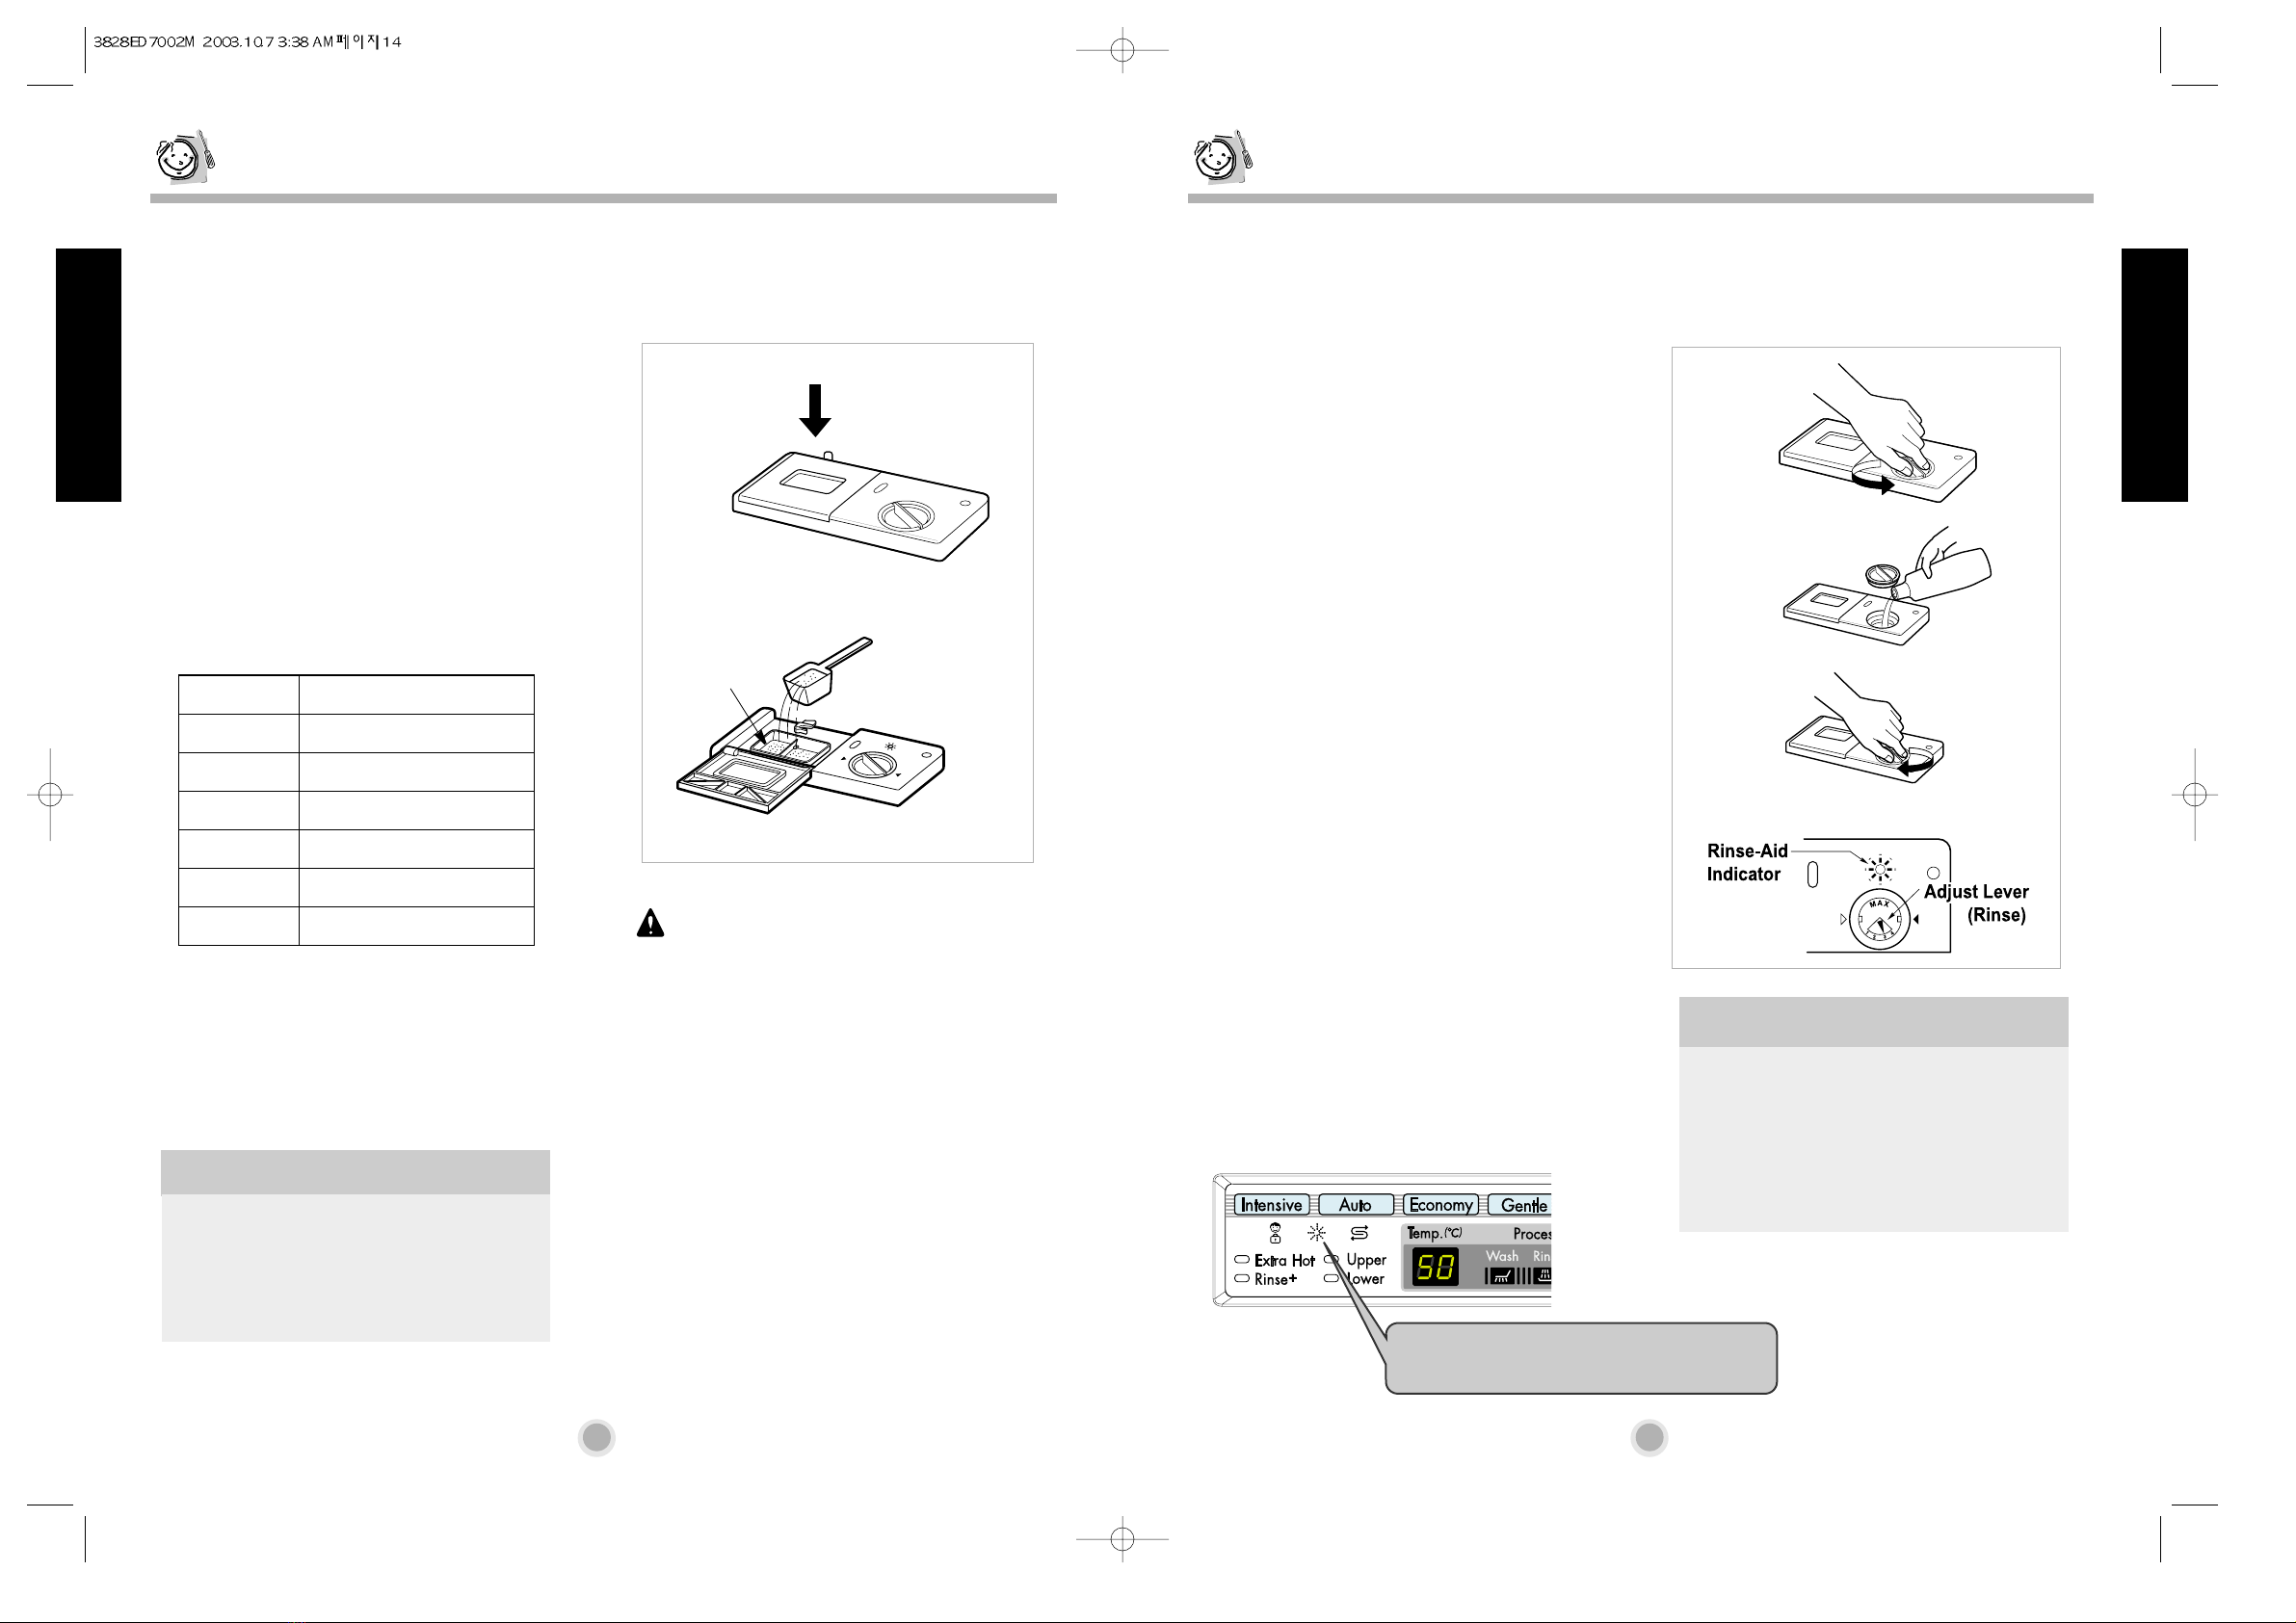
Measure out detergent
Add the required amount of detergent into
the dispenser. Close the detergent
dispenser lid.
Setting and starting the
program
Turn the dial knob to select the program.
If necessary, select the option function
corresponding to the desired program.
PROGRAM
Model : LD-2051WH / LD-2051SH / LD-2051MH
Auto Wash
During the Auto program, the degree of
soiling in the dishes is determined by the
amount of clouding of the water.
According the degree of soiling, the
program automatically adjust the washing
time, temperature, level of water jet, the
number of rinse.
As a result, the energy and water
consumption is kept as low as possible.
According to the turbidity of the water, the drain course may be deleted after pre-wash on
Intensive, Auto and Gentle program.
Intensive Wash
This program is for very heavily soiled
loads including pots, pans and casserole
dishes which may have dry food residue.
Quick Wash
This program is for that quick wash of
lightly soiled recently used dishes and
cutlery.
Economy Wash
This program is for light soiled everyday loads.
Gentle Wash
This program is for washing delicate items
like glasses.
The “F”on display means that the sensor
is sensing the status of the dishwasher.
Operating Sequence
Program
CAUTION
Do not load the items in upper rack with
the lower rack is pulled out and loaded.
CAUTION
Empty the lower rack first and then the upper
one;this will avoid water dripping from the
upper rack onto the dishes in the lower one.
Warning
In general it is not advisable to open the door
while the machine is working;
If the door is opened however, a safety device
ensures that the machine stops.
Care must be taken if the door is opened during
the hot phase or immediately after a program has
finished, as steam may escape.