manuals.online logo
Brands
  1. Home
  2. •
  3. Brands
  4. •
  5. LG
  6. •
  7. Dishwasher
  8. •
  9. LG SDWB24S3 User manual

LG SDWB24S3 User manual

LG STUDIO
HOME APPLIANCES
© 2023 LG Electronics USA, Inc. All rights reserved. "LG Life’s Good" is a registered trademark of LG Corp. All other product and brand names are trademarks or registered trademarks of their respective owners. Design, features and specifications are subject to
change without notice. Non-metric weights and measurements are approximate. Some features may require Internet access. Content and services may vary by product and are subject to change without notice. 5/12/23
KEY FEATURES
1-Hour Wash & Dry Cycle
QuadWash® Pro
Dynamic Heat Dry™
TrueSteam®
Height Adjustable 3rd Rack
ThinQ® Technology with ThinQ Care
PRODUCT FEATURES
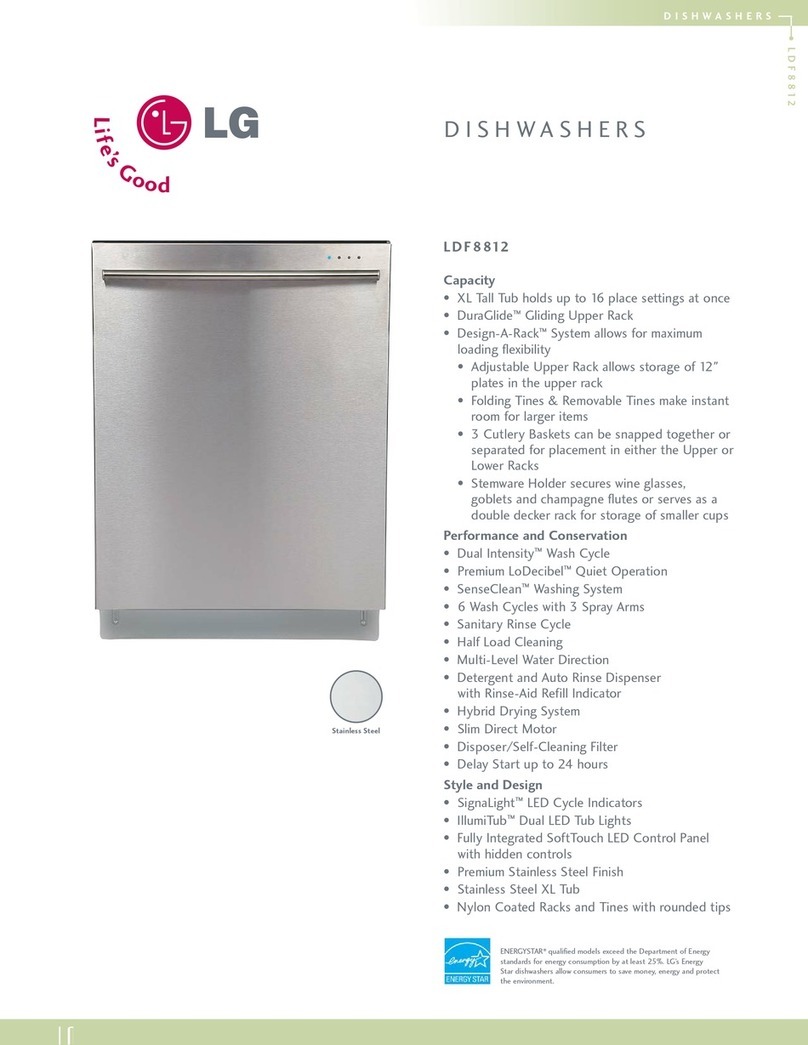
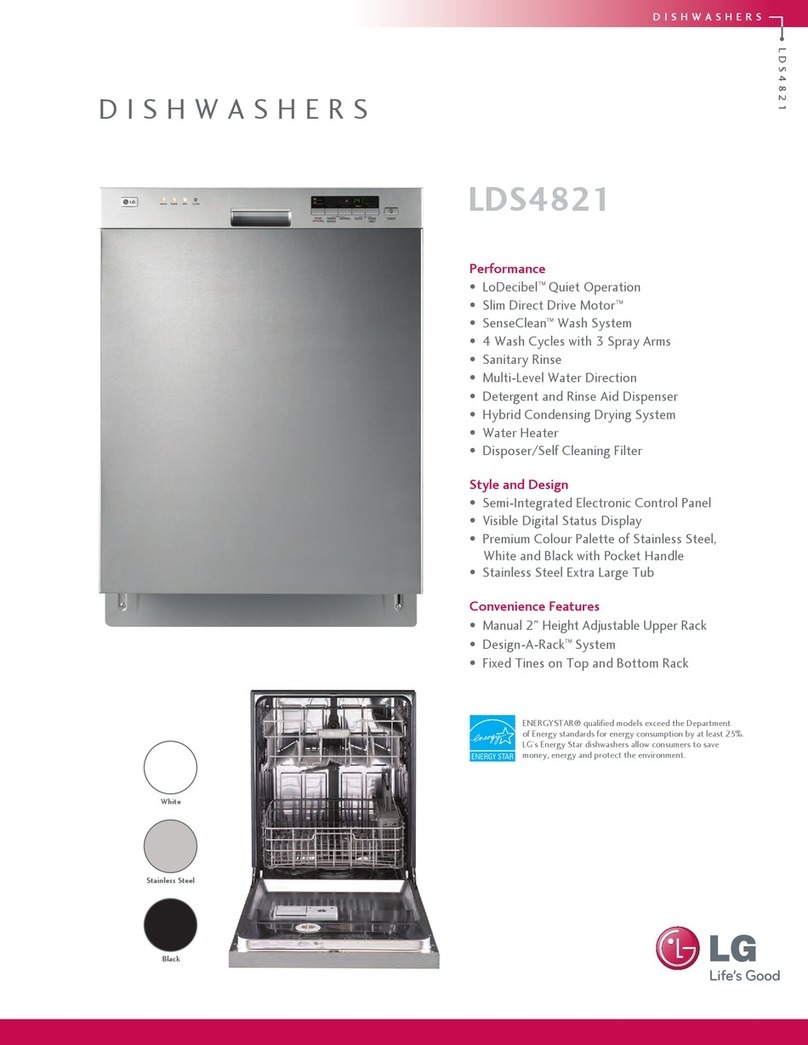
SDWB24S3
Top Control Wi-Fi Enabled Dishwasher
CAPACITY
Total Place Settings 15
Maximum Height of Upper Rack 7.1”
Maximum Height of Lower Rack 12.5”
RACKS AND BASKETS
EasyRack™ Plus System Yes
Fold Down Tines Yes (Fully on Upper & Fully (Smart) on Lower)
Rack Handle / Deco Yes (Upper & Lower)
Rack Color (Handle / Tine) Dark Gray / Dark Gray
Cup Rack Yes
Cup Rack Color Dark Gray
Stemware Holder Yes
Height-Adjustable Yes (Easy One Touch (3 Level))
Stemware Holder Yes
Cutlery Baskets Yes
Height Adjustable 3rd Rack Yes
Cutlery Baskets Yes
Glide Rail Upper
Glide Wheel Lower
STYLE AND DESIGN
Colors PrintProof™ Stainless Steel
Status Indicators 3 Indicator Lights
Remaining Time indicator LED
Tub Material NeveRust® Stainless Steel
Tub Light Yes
FEATURES
Number of Wash Cycles 10 (Auto, Heavy, Delicate, Refresh, Normal, 1-Hour,
Download Cycle, Machine Wash, Rinse, Express)
Number of Options
8 (Flex Zone, Steam, High Temp, Dry Boost, Delay Start
(Up to 12 Hours), Control Lock, Night Dry, Remote
Start)
TrueSteam® Yes
Quad Wash™ Yes
SenseClean Wash System Yes
Vario Wash Yes
No. of Spray Arms 3 (Top, Upper, Lower)
Detergent and Rinse-Aid Dispenser Yes
Drying System Dynamic Dry+
End of Cycle Indicator Beeper + END indication on display
Hidden Water Heater Yes
Safety Float Switch (Leaks) Yes
Soil (Turbidity) Sensor Yes
DirectDrive Motor™ Yes
LoDecibel Quiet Operation 40dBA
Tub Insulation Damping Sheet, Sound Absorbing Material (felt), Base
BPA-Free Nylon Coated Racks and Tines Yes
Anti-Bacterial Treatment (Drain hose) Yes
Balanced Door Yes
QUAD ARM
STS Deco Yes
Body Color Pearl Dark Gray
Nozzle Color Orange
SMART FEATURES
Wi-Fi Enabled Yes
POWER RATINGS
ENERGY STAR® Qualied Yes
CEE Tier 1
Energy Use (kWh/Year) 238 kWh/ Year
Water Use (Gallons/Cycle) 2.9
DIMENSIONS/CLEARANCES/WEIGHT
Product Dimensions (W x H x D) (in) 23 3/4” x 33 5/8” x 24 5/8”
Depth with Door Closed (Handle) (in) 26 13/16”
Depth with Door Open (in) 49 1/4”
Carton Dimensions (W x H x D) (in) 28 1/32” x 29 5/8” x 34 7/8”
Clearances (W x H x D) 24” x 24” x 33 5/8”
Product Weight (lbs.) 97 lbs.
Carton Weight (lbs.) 110 lbs.
WARRANTY
Labor & Parts
2 Year
Main Control Board and Rack Parts
5 Years
Stainless Steel Door Liner and Tub
5 Years
Direct Drive Motor
10 Years
UPC CODES
SDWB24S3 (PrintProof™ Stainless Steel) 195174054734
LG STUDIO
HOME APPLIANCES
23 5/8" - 24"
(600 - 610 mm)
Min. 23 5/8"
(600mm)
32 1/4 " - 34 1/2 "
(820 - 876 mm)
23 5/8" - 24"
(600 -610mm)
Min. 23 5/8"
(600mm)
32¼"-34½"
(820 - 876 mm)
32¼"-34½"
(820 - 876 mm)
4 "
(100 mm)
3 "
(75 mm)
PREPARING WATER AND ELECTRICAL CONNECTIONS
SDWB24S3
Top Control Wi-Fi Enabled Dishwasher
QUICK INSTALL & CLEARANCES
For full installation directions/clearances please refer to
the corresponding User Manual and Installation Guide.
IMPORTANT
DIMENSIONS / CLEARANCES / WEIGHT
Product Dimensions (in) (W x H x D) 23 3/4” x 33 5/8” x 24 5/8”
Depth with Door Closed (Handle) (in) 26 13/16” ’
Depth with Door Open (in) 49 1/4”’
Carton Dimensions (in) (W x H x D) 28 1/32” x 29 5/8” x 34 7/8”
POWER RATINGS
ENERGY STAR® Qualified Yes
CEE Tier 1
Energy Use (kWh/Year) 238 kWh/Year
Water Factor (WF) 2.9
• This dishwasher is designed to work with a cabinet front panel (not
provided) which slides up as the door is opened. Before installing the
dishwasher, check the weight and dimensions of the cabinet front
panel you have selected.
• The dishwasher can support panels
weighing 5.5 – 24.2 lb (2.5 – 11 kg).
• If the cabinet panel weighs between 17.6
lb (8 kg) and 24.2 lb (11 kg), adjust the
door spring tension to make the door easier
to open. See the Adjusting Door Spring
Tension topic in the Owners Manual.
• For best results, the width of the wood
panel should be 1/4” (6 mm) less than
the width of the cabinet.
▲
!WARNING
• Installation damage is not
covered by the warranty,
and leaks caused by
improper installation may
result in property damage.
• Do not use existing holes unless they are in the target area.
• Failure to properly locate the hole for the water and drain lines
may prevent the dishwasher from installing ush with the
cabinets and could result in kinked, pinched, crushed, stressed
or damaged lines.
CHECKING THE CABINET PANEL
PREPARING CABINET OPENING
▲
!WARNING
Water Connection
• Do not reuse an old hose. Use only a new hose when installing the dishwasher. The
old hose could leak or burst causing ooding and property damage. Contact an LG
Customer Information Center for assistance in buying a new hose.
Electrical Connection
• Use a time-delay fuse or circuit breaker.
• Operate this appliance with the correct voltage as shown in this manual and on the
rating plate.
• The wiring must be grounded properly. If in doubt, have it checked by a qualied
electrician.
• The appliance and outlet must be positioned so that the plug is easily accessible.
• Do not use an extension cable or adapter with this dishwasher.
• Do not overload the outlet with more than oneappliance.
• It is the personal responsibility and obligation of the product owner to have a
proper outlet installed by a qualied electrician.
▲
!CAUTION
• When connecting the dishwasher water supply line to the house water supply,
sealing tape or compound should be used on pipe threads to avoid leaks. Tape or
compound should not be used on compression ttings.
• Connect the dishwasher to a hot water supply with a temperature range between
120 °F (49 °C) and 149 °F (65 °C). This temperature range provides the best
washing results and shortest cycle time. To prevent damage to dishes, the
temperature should not exceed 149 °F (65 °C).
• Water supply pressure must be between 20 psi and 80 psi (140–550 kPa). If the
water supply pressure exceeds 80 psi, a pressure reducing valve must be installed.
Otherwise premature failure of the inlet valve may occur.
© 2023 LG Electronics USA, Inc. All rights reserved. "LG Life’s Good" is a registered trademark of LG Corp. All other product and brand names are trademarks or registered trademarks of their respective owners. Design, features and specifications are subject to
change without notice. Non-metric weights and measurements are approximate. Some features may require Internet access. Content and services may vary by product and are subject to change without notice. 2/13/23
23 1/2”
(598 mm)
18”
(455 mm)
32 1/16"
(815 mm)
21 7/8”
(554 mm)
23 1/4 " - 23 3/4 " (590 - 603 mm)
5/8 - 7/8 "
(16 - 22 mm)
28 3/8 " - 30 11/16"
(720 - 780 mm)
5.5 lb (2.5 kg) ≤ ≤ 24.2 lb (11 kg)
• This dishwasher is designed to t a standard dishwasher opening.
An opening may be needed on both sides to route plumbing and
electrical connections.
• To ensure proper drainage, install the dishwasher no more than 12 ft. (3.65 m)
from the sink.
• The location must have sufcient space for the dishwasher door to open easily
and provide at least 0.1” (2 mm) between the dishwasher and the cabinet sides.
• If installing the dishwasher in a corner, leave a minimum of 2” (50 mm) between
the dishwasher and the adjacent wall.
• The adjacent wall must be free of obstructions.
• For ush installations only, you may remove the cabinet brace inside the cabinet.
Choosing the Proper Location
• Select a location as close to the sink as
possible for easy connections to water
supply line, drain hose and electrical
connection.
• To allow for proper clearance of
plumbing and electrical, use the
template included with the literature to
determine the clearance on the side of
the cabinet where the cabinet meets
the back wall. Using a 2 1/2” diameter
hole saw, drill a hole in the target area
as shown on the template.
23 5/8" - 24"
(600 - 610 mm)
Min. 23 5/8"
(600mm)
32 1/4 " - 34 1/2 "
(820 - 876 mm)
23 5/8" - 24"
(600 -
610mm)
Min. 23 5/8"
(600mm)
32¼"-34½"
(820 - 876 mm)
32¼"-34½"
(820 - 876 mm)
4 "
(100 mm)
3 "
(75 mm)
23 5/8" - 24"
(600 - 610 mm)
Min. 23 5/8"
(600mm)
32 1/4 " - 34 1/2 "
(820 - 876 mm)
23 5/8" - 24"
(600 -
610mm)
Min. 23 5/8"
(600mm)
32¼"-34½"
(820 - 876 mm)
32¼"-34½"
(820 - 876 mm)
4 "
(100 mm)
3 "
(75 mm)
8 1/8"
(207 mm)
6 11/16"
(170 mm)
5 15/16"
(150 mm)
13 9/16"
(345 mm)
Installing Fleece Tape
• Attaching eece tape between the dishwasher
door and the cabinet panel will reduce the
friction when the door slides up and down.
• Install the eece tape close to the bracket
openings to make sure the door slides smoothly.
• Peel the eece tape strips off the carrier and
attach them to the door.
23 1/4 " - 23 3/4 " (590 - 603 mm)
5/8 - 7/8"
(16 - 22 mm)
28 3/8 " - 30 11/16"
(720 - 780 mm)
5.5 lb (2.5 kg) ≤ ≤ 24.2 lb (11 kg)

Other manuals for SDWB24S3

1

Other LG Dishwasher manuals

LG LDS 5811WW User manual

LG

LG LDS 5811WW User manual

LG LSDT9908ST User manual

LG

LG LSDT9908ST User manual

LG LDS 5811BB User manual

LG

LG LDS 5811BB User manual

LG LSDF795ST User manual

LG

LG LSDF795ST User manual

LG LD-05AW2 User manual

LG

LG LD-05AW2 User manual

LG LDT7797 Series User manual

LG

LG LDT7797 Series User manual

LG LDF8874ST User manual

LG

LG LDF8874ST User manual

LG LDF9810BB User manual

LG

LG LDF9810BB User manual

LG DFB415 Series User manual

LG

LG DFB415 Series User manual

LG D1417 Series User manual

LG

LG D1417 Series User manual

LG LDF9932ST - FULLY INTEGRATED DISHWASHER User manual

LG

LG LDF9932ST - FULLY INTEGRATED DISHWASHER User manual

LG LSDF9963 Series User manual

LG

LG LSDF9963 Series User manual

LG LDT566 SERIES User manual

LG

LG LDT566 SERIES User manual

LG LDF8812 User manual

LG

LG LDF8812 User manual

LG LDF8874ST User manual

LG

LG LDF8874ST User manual

LG LDS6040ST User manual

LG

LG LDS6040ST User manual

LG LSDTS9882S Instructions for use

LG

LG LSDTS9882S Instructions for use

LG LSDF996 SERIES User manual

LG

LG LSDF996 SERIES User manual

LG Studio LSDF995ST User manual

LG

LG Studio LSDF995ST User manual

LG LDF8572ST User manual

LG

LG LDF8572ST User manual

LG D1444 Series User manual

LG

LG D1444 Series User manual

LG D1441 Series User manual

LG

LG D1441 Series User manual

LG LDT7808ST User manual

LG

LG LDT7808ST User manual

LG Studio LSDF995ST User manual

LG

LG Studio LSDF995ST User manual

Popular Dishwasher manuals by other brands

GE GSD3900G00BB owner's manual

GE

GE GSD3900G00BB owner's manual

Gorenje GV64161 operating instructions

Gorenje

Gorenje GV64161 operating instructions

Jackson CONSERVER  XL-E Installation, operation and service manual

Jackson

Jackson CONSERVER XL-E Installation, operation and service manual

GE GLD3806T Dimensions and installation information

GE

GE GLD3806T Dimensions and installation information

AEG FAVORIT 66702 VI1P user manual

AEG

AEG FAVORIT 66702 VI1P user manual

Kenmore 587.15072 Use and care guide

Kenmore

Kenmore 587.15072 Use and care guide

Amica GSP 530 920 E operating instructions

Amica

Amica GSP 530 920 E operating instructions

Bosch SMS6ZDW48G user manual

Bosch

Bosch SMS6ZDW48G user manual

AEG FSS5367XZ user manual

AEG

AEG FSS5367XZ user manual

Maytag JET CLEAN II JDB1100AW Service manual

Maytag

Maytag JET CLEAN II JDB1100AW Service manual

Bosch SMV4HTX26G user manual

Bosch

Bosch SMV4HTX26G user manual

Jackson JP-24BPNSU Technical manual

Jackson

Jackson JP-24BPNSU Technical manual

ETNA TFI8014ZT/E02 Instructions for use

ETNA

ETNA TFI8014ZT/E02 Instructions for use

Asko D5233 Instrucciones de funcionamiento

Asko

Asko D5233 Instrucciones de funcionamiento

Indesit DIFP 36 operating instructions

Indesit

Indesit DIFP 36 operating instructions

Zanussi Electrolux ZDF 301 Instruction book

Zanussi Electrolux

Zanussi Electrolux ZDF 301 Instruction book

Omega DW2006 Installation and operating instructions

Omega

Omega DW2006 Installation and operating instructions

Zanussi ZDT24003FA user manual

Zanussi

Zanussi ZDT24003FA user manual

manuals.online logo
manuals.online logoBrands
  • About & Mission
  • Contact us
  • Privacy Policy
  • Terms and Conditions

Copyright 2025 Manuals.Online. All Rights Reserved.