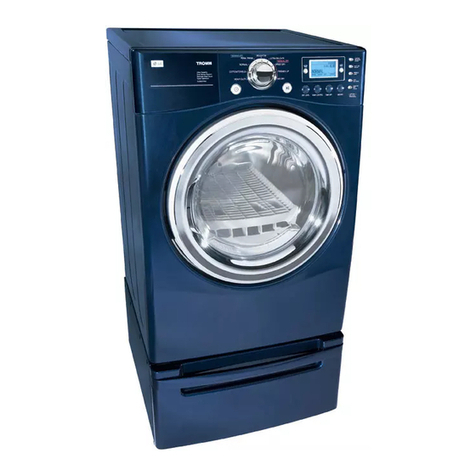
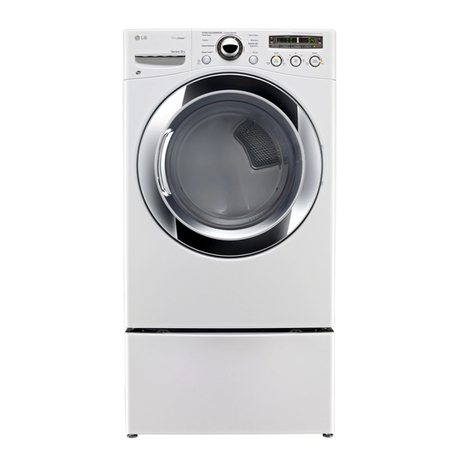
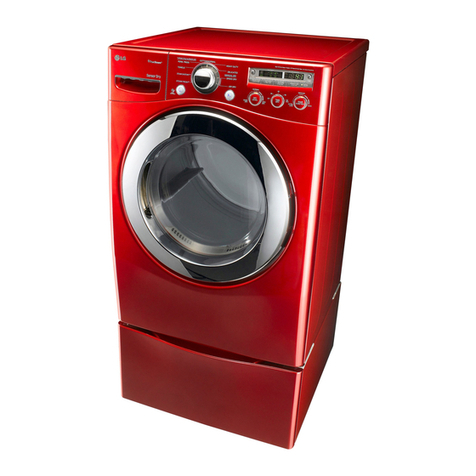
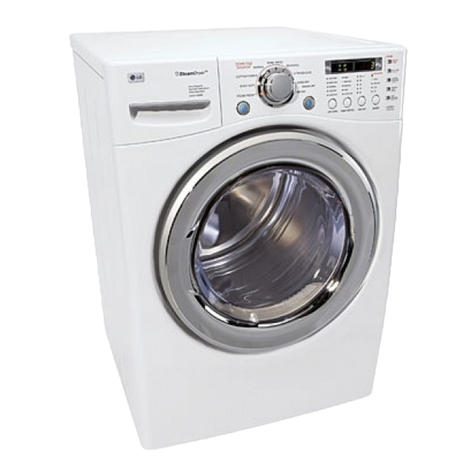
LG DLE4801W User manual

OWNER’S MANUAL
DRYER
DLE4801W DLG4802W
Before beginning installation, read these instructions carefully. This
will simplify installation and ensure that the dryer is installed correctly
and safely. Leave these instructions near the dryer after installation
for future reference.
P/No. 3828EL2001F www.lg.com
ENGLISH ESPAÑOL

2
SPECIAL FEATURES
EASY-TO-USE CONTROL PANEL
An entire selection of user-friendly functions make operating the dryer easy.
EASY-ACCESS REVERSIBLE DOOR
The wide-opening door provides easy access for loading and unloading. The door hinge can be reversed to adjust for installation location.
FLOW SENSE™ DUCT BLOCKAGE SENSING SYSTEM INDICATOR
The FLOW SENSE™ duct blockage sensing system detects and alerts you to blockages in the ductwork that reduce exhaust flow from the
dryer. Clean exhaust systems increase efficiency and reduce drying times.
SMARTDIAGNOSIS™
Should you experience any technical difficulty with your dryer, it has the capability of transmitting data via your telephone to the
Customer Information Center. The call center agent records the data transmitted from your machine and uses it to analyze the issue,
providing a fast and effective diagnosis (Refer to page 34).
SPECIAL FEATURES
C
E
R
T
I
F
I
E
D
D
E
S
I
G
N

3
ENGLISH
IMPORTANT SAFETY INSTRUCTIONS
READ ALL INSTRUCTIONS BEFORE USE
WWARNING
For your safety, the information in this manual must be followed to minimize the risk of fire or explosion, electric shock, or to
prevent property damage, injury to persons, death.
Your Safety and the safety of others is very important.
We have provided many important safety messages in this manual and on your appliance. Always read and obey all safety messages.
This is the safety alert symbol.
This symbol alerts you to potential hazards that can kill or hurt you and others.
All safety messages will follow the safety alert symbol and either the word DANGER, WARNING or CAUTION.
These words mean:
WDANGER
You will be killed or seriously injured if you don’t immediately follow instructions.
WWARNING
You can be killed or seriously injured if you don’t follow instructions.
WCAUTION
You may be slightly injured or cause damage to the product if you do not follow instructions.
All safety messages will tell you what the potential hazard is, tell you how to reduce the chance of injury, and tell you what can happen if
the instructions are not followed.
t%POPUJOTUBMMBDMPUIFTESZFSXJUIGMFYJCMFQMBTUJDWFOUJOHNBUFSJBMT*GGMFYJCMFNFUBMGPJMUZQFEVDUJTJOTUBMMFEJUNVTUCFPG
a specific type identified by the appliance manufacturer as suitable for use with clothes dryers. Flexible venting materials are
known to collapse, be easily crushed, and trap lint. These conditions will obstruct clothes dryer airflow and increase the risk of
fire.
t%POPUTUPSFPSVTFHBTPMJOFPSPUIFSGMBNNBCMFWBQPSTBOEMJRVJETJOUIFWJDJOJUZPGUIJTBQQMJBODFPSBOZPUIFSBQQMJBODFT
t*OTUBMMBUJPOBOETFSWJDFNVTUCFQFSGPSNFECZBRVBMJGJFEJOTUBMMFSTFSWJDFBHFODZPSUIFHBTTVQQMJFS
t*OTUBMMUIFDMPUIFTESZFSBDDPSEJOHUPUIFNBOVGBDUVSFSTJOTUSVDUJPOTBOEMPDBMDPEFT
t4BWFUIFTFJOTUSVDUJPOT
8)"550%0*':064.&--("4
%POPUUSZUPMJHIUBNBUDIPSDJHBSFUUFPSUVSOPOBOZHBTPSFMFDUSJDBMBQQMJBODF
%POPUUPVDIBOZFMFDUSJDBMTXJUDIFT%POPUVTFBOZQIPOFJOZPVSCVJMEJOH
3. Clear the room, building, or area of all occupants.
*NNFEJBUFMZDBMMZPVSHBTTVQQMJFSGSPNBOFJHICPSTQIPOF'PMMPXUIFHBTTVQQMJFSTJOTUSVDUJPOTDBSFGVMMZ
*GZPVDBOOPUSFBDIZPVSHBTTVQQMJFSDBMMUIFGJSFEFQBSUNFOU
W
IMPORTANT SAFETY INSTRUCTIONS

4
IMPORTANT SAFETY INSTRUCTIONS
READ ALL INSTRUCTIONS BEFORE USE
WWARNING
For your safety, the information in this manual must be followed to minimize the risk of fire or explosion, electric shock, or to
prevent property damage, injury to persons, death.
#"4*$4"'&5:13&$"65*0/4
WWARNING
To reduce the risk of fire, electric shock, or injury to persons when using this appliance, follow basic precautions, including the following:
$"-*'03/*"4"'&%3*/,*/(8"5&3"/%509*$&/'03$&.&/5"$5
This act requires the governor of California to publish a list of substances known to the state to cause cancer, birth defects, or other
reproductive harm and requires businesses to warn customers of potential exposure to such substances.
Gas appliances can cause minor exposure to four of these substances, namely benzene, carbon monoxide, formaldehyde, and soot, caused
primarily by the incomplete combustion of natural gas or LP fuels.
Properly adjusted dryers will minimize incomplete combustion. Exposure to these substances can be minimized further by properly
venting the dryer to the outdoors.
t3FBEBMMJOTUSVDUJPOTCFGPSFVTJOHUIFESZFS
t#FGPSFVTFUIFESZFSNVTUCFQSPQFSMZJOTUBMMFEBTEFTDSJCFEJO
this manual.
t%POPUQMBDFJUFNTFYQPTFEUPDPPLJOHPJMTJOZPVSESZFS*UFNT
contaminated with cooking oils may contribute to a chemical
reaction that could cause a load to catch fire.
t%POPUESZBSUJDMFTUIBUIBWFCFFOQSFWJPVTMZDMFBOFEJOXBTIFE
in, soaked in, or spotted with gasoline, dry-cleaning solvents, or
other flammable or explosive substances as they give off vapors
that could ignite or explode.
t%POPUSFBDIJOUPUIFESZFSJGUIFESVNPSBOZPUIFSQBSUJT
moving.
t%POPUSFQBJSPSSFQMBDFBOZQBSUPGUIFESZFSPSBUUFNQUBOZ
servicing unless specifically recommended in this Use and Care
Guide or in published user-repair instructions that you understand
and have the skills to carry out.
t%POPUUBNQFSXJUIDPOUSPMT
t#FGPSFUIFESZFSJTSFNPWFEGSPNTFSWJDFPSEJTDBSEFESFNPWFUIF
door to the drying compartment.
t%POPUBMMPXDIJMESFOUPQMBZPOPSJOUIFESZFS$MPTFTVQFSWJTJPO
of children is necessary when the dryer is used near children.
t%POPUVTFGBCSJDTPGUFOFSTPSQSPEVDUTUPFMJNJOBUFTUBUJDVOMFTT
recommended by the manufacturer of the fabric softener or
product.
t%POPUVTFIFBUUPESZBSUJDMFTDPOUBJOJOHGPBNSVCCFSPSTJNJMBSMZ
textured rubber-like materials.
t,FFQBSFBBSPVOEUIFFYIBVTUPQFOJOHBOEBEKBDFOUTVSSPVOEJOH
areas free from the accumulation of lint, dust, and dirt.
t5IFJOUFSJPSPGUIFESZFSBOEFYIBVTUWFOUTIPVMECFDMFBOFE
periodically by qualified service personnel.
t%POPUJOTUBMMPSTUPSFUIFESZFSXIFSFJUXJMMCFFYQPTFEUPUIF
weather.
t"MXBZTDIFDLUIFJOTJEFPGUIFESZFSGPSGPSFJHOPCKFDUT
t$MFBOMJOUTDSFFOCFGPSFPSBGUFSFBDIMPBE
t%POPUTUPSFQMBTUJDQBQFSPSDMPUIJOHUIBUNBZCVSOPSNFMUPO
top of the dryer during operation.
IMPORTANT SAFETY INSTRUCTIONS

5
ENGLISH
IMPORTANT SAFETY INSTRUCTIONS
READ ALL INSTRUCTIONS BEFORE USE
WWARNING
For your safety, the information in this manual must be followed to minimize the risk of fire or explosion, electric shock, or to
prevent property damage, injury to persons, death.
(306/%*/(*/4536$5*0/4
WWARNING
Improper connection of the equipment-grounding conductor can result in a risk of electric shock. Check with a qualified electrician or
service person if you are in doubt that the appliance is properly grounded.
4"'&5:*/4536$5*0/4'03*/45"--"5*0/
WWARNING
To reduce the risk of fire, electric shock, or injury to persons when using this appliance, follow basic precautions, including the following:
t1SPQFSMZHSPVOEESZFSUPDPOGPSNXJUIBMMHPWFSOJOHDPEFT
and ordinances. Follow details in the installation instructions.
Electric shock can result if the dryer is not properly grounded.
tBefore use, the dryer must be properly installed as described
in this manual. Electric shock can result if the dryer is not properly
grounded.
t*OTUBMMBOETUPSFUIFESZFSXIFSFJUXJMMOPUCFFYQPTFEUP
temperatures below freezing or exposed to the weather.
tAll repairs and servicing must be performed by an authorized
TFSWJDFSVOMFTTTQFDJGJDBMMZSFDPNNFOEFEJOUIJT0XOFST
(VJEF6TFPOMZBVUIPSJ[FEGBDUPSZQBSUTFailure to follow this
warning can cause serious injury, fire, electric shock, or death.
tTo reduce the risk of electric shock, do not install the dryer in
humid spaces. Failure to follow this warning can cause serious
injury, fire, electric shock, or death.
tConnect to a properly rated, protected, and sized power
circuit to avoid electrical overload. Improper power circuit can
melt, creating electric shock and/or fire hazard.
t3FNPWFBMMQBDLJOHJUFNTBOEEJTQPTFPGBMMTIJQQJOH
materials properly. Failure to do so can result in death, explosion,
fire, or burns.
t1MBDFESZFSBUMFBTUJODIFTBCPWFUIFGMPPSGPSBHBSBHF
installation. Failure to do so can result in death, explosion, fire, or
burns.
t,FFQBMMQBDLBHJOHGSPNDIJMESFO Packaging material can be
dangerous for children. There is a risk of suffocation.
t%POPUJOTUBMMOFBSBOPUIFSTPVSDFPGIFBUTVDIBTBTUPWF
cooking oven. Failure to do so can cause deform, smoke and fire.
t%POPUQMBDFDBOEMFTTNPLJOHNBUFSJBMTPSPUIFSGMBNNBCMFT
on top of the product. Dripping wax, smoke, or fire can result.
t3FNPWFBMMQSPUFDUJWFWJOZMGJMNGSPNUIFQSPEVDUFailure to do
so can cause product damage, smoke or fire.
This appliance must be grounded. In the event of malfunction
or breakdown, grounding will reduce the risk of electric shock
by providing a path of least resistance for electric current. This
appliance must be equipped with a cord having an equipment-
grounding conductor and a grounding plug. The plug must be
plugged into an appropriate outlet that is properly installed and
grounded in accordance with all local codes and ordinances.
Do not modify the plug provided with the appliance. If it will not fit
the outlet, have a proper outlet installed by a qualified electrician.
This appliance must be connected to a grounded metal, permanent
wiring system or an equipment-grounding conductor must be
run with the circuit conductors and connected to the equipment-
grounding terminal or lead on the appliance.
Electric shock can result if the dryer is not properly grounded.
IMPORTANT SAFETY INSTRUCTIONS

6
IMPORTANT SAFETY INSTRUCTIONS
READ ALL INSTRUCTIONS BEFORE USE
WWARNING
For your safety, the information in this manual must be followed to minimize the risk of fire or explosion, electric shock, or to
prevent property damage, injury to persons, death.
4"'&5:*/4536$5*0/4'03*/45"--"5*0/
WWARNING
To reduce the risk of injury to persons, follow all industry recommended safety procedures including the use of long sleeved gloves and
safety glasses. Failure to follow all of the safety warnings in this manual could result in property damage, injury to persons or death.
Exhaust/Ducting:
t(BTESZFST.645CFFYIBVTUFEUPUIFPVUTJEF Failure to follow
these instructions can result in fire or death.
tThe dryer exhaust system must be exhausted to the outside of
UIFEXFMMJOH*GUIFESZFSJTOPUFYIBVTUFEPVUEPPSTTPNFGJOF
lint and large amounts of moisture will be expelled into the
laundry area. An accumulation of lint in any area of the home can
create a health and fire hazard.
t6TFPOMZSJHJENFUBMPSGMFYJCMFNFUBMJODIEJBNFUFS
ductwork inside the dryer cabinet or for exhausting to the
PVUTJEF6TFPGQMBTUJDPSPUIFSDPNCVTUJCMFEVDUXPSLDBO
cause a fire. Punctured ductwork can cause a fire if it collapses or
becomes otherwise restricted in use or during installation.
t%VDUXPSLJTOPUQSPWJEFEXJUIUIFESZFSBOEZPVTIPVME
obtain the necessary ductwork locally. The end cap should
have hinged dampers to prevent backdraft when the dryer is
not in use. Failure to follow these instructions can result in fire or
death.
t5IFFYIBVTUEVDUNVTUCFJODIFTDNJOEJBNFUFSXJUI
no obstructions. The exhaust duct should be kept as short as
QPTTJCMF.BLFTVSFUPDMFBOBOZPMEEVDUTCFGPSFJOTUBMMJOH
your new dryer. Failure to follow these instructions can result in
fire or death.
t3JHJEPSTFNJSJHJENFUBMEVDUJOHJTSFDPNNFOEFEGPSVTF
CFUXFFOUIFESZFSBOEUIFXBMM*OTQFDJBMJOTUBMMBUJPOT
when it is impossible to make a connection with the above
SFDPNNFOEBUJPOTB6-MJTUFEGMFYJCMFNFUBMUSBOTJUJPOEVDU
may be used between the dryer and wall connection only.
The use of this ducting will affect drying time. Failure to follow
these instructions can result in fire or death.
t%0/05VTFTIFFUNFUBMTDSFXTPSPUIFSGBTUFOFSTXIJDI
extend into the duct that could catch lint and reduce the
efficiency of the exhaust system. Secure all joints with duct tape.
For complete details, follow the Installation Instructions. Failure to
follow these instructions can result in fire or death.
IMPORTANT SAFETY INSTRUCTIONS
7
ENGLISH
IMPORTANT SAFETY INSTRUCTIONS
READ ALL INSTRUCTIONS BEFORE USE
WWARNING
For your safety, the information in this manual must be followed to minimize the risk of fire or explosion, electric shock, or to
prevent property damage, injury to persons, death.
4"'&5:*/4536$5*0/4'03$0//&$5*/(&-&$53*$*5:
WWARNING
To reduce the risk of fire, electric shock, or injury to persons when using this appliance, follow basic precautions, including the following:
4"7&5)&4&*/4536$5*0/4
t%POPUVOEFSBOZDJSDVNTUBODFTDVUPSSFNPWFUIFHSPVOE
prong from the power cord. To prevent injury to persons or
damage to the dryer, the electrical power cord must be plugged
into a properly grounded outlet.
tFor personal safety, this dryer must be properly grounded.
Failure to do so can result in electric shock or injury.
t3FGFSUPUIFJOTUBMMBUJPOJOTUSVDUJPOTJOUIJTNBOVBMGPSTQFDJGJD
FMFDUSJDBMSFRVJSFNFOUTGPSZPVSNPEFM Failure to follow these
instructions can create an electric shock hazard and/or a fire
hazard.
tThis dryer must be plugged into a properly grounded outlet.
&MFDUSJDTIPDLDBOSFTVMUJGUIFESZFSJTOPUQSPQFSMZHSPVOEFE
)BWFUIFXBMMPVUMFUBOEDJSDVJUDIFDLFECZBRVBMJGJFE
electrician to make sure the outlet is properly grounded.
Failure to follow these instructions can create an electric shock
hazard and/or a fire hazard.
tThe dryer should always be plugged into its own individual
electrical outlet which has a voltage rating that matches
the rating plate. This provides the best performance and also
prevents overloading house wiring circuits which could cause a
fire hazard from overheated wires.
t/FWFSVOQMVHZPVSESZFSCZQVMMJOHPOUIFQPXFSDPSE"MXBZT
grip plug firmly and pull straight out from the outlet. The
power cord can be damaged, resulting in a risk of fire and electric
shock.
t3FQBJSPSSFQMBDFJNNFEJBUFMZBMMQPXFSDPSETUIBUIBWF
CFDPNFGSBZFEPSPUIFSXJTFEBNBHFE%POPUVTFBDPSEUIBU
shows cracks or abrasion damage along its length or at either
end. The power cord can melt, creating an electric shock and/or
fire hazard.
tWhen installing or moving the dryer, be careful not to pinch,
crush, or damage the power cord. This will prevent injury and
prevent damage to the dryer from fire and electric shock.
IMPORTANT SAFETY INSTRUCTIONS

8
TABLE OF CONTENTS
2SPECIAL FEATURES
3IMPORTANT SAFETY INSTRUCTIONS
3 WHAT TO DO IF YOU SMELL GAS
4 BASIC SAFETY PRECAUTIONS
4 CALIFORNIA SAFE DRINKING WATER AND TOXIC
ENFORCEMENT ACT
5 GROUNDING INSTRUCTIONS
5 SAFETY INSTRUCTIONS FOR INSTALLATION
7 SAFETY INSTRUCTIONS FOR CONNECTING
ELECTRICITY
9
PARTS AND FEATURES
9 Components
10 Control Panel Features
11 INSTALLATION INSTRUCTIONS
11 Preview Installation Order
12 Installation Location Requirements
12 Clearances
13 Leveling the Dryer
14 Reversing the door
15 Changing the Dryer Vent Location
16 Venting the Dryer
18 Connecting Gas Dryers
20 Connecting Electric Dryers
25 Special Requirements for Manufactured or Mobile
Homes
25 Final Installation Check
26 Installation Test (Exhaust Check)
28 HOW TO USE
28 Operating the Dryer
29 Cycle Guide
30 Sorting Load
30 Loading the Dryer
30 Check the Lint Filter before Every Load
31 Cycle Setting Buttons
31 Special Functions
31 Custom Program
32 MAINTENANCE
32 Regular Cleaning
33 TROUBLESHOOTING
33 Before Calling for Service
34 SPECIFICATIONS
34 USING SMARTDIAGNOSISTM
35 WARRANTY
TABLE OF CONTENTS

9
ENGLISH
PARTS AND FEATURES
PARTS AND FEATURES
Components
NOTE
t$POUBDU-($VTUPNFS4FSWJDFBUJO$BOBEBJGBOZBDDFTTPSJFTBSFNJTTJOH
t'PSZPVSTBGFUZBOEGPSFYUFOEFEQSPEVDUMJGFVTFPOMZBVUIPSJ[FEDPNQPOFOUT5IFNBOVGBDUVSFSJTOPUSFTQPOTJCMFGPSQSPEVDU
malfunction or accidents caused by the use of separately purchased unauthorized components or parts.
t5IFJNBHFTJOUIJTHVJEFNBZCFEJGGFSFOUGSPNUIFBDUVBMDPNQPOFOUTBOEBDDFTTPSJFTBOEBSFTVCKFDUUPDIBOHFCZUIFNBOVGBDUVSFS
without prior notice for product improvement purposes.
Terminal Block
Access Panel
(Electric Models)
Gas Connection
Location
(Gas Models)
Exhaust Duct
Outlet
Power Cord
Location
(Gas Models)
Control panel
Leveling feet
Lint filter
Reversible
door

10 PARTS AND FEATURES
Control panel features
Following are instructions for starting and using your new dryer. Please refer to specific sections of
this manual for more detailed information.
WWARNING:To reduce the risk of fire, electric shock, or injury to persons, read this entire manual,
including the Important Safety Instructions, before operating this dryer.
108&30/0''#6550/
Press to turn the dryer ON. Press again to turn the
dryer OFF.
Pressing the ON/OFF button during a cycle will cancel
that cycle and any load settings will be lost.
A
$:$-&4#6550/
Press this button to select the desired cycle. Once the
desired cycle has been selected, the standard presets will
be shown in the display. On MANUAL DRY cycles, these
settings can be adjusted using the cycle setting buttons
anytime before starting the cycle.
B
45"351"64ᦖ/
Press this button to START the selected cycle. If the
dryer is running, use this button to PAUSE the cycle
without losing the current settings.
If you do not press the START/PAUSE button to
resume a cycle within 4 minutes, the dryer turns off
automatically.
C
D.03&5*.&-&445*.ᦖ/4
To adjust the drying time, use these buttons with
MANUAL DRY, TIME DRY cycles. Press the MORE TIME
button to increase the selected manual cycle time by a
minute; press LESS TIME to decrease the cycle time by
a minute.
E$:$-&4&55*/(#6550/4
Use these buttons to select the desired cycle settings
for the selected cycle. The current settings are shown
in the display. Press the button for that option to view
and select other settings.
F5*.&"/%45"564%*41-":
The display shows the settings, estimated time
remaining, options, and status messages for your dryer.
G015*0/#6550/4
The OPTION buttons allow you to select additional
cycle options. Not all settings are available for all
cycles. Refer to the CYCLE GUIDE section of the
manual.
H4*(/"-#6550/
Press the SIGNAL button repeatedly to adjust the
volume of the signals. This button is also used to
BDUJWBUFBOEEFBDUJWBUF$)*-%-0$,CZQSFTTJOHBOE
holding the buttom for three seconds.
NOTE
NOTE
A BH
F
G
D
E C

11
ENGLISH
INSTALLATION INSTRUCTIONS
Preview installation order
Checking and choosing
the proper location
Leveling the dryer
Connecting Electric Dryers
(Electric Dryer Type)
Venting the Dryer
Plugging in the power
cord and grounding
Connecting Gas Dryers
(Gas Dryer Type)
Duct check test
(Refer to page 26.)
INSTALLATION INSTRUCTIONS
120V 240V
Test run

12 INSTALLATION INSTRUCTIONS
Installation location requirements
WWARNING
3FBEBMMJOTUBMMBUJPOJOTUSVDUJPOTDPNQMFUFMZCFGPSFJOTUBMMJOHBOEPQFSBUJOHZPVSESZFSIt is important that you review this entire
manual before installing and using your dryer. Detailed instructions concerning electrical connections, gas connections, and exhaust
requirements are provided on the following pages.
%POPUPQFSBUFZPVSESZFSBUUFNQFSBUVSFTCFMPX¡'¡$"UMPXFSUFNQFSBUVSFTUIFESZFSNJHIUOPUTIVUPGGBUUIFFOEPGBOBVUPNBUJD
cycle. This can result in longer drying times. The dryer must not be installed or stored in an area where it will be exposed to water and/or
weather. Check code requirements. Some codes limit, or do not permit, installation of the dryer in garages, closets, mobile homes or
sleeping quarters. Contact your local building inspector.
t"MFWFMGMPPSXJUIBNBYJNVNTMPQFPGJODIDNVOEFSFOUJSFESZFS*GTMPQFJTHSFBUFSUIBOJODIDNJOTUBMMUIF&YUFOEFE%SZFS
'FFU,JU$MPUIFTNBZOPUUVNCMFQSPQFSMZBOEBVUPNBUJDTFOTPSDZDMFTNBZOPUPQFSBUFDPSSFDUMZJGESZFSJTOPUMFWFM
t'PSBHBSBHFJOTUBMMBUJPOZPVXJMMOFFEUPQMBDFUIFESZFSBUMFBTUJODIFTDNBCPWFUIFGMPPS*GVTJOHBQFEFTUBMZPVXJMMOFFE
JODIFTDNUPUIFCPUUPNPGUIFESZFS
Clearances
INSTALLATION SPACING FOR RECESSED AREA OR CLOSET INSTALLATION
5IFGPMMPXJOHTQBDJOHEJNFOTJPOTBSFSFDPNNFOEFEGPSUIJTESZFS5IJTESZFSIBTCFFOUFTUFEGPSTQBDJOHPGJODIFTDNDMFBSBODFPO
the sides and rear. Recommended spacing should be considered for the following reasons:
There should be at least a little space around the dryer (or any other appliance) to eliminate the transfer of vibration from one to the
other. Too much vibration, it could cause them to make noise or touch each other causing paint damage and making even more noise.
t"MPDBUJPOUIBUBMMPXTGPSQSPQFSFYIBVTUJOTUBMMBUJPO"HBTESZFS
must be exhausted to the outdoors. See 7FOUJOH3FRVJSFNFOUT.
t"HSPVOEFEFMFDUSJDBMPVUMFUMPDBUFEXJUIJOGUDNPGFJUIFS
side of the dryer. See &MFDUSJDBM3FRVJSFNFOUT.
t"TUVSEZGMPPSUPTVQQPSUUIFUPUBMESZFSXFJHIUPGMCT
kg). The combined weight of a companion appliance should also
be considered.
tNo other fuel-burning appliance can be installed in the same
closet as a dryer.
t"EEJUJPOBMTQBDJOHTIPVMECFDPOTJEFSFEGPSFBTFPGJOTUBMMBUJPO
and servicing.
t"EEJUJPOBMDMFBSBODFTNJHIUCFSFRVJSFEGPSXBMMEPPSBOEGMPPS
moldings.
t"EEJUJPOBMTQBDJOHTIPVMECFDPOTJEFSFEPOBMMTJEFTPGUIFESZFS
to reduce noise transfer.
For closet installation, with a door, minimum ventilation openings
in the top and bottom of the door are required. Louvered doors
with equivalent ventilation openings are acceptable.
t$PNQBOJPOBQQMJBODFTQBDJOHTIPVMEBMTPCFDPOTJEFSFE
Closet Door Vent
Requirements
5
"
**
(12.7 cm)
14
"
max.*
(35.6
cm)
50
1⁄4"
(127.5 cm)
28
15⁄16"
(73.4 cm)
21
1⁄4"
(54 cm)
45
7⁄16"
(115.3 cm)
NOTE
NOTE

13
ENGLISH
INSTALLATION INSTRUCTIONS
Clearance (Cont.)
RECOMMENDED INSTALLATION SPACING FOR CABINET INSTALLATION
tFor cabinet installation with a door, minimum ventilation openings in the top of the cabinet are required.
*Required spacing
**For side or bottom venting,
JODIFTDNTQBDJOHJTBMMPXFE
7"* (17.8 cm)
5"**
(12.7 cm)
1"
(2.54 cm)
29/32"
(68.6 cm)
1"
(2.54 cm)
28 15/16"
(73.4 cm)
1"**
(2.5 cm)
7"* (17.8 cm)
Leveling the dryer
WWARNING
t5PSFEVDFUIFSJTLPGJOKVSZUPQFSTPOTBEIFSFUPBMMJOEVTUSZ
recommended safety procedures including the use of
long sleeved gloves and safety glasses. Failure to follow this
warning can cause serious injury or death.
t5IFBQQMJBODFTBSFIFBWZ5XPPSNPSFQFPQMFBSFSFRVJSFE
when installing the dryer. Failure to follow this warning can
cause serious injury or death.
To ensure that the dryer provides optimal drying performance,
it must be level. To minimize vibration, noise, and unwanted
movement, the floor must be a perfectly level, solid surface.
Adjust the leveling feet only as far as necessary to level the dryer.
Extending the leveling feet more than necessary can cause the
dryer to vibrate.
1PTJUJPOUIFESZFSJOUIFGJOBMMPDBUJPO1MBDFBMFWFMBDSPTTUIF
top of the dryer.
t"MMGPVSMFWFMJOHGFFUNVTUSFTUTPMJEMZPOUIFGMPPS(FOUMZQVTI
on the top corners of the dryer to make sure that the dryer does
not rock from corner to corner.
If you are installing the dryer on the optional pedestal, you must
use the leveling feet on the pedestal to level the dryer. The dryer
leveling feet should be fully retracted.
6TFBOBEKVTUBCMFXSFODIUPUVSOUIFMFWFMJOHGFFU5VSO
clockwise to raise the dryer or counterclockwise to lower it.
Raise or lower the leveling feet until dryer is level from side to
side and front to back.
Make sure that all 4 leveling feet are in firm contact with the floor.
Level
Leveling Feet
NOTE

14 INSTALLATION INSTRUCTIONS
WWARNING
t
To avoid damage to the dryer or the door, support the door with a stool
or box that fits under the door, or have an assistant support the weight of
the door.
t
Avoid dropping the door to avoid damage to the door or the floor.
THE DRYER DOOR IS VERY LARGE AND HEAVY. Failure to follow
the instructions below can result in damage to the dryer,
property damage or injury to persons.
0QFOUIFEPPSBOESFNPWFUIFUXPQMBTUJDIPMFDBQTPOUIF
catch side by gently prying up with a flat blade screwdriver.
4BWFUIFTFGPSTUFQ
8IJMFTVQQPSUJOHUIFEPPSSFNPWFUIFTDSFXTUXPGSPN
each hinge. Set the door aside face down on a protected
surface to prevent damage to the door or the work surface.
8JUIUIFEPPSPOBQSPUFDUFETVSGBDFSFNPWFUIFTDSFXT
on each side of the door and lift off the inner door frame
using a flat blade screwdriver. Remove the latch hook and
blank and move them to the opposite side.
Reversing the door
4. Remove the 4 screws securing the hinges to the door frame.
Remove the two plastic cover caps. Reinstall the hinges
and cover caps on the opposite sides from which they were
removed.
8JUIUIFIJOHFTBOEDPWFSDBQTJOUIFOFXMPDBUJPOTSFNPVOU
the inner door frame onto the outer door frame with the screws
removed in step 3 above.
3FJOTUBMMUIFEPPSXJUIUIFTDSFXTGSPNTUFQ
5FTUUIFTXJOHPGUIFEPPSUPNBLFTVSFUIFIJOHFTBOEMBUDIBSF
properly aligned and that the door closes and latches correctly.
Hole cap
Hinge Screw
inner door frame
latch hook
Hinge
assembly
Cover cap
Swing Door

15
ENGLISH
Changing the dryer vent location
WWARNING
t6TFBIFBWZNFUBMWFOU
t%POPUVTFQMBTUJDPSUIJOGPJMEVDU
t$MFBOPMEEVDUTCFGPSFJOTUBMMJOHUIJTESZFS
t5PSFEVDFUIFSJTLPGQFSTPOBMJOKVSZBEIFSFUPBMMJOEVTUSZ
recommended safety procedures including the use of long
sleeved gloves and safety glasses.
t'BJMVSFUPGPMMPXBMMPGUIFTBGFUZXBSOJOHTJOUIJTNBOVBMDPVME
result in property damage, Injury to person or death.
Your new dryer is shipped to vent to the rear.
It can also be configured to vent to the bottom or side (right-side
venting is not available on gas models).
An adapter kit, part number &&-#, may be purchased
from your LG retailer. This kit contains the necessary duct
components to change the dryer vent location.
3FNPWFUIFSFBSFYIBVTUEVDUSFUBJOJOHTDSFX1VMMPVUUIF
exhaust duct.
OPTION 1: SIDE VENTING
1SFTTUIFUBCTPOUIFLOPDLPVUBOEDBSFGVMMZSFNPWFUIF
knockout for the desired vent opening (right-side venting is
not available on gas models). Press the adapter duct onto the
blower housing and secure to the base of the dryer as shown.
1SFBTTFNCMFBJODIFTDNFMCPXUPUIFOFYUJODIFT
DNEVDUTFDUJPOBOETFDVSFBMMKPJOUTXJUIEVDUUBQF#F
sure that the male end of the elbow faces AWAY from the dryer.
Insert the elbow/duct assembly through the side opening and
press it onto the adapter duct. Secure in place with duct tape.
#FTVSFUIBUUIFNBMFFOEPGUIFEVDUQSPUSVEFTJODIFT
cm) to connect the remaining ductwork.
Attach cover plate to the back of the dryer with included screw.
OPTION 2: BOTTOM VENTING
1SFTTUIFBEBQUFSEVDUPOUPUIFCMPXFSIPVTJOHBOETFDVSFUP
the base of the dryer as shown.
*OTFSUUIFJODIFTDNFMCPXUISPVHIUIFSFBSPQFOJOH
BOEQSFTTJUPOUPUIFBEBQUFSEVDU#FTVSFUIBUUIFNBMFFOEPG
the elbow faces down through hole in the bottom of the dryer.
Secure in place with duct tape.
Attach the cover plate to the back of the dryer with included
screw.
Rear
Exhaust Duct
Retaining
Screw
11/2"
(3.8 cm)
Elbow
Cover
Plate
Elbow
Cover
Plate
,OPDLPVU
#SBDLFU
Adapter
Duct
#SBDLFU
Adapter
Duct
INSTALLATION INSTRUCTIONS

16
Venting the dryer
WWARNING
To reduce the risk of fire, electric shock, or personal injury when using this appliance, follow basic precautions, including the following:
t%POPUDSVTIPSDPMMBQTFEVDUXPSL Failure to follow these
instructions can result in fire or death.
t%POPUBMMPXEVDUXPSLUPSFTUPOPSDPOUBDUTIBSQPCKFDUT
Failure to follow these instructions can result in fire or death.
t*GDPOOFDUJOHUPFYJTUJOHEVDUXPSLNBLFTVSFJUJTTVJUBCMF
and clean before installing the dryer. Failure to follow these
instructions can result in fire or death.
tVenting must conform to local building codes. Failure to follow
these instructions can result in fire or death.
t(BTESZFST.645FYIBVTUUPUIFPVUEPPST
Failure to follow these instructions can result in fire or death.
t6TFPOMZJODIDNSJHJEPSGMFYJCMFNFUBMEVDUXPSL
inside the dryer cabinet and for venting outside. Failure to
follow these instructions can result in fire or death.
tTo reduce the risk of fire, combustion, or accumulation of
DPNCVTUJCMFHBTFT%0/05FYIBVTUESZFSBJSJOUPBOFODMPTFE
and unventilated area, such as an attic, wall, ceiling, crawl
space, chimney, gas vent, or concealed space of a building.
Failure to follow these instructions can result in fire or death.
t5PSFEVDFUIFSJTLPGGJSF%0/05FYIBVTUUIFESZFSXJUI
plastic or thin foil ducting.
Failure to follow these instructions can result in fire or death.
t5IFFYIBVTUEVDUNVTUCFJODIFTDNJOEJBNFUFSXJUI
no obstructions. The exhaust duct should be kept as short as
QPTTJCMF.BLFTVSFUPDMFBOBOZPMEEVDUTCFGPSFJOTUBMMJOH
your new dryer. Failure to follow these instructions can result in
fire or death.
t3JHJEPSTFNJSJHJENFUBMEVDUJOHJTSFDPNNFOEFEGPSVTF
CFUXFFOUIFESZFSBOEUIFXBMM*OTQFDJBMJOTUBMMBUJPOT
when it is impossible to make a connection with the above
SFDPNNFOEBUJPOTB6-MJTUFEGMFYJCMFNFUBMUSBOTJUJPOEVDU
may be used between the dryer and wall connection only.
The use of this ducting will affect drying time. Failure to follow
these instructions can result in fire or death.
t%0/05VTFTIFFUNFUBMTDSFXTPSPUIFSGBTUFOFSTXIJDI
extend into the duct that could catch lint and reduce the
efficiency of the exhaust system. Secure all joints with duct
tape. Failure to follow these instructions can result in fire or death.
tTo maximize operating results, please observe the duct length
limitations noted in the chart next page. Failure to follow these
instructions can result in fire or death.
t%VDUXPSLJTOPUQSPWJEFEXJUIUIFESZFS:PVTIPVMEPCUBJO
the necessary ductwork locally. The end cap should have
hinged dampers to prevent backdraft when the dryer is not in
use. Failure to follow these instructions can result in fire or death.
t5IF5PUBMMFOHUIPGGMFYJCMFNFUBMEVDUTIBMMOPUFYDFFEGU
N
t*O$BOBEBUIBUPOMZUIPTFGPJMUZQFGMFYJCMFEVDUTJGBOZ
specifically identified for use with the appliance by the
manufacturer shall be used. In the United States, that only those
foil-type flexible ducts, if any, specifically identified for use with
the appliance by the manufacturer and that comply with the
0VUMJOFGPS$MPUIFT%SZFS5SBOTJUJPO%VDU4VCKFDU"TIBMMCF
used.
INSTALLATION INSTRUCTIONS

17
ENGLISH
INSTALLATION INSTRUCTIONS
Venting the dryer (cont.)
%FEVDUGUNGPSFBDIBEEJUJPOBMFMCPX*UJTOPUSFDPNNFOEFE
UPVTFNPSFUIBOGPVS¡FMCPXT
ROUTING AND CONNECTING DUCTWORK
Follow the guidelines below to maximize drying performance and
reduce lint buildup and condensation in the ductwork.
Ductwork and fittings are NOT included and must be purchased
separately.
t6TFJODIDNEJBNFUFSSJHJEPSTFNJSJHJENFUBMEVDUXPSL
t5IFFYIBVTUEVDUSVOTIPVMECFBTTIPSUBTQPTTJCMF
t6TFBTGFXFMCPXKPJOUTBTQPTTJCMF
t5IFNBMFFOEPGFBDITFDUJPOPGFYIBVTUEVDUNVTUQPJOUBXBZGSPN
the dryer.
t6TFEVDUUBQFPOBMMEVDUKPJOUT
t*OTVMBUFEVDUXPSLUIBUSVOTUISPVHIVOIFBUFEBSFBTJOPSEFSUP
reduce condensation and lint buildup on duct surfaces.
t'BJMVSFUPFYIBVTUUIFESZFSDPSSFDUMZXJMMWPJEUIFESZFSTXBSSBOUZ
Ductwork
8"--$"15:1&
3
4
3
4
/6.#&30'¡
&-#084
."9*.6.-&/(5)0'
ű*/$)%*".&5&33*(*%
.&5"-%6$5
GUN
GUN
GUN
GUN
GUN
GUN
GUN
GUN
GUN
GUN
4"
(10.2 cm)
Recommended
Use Only for Short
Run Installations
4"
(10.2 cm)
21/2"
(6.35 cm)
*/$033&$57&/5*/(
$033&$57&/5*/(
NOTE
NOTE

18
Connecting gas dryers
WWARNING
To reduce the risk of fire, electric shock, or personal injury when using this appliance, follow basic precautions, including the following:
Electrical Requirements for Gas Models Only
WWARNING
To reduce the risk of fire, electric shock, or personal injury when using this appliance, follow basic precautions, including the following:
t%POPUVOEFSBOZDJSDVNTUBODFTDVUPSSFNPWFUIFUIJSE
HSPVOEQSPOHGSPNUIFQPXFSDPSEFailure to follow this
warning can result in fire, explosion, or death.
tFor personal safety, this dryer must be properly grounded.
Failure to follow this warning can result in fire, explosion, or death.
t5IFQPXFSDPSEPGUIJTESZFSJTFRVJQQFEXJUIBQSPOH
HSPVOEJOHQMVHXIJDINBUFTXJUIBTUBOEBSEQSPOH
HSPVOEJOHXBMMPVUMFUUPNJOJNJ[FUIFQPTTJCJMJUZPGFMFDUSJD
shock hazard from this appliance. Failure to follow this warning
can result in fire, explosion, or death.
t5IJTESZFSNVTUCFQMVHHFEJOUPB)[7"$HSPVOEFE
PVUMFUQSPUFDUFECZBBNQFSFGVTFPSDJSDVJUCSFBLFS Failure
to follow this warning can result in fire, explosion, or death.
t8IFSFBTUBOEBSEQSPOHXBMMPVUMFUJTFODPVOUFSFEJUJTZPVS
personal responsibility and obligation to have it replaced with
BQSPQFSMZHSPVOEFEQSPOHXBMMPVUMFU Failure to follow this
warning can result in fire, explosion, or death.
t(BTTVQQMZSFRVJSFNFOUT
As shipped from the factory, this dryer is configured for use
XJUIOBUVSBMHBT*UDBOCFDPOWFSUFEGPSVTFXJUI-1-JRVFGJFE
1SPQBOFHBT(BTQSFTTVSFNVTUOPUFYDFFEJODIFTPG
water column.
t"RVBMJGJFETFSWJDFPSHBTDPNQBOZUFDIOJDJBONVTUDPOOFDU
the dryer to the gas service.
Failure to do so can result in fire, explosion, or death.
t*TPMBUFUIFESZFSGSPNUIFHBTTVQQMZTZTUFNCZDMPTJOHJUT
individual manual shutoff valve during any pressure testing
of the gas supply. Failure to do so can result in fire, explosion, or
death.
t4VQQMZMJOFSFRVJSFNFOUT
Your laundry room must have a rigid gas supply line to your
ESZFS*OUIF6OJUFE4UBUFTBOJOEJWJEVBMNBOVBMTIVUPGGWBMWF
.645CFJOTUBMMFEXJUIJOBUMFBTUGUNPGUIFESZFSJO
BDDPSEBODFXJUIUIF/BUJPOBM'VFM(BT$PEF"/4*;PS
$BOBEJBOHBTJOTUBMMBUJPODPEF$4"#"1cľJODI/15
pipe plug must be installed. Failure to do so can result in fire,
explosion, or death
t*GVTJOHBSJHJEQJQFUIFSJHJEQJQFTIPVMECFJODI*14
*GBDDFQUBCMFVOEFSMPDBMDPEFTBOEPSEJOBODFTBOEXIFO
acceptable to your gas supplier, 3cľJODIBQQSPWFEUVCJOH
NBZCFVTFEXIFSFMFOHUITBSFMFTTUIBOGUN-BSHFS
UVCJOHTIPVMECFVTFEGPSMFOHUITJOFYDFTTPGGUN
Failure to do so can result in fire, explosion, or death.
tConnect the dryer to the type of gas shown on the nameplate.
Failure to do so can result in fire, explosion, or death.
tTo prevent contamination of the gas valve, purge the gas
supply of air and sediment before connecting the gas supply
to the dryer. Before tightening the connection between the
gas supply and the dryer, purge remaining air until the odor
of gas is detected. Failure to do so can result in fire, explosion, or
death.
t%0/05VTFBOPQFOGMBNFUPJOTQFDUGPSHBTMFBLT6TFB
OPODPSSPTJWFMFBLEFUFDUJPOGMVJE Failure to do so can result in
fire, explosion, or death.
t6TFPOMZBOFX"("PS$4"DFSUJGJFEHBTTVQQMZMJOFXJUI
flexible stainless steel connectors. Failure to do so can result in
fire, explosion, or death.
tSecurely tighten all gas connections. Failure to do so can result
in fire, explosion, or death.
t%0/05BUUFNQUBOZEJTBTTFNCMZPGUIFESZFSBOZ
EJTBTTFNCMZSFRVJSFTUIFBUUFOUJPOBOEUPPMTPGBOBVUIPSJ[FE
BOERVBMJGJFETFSWJDFQFSTPOPSDPNQBOZ Failure to do so can
result in fire, explosion, or death.
t6TFBQJQFKPJOUDPNQPVOEUIBUJTJOTPMVCMFJO-JRVFGJFE
1FUSPMFVN-1HBTPOBMMQJQFUISFBETFailure to do so can
result in fire, explosion, or death.
INSTALLATION INSTRUCTIONS

19
ENGLISH
Connecting gas dryers (cont.)
WWARNING
To reduce the risk of fire, electric shock, or personal injury when
using this appliance, follow basic precautions, including the
following:
t*OTUBMMBUJPOBOETFSWJDFNVTUCFQFSGPSNFECZBRVBMJGJFE
installer, service agency, or the gas supplier. Failure to do so
can result in fire, explosion, or death.
t6TFPOMZBOFXTUBJOMFTTTUFFMGMFYJCMFDPOOFDUPSBOEBOFX
"("DFSUJGJFEDPOOFDUPS Failure to do so can result in fire,
explosion, or death.
t"HBTTIVUPGGWBMWFNVTUCFJOTUBMMFEXJUIJOGUNPG
the dryer. Failure to do so can result in fire, explosion, or death.
t5IFESZFSJTDPOGJHVSFEGPS/BUVSBM(BTXIFOTIJQQFEGSPN
UIFGBDUPSZ.BLFTVSFUIBUUIFESZFSJTFRVJQQFEXJUIUIF
DPSSFDUCVSOFSPSJGJDFGPSUIFUZQFPGHBTCFJOHVTFE/BUVSBM
(BTPS-JRVFGJFE1FUSPMFVN Failure to do so can result in fire,
explosion, or death.
t*GOFDFTTBSZUIFDPSSFDUPSJGJDFGPSUIF-1PSJGJDFLJUPSEFS
QBSUOVNCFS&&-%TIPVMECFJOTUBMMFECZB
RVBMJGJFEUFDIOJDJBOBOEUIFDIBOHFTIPVMECFOPUFEPOUIF
dryer. Failure to do so can result in fire, explosion, or death.
tAll connections must be in accordance with local codes and
regulations. Failure to do so can result in fire, explosion, or
death.
t(BTESZFST.645FYIBVTUUPUIFPVUEPPST Failure to do so can
result in fire, explosion, or death.
Connecting the Gas Supply
.BLFTVSFUIBUUIFHBTTVQQMZUPUIFMBVOESZSPPNJTUVSOFE
OFF. Confirm that the type of gas available in your laundry room
is appropriate for the dryer. The dryer is prepared for Natural
Gas with a 3⁄ - inch NPT gas connection.
3FNPWFUIFTIJQQJOHDBQGSPNUIFHBTDPOOFDUJPOBUUIFCBDL
PGUIFESZFS#FDBSFGVMOPUUPEBNBHFUIFUISFBETPGUIFHBT
connector when removing the shipping cap.
3. Connect the dryer to your laundry room’s gas supply using a
new flexible stainless steel connector with a 3⁄ - inch NPT fitting.
4. Securely tighten all connections between the dryer and your
laundry room’s gas supply. Turn on your laundry room’s gas
supply and check all pipe connections (both internal and
external) for gas leaks with a noncorrosive leak-detection fluid.
Electrical Connection
High-Altitude Installations
5IF#56SBUJOHPGUIJTESZFSJT"("DFSUJGJFEGPSFMFWBUJPOTCFMPX
GFFU
*GZPVSHBTESZFSJTCFJOHJOTUBMMFEBUBOFMFWBUJPOBCPWF
feet, it must be derated by a qualified technician or gas supplier.
Plug dryer into a 7"$
Hz grounded 3-prong outlet.
w/15(BT
Connection Gas Supply
Shutoff Valve
w/151JQF
Plug
AGA/CSA-Certified
Stainless Steel Flexible
Connector
INSTALLATION INSTRUCTIONS

20
Connecting electric dryers
WWARNING
To help prevent fire, electric shock, serious injury, or death, the
wiring and grounding must conform to the latest edition of the
/BUJPOBM&MFDUSJDBM$PEF"/4*/'1"BOEBMMBQQMJDBCMFMPDBM
regulations. Please contact a qualified electrician to check your
home’s wiring and fuses to ensure that your home has adequate
electrical power to operate the dryer.
Electrical Requirements for Electric Models Only
WWARNING
To reduce the risk of fire, electric shock, or injury to persons when
using this appliance, follow basic precautions, including the
following:
tThis dryer must be connected to a grounded metal,
QFSNBOFOUXJSJOHTZTUFNPSBOFRVJQNFOUHSPVOEJOH
conductor must be run with the circuit conductors and
DPOOFDUFEUPUIFFRVJQNFOUHSPVOEJOHUFSNJOBMPSMFBEPO
the dryer. Failure to do so can result in fire, explosion, or death.
tThe dryer has its own terminal block that must be connected
UPBTFQBSBUF7"$)FSU[TJOHMFQIBTFDJSDVJUGVTFE
BUBNQFSFTUIFDJSDVJUNVTUCFGVTFEPOCPUITJEFTPGUIF
MJOF&-&$53*$"-4&37*$&'035)&%3:&34)06-%#&0'
5)&."9*.6.3"5&70-5"(&-*45&%0/5)&/".&1-"5&
%0/05$0//&$5%3:&3500370-5
$*3$6*5 Failure to follow these instructions can result in fire,
explosion, or death.
t*GCSBODIDJSDVJUUPESZFSJTGUNPSMFTTJOMFOHUI
VTF6-6OEFSXSJUFST-BCPSBUPSJFTMJTUFE/P"8(XJSF
DPQQFSXJSFPOMZPSBTSFRVJSFECZMPDBMDPEFT*GPWFS
GUNVTF6-MJTUFE/P"8(XJSFDPQQFSXJSF
POMZPSBTSFRVJSFECZMPDBMDPEFT"MMPXTVGGJDJFOUTMBDLJO
wiring so dryer can be moved from its normal location when
necessary. Failure to do so can result in fire, explosion, or death.
t5IFQPXFSDPSEQJHUBJMDPOOFDUJPOCFUXFFOXBMMSFDFQUBDMF
BOEESZFSUFSNJOBMCMPDL*4/05TVQQMJFEXJUIESZFS5ZQFPG
pigtail and gauge of wire must conform to local codes and
with instructions on the following pages. Failure to follow
these instructions can result in fire, explosion, or death.
t"XJSFDPOOFDUJPOJTSFRVJSFEGPSBMMNPCJMFBOE
manufactured home installations, as well as all new
DPOTUSVDUJPOBGUFS+BOVBSZ"XJSFDPOOFDUJPONVTU
be used where local codes do not permit grounding through
the neutral wire. Failure to do so can result in fire, explosion, or
death.
WWARNING
To reduce the risk of fire, electric shock, or personal injury when
using this appliance, follow basic precautions, including the
following:
t%POPUNPEJGZUIFQMVHBOEJOUFSOBMXJSFQSPWJEFEXJUIUIF
dryer.
t5IFESZFSTIPVMECFDPOOFDUFEUPIPMFPVUMFU
t*GJUEPFTOPUGJUUIFPVUMFUBQSPQFSPVUMFUXJMMOFFEUPCF
JOTUBMMFECZBRVBMJGJFEFMFDUSJDJBO
WWARNING
To reduce the risk of fire, electric shock, or personal injury when
using this appliance, follow basic precautions, including the
following:
tAny installation in a manufactured or mobile home must
DPNQMZXJUIUIF.BOVGBDUVSFE)PNF$POTUSVDUJPOBOE
4BGFUZ4UBOEBSET5JUMF$'31BSUPS4UBOEBSE$"/
$4";.)BOEMPDBMDPEFTBOEPSEJOBODFT
t"XJSFDPOOFDUJPOJTSFRVJSFEGPSBMMNPCJMFBOE
manufactured home installations, as well as all new
DPOTUSVDUJPOBGUFS+BOVBSZ Failure to do so can result
in fire, explosion, or death.
INSTALLATION INSTRUCTIONS
Other manuals for DLE4801W
2
This manual suits for next models
1
Table of contents
Other LG Dryer manuals
Popular Dryer manuals by other brands

Hotpoint
Hotpoint CTD90 Instructions for installation and use

Crosley
Crosley CDE7400QW0 Use & care guide

Crosley
Crosley Conservator CEDC392JQ0 Use & care guide

Danby
Danby DCD5505W-1 USA ONLY owner's manual

American Dryer Corp.
American Dryer Corp. AD/ML-310 Non-Tilt parts manual

Cylinda
Cylinda TVP 5571 user manual