3
Introduction..................4-7
AbouttheSymbolDisplay.............4
SymbolusedinthisManual..............4
NotesonDiscs........................4
HandlingDiscs.......................4
StoringDiscs........................4
CleaningDiscs.......................4
TypesofPlayableDiscs.................5
RegionalCode.........................5
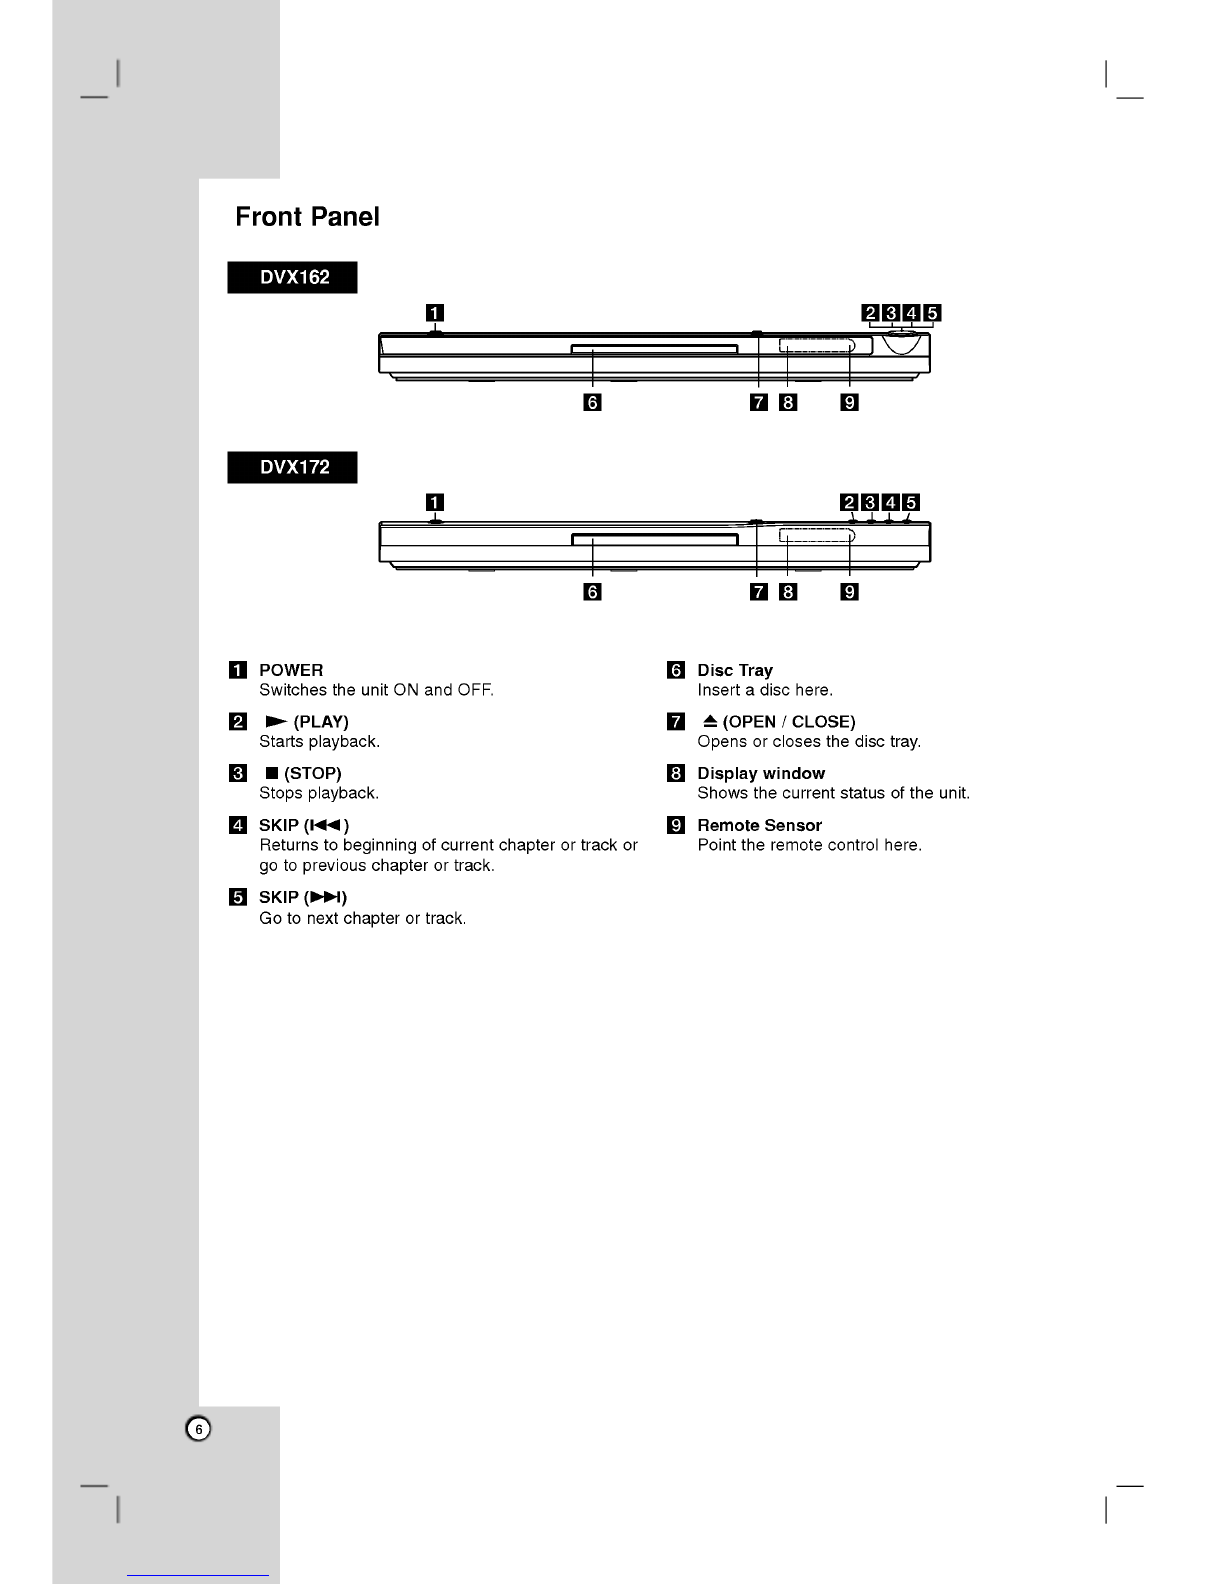
FrontPanel...........................6
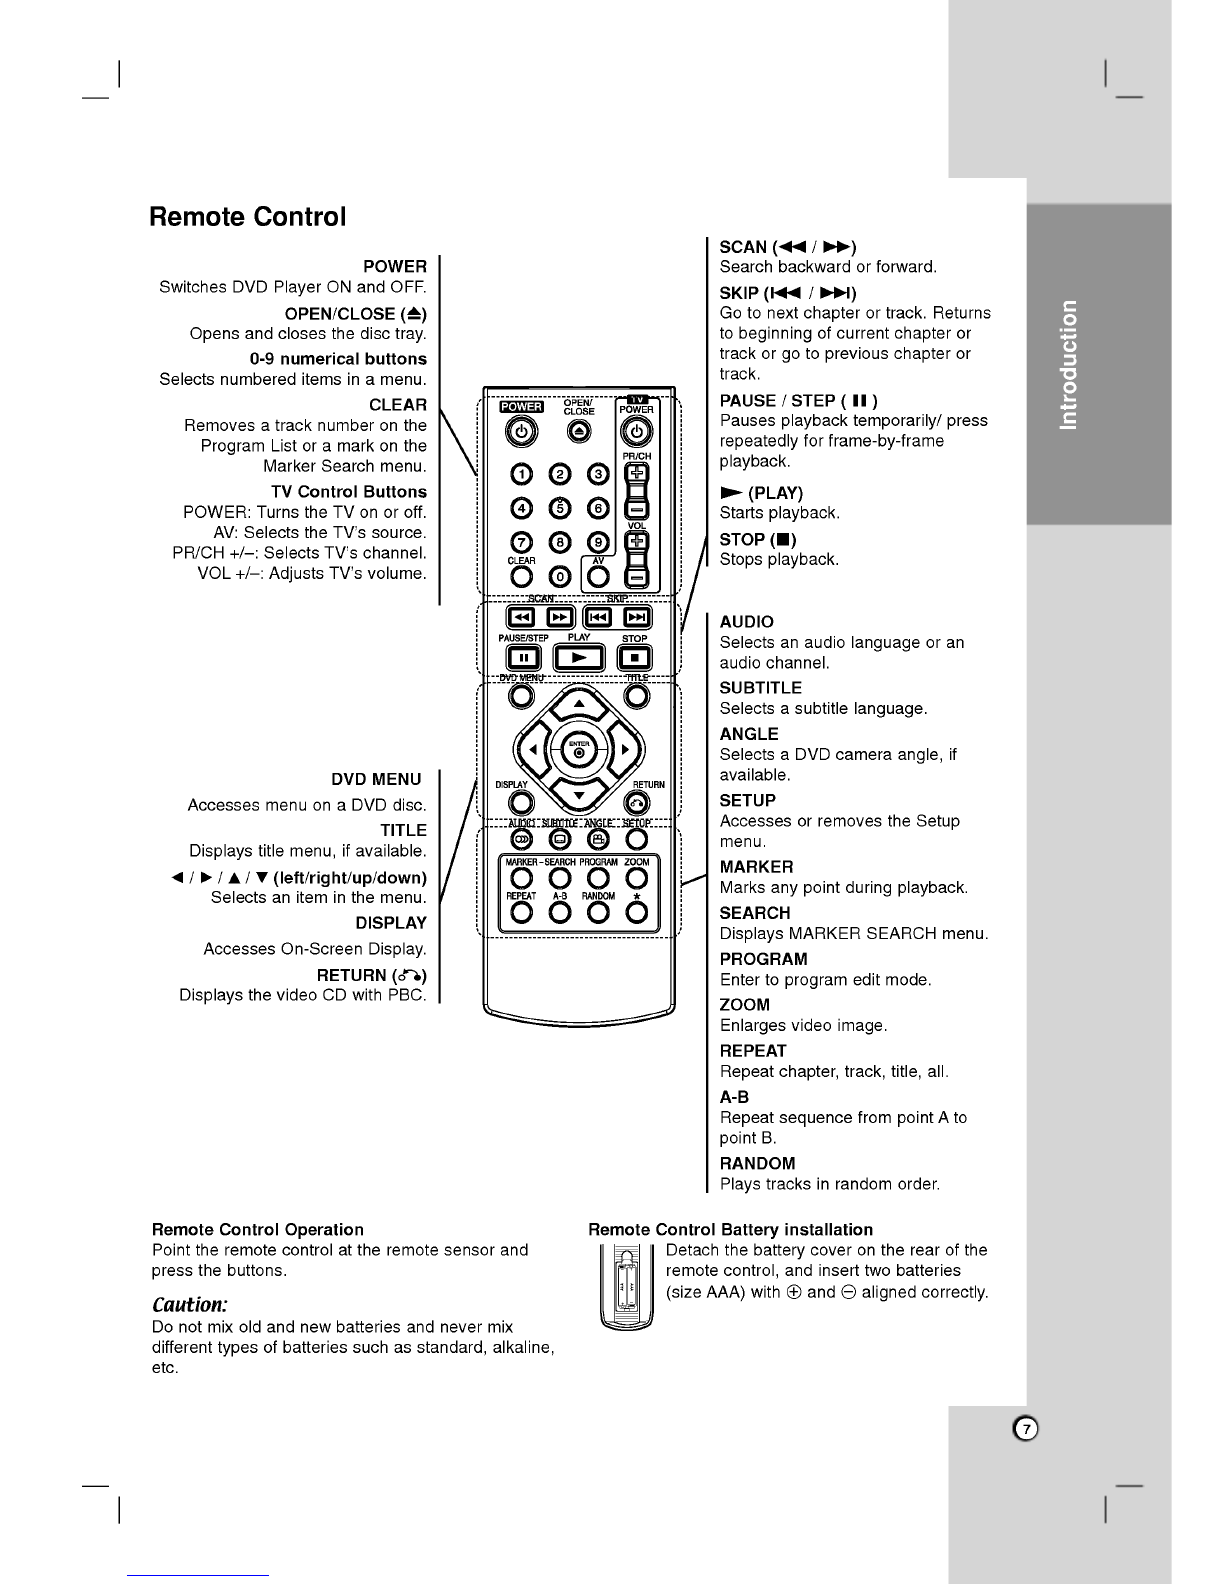
RemoteControl........................7
RemoteControlOperation..............7
Remote
Control
Battery
Installation
......
.7
InstallationandSetup.
.......
.8-13
SettingupthePlayer....................8
DVDPlayerConnections.................8
Video
and
Audio
Connections
to
Your
TV
. .
.8
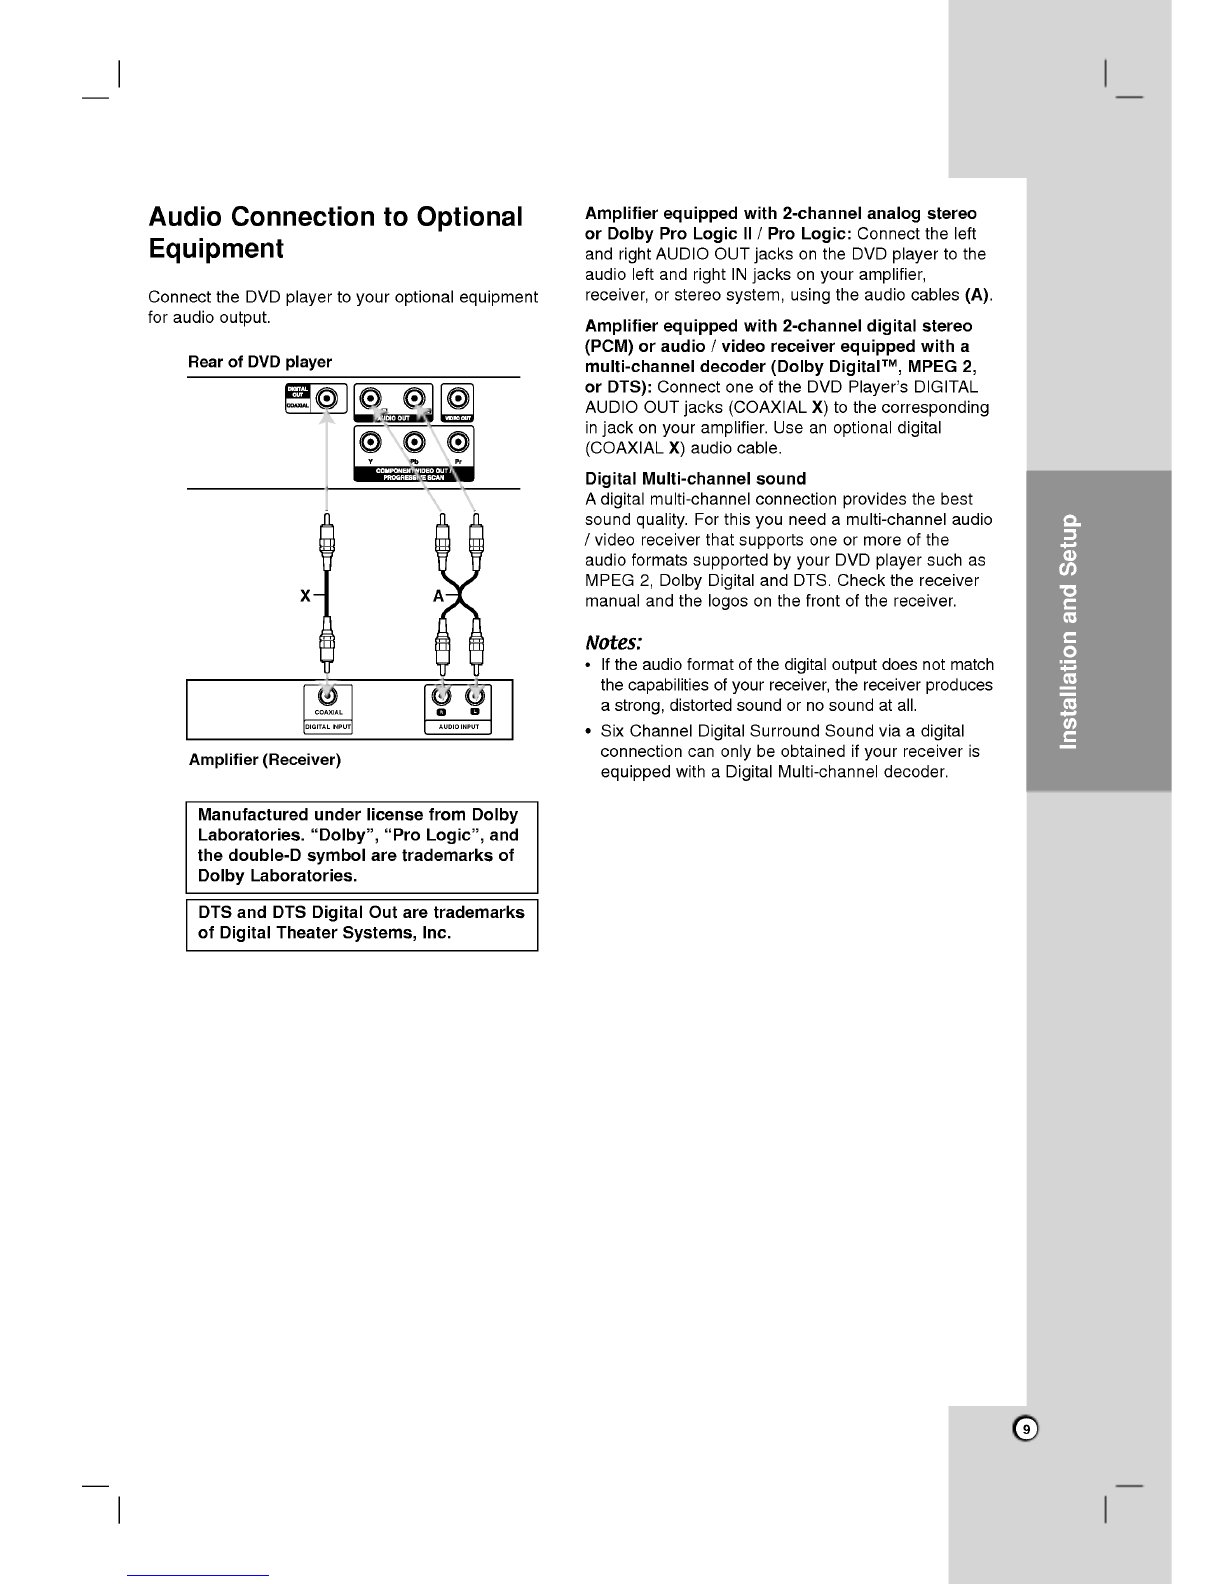
Audio
Connection
to
Optional
Equipment
. .
.9
Displaying
Disc
Information
on-screen
...
.10
InitialSettings........................10
GeneralOperation...................10
LANGUAGE........................11
?MenuLanguage...................11
?
DiscAudio/Subtitle/Menu.
.........
.11
DISPLAY..........................11
?TVAspect........................11
?DisplayMode.....................11
?ProgressiveScan..................11
?TVOutputSelect...................11
AUDIO............................12
?DolbyDigital/DTS/MPEG
.........
.12
?
SampleFreq.(Frequency).
..........
.12
?
DynamicRangeControl(DRC).
......
.12
?Vocal...........................12
LOCK(ParentalControl)..............12
?Rating...........................12
?Password........................12
?AreaCode.......................13
OTHERS..........................13
?PBC............................13
?AutoPlay........................13
?
B.L.E.
(Black
Level
Expansion)
.......
.13
?DivX(R)VOD.....................13
Operations.................14-19
GeneralFeatures......................14
AdditionalFeatures....................15
Playing
an
Audio
CD
or
MP3/WMA
file
....
.16
ProgrammedPlayback.................16
RepeatProgrammedTracks.
..........
.16
Erasing
a
Track
from
Program
List
......
.16
Erasing
the
Complete
Program
List
.....
.16
ViewingaJPEGfile....................17
SlideShow.........................17
StillPicture.........................17
MovingtoanotherFile................17
Zoom.............................17
Torotatepicture.....................17
PlayingaDivXMoviefile................18
Controlling
other
TVs
with
the
remote
control
.19
MaintenanceandService...............19
Reference..................20-21
LanguageCodes.......................20
AreaCodes...........................20
Troubleshooting........................21
Specifications.........................21
Contents