manuals.online logo
Brands
  1. Home
  2. •
  3. Brands
  4. •
  5. LG
  6. •
  7. Monitor
  8. •
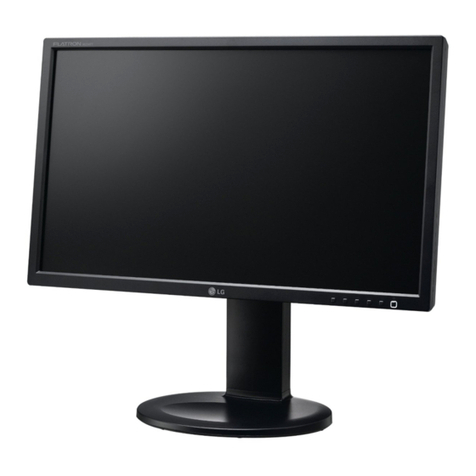
  9. LG E1642C User manual

LG E1642C User manual

лчиттничюнльтцию.
глтчн.Бзвыдны
www.sotmarket.ru
дбняинфмциятв,
тзывы,бзыиы
Инструкция
LG E2242C
Перейти в карточку товара
8 800 775 98 98
All manuals and user guides at all-guides.com
all-guides.com
www.lg.com
OWNER’S MANUAL
LED LCD MONITOR
E1642C
E1942C
E2042C
E2242C
Please read this manual carefully before operating
your set and retain it for future reference.
LED LCD MONITOR MODEL
ENGLISH
All manuals and user guides at all-guides.com
2
ENG
ENGLISH
TABLE OF CONTENTS
CONTENTS
3 ASSEMBLINGANDPREPAR-
ING
3 Unpacking
4 Partsandbuttons
5 SettinguptheMonitorset
5 - AttachingtheStandBase
5 - DetachingtheStandBase
6 - Mountingonatable
6 - Usingthecableholder
8 - Mountingonawall
9 USINGTHEMONITORSET
9 ConnectingtoaPC
9 - D-SUBconnection
11 CUSTOMIZINGSETTINGS
12 CustomizingSettings
12 - MenuSettings
13 -PICTURE
14 -COLOR
15 -DISPLAY
16 -OTHERS
17 SUPERENERGYSAVINGSetting
18 PICTUREMODESetting
19 TROUBLESHOOTING
21 SPECIFICATIONS
21 E1642C
22 E1942C
23 E2042C
24 E2242C
25 PresetModes(Resolution)
26 Indicator
27 PROPERPOSTURE
27 ProperpostureforusingtheMonitorset.
All manuals and user guides at all-guides.com
3
ENG
ENGLISH
ASSEMBLING AND PREPARING
ASSEMBLINGANDPREPARING
Unpacking
Checkyourproductboxforthefollowingitems.Ifthereareanymissingaccessories,contactthelocal
dealerwhereyoupurchasedyourproduct.Theillustrationsinthismanualmaydifferfromtheactualproduct
andaccessories.
 Donotuseanyunapprovedaccessoriestoensurethesafetyandproductlifespan.
 Anydamagesorinjuriesbyusingunapprovedaccessoriesarenotcoveredbythewarranty.
 Theaccessoriessuppliedwithyourproductmayvarydependingonthemodel.
 Productspecificationsorcontentsinthismanualmaybechangedwithoutpriornoticeduetoupgrade
ofproductfunctions.
CAUTION
NOTE
StandBody StandBase
CD(Owner'sManual)/
Card D-SUBCable
(Dependingonthecountry) (Dependingonthecountry)
PowerCord AC-DCAdapter AC-DCAdapter
or
All manuals and user guides at all-guides.com
4
ENG
ENGLISH
ASSEMBLING AND PREPARING
Partsandbuttons
PowerIndicator
 LightingOn:Turnedon
 LightingOff:Turnedoff
Connectionpanel(Seep.9)
Button(Seep.11)
(PowerButton)
All manuals and user guides at all-guides.com
5
ENG
ENGLISH
ASSEMBLING AND PREPARING
AttachtheStandBodytothemonitorset.
AttachtheStandBase.
Tightenthescrewtotherightwithacoin.
SettinguptheMonitorset
AttachingtheStandBase
1 PlacetheMonitorsetwiththescreenside
downonaflatandcushionedsurface.
Layafoammatorsoftprotectivecloth
onthesurfacetoprotectthescreenfrom
damage.
CAUTION
2
StandBase
StandBody
1
2
3
 Thisillustrationdepictsthegeneralmodelof
connection.Yourmonitormaydifferfromthe
itemsshowninthepicture.
 Donotcarrytheproductupsidedownholding
onlythestandbase.Theproductmayfall
andgetdamagedorinjureyourfoot.
CAUTION
DetachingtheStandBase
1 PlacetheMonitorsetwiththescreenside
downonaflatandcushionedsurface.
2
StandBase
StandBase
StandBody
StandBody
PullouttheStandBodyandStandBase
fromthemonitorset.
Turnthescrewtotheleftwithacoin.
PullouttheStandBase.
1
2
3
All manuals and user guides at all-guides.com
all-guides.com
6
ENG
ENGLISH
ASSEMBLING AND PREPARING
Mountingonatable
1 LiftandtilttheMonitorsetintoitsupright
positiononatable.
Leavea10cm(minimum)spacefromthewall
forproperventilation.
Usingthecableholder
2 ConnecttheAC-DCAdapterandPowerCord
toawalloutlet.
3 Press (Power)buttononthebottomswitch
paneltoturnthepoweron.
10 cm
10 cm
10 cm
10 cm
Unplugthepowercordbeforemovingthe
Monitortoanotherlocation.Otherwiseelectric
shockmayoccur.
CAUTION
Cableholder
or
All manuals and user guides at all-guides.com
7
ENG
ENGLISH
ASSEMBLING AND PREPARING
UsingtheKensingtonsecuritysystem
TheKensingtonsecuritysystemconnectoris
locatedatthebackoftheMonitorset.Formore
informationofinstallationandusing,refertothe
manualsuppliedwiththeKensingtonsecurity
systemorvisit
http://www.kensington.com
.
ConnecttheKensingtonsecuritysystemcable
betweentheMonitorsetandatable.
TheKensingtonsecuritysystemisoptional.
Youcanobtainitfrommostelectronicsstores.
NOTE
Whenyouadjusttheangle,donotholdthe
bottomoftheMonitorsetframeasshownon
thefollowingillustration,asmayinjureyour
fingers.
Donottouchorpressthescreenwhen
adjustingtheangleofthemonitor.
Donotholdthissetlikebelowpicture.Monitor
screencandetachfromstandbaseandinjure
yourbody.
WARNING
Tiltfrom+20to-5degreesupordowntoadjust
theangleoftheMonitorsettosuityourview.
NOTE
Front Rear
All manuals and user guides at all-guides.com
8
ENG
ENGLISH
ASSEMBLING AND PREPARING
Mountingonawall
Forproperventilation,allowaclearanceof10cm
oneachsideandfromthewall.Detailed
instructionsareavailablefromyourdealer,seethe
optionalTiltWallMountingBracketInstallationand
SetupGuide.
IfyouintendtomounttheMonitorsettoawall,
attachWallmountinginterface(optionalparts)to
thebackoftheset.
WhenyouinstalltheMonitorsetusingawall
mountinginterface(optionalparts),attachit
carefullysoitwillnotdrop.
1Please,Usethescrewandwallmountinterface
inaccordancewithVESAStandards.
2Ifyouusescrewlongerthanstandard,the
monitormightbedamagedinternally.
3Ifyouuseimproperscrew,theproductmightbe
damagedanddropfrommountedposition.In
thiscase,LGElectronicsisnotresponsiblefor
it.
4VESAcompatible.
5PleaseuseVESAstandardasbelow.
 784.8mm(30.9inch)andunder
*WallMountPadThickness:2.6mm
*Screw:4.0mmxPitch0.7mmx
Length10mm
 787.4mm(31.0inch)andabove
*PleaseuseVESAstandardwallmountpad
andscrews.
10 cm
10 cm
10 cm
10 cm  Disconnectthepowercordfirst,andthen
moveorinstalltheMonitorset.Otherwise
electricshockmayoccur.
 IfyouinstalltheMonitorsetonaceilingor
slantedwall,itmayfallandresultinsevere
injury.
 UseonlyanauthorizedLGwallmount
andcontactthelocaldealerorqualified
personnel.
 Donotovertightenthescrewsasthismay
causedamagetotheMonitorsetandvoid
yourwarranty.
 Useonlyscrewsandwallmountsthat
meettheVESAstandard.Anydamages
orinjuriesbymisuseorusinganimproper
accessoryarenotcoveredbythewarranty.
 UsethescrewsthatarelistedontheVESA
standardscrewspecifications.
 Thewallmountkitwillincludeaninstallation
manualandnecessaryparts.
 Thewallmountbracketisoptional.Youcan
obtainadditionalaccessoriesfromyourlocal
dealer.
 Thelengthofscrewsmaydifferdepending
onthewallmount.Besuretousetheproper
length.
 Formoreinformation,refertothe
instructionssuppliedwiththewallmount.
CAUTION
NOTE
Model E1642C
E1942C
E2042C
E2242C 
VESA(AxB) 75x75
Standardscrew M4
Numberofscrews 4
All manuals and user guides at all-guides.com
9
ENG
ENGLISH
USING THE MONITOR SET
USINGTHEMONITORSET
ConnectingtoaPC
 YourMonitorsetsupportsPlug&Play*.
*Plug&Play:APCrecognizesaconnected
devicethatusersconnecttoaPCandturn
on,withoutdeviceconfigurationoruser
intervention.
D-SUBconnection
TransmitsanalogvideofromyourPCtothe
Monitorset.ConnectthePCandtheMonitorset
withthesuppliedD-sub15pinsignalcableas
showninthefollowingillustrations.
 Macadapter
ForAppleMacintoshuse,aseparateplug
adapterisneededtochangethe15pin
highdensity(3row)D-SUBVGAconnector
onthesuppliedcabletoa15pin2row
connector.
 WhenusingaD-Subsignalinputcable
connectorforMacintosh
NOTE
All manuals and user guides at all-guides.com
10
ENG
ENGLISH
USING THE MONITOR SET
 WhenyouwanttousetwoPCinourMonitor,
pleaseconnectthesignalcable(D-SUB)
respectivelyinMonitorset.
 IfyouturntheMonitorsetonwhileitiscold,
thescreenmayflicker.Thisisnormal.
 Somered,green,orbluespotsmayappear
onthescreen.Thisisnormal.
 "SelfImageSetting"Function.
Thisfunctionprovidestheuserwithoptimal
displaysettings.Whentheuserconnects
themonitorforthefirsttime,thisfunction
automaticallyadjuststhedisplaytooptimal
settingsforindividualinputsignals.(Only
supportedinAnalogMode)
 ‘AUTO’Function.
Whenyouencounterproblemssuchas
blurryscreen,blurredletters,screenflicker
ortiltedscreenwhileusingthedeviceor
afterchangingscreenresolution,pressthe
AUTOfunctionbuttontoimproveresolution.
(OnlysupportedinAnalogMode)
NOTE NOTE
 Connectthesignal
inputcableandtighten
itbyturningthescrews
clockwise.
 Donotpressthescreenwithyourfingerfor
alongtimeasthismayresultintemporary
distortiononthescreen.
 Avoiddisplayingafixedimageonthe
screenforalongperiodoftimetoprevent
imageburn.Useascreensaverifpossible.
CAUTION SelfImageSettingFunction
Pressthepowerbuttononthebottompanelto
turnthepoweron.Whenmonitorpoweristurned
on,the"SelfImageSetting"Functionisexecuted
automatically.(OnlysupportedinAnalogMode)
All manuals and user guides at all-guides.com
all-guides.com
11
ENG
ENGLISH
CUSTOMIZING SETTINGS
CUSTOMIZINGSETTINGS
1 PressthedesiredbuttononthebottomoftheMonitorset.
2 ChangethevalueofthemenuitembypressingthebuttonsonthebottomoftheMonitorset.
Toreturntotheuppermenuorsetothermenuitems,usetheuparrow( )button.
3 SelectEXITtoleavetheOSDmenu.
MonitorsetButtons
Button Description
Accessesthemainmenus.(Seep.12)
OSDLOCKED/
UNLOCKED
Thisfunctionallowsyoutolockthecurrentcontrolsettings,so
thattheycannotbeinadvertentlychanged.
PressandholdtheMENUbuttonforseveralseconds.
Themessage"OSDLOCKED"shouldappear.
YoucanunlocktheOSDcontrolsatanytimebypushing
theMENUbuttonforseveralseconds.Themessage"OSD
UNLOCKED"shouldappear.
(SUPERENERGYSAVING)
UsethisbuttontoenterSUPERENERGYSAVINGmenu.Formoreinformation.(Seep.17)
UsethisbuttontoenterCUSTOM,TEXT,PHOTO,CINEMA,GAMEmenus.(Seep.18)
Whenadjustingyourdisplaysettings,alwayspresstheAUTObuttonontheMONITOR
SETUPOSD.(OnlysupportedinAnalogMode)
Thebestdisplaymode E1642C/E1942C:1366x768
E2042C:1600x900
E2242C:1920x1080
EXIT
ExittheOSD(OnScreenDisplay).
(PowerButton) Turnsthepoweronoroff.
PowerIndicator Thepowerindicatorstaysredifthedisplayisrunningproperly
(OnMode).IfthedisplayisinSleepMode,thepowerindicator
blinksred.
All manuals and user guides at all-guides.com
12
ENG
ENGLISH
CUSTOMIZING SETTINGS
CustomizingSettings
MenuSettings
1 PressMENUbuttononthebottomoftheMonitorset
todisplaytheMENUOSD.
2 Settheoptionsbypressingtheoror
buttons.
3 Selectthe"NEXTMENU"buttontoenterthemore
optionsettings.
4 SelectEXITtoleavetheOSDmenu.
Toreturntotheuppermenuorsetothermenuitems,
usetheuparrow( )button.
Eachoptionisexplainedbelow.
MENU>NEXTMENU Description
PICTURE SHARPNESS Toadjusttheclearnessofthescreen.
COLOR GAMMA Tocustomizethecolorofthescreen
COLORTEMP
DISPLAY HORIZONTAL Toadjustthepositionofthescreen
VERTICAL
CLOCK Toimprovetheclarityandstabilityofthescreen
PHASE
OTHERS LANGUAGE
Tocustomizethescreenstatusforauser'soperatingenvironmentPOWERINDICATOR
WHITEBALANCE
 Analog:D-SUB(Analogsignal)input.
MENU Description
BRIGHTNESS Toadjustthebrightness,contrastofthescreen
CONTRAST
WIDE/ORIGINAL WIDE
Switchtofullscreenmodeaccordingtoinputimagesignal.
ORIGINAL
Changetheinputimagesignalratiotooriginal.
*ThisfunctionworksonlyifinputresolutionislowerthanMonitorsetratio(16:9).
RESET Restoreallfactorydefaultsettings.Pressthe,buttonstoresetimmediately.
All manuals and user guides at all-guides.com
13
ENG
ENGLISH
CUSTOMIZING SETTINGS
PICTURE
1 PressMENUbuttononthebottomoftheMonitorset
todisplaytheMENUOSD.
2 Selectthe"NEXTMENU"buttontoenterthemore
optionsettings.
3 EntertoPICTUREbypressingthebutton.
4 Settheoptionsbypressingtheoror
buttons.
5 SelectEXITtoleavetheOSDmenu.
Toreturntotheuppermenuorsetothermenuitems,
usetheuparrow( )button.
Eachoptionisexplainedbelow.
MENU>NEXTMENU>PICTURE Description
SHARPNESS Toadjusttheclearnessofthescreen.
All manuals and user guides at all-guides.com
14
ENG
ENGLISH
CUSTOMIZING SETTINGS
COLOR
1 PressMENUbuttononthebottomoftheMonitorset
todisplaytheMENUOSD.
2 Selectthe"NEXTMENU"buttontoenterthemore
optionsettings.
3 SelectCOLORbypressingthebutton.
4 EntertoCOLORbypressingthebutton.
5 Settheoptionsbypressingtheoror
buttons.
6 SelectEXITtoleavetheOSDmenu.
Toreturntotheuppermenuorsetothermenuitems,
usetheuparrow( )button.
Eachoptionisexplainedbelow.
MENU>NEXTMENU>COLOR Description
GAMMA Setyourowngammavalue.:GAMMA0,GAMMA1,GAMMA2onthemonitor,
highgammavaluesdisplaywhitishimagesandlowgammavaluesdisplay
blackishimages.
COLORTEMP CUSTOM
•RED:Setyourownredcolorlevels.
•GREEN:Setyourowngreencolorlevels.
•BLUE:Setyourownbluecolorlevels.
Selectthescreencolor.
WARM:Setthescreentowarmcolortemperature(morered).
MEDIUM:Setthescreentomediumcolortemperature.
COOL:Setthescreentocoolcolortemperature(moreblue).
All manuals and user guides at all-guides.com
15
ENG
ENGLISH
CUSTOMIZING SETTINGS
DISPLAY
1 PressMENUbuttononthebottomoftheMonitorset
todisplaytheMENUOSD.
2 Selectthe"NEXTMENU"buttontoenterthemore
optionsettings.
3 SelectDISPLAYbypressingthebutton.
4 EntertoDISPLAYbypressingthebutton.
5 Settheoptionsbypressingtheoror
buttons.
6 SelectEXITtoleavetheOSDmenu.
Toreturntotheuppermenuorsetothermenuitems,
usetheuparrow( )button.
Eachoptionisexplainedbelow.
MENU>NEXTMENU>DISPLAY Description
HORIZONTAL Tomoveimageleftandright.
VERTICAL Tomoveimageupanddown.
CLOCK Tominimizeanyverticalbarsorstripesvisibleonthescreenbackground.The
horizontalscreensizewillalsochange.
PHASE Toadjustthefocusofthedisplay.Thisitemallowsyoutoremoveanyhorizontal
noiseandclearorsharpentheimageofcharacters.
All manuals and user guides at all-guides.com
all-guides.com
16
ENG
ENGLISH
CUSTOMIZING SETTINGS
OTHERS
1 PressMENUbuttononthebottomoftheMonitorset
todisplaytheMENUOSD.
2 Selectthe"NEXTMENU"buttontoenterthemore
optionsettings.
3 SelectOTHERSbypressingthebutton.
4 EntertoOTHERSbypressingthebutton.
5 Settheoptionsbypressingtheoror
buttons.
6 SelectEXITtoleavetheOSDmenu.
Toreturntotheuppermenuorsetothermenuitems,
usetheuparrow( )button.
Eachoptionisexplainedbelow.
MENU>NEXTMENU>OTHERS Description
LANGUAGE Tochoosethelanguageinwhichthecontrolnamesaredisplayed.
POWER
INDICATOR
Usethisfunctiontosetthepowerindicatoronthebottomsideofthemonitorto
ONorOFF.IfyousetOFF,itwillgooff.
IfyousetONatanytime,thepowerindicatorwillautomaticallybeturnedon.
WHITE
BALANCE
Iftheoutputofthevideocardisdifferenttherequiredspecifications,thecolor
levelmaydeteriorateduetovideosignaldistortion.Usingthisfunction,the
signallevelisadjustedtofitintothestandardoutputlevelofthevideocardin
ordertoprovidetheoptimalimage.Activatethisfunctionwhenwhiteandblack
colorsarepresentinthescreen.
All manuals and user guides at all-guides.com
17
ENG
ENGLISH
CUSTOMIZING SETTINGS
SUPERENERGYSAVINGSetting
1 Press (SUPERENERGYSAVING)buttonon
thebottomoftheMonitorsettodisplaytheSUPER
ENERGYSAVINGOSD.
2 Settheoptionsbypressingtheororbuttons.
3 SelectEXITtoleavetheOSDmenu.
Eachoptionisexplainedbelow.
SUPERENERGYSAVING Description
ON
EnablesSUPERENERGYSAVINGyoucansaveenergywiththisenergy-efficientfunction
OFF DisablesSUPERENERGYSAVING.
RESET ResetsthevaluesoftotalenergyconsumptionreductionandCO2emissionreduction
estimates.
 TOTALPOWERREDUCTION:Howmuchpowerissavedwhileusingthemonitor.
 TOTALCO2REDUCTION:ChangetheTOTALPOWERREDUCTIONtoCO2.
 SAVINGDATA(W/h)
396mm
(15.6inch)
470mm
(18.5inch)
508mm
(20inch)
546mm
(21.5inch)
SUPERSAVING 4W/h 4W/h 5W/h 6W/h
 SavingDatadependsonthePanel.So,thosevaluesshouldbedifferentfromeachpanelandpanel
vendor.
 LGcalculatedthesevaluesbyusing“broadcastvideosignal”
(includingbroadcastvideo:IEC62087)
 SUPERSAVINGreferstohowmuchpowercanbesavedusingtheSUPERENERGYSAVING
function.
NOTE
All manuals and user guides at all-guides.com
18
ENG
ENGLISH
CUSTOMIZING SETTINGS
Eachoptionisexplainedbelow.
PICTUREMODESetting
1 PressMODEbuttononthebottomoftheMonitorsettodisplaythePICTUREMODEOSD.
2 Settheoptionsbypressingtheororbuttons.
3 SelectEXITtoleavetheOSDmenu.
PICTUREMODE Description
CUSTOM Itisamodethattheusercanadjusteachelement.ItcanadjustthecolormodeoftheMainMenu.
TEXT Itisamodethatthescreenisadjustedtothebestforthetextworks.
PHOTO Itisamodethatthescreenisadjustedtothebesttoviewpictures.
CINEMA Itisamodethatthescreenisadjustedtothebesttoviewthevideos.
GAME Itisamodethatthescreenisadjustedtothebesttoplayagame.
All manuals and user guides at all-guides.com
19
ENG
ENGLISH
TROUBLESHOOTING
TROUBLESHOOTING
Checkthefollowingbeforecallingforservice.
Noimageappears
Isthepowercordofthedisplay
connected?

Checkandseeifthepowercordisconnectedproperlytothepower
outlet.
Isthepowerindicatorlighton? 
PressthePowerbutton.
Isthepoweronandthepower
indicatorRed?

Adjustthebrightnessandthecontrast.
Isthepowerindicatorflickering? 
Ifthedisplayisinpowersavingmode,trymovingthemouseor
pressinganykeyonthekeyboardtobringupthescreen.

TrytoturnonthePC.
Doyouseean"OUTOFRANGE"
messageonthescreen?

ThismessageappearswhenthesignalfromthePC(videocard)is
outofhorizontalorverticalfrequencyrangeofthedisplay.Seethe
'Specifications'sectionofthismanualandconfigureyourdisplay
again.
Doyouseea"NOSIGNAL"
messageonthescreen?

Whenthemonitorison"No-Signal"in5minutes,themonitorgoesto
DPMmode.
Doyouseea"OSDLOCKED"messageonthescreen?
Doyousee“OSDLOCKED”when
youpushMENUbutton?

Youcansecurethecurrentcontrolsettings,sothattheycannotbe
inadvertentlychanged.YoucanunlocktheOSDcontrolsatanytime
bypushingtheMENUbuttonforseveralseconds:themessage“OSD
UNLOCKED”willappear.
Displayimageisincorrect
DisplayPositionisincorrect. 
PresstheAUTObuttontoautomaticallyadjustyourdisplayimageto
theidealsetting.
Onthescreenbackground,vertical
barsorstripesarevisible.

PresstheAUTObuttontoautomaticallyadjustyourdisplayimageto
theidealsetting.
Anyhorizontalnoiseappearingin
anyimageorcharactersarenot
clearlyportrayed.

PresstheAUTObuttontoautomaticallyadjustyourdisplayimageto
theidealsetting.

CheckControlPanelDisplaySettingsandadjustthedisplay
totherecommendedresolutionoradjustthedisplayimagetotheideal
setting.Setthecolorsettinghigherthan24bits(truecolor).
All manuals and user guides at all-guides.com

Other manuals for E1642C

1

This manual suits for next models

3

Other LG Monitor manuals

LG L1970HR-BF User manual

LG

LG L1970HR-BF User manual

LG T1910B User manual

LG

LG T1910B User manual

LG 32UQ85R User manual

LG

LG 32UQ85R User manual

LG 29WL500 User manual

LG

LG 29WL500 User manual

LG L226WT User manual

LG

LG L226WT User manual

LG WK9 Specification sheet

LG

LG WK9 Specification sheet

LG E2370V-BF User manual

LG

LG E2370V-BF User manual

LG UltraGear 32GN50T-B.AUS User manual

LG

LG UltraGear 32GN50T-B.AUS User manual

LG Flatron L196WTQ User manual

LG

LG Flatron L196WTQ User manual

LG E2042SA User manual

LG

LG E2042SA User manual

LG 34WQ65X User manual

LG

LG 34WQ65X User manual

LG 27UP850 User manual

LG

LG 27UP850 User manual

LG 34BP88CN User manual

LG

LG 34BP88CN User manual

LG UltraGear 48GQ900-B.AEU User manual

LG

LG UltraGear 48GQ900-B.AEU User manual

LG M4200N User manual

LG

LG M4200N User manual

LG 20M35TD User manual

LG

LG 20M35TD User manual

LG FLATRON L2323T User manual

LG

LG FLATRON L2323T User manual

LG Flatron L1718S-BN User manual

LG

LG Flatron L1718S-BN User manual

LG L2000CE -  - 20.1" LCD Monitor Quick start guide

LG

LG L2000CE - - 20.1" LCD Monitor Quick start guide

LG E1948T User manual

LG

LG E1948T User manual

LG 505EM.ALLABL User manual

LG

LG 505EM.ALLABL User manual

LG 29WQ60A User manual

LG

LG 29WQ60A User manual

LG 19MB35P-I.AUB User manual

LG

LG 19MB35P-I.AUB User manual

LG 22M45HQ User manual

LG

LG 22M45HQ User manual

Popular Monitor manuals by other brands

Barco X8 installation manual

Barco

Barco X8 installation manual

RCA D36120 user guide

RCA

RCA D36120 user guide

IBM T74 manual 

IBM

IBM T74 manual 

JVC VM-4200 instructions

JVC

JVC VM-4200 instructions

I-Inc CY199D user manual

I-Inc

I-Inc CY199D user manual

Lenovo R25f-30 user guide

Lenovo

Lenovo R25f-30 user guide

PROLiNK PRO1912W user manual

PROLiNK

PROLiNK PRO1912W user manual

iSMA CONTROLLI PA-LED user manual

iSMA CONTROLLI

iSMA CONTROLLI PA-LED user manual

Samsung PPM42S2 Owner's instructions

Samsung

Samsung PPM42S2 Owner's instructions

Axis T8412 user manual

Axis

Axis T8412 user manual

Mermaid ventura 150 TFT x4 user manual

Mermaid

Mermaid ventura 150 TFT x4 user manual

Eizo FlexScan L760T-C user manual

Eizo

Eizo FlexScan L760T-C user manual

Elvox wide TOUCH 7311 operating instructions

Elvox

Elvox wide TOUCH 7311 operating instructions

CTX PR1400F user guide

CTX

CTX PR1400F user guide

Voxx Electronics Rostra Accessories 250-8222 installation guide

Voxx Electronics

Voxx Electronics Rostra Accessories 250-8222 installation guide

Philips B Series user manual

Philips

Philips B Series user manual

Samsung SyncMaster 550b Owner's instructions

Samsung

Samsung SyncMaster 550b Owner's instructions

Sony LDI-D100B Service manual

Sony

Sony LDI-D100B Service manual

manuals.online logo
manuals.online logoBrands
  • About & Mission
  • Contact us
  • Privacy Policy
  • Terms and Conditions

Copyright 2025 Manuals.Online. All Rights Reserved.