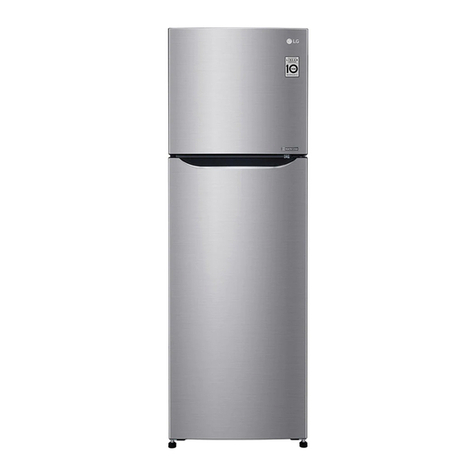
LG LRTB2023BS User manual

website:http:flwwwJgservice.com
e-mail:http:ff_.lgeservice._rrVtechsup,_l
_023W, BK
REFRIGERATOR-
OWNER'SMANUAL
PLEASE
READ THiS OWNER'S MANUAL THOROUGHLY
BEFORE OPERATING AND KEEP iT HANDY
REFERENCE AT ALL TIMES
R
iiiiiiiiiiiiiiiiiiiiiiiiiiiiiiiil_
iiiiiiiiiiiiiiiiiiiiiiiiiiiiiiii'_
iiiiiiiiiiiiiiiiiiiiiiiiiiiiiiiiiii_,,
iiiiiiiiiiiiiiiiiiiiiiiiiiiiiiiiiiiiiiiiii_.......
AVANT FAtRE
CONSERVEZ-LE
MOMENT.
COMO
P/NO, 3828JD83i 5V

TABLE OF REFRIGERATOR SAFETY ............................ 3
INSTALLING YOUR REFRIGERATOR ......... 4
Un_cking Your Refrigerator ............... 4
Installation .................................................. 4
Etectric_ R_uirements ............................. 5
FEATURES CHART ........................................ 6
OPERATION .................................................... 7
St_ing ..................................................... 7
Temperature Control .................................. 7
Ice M_ing ............................................ 8
Defrosling ................................................... 8
Disassembly and Adjustment ...................... 9
SUGGESTIONS ON FOOD STORAGE ...... 10
CLEANING YOUR REFRIGERATOR ......... 11
LAMP REPLACEMENT ............................... 12
GENERAL |NFORMATION ......................... 12
REPLACEMENT OF
_R OPENING TYPE ................................ 13
BEFORE CALLING FOR SERVICE .............. 16
2

REFRIGERATOR SAFETY
Your safety and the safety of others is very important.
We have provided many important safety messages in this manuat and on your appliance
Always read and obey all safety messages
This is the _fety a_ert symbol
This symbol alerts you to hazards tllat can kit_or hurt you and otl_ers.
All safety messages will be preceded by the safety alert symbol and the word
DANGER or WARNING. Ttlese words mean:
You _be killed or seriously injured ff
you don't foBow instructions.
You can be killed or seriously injured i1
you don't follow instructions,
A_i safety messages will identify the hazard, telt you how to reduce tt_e chance of injury, and felt
you what can happen if the instructions are net followed.
IMPORTANT SAFETY INSTRUCTIONS
WARNING: To reduce the risk of fire, eiectric shock, or injury when using your refrigerator
fotlow these basic precautions:
mPlug into a grounded 3-prong outlet
I Do not remove ground; prong.
iDo not use an adapter.
mDo not use an extension cord.
mDisconnect power before servicing,
m Replace all panels before operating
iRemove doors from your oid refrigerator.
iUse nonflammable cleaner.
I Keep flammable matedats and vapors,
such as gasoline, away from refrigerator.
,, Use two or more people to move
refrigerator using handles and instaJI
refrigerator
I Disconnect power before installing ice
maker.
(on some mode_s)
SAVE THESE INSTRUCTIONS
Suffocation Hazard
m
Remove doors from your old refrigerator.
Failure to do so can resu|t in death or
brain damage.
IMPORTA_ - Child entrapment and
suffocation are not problems of the past.
Junked or abandoned refrigerators are still
clangorous o even if they will sit for just a few
_ys, ff you are getling rid of your old
refrigerator, please follow these instructions to
help prevent accider4s
Before you throw away your old
I Take off tile
doors,
iLeave the shelves
in place so that
chiidren may not
easily climb
inside
3

INSTALLING YOUR
Excessive Weight Hazard
U_ two or mote _ple to move and
install refrigetator_
Failure to do so can result in back or
other injury.
Unpacking You_ R÷frige_ato_
Remove tape and any temporary labels from
your refrigerator before using, Do not remove
any warning type labels, the mode_ and seri_d
number _abel, or timeTech Sheet that is
attached to back wa_l of the refrigerator.
To remove any remaining t_ or glue rubthe
area briskly wiU_your thumb Tape or glue residue
can a_so be easity removed by rubbing a smal_
amount of liquid dish soap over the adhesive with
your fingers Wipe with warm water and dry
Do not use sharp instruments, rubbing alcohol,
flammable fluids, or abrasive cteaners to remove
tape or glue. These products c_s damage the
surface of your refrigerator. For more
information, see Important Safety Instructions
in the Refrigerator Safety section.
Refrigerator she_ves are installed in the
shipping position,
Please reinstall sheJves according to your
individual storage needs.
When Moving Your Refrigerator:
Your refrigerator is heavy, When moving the
refrigerator for cleaning or service, be sure
to protect the floor.
Always pull the refrigerator str_ght out when
moving it,
Do not w4gg_e or walk the refrigerator when
trying to move _, as floor damage could occur,
Explosion Hazard
K_p flammable materials and vapors,
such as gasoline, away from refrigerator,
Failure to do so can result in death,
explosion, or fire,
2,
3_
Avoid p_acingthe unit near heat sources,
direct sunlight, or moisture,
To avoid vibration, the unit must be level
if required adjus_ the leveling screws to
compensate for unevenness of the floor.
__e front should be slightly higher than the
rear to aid in door dosing.
Leveling screws can be tum_ easily by
tipping the cabinet slightly.
Turn the leveling screws clockwise ( _ ) to
raise the unit, counterclockwise ( _ ) to
lower
_nstatf this appliance between 55 '*F (13 °C)
and 110 ° F (43 °C.) tfthe temperature
around the appliance is too _ow or high
cooling ability may _essen
NEXT
1. Cle_ your refrigerator thoroughly and wipe
off al_ dust accumulated during shipping,
2. Instal} accessories such as ice cube bin,
drawers, shelves, etc.,, in their proper places.
They are packed together to prevent possibEe
damage during shipment
3. Let your refrigerator run for 2 or 3 hours
before putting food in it.
Check the flow of cold air in the freezer
compartment to ensure proper cooling.
Your refrigerator is now ready for use.
4

Eiect_icai F_equi_ements
Electrica| Shock Hazard
Plug into a grounded 3*prong outlet.
Do not remove ground prong.
Do not use an adapter.
Do not use an extension cord.
Failure to follow these instructions can
result in death, f_re, or electrical shock.
_fore you move your refrigerator into its final
location, it is important to make sure you have
the proper electrical connection: m
P
Recommended Grounding Meth_
A 115 Vott 60 Hz., AC only 15 or 20 ampere
fused, grounded ele_dca_ supply is required, ff
is recommended that a separate circuit serving
only your refrigerator be provided. Use an outlet
that cannot _ turned off by a switch. Do not
use an extension cord.
NOTE: Before performing any type of
installation, cleaning, or removing a ligllt bulb
turn the control, (Thermo_at, Refrigerator, or
Freezer Contro_ depending on the model) to
OFF and then disconnect the refrigerator from
the electrical source. When you are finished_
reconnect the refrigerator' to the e_ectricol
source and reset the controt (Thermostat,
Refrigerator or Freezer Control depending on
the model) to the desired setting.
5

FEATURES CHART
FREEZER
COMPARTMENT
Freezer Shelf
General Type
ice Tray
Freezer Temper_ure
Control Dial
REFRIGERATOR
COMPARTMENT
Temperature
Control Dial
Lamp
Shelves
Egg Box
Snack Corner
Crisper
Used to keep fruits
and vegetables fresh
and crisp.
Base Grille
Push the grille toward
the refrigerator unti]
snaps into p_ace
Freezer Door Bin
Door Cooling
the refrigerator
door, the cold air
passageway is
installed to supply
co]d air to the
doorside of the
refrigerator
compa_ment
Can Server
Dairy Corner
Adjustable
Door Bin
Refrigerator Door
Rack
Leveling Screw
(Inside)
6

FREEZER
When your refrigerator is first installS, allow to
mn 2-3 hours to stabilize at norton operating
temperature prior to fil_ing it with fresh or frozen
foods.
If operation is interrupted wait 5 minutes before
restarting.
Temperstur@ Control
REFRIGERATOR
REFRIGERATOR CONTROL
I Your refrigerator has two controls that let you
regulate the temperature in the freezer and
refrigerator compartments.
i Initially set the REFRIGERATOR CONTROL
at 5 and the FREEZER CONTROL at 2.
Leave it at this setting for 24 hours (one day)
to _abilize
Then adjust the compartment temperature
according to your desire.
IREFRIGERATOR CO_ROL = 1,2, 3, 4, 5,
6,78
The higher the number setting, the colder the
refrigerator compartment wil_ become.
m To turn the refrigerator off, turn the dial to the
right to the word "off".
Mtn @
Normal
Max
.. FREEZER CONTROL _ 1,2 3
Setting at 3the freezer compartment
becomes colder.
But the refrigerator compartment _comes
warmer b_ause less cold air flows into the
refrigerator compartment
,, In cold wether the unit operates tess and
the freezer compadment has a tendency to
warm up
For a colder freezer, turn the FREEZER
CONTROL to 3.
,, If you put a tot of food in the freezer or open
its door frequently, its temperature is apt to
be somewhat higher. In this case, set the
FREEZER CONTROL dial at 3 to cool it.
Return the FREEZER CONTROL dial to the
original pesition to cut down the consumption
of energy.
,, |n hot weather or if a lot of f_ _s put in
the ref_r_gerator compartment, the
refrigerator compartment has a tend-ency to
warm up
For a colder refrigerator turn the FREEZER
CONTROL to 1 to dire_ more co_d air into
the refrigerator com_rtment and the
REFRIGERATOR CONTROL to 6'_8.
If the FREEZER CONTROL is set at 3_ the
refrigerator compartment will not be cold
enough.
m
P
7

ICE MAKING (Fo_ Gen÷rai
%=p÷Ice Maker)
m If tJ'_etray is fi_led with water to the highest
levet, it w'Jll be difficult to remove ice cubes.
i For quick freeze adjust tile freezer dial to 3.
i Defrosting takes place automatically.
•, Defrosted water flows down to the
evaporating tray which is _ocated in the lower
back side of the refrigerator and is
evaporated automaticaIFy,
TO FemOV÷ ice OI,JbeS
twist the tray°
In Do not warp the ice tray.
Doing so may result in damage to the tray,
i To remove ice cubes easily, pour water on
the tray or soak it into water before removing
ice cubes,
Adiustin 9 the Crisper
Humiidity Control
You can contro_ the amount of humidity in the
moisture-sealed crispers Adjust the contro_ to
any setting between Veg, and Fru_,
gFruit (open)lets moist air out of the crisper
for best storage of fruits
m Veg (cbsed) keeps moist air in the cdsper
for best storage of fresh _eafyvegetables,
8

Lift the front side of the shelf slightly and pull it
forward to remove it, Make sure that a shelf is placed
horizontally,
Failure to do so may result in falling of
the shelf, causing spilling or spoiling of
food.
ri i i_
Ad_ust_ sg She_v÷s
The she_ves in your refrigerator are adjustable
to make room for various types of food
mTo remove a shelf
Tilt up the front of the shelf in the direction of
(1) and lift it in the direction of (2), Pult the
shelf ouL
aTo replace a shelf
Tilt the front of the shelf up and guide the
shelf hooks into the s_ots at a desired height,
Then Iower the front of the shelf so that the
hooks drop into the s_ots,
,,, Encour_ed shelf #ition
If you put shelf on the place indicated by
arrow, it is profi_ble for the food storage,
Snad< Corn@'
While holding it with one hand, pull it forward
s_ightly.
Lift it slightly and pull it o_,
m
P

SUGGESTIONS ON
FOOD STORAGE
Sto_i_°_gFood
=' Store fresh food in the refrigerator
compartment. How food is frozen and
defrosted is an important factor in
maintaining freshness and flavor
I Do not stere food which spoils easily at low
temperatures, such as bananas, pineappies,
and melons
I Allow hot food to cool pdor to storing. Placing
hot food in the refrigerator could spoil other
food, and lead to tligh e_ectricity bills!
i When stodng, wrap food in vinyl, or place in
a covered container. This prevents moisture
from evaporating, and helps food to keep its
taste and nutritional va_ue.
•, Do not block air vents with food Smooth
circulation of chilled air keeps the refrigerator
temperature even.
m Do not open tile door frequently Opening the
door lets w_m air enter the refrigerator,
causing temperature to rise=
m To adjust the temperature control easity do
not store food near the temperature contro_
dial
R_ _ _ 4 4
,_fr_ge_ato_ Cempadment
aAvoid placing moist food on deep interior
refrigerator shelves, it could freeze upon
direct contac:t with chilled air. To avoid this
is belier to store food in a covered container.
,, Always dean food pnor to refrigeration.
Vegetables and fruits should be washed and
wiped, and packed food should be wiped
cleam to prevent other food from spoiling.
"if you keep the refrigerator in a hot and
humid pFace, frequently opening the door
or putting a lot of vegetables in it may
cause dew to form. This has no effect on
_s performance. Remove the dew with a
dry, dust-free cloth.
mtfdroplets form beneath the cover of the
vegetaJ01e drawer, keep vegetables or
fruits wrapped with plastic wrap.
R_÷ezer CompaAment
*, Do not store bottles in the freezer
compartment -they may break when frozen.
m Do not refreeze feed that has been
defrosted. This causes loss of taste and
nutritional value
,, When stodng frozen food, like ice cream, for
a long period, place it on the freezer shelf,
not in the door rack.
10

CLEANING YOUR
REFRIGERATOR
Explosion Hazard
Use nonflammable cleaner=
Failure to do so can result in death,
explosion, or fire.
Both the refrigerator and freezer sections
defrost automaticafly, However_ dean both
_ctions aboL,_ once a month to prevent odors
from building up, Wipe up spi]ts immediately.
To clean your refrigerator.
'." Unplug refrigerator or d[sconned power
i Remove al_removable parts from inside,
such as shelves, crispers, etc,
.= Use a clean sponge or soft cloth and a mi_d
detergent in warm water, Do not use
abrasive or harsh cleaners,
.. Hand wash_ dnse, and dry all surfaces
thoroughly,
iPlug in refrigerator or reconnect power
m Additional cleaning tips are listed below:
PART COMMENTS
metal surfaces helps provide
rust protection Do not wax
plastic parts, Wax painted
metal surfaces at least twice
a year using appliance wax
(or aL_o paste wax), Apply
wax with a clean, soft doth.
inside wails
(allow
freezer to
warm up
cioth won't
stick)
For products with a stainless
steel exterior use a clean
sponge or soft cloth and a
mitd detergent in warm
water. Do not use abrasive
or harsh cleaners Dry
thoroughly with a soft cloth
To help remove odors, you
can wash the inside of the
refrigerator with a mixture of
baking soda and warm water.
Mix 2 tablespoons so_ to 1
quart of water (26 g soda to 1
}iter water.) Be sure the soda
is completely dissolved so it
is not abrasive and _sn't
scratch the surfaces of the
refrigerator
Door liners
and gaskets Do not use cteaning waxes,
concentrated detergents,
bleaches, or cleaners
containing petroleum on
plastic parts.
Plastic parts
(covers attd
panels)
Do not use paper towels
window sprays, abrasive
cleansers, or flammable
fluids. These can scratch or
damage material
Condenser - Remove base gdHe (See
coils the Base grille section on
page 6)
= Use a vacuum witi_ an
extended attachment to
clean condenser coils,
Vacuum coils wl)en dusty or
dirty.
Coils may need to be
cteaJqed as often as every
other month
i Replace base grille.
m
P
11

1_ Unplug the power cord from the outlet,
2 Remove refrigerator she_ves.
3. Upper Refrigerator Lamp
Release the hoo_ on both ends of the lamp
shield and pullthe shield downward to
remove it
4_ "rum the _amp counterclockwise.
5. Assemble in reverse order of disassembly.
Replacement bulb must be the same
specification as originaL(Max 40 W)
Powe_ Faiiu_re
Most power failures are corrected in an hour or
two and will not affect your refrigerator
temperatures However, you should minimize
the number of door openings while the power is
off. During power failures of longer duration,
place a block of dry ice on top of your frozen
packages.
_ You _aove
Remove or securely fasten down a_Jloose items
inside the refrigerator.
To avoid damaging the leveling screws, turn
them all the way into the base_
AntioCo,r_densatie_ Pipe
The oulside wall of tile refrigerator cabinet may
sometimes get warm, especially just after
instalmetion. Don_ be alarmed. This is due to the
anti*condens_ion pipe, which pumps hot
refrigerant to prevent sweating on the outer
cabinet wail
GENERAL
INFORMATION
Vscation 'i°ime
During average length vacations, you wiil
probably find it best to leave the refrigerator in
operation. Place freezabie items in freezer for
_onger storage. When you plan to be away for
an extended period,
= Disconnect the power cord or set refrigerator
Diamknob to off position,
I Remove a_lfood and other items from the
unit,
m C_ean the unit thoroughly.
= Leave the shetves in the unit to discourage
children from playing in the unit,
m Leave the doors open and b_k them to
ensure that they _nnot be cFosed.
Anti-Condensation
Pipe
,, Dry ice is very cold! Do not aiJow it to
touci_ bare skin. It is welJ below 0 _ and
will cause immediate frostbite and damage
to the skin and other tissue.
m Dry ice is frozen carbon dioxide. Use only
in a well ver_i_ated area. As the ice
releases carbon dioxide vapor, _ could
cause light-headedness, fainting,
suffocation or deeth.
12

REPLACEMENTOF
DOOR OPENINGTYPE
1, Before replacing the door opening type,
first of al_ you sho@d _ke out of fo_ and
acces_ries _ike shelves or trays, which
are not fixed in the refrigerafor
2. Use a '+_Driver, BoIt Driver, Torque
Wrench or Spanner to fix or remove the
bo&
3, Be carefut not to tip over the refrigerator
in di_ssembiing or assembling the Lower
Hinge and the Adjustable Screw
Asm Dont lay the refrigerator down when
working it will cause it to maffunction
4, Be careful not to drop tile door in
disassembling or assembling tile freezer
or the refrigerator door,
5. This refrigerator, according to the
installation position or user's preference
can have the door opening from the right
or left
How to Replace the Door
Opening Left to Right
(when converting from the
b_Fopening type to ri@st
opening type}
1, Removing Freezer Door
I Separate the top hinge cover (1)
iLoosen 3 screws and separate off the top
hinge (2)
i Lift the freezer door (3) sigl%tIy and separate it,
i Separate the cover (4) using a (-)-
screwdriver and fix if on the right.
i Loosen the screw (5), separate off the
stopper (6), and fix it on the [eft (on the
opposite side)
= Separate the cover (7) using a (-)o
screwdriver and fix if on the dght_
I Separate off (8),
2_Removing Refrigerator Door
ILoosen the screw (9) and separate off the
middle hinge (10).
i Lift the door (11 )sightty and separate if.
i Take off the Grille (12).
i Loosen the screw (14) and fix the pin (15)
and the cap (16) into tile hole on the [eft.
i Remove the _rew (17).
I Loosen the screw (18) Sep_arate the bottom
hinge (20) and fix _ on the teft.
i Fix the screw(17) on the right.
i Loosen the screw (22) and fix the stopper
(23) on the left
m
t_Ji
13

3. Moving Freezer Handle
mLoosen 2 screws (4).
m Loosen the screws (1) (two on the top and
two on tlie bottom), take off the handle (2),
and attach it on the right.
I Attach the removed 2 screws (4) on the left.
= Attach the cap (3) on the top on the opposite
side_
4. Moving Refrigerator Handle
==Separate the cap (8) and toosen 2 screws
(9),
I Loosen 1 screw (6) (on the bottom), pull tl_e
cover (5) downward, and take it off
g Loosen 3 screws (6) (two on the top and one
on the center) take off the handle (7) and
attach it on the right.
m Attach the cover (5) by pushing it up.
I Attach the removed cap (8) and 2 screws (9)
on the left.
,, Take off tile cap (10) and attach it on tI)e
right.
14

5, Attaching Refrigerator Door
I Fix the base Grille (1).
i Fix the door (3) to the bottom hinge pin.
i Fix the middie hinge (4) on the opposite side
with the screw (5)
6. Attaching Freezer Door
I Place tile washer (6) to the mille hinge pin
(7)
i Place the door (8) so that it f_ (5) into the
middle hinge pin (7).
,= Fix the top hinge(iO) with screws.
= Fix fop hinge cover (11).
7_After Completing the job
mMake sure that the four corners of the door
gasket are not folded It is recommend_ to
appty a small amount of siEicon grease on
them.
I Adjust the teveling screw on the bottom to
the highest level so that the front side of the
refrigerator is higher than the rear side,
mif you need assistance after switching the
direction of the door opening as shown
above, caU a servi_ center.
Comer
m
P
i
l_e 7
15

O/M)£-_(2~17) 2(_Z2.1G254:4 FM _10_6
BEFORE CALLING FOR SERVICE
SERVICE CALLS CAN OFTEN BE AVOIDED!
IF YOU FEEL YOUR REFRIGERATOR IS NOT OPERATING PROPERLY, CHECK THESE
POSSIBLE CAUSES FIRST:
PROBLEM
REFRIGERATOR DOES NOT
OPERATE
POSSIBLE CAUSES
wHas a house fuse biown or circuit breaker tripped?
m Has the power cord p(ug been removed or loosened from
the electrical wat_ outlet?
REFRIGERATOR OR
FREEZER COMPARTMENT
TEMPERATURE TOO WARM
u Temperature contro( not set on proper position.
= Appliance is ptaced c(ose to w_l or heat source.
aWarm weather4requent door o_nings,
,,, Door is not closed entire)y.
,= Door (eft own for a long time,
III Large amount of foods are kept in the refrigerator.
ABNORMAL NOiSE(S) aRefrigerator is instaltod in a weak or uneven ptace or
leveling screw needs adjusting.
ii Unnecessary objects piaced in the back side of the
refrigerator
REFRIGERATOR HAS ODOR = Foods with strong odors should be lightly covered or
wrapped,
11 interior needs cleaning,
DEW FORMS ON THE " Not unusual during periods of high humidity,
CABINET SURFACE m Door may have been left ajar,
Custome_ Assists_sce
aTo Prove Warranty Coverage
Retain your Sa_es Receipt to prove date of purchase_
A copy of your Sales Receipt must be submitted at the time warranty service is provided
m To Obtain ProducL Customer or Service Assistance
Cai( ToiFfree for Customer Service
Tel: 1-877-714-7486
=. To Obtain Nearest Authorized _rvice Center
Cal_ 1-877-714-7486, push option #1, 24 hours a day_ 7days per week.
Ptease have your product type (Monitor, TV, VCR, MWO, Refrigerator) and ZIP code ready.
16

m
P
17

iiiiiiiiiiiiiiiii
iiiiiiiiiiiiiiiii
This manual suits for next models
2
Table of contents
Other LG Refrigerator manuals