LG WD-20900 User manual

CAUTION
• The appliance is not intended f or use by young children or infi rm persons without sup ervision.
• Young Children should be supervised to ensure that they do not play with appliance.
CAUTION
The hose supplied wit h the machine must be used.
Old hoses may not be reused.
1 2 3 4 5
1 2 3 4 5
Install or store the appliance where it will not be exp osed to sub-zero temperatures or exposed to the weather. Fit the power plug
to a grounded wall socke t that complies with all statutor y regulations and ordinances. Ensure that the base opening is free from
obstruction by carpeting if the washing machine is installed on a c arpeted fl oor. In countries where there is a risk of cockroac h
infestation or other vermin, pay particular attention to keep the appliance and its surro undings in a clean condition at all times.
Any damage which may be caused by co ckroaches or other vermin is not covered by the appliance g uarantee.
CAUTION about p ositioning the appliance
Install the was hing machine on a flat hard floor. Make sure th at air circulation around th e washing machine is
not impeded by car pets, rug etc.
•
Never try to correc t any unevenness in the fl oor using pieces of wood, cardboard or similar mater ials under the washing machine.
•
If it is not possibl e to position the washing machine away from a gas cooker or coal burning stove, an insul ation panel
(85x60 cm) covered with aluminum foil on the side facing the coo ker or stove, must be inserted between the t wo appliances.
•
The washing machine must not be inst alled in rooms where the temperature may drop below 0°C.
•
Please ensure that when the washing machine is in stalled, that a Service Technician can gain easy access in the event of a
breakdown.
•
Adjust all four feet using the transit bolt spanner provided to ensure that the appliance is stable, with 20mm clearnace between
the top of the washing machine and under side of the worktop.
CAUTION about t he power cord
We recommend connec ting most appliances to a dedi cated circuit which is protected by a mains fuse.. That is, a single outlet
supplying pow er only to the appliance con cerned, without any additional out lets or branch circuits. Check the specifi cations
of this owner‘s manual. Do not overload wa ll sockets. Overl oaded wall sockets, loose or damaged wall socket s or extension
cords, frayed powe r cords, damaged or cracked w ire insulation are dangerous. Any of these conditions could r esult in electric
shock or fi re. Periodically examine the cord of your appliance, and if its appearance indicates damage or deterioratio n, unplug it,
discontinue use of the applianc e, and have the cord replaced with an exact replacement par t by an authorized servicer. Protect
the power cor d from physical or me chanical abuse, such as being twisted, kinked, pinched, squashed in a jam b of a door, or
walked upon. Pay particular a ttention to plugs, wall outlets, and the point wh ere the cord exits the appliance.
CAUTION about l ocation and moving
This equipment is not designed for mar itime use or for use mobile installations such as caravans, airc raft etc. Turn off the
stopcock if the machine is to be left for any length of time (e.g. if you are going on holiday) , especially if there i s no fl oor drain
(gully) in the immediate vicinity. If relocating the applia nce use the original packing material. Packaging material (e.g. plastic fi lm,
Styrofoam ) can be dangerous for children. Ther e is a risk of suffocation ! Keep all packaging well away from children and do not
allow children to play inside the bowl as th ey may become trapped.
CAUTION about t he floor surface
• T he installation surface must be clean, dry an d level.
• In stall washing machine on a fl at hard fl oor.
• Po orly constructed timber base fl oors can contribu te to excessive noise and vibration.
• Pro per placement and levelling of the washing machine ensure long, regular and relia ble operation.
• T he washing machine must be perfectly level and fi rmly in position.
• I t must not “see-saw” across corners under load.
• T he installation surface must be clean, free from fl oor wax and other lubricant coatings.
• D o not allow the feet of the washing machine to get wet. If feet of the washing ma chine get wet, slipping may occur.
Ownerʻs Manual
F1403RDS(1~9)
WD-20900
Before use plea se read carefully the safet y instructions!
Thank you for buying an LG fully aut omatic washing machine.
Please read this owner‘s manual ca refully, it provides instructions on safe installation, us e and maintenance.
Keep it handy for future refere nce of this machine. Make a note of the model and serial numbers of you r washing machine.
Rattling and cla nking noise Extraneous o bjects such as coins or safety pins maybe in drum or pum p.
Thumping sound Heavy wash loads may produce a thum ping sound. This is usually normal.
Vibrating nois e Have all transit bolts and pac king been removed?
Water leaks. Check and tighten hose conne ctions. Unclog drain pipe. Contact plumber i f necessary.
Excessive suds Too much dete rgent or unsuitable detergent.
Washing machine does n ot start Power cord may not be plugged in or conne ction may be loose.
Washing machine won’t sp in Check that the door is shut.
Check that foreign object s may be blocking the drain causing the water not to drain out.
Door does not open Once started, the d oor can not be opened for safety reasons.
At the end of the cycle or when Start Paus e is pressed, wait one or two minutes before
opening the door to allow the elec tric locking mechanism time to release.
Troubleshooting
P/No.: M FL59755535
• Water supply is not adequate in area
• Water supply taps are not completely
open.
• Water inlet hose(s) are kinked.
• The fi lter of the inlet hose(s) are clogged.
Check another tap in the house.
Fully open tap.
Straighten hose(s).
Check the filter of the inlet hose(s).
• Drain hose is kinked or clogged.
• The drain fi lter is clogged.
Clean and straighten the drain hose.
Clean the drain filter.
For more detailed information, please
refer to “Cleaning the drain pump filter”
• Load is too small.
• Load is out of balance.
• The appliance has an unbalance detection
and correction system. If individual heavy
articles are loaded (ex. bath mat, both
robe, etc.), this system may stop spinning
or even interrupt the spin cycle altogether.
• If the laundry is still too wet at the end of
the cycle, add smaller articles of laundry to
balance the load and repeat the spin cycle.
• Floor is unstable.
Feet are not adjusted
Add 1 or 2 similar items to help balance
the load.
Rearrange load to allow proper spinning
The fl oor should be a solid surface.
Adjust the feet so that the machine
does not rock from side to side or front
to back.
• Is the door opened or not
completely closed?
Close the door completely.
If the “ ” does not clear, call for
service.
Unplug the power plug and call for
service.
• Water overfi lls due to the faulty water
valve.
Close the water tap.
Unplug the power plug.
Call for service.
Restart the cycle.
• Water level sensor has malfunctioned.
• Over load in motor.
• The washer experienced a power
failure.
Turn the tap on.
If “ ” is not released, unplug
power plug and call for service.
• Check water supply.
1 3
5
2 4
Turn off the
water tap
Unscrew the
water inlet hose
Pull out the water
inlet filter
Clean the filter
using a hard
bristle brush
Pull out the
dispenser drawer
Clean the dispenser
drawer under
flowing water
Clean inside the
recess with an
old toothbrush
Insert the dis-
penser drawer
Cleaning the water inlet filter
Cleaning the dispenser drawer
Open the lower
filter cover and
pull out the drain
hose.
Unplug the drain
hose plug.
Then
open the filter by
turning to the left
Remove any
extr aneous
matter from the
pump filter
After cleaning, refi t
the drain filter cap
and tighten it by
turning it clockwise.
insert the drain plug
Refit the inlet
filter and tighten
up the inlet hose
Close t he lower
cover
Once you
have finished
cleaning, replace
the drawer and
run a rinse cycle
without laundry or
soap.
Warning: Before cleaning t he washing machine interior, unplug the electrical power cord to avoid the r isk of electric
shock.
Exterior
Proper care of your washing machine c an extend its service life.
The outside of the machine ca n be cleaned with warm water and
a neutral non-abrasive ho usehold detergent. Immediately wipe
off any spillage. Wipe with dam p cloth. Avoid striking the surface
with sharp objects. N ever hose down the machine!
Interior
Dry around the washing machin e door
opening, flexible gasket and doo r glass.
Run washing machine through a complet e
cycle using hot w ater. Repea t process if
necessary.
Cleaning in general
Important : Do not use methylated spirits, solvents or s imilar products.
Cleaning and Maintenance
Cleaning the drain pump filter
ca. 100 cm ca. 100 cm
ca. 145 cm ca. 145 cm
ca. 105 cm ca. 105 cm
min. 60 cm
max. 100 cm
min. 60 cm
max. 100 cm
60 – 100 cm
Hose
Retainer
Tie
strap
max. 100 cm
min. 60 cm
Installation of drain hose
• The drain hos e should not be placed higher than 100 cm above the fl oor.
• Proper secur ing of the drain hose will protect the fl oor from damage due to any water leakage.
• If the drain ho se is too long do not force back into the washing machine. This will caus e abnormal
noise and cause the machine to malfu nction and leak.
Call for service.• Water leaks
Electrical connection
1. Do not use an extension cord or double ad apter.
2. Have damaged supply cords repl aced by the manufacturer or its service agent s or a similarly qualifi ed
person to prevent danger.
3. Always unplug the machine and tur n off the water supply after use.
4. Connect the machine to an ear thed socket in accordance with current wirin g regulations.
5. The appliance must be pos itioned so that the plug is easily accessible.
• Repairs to the w ashing machine must only be carried out by qualifi ed personnel. Repair s carried out by inex-
perienced persons may cau se injury or serious malfunctioning. Conta ct your local service centre.
• Do not install your washing machine in rooms where temperature below freezing may occur. Frozen hoses may
burst under pressure. The ele ctronic control unit may become unreliable at temperat ures below freezing point.
• If the appliance is delivered in the winter mo nths and temperatures are below freezing : Leave the was hing
machine standing at room temperat ure for a few hours before putting it into operatio n.
Safety instuctions for the installation
Name of product Front loading washing machine
Power supply 220-240 V~, 50 Hz
Size WxDxH mm : 600 x 640 x 850
Weight 73 kg
Max. Watt
2100 W (Wash) / 1500 W ( Dry)
Capacity Refer to the Rating La bel
Water consumption 73
Permissible water pressure 1.0-10 bar (100-1000kPa )
Technical Specification
Safety instructions f or use
Read all instructions and explan ations of the installation before use. Follow the instructi ons carefully. Keep the operating instruc-
tions handy for later use. If the appliance is sold or passed on t hen ensure that the new owner always receives these operat ing
instructions. Th e following warnings must be strict ly observed for safety rea sons. They must be read before ins talling the appli-
ance and putting it into op eration.
• I ntended use: This appliance has been design ed exclusively for use in dry-interior households. Us e the appliance only with
cold drinking water and only for wa shing textiles with washing detergents designed fo r washing machines. Every other use is
improper and may lead to injuries, where by the liability of the manufacturer will cease.
• T his appliance may only be used by adults. Do not allow children to to uch the controls or to play with the product.
• N ever modify the appliance on your own, as this is dan gerous.
• T his appliance is heavy. Transporting with care.
• R emove all packaging and transport bolts bef ore using the appliance. Otherwise serious da mage may result.
• A ll installation work must be carried out by a quali fi ed fi tter or technician.
• H ave electrical connections done by a qualifi ed electrician.
• N ever place the appliance on the power cord.
• I f the appliance is placed on a carpet then place the fe et so that air can circulate underneath the appliance.
• A lways unplug the machine and turn off the water supply af ter use. Disconnect appliance by pulling only the plug - never
disconnect by pulling the power co rd. Never touch the plug with wet fi ngers or hands.
• D o not overload the appliance.
• Wa sh only machine-washable textiles. If you have doubts r egarding this, then observe the markings on t he label.
• N ever place electrical heaters, candles etc. in th e vicinity of the appliance. They could cause the ap pliance to ignite or parts
to warp.
• P rotect the appliance from wet and damp. Other wise, there is danger of electric shock and fi re.
• C onnect the appliance to a suitable wall socket for 2 20-240V. Never use an extension cord or double adapter.
• E mpty all pockets. Hard or sharp object s such as coins, needles, nails, screws or stones may cause se rious damage.
Unbalanced mass may create he avy vibrations. If heavy vibrations remain al so without load, call for an authorized customer
service.
• D o not wash or dry articles that have been clean ed in, washed in, soaked in, or dabbed with combustible or ex plosive
substances (su ch as wax, oil, paint, gasoline, degreasers, dry- cleaning solvents, kerosene, etc.). T his may result in fi re or
explosion.
• N ever insert products coated with mineral o ils (e.g. nylon coating, plastic belts, etc. ) into the mac hine. If a stain remover has
been used then make sure that the s olvent has been carefully washed out before inser ting the clothes into the appliance. Oil
may remain in the tub after a whole cy cle resulting in fi re during dry ing. So, do not load oily clothes.
• D o not operate the appliance at locations where fl ammable substances are present such as oil, benzene or highly in fl amma-
ble gas. Such materials may cause fi re or explosion. Never use combustible detergents.
• O nly add the prescribed amount of softener. Excessi ve amounts may damage the clothes.
• A fter washing, keep the drum door open to protec t the door seal.
• M ake sure that all water has run off before opening the do or. Never open the door if w ater still remains. Danger of scalding.
• A nimals and children may get into the washing machine. So always check the a ppliance before using it.
• D uring washing, the glass door becomes very hot . Keep children away from the appliance when in operation.
• N ever try to repair the machine yourself. Incorrect r epairs may result in injuries and/or serious d efects to the machine.
• T he product should be serviced and repaire d only by the authorised customer service using o riginal replacement parts.
• W hen disposing of your old machine, the power cable must be cap ped and the door lock must be made unusable in order to
protect children.
• W hen placing on a carpeted fl oor, make sure that the opening in the socket is not blocked.
• I f the appliance has been under water then contac t the customer service. There is danger of elect ric shock and fi re.
• T he cover cup of the fi lter as well as t he dispenser drawer may not be opened during the operation.
• K eep all washing powder and detergents away from children. Danger o f poisoning
Disposal
• When this cro ssed-out wheeled bin symbol is attache d to a product it means the product is cover-
ed by European Directive 2 002/96/ EC.
• All elect rical and electronic products should be disp osed of separately from municipal waste
stream
via designated collection fa cilities appointed by the government or the local auth orities.
• The corr ect disposal of your old appliance will help prevent potent ial adverse consequences for the
environment and human health.
• For more det ailed information about disposal of your old app liance, please contact your city offi ce,
waste disposal ser vice or the shop where you purchased the product.
Safety instructions f or use
To minimize the risk of fire w ithin the inner bowl, the fol lowing should be observed :
• Item s that have been spotted or soaked with vegeta ble or cooking oil constitute a fi re hazard and should not be
placed in a tumble dryer.
Oil-affected items can i gnite spontaneously, especially when exposed to heat s ources Such as in a tumble dryer.
The items become warm, caus ing an oxidation reaction in the oil. Oxidation creates heat . If the heat cannot
escape, the items can beco me hot enough to catch fi re. Piling, sta cking or storing oil-affected items can prevent
heat from escaping and so creat e a fi re hazard.
If it is unavoidable that fabric s that contain vegetable or cooking oil or have been c ontaminated by hair care prod-
ucts be placed in a tumble dr yer they should fi rst be washe d in hot water with extra detergent-this will reduce,
but not eliminate, the hazard. Th e ‘cool down’ cycle of tumble dryers should be used to reduce t he temperature
of the items. They should not be remo ved from the tumble dryer or piled or stacked while hot.
• Item s that have been previously cleaned in, washed in, soaked in or spo tted with petrol/gasoline, dr y-cleaning
solvents or other fl ammable or explosive subs tances should not be placed in a tumble dryer.
Highly fl ammable substances commonly use d in domestic environments include acetone, denatured alc ohol,
petrol/gas oline, kerosene, spot removers (some brands ), turpentine, waxes and wax removers.
• Item s containing foam rubber (also known a s latex foam) or similarly testured rubber like materials s hould not be
dried in a tumble dryer on a heat se tting.
Foam rubber materials ca n, when heated, produce fi re by sp ontaneous combustion.
• Fab ric softeners or similar products should not be u sed during a drying cycle, to eliminate the effects of s tatic
electricity unless t his practice is specifi cally recommended by the manufacture r of the fabric softener or product.
• Und ergarments that contain metal reinforcement s should not be placed in a tumble dryer.
Damage to the tumble dryer ca n result if metal reinforcements come loose during dr ying.
When available a drying rack c ould be used for such items.
• Plastic articles su ch as shower caps or babies waterproof napkin cove rs should not be placed in a tumble dryer.
• Rub ber-backed articles, clothes fi tted with foam rubber pads, p illows, rubber boots and rubber-coated tennis
shoes should not be placed in a tumble d ryer.

1
1 2
1 2 3 4 5
3 sec.
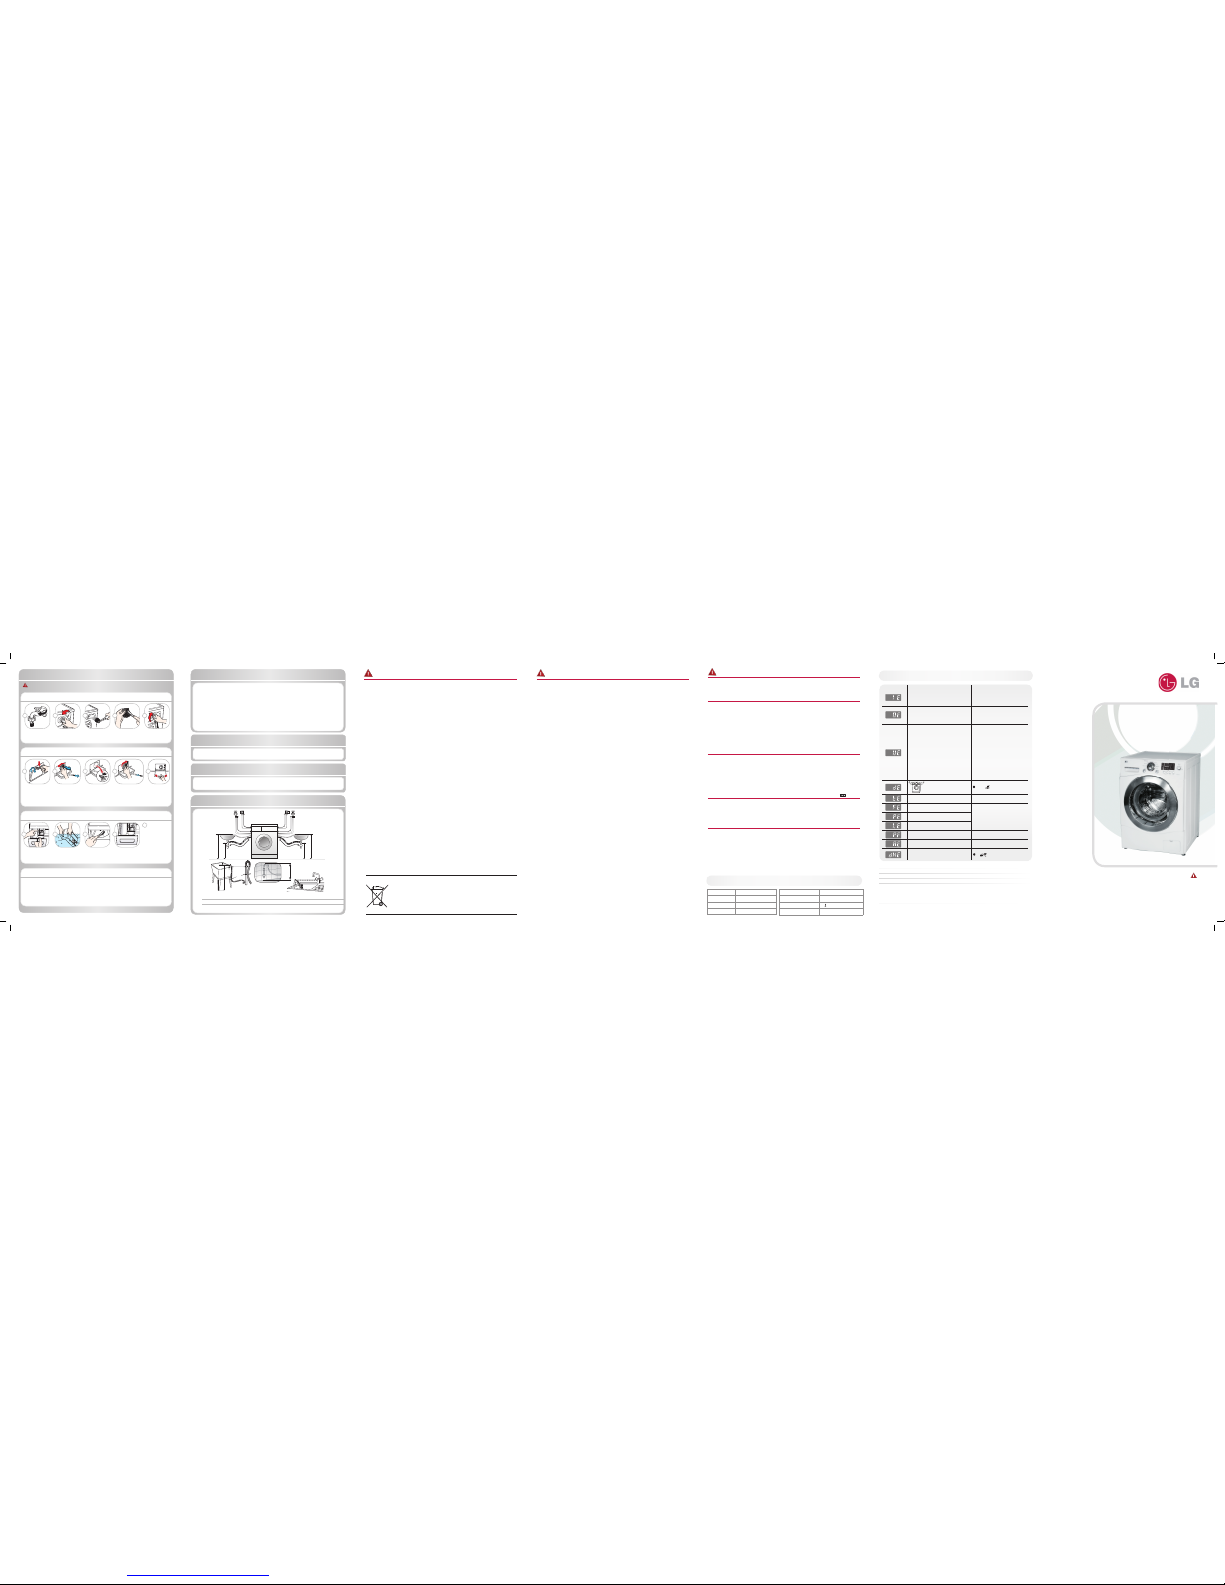
INSERT PLU S INTO THE MAINS SOC KET
Never touch the plug with wet hand s!
Never remove the plug from the
socket by pulling on the cord.
HANG UP WAS TE WATER HOSE
Hose elbow connectio n e.g. attach to water ta p
WATER CONNECTION
Turn on the water tap
CHECKIN G THE MACHINE
Never use a defe ctive mach ine! In c ase of an y
failure , first un plug the m achine and turn off the
water
tap.
DOIN G LAUNDRY A ND USING MA CHINE
WITH CAR E
- empty all pockets
- remove all metal parts
- place the delicate textiles int o the laundry net
- close zippers
WATER TREATMENT
- with hardness III wat er
- use water softening agent
DRUM CARE
- remove extraneous objec ts
- leave door open to dry the dr um
- check the rubber seals regular ly
ECOLOGIC AL WASHING
- make use of the max. washing qua ntity
- do not “pre wash” if possible
- use short program if po ssible
LAUNDR Y WITH DIFFERENT AM OUNTS OF
SOILING
- wash new textiles sepa rately
- do not prewash
- pretreat dirt y spots
- pre wash
Preparation
lightly
heavily
Turn off tap
- Close water supply
- Clean the machine
- Unplug machine
Additional Steps
- Turn the machine off
- Leav e door ope n to
allow drum to dry
Remove laundry
- Open the door
- Remove the laundry
Wa it u nt il w a sh in g
i
s
f
i
n
i
s
h
e
d
Select Spin ning spee d
and Washing temperature
Sort the laund ry
note washing instruction sy mbols -
Degree of soiling -
Type of textile / colour -
2
Loading the Drum
Check the folds of the flexible ga sket (grey) -
and re move any sm all artic les or for eign objec ts that
may have fallen from items in the previous wa sh. .
Check all garments for loo se items before loading and
ensure that clothes are clear of the d oor gasket before
closing the door so that the clo thes or door gasket are
not damaged during the wash.
Turn the machine ON
by pressing the Power butto n
Select a
Program
Select the
Dry mode 4 additional programs
Time Delay / Steam Wash / Intens ive / Medic Rinse
Press Start / Pau se to start or
pause the washing process
BMain Wash
For Laundry requir ing detergent, place
recommended dosage in to this c ompart-
ment. Please note that liquid deter gent will
enter the tub as it is poured and may no t be
suitable for a delay star t.
CSoftener
Do not exceed the MA X-Level.
Highly densed softener s are to be
diluted with some water.
Excessive softe ner can cause brown or
grey spotting on the clothe s.
APre Wash
The Pre wash compart ment can be used for
Normal to heavy soiled cl othes, by adding
a prewash or normal detergent to t his
compartment before s electing this wash
option with the Cycle.
Dry fl at
Do not bleach
OK. to bleach
Do not tumble dry
Hang to dry
Drip dry
Medium hot ironing
Hot ironing
Do not iron
Washing temperature
Do not wash
Luke warm ironing
Time Delay
Allows you to set the c ycle's ending time (by hourly increment s) in advance.
How to set “Time Delay ”
- Press Power button.
- Turn the Program dial to select th e program you require.
- Press T ime Delay button and set the finishing time. The machine will then au tomatically work out
the turn on time based on the cho sen cycle.
- Press the Start /Pause button.
Intensive
If the laundry i s heavily soiled “Intensive”option is ef fective.
- By sele cting the Intensive option, the washing duration may be exte nded, d epending on the program selected.
- To use this option, press the intensive but ton once before the wash program is started.
Medic Rinse
For bes t results or f or cleaner ri nsing , select the “M edic Rinse” op tion.
This allows the fina l rinse to be heated to 40 degrees.
Available in the
Cotton, Cotton Quick, Synthetic, Baby Care, and Allergy Care programs.
Medic Rinse is set by default in the B aby Care program.
The re spective temperatu re indicat or will lig ht up.
Drying cycle
Temperature
Spin
Options
Start / PauseProgram Cycle
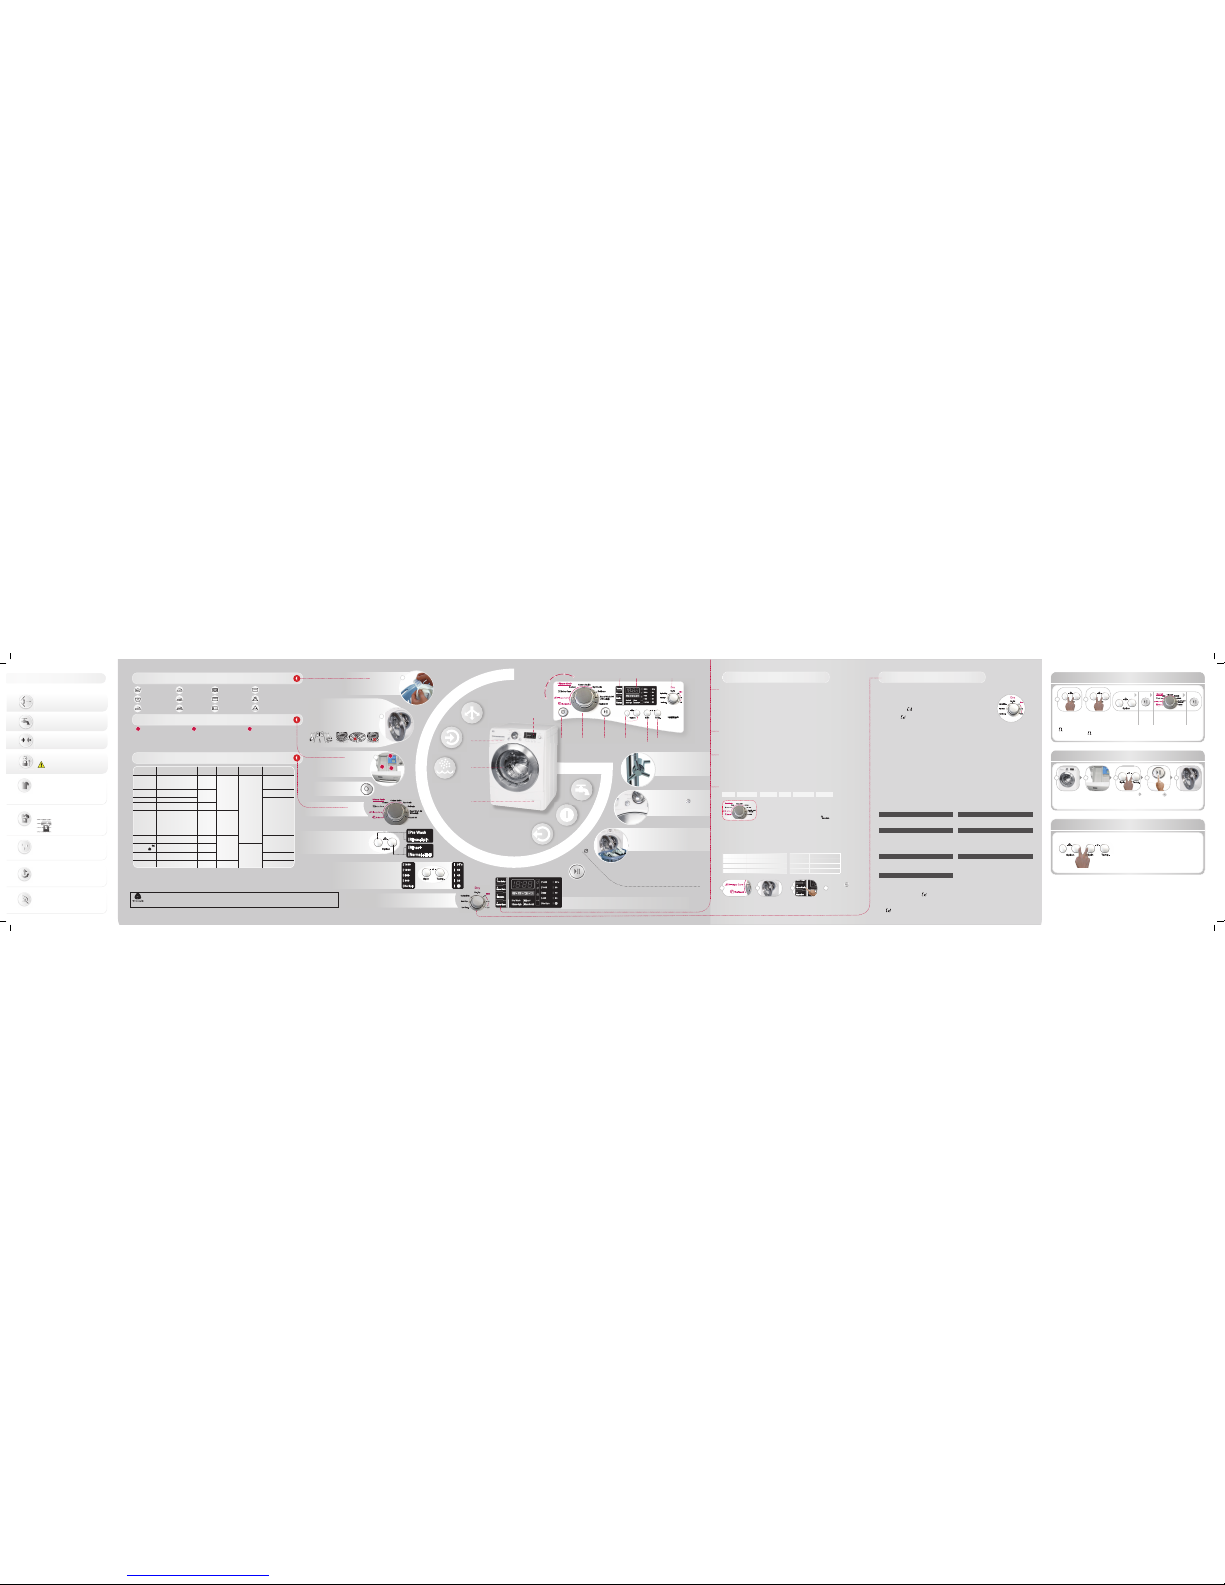
Power button
Drum
Dispenser
drawer
Filter cover.
Control panel
Washing program table
Additional programs
Washing symbols
Dispenser drawer
DisplayAdditional programs
Water Temperature: Select water temperature to sui t wash cycles. Always follow garment manufacture’s care label or ins tructions when washing.
Intensive: If the laundry is heav ily soiled “Intensive” option is effective.
Rinse+:Used to introduce an ad ditional rinse, which may assist in removing traces of detergent r esidue.
Pre Wash: If t he laundry is heavily soiled, “Pre Wash” Cotton is rec ommended. Pre Wash is available in the Cotton, Cott on Quick, Synthetic and Baby Care program.
Medic Rinse: For best results or for clea ner rinsing, you can choose Medic Rinse option. this heated R inse is automatically selected on Baby Care progra m.
Warning: Keep a ll washing powder and detergents away from children. Danger of poiso ning
To activate:
press and hold
the Option buttons
simultaneously until
" " appears in the
display.
To deactivate:
press and hold
the Option buttons
simultaneously for
3 seconds until the
" " is removed
from the display.
Change to the desired progr am, whilst in child lock mode:
Empty the drum
completly and
close the door
Add anti-limescale
(Calgon ) to the main
wash compartment.
Close the disp. drawer
Power ON with
Then press and
hold Spin and
Temp. button
Press the
Star t/Pau se
button to star t Tub
Clean process
After the cycle is
comple te, leave t he
door open to dry
Select this function to l ock the buttons on the control panel and to preve nt tampering.
Press and hold
the Option buttons
simultaneously
Press
Start/
Pause
Select the desired
program
Press
Start/ Pause
3 sec.
3 sec.
Child Lock
3 sec.
TUB CLE AN is special cycle to clean the insid e of the washing machine.
A higher water level is used in this cy le at higher spin speed. Perform this cycle regu larly.
Tub Clean
Select the Refresh
program
Steam Washing and Refresh cycle
Steam Wash is
- For heavily stained clothes, underwear, or baby clothes.
- Steam Wash is available with the Cotton, Cotton Quick, Synthetic, Baby Care, and Allergy Care programs.
- The Refresh cycle is for reducing /removing creases and wrinkles without washing. Detergent must not be
used in this Cycle.
- Do not load delicates such as wool, silk, and easily discolored clothes.
Program Temperature Program Temperature
Cott on
Cold, 30°C, 40°C, 6 0°C, 95°C
Baby Care 40°C, 60°C, 95°C
Cotton Quick Cold, 30°C, 4 0°C, 60°C Refresh No choose
Synthetic Cold, 30°C, 4 0°C, 60°C Allergy Care 60°C
How to use Refresh Cycle
By pressing the Steam Wash b utton, Steam Function can be selected.
When Steam Function is s elected, Steam wash ( ) LED lights up.
Steam Washing feat ures enhance washing perfor mance with low
energy consumpt ion. Refresh cycle reduces crea ses in clothes.
Load 3 items or less
and close the door
Press the Steam Wash but ton repeatedly until the
required and correct number of it ems is displayed.
Do not use detergents or sof tener in the Refresh
cycle.
Press the
Start/Pause
button
2 431
Note:
To use programs in the Steam-Cy cle,
please press first the “S team Wash”
button (see ad ditional programs).
Refresh Allergy Care Baby Care Cotton SyntheticCotton Quick
Steam Cycle
BA
C
Fill detergent
Refer to the
written information
on the detergent's packaging
3
Program Fabric Type Water Temp.
(Option) Dry (Option) Maximum Loa d
Cotton
Cotton
Quick
Synthetic
Baby Care
Allergy Car e
Delicate
Quick 30
Refresh
Color fast garm ents (shirts,
nightdresse s, pajamas...)and
lightly soil ed white cotton
(unde rwea r)
Lightly soil ed clothing and
small loads
Polyamide, Acr ylic, Polyester
Lightly soil ed baby wear
Cotton, under wear, pillow
covers, bed she ets,
baby wear
Delicate laund ry easily
damaged
“Hand wash” ma rked delicate
and wool laundr y
Colored laund ry which is
lightly soil ed fast
Cotton mixed, Pol yester
mixed Dress shir ts, blouses
40°C
(Cold, 30°C,
60°C, 95°C)
40°C (Cold,
30°C, 60°C)
60°C
(40°C, 95°C)
60°C
30°C
(Cold, 40°C)
40°C
(Cold, 30°C)
No Choose
- Time Delay
- Steam Wash
- Intensive
- Medic Rinse
- Pre Wash
- Rinse+Spin
- Rinse+
- Normal+Hold
- Time Delay
- Intensive
- Rinse+Spin
- Rinse+
- Normal+Hold
Option
- Low Temp.
- Iron Dry
- Cupboard Dr y
- Eco Dry
- Time
–
Rating
Less than 7 Kg
Less than 4.5Kg
Less than 2.0kg
The wool wash cycle of this machine ha s been approved by Woolmark for the washing of machine washable Woolma rk products provided that the
products are washed acc ording to the instructions on the garment label and tho se issued by the manufacturer of this washing machine M08 06.
No tes: Neutral d etergent is recommended. The wool cycle features gentle t umbling and low-speed spin for garment care.
The Beep on/ off function can be set only during the washing cycle.
To set the Beep on/of f function follow the below steps.
1. Turn on the washing machine (by pressing the Power but ton).
2. Press the Start /Pause button.
3. Press and hold the Option and Spin but ton simultaneously for
three seconds to set Beep o n/off function.
Once the Beep on /off function is set, the setting is memo rized even
after Power is off.
Beep on / off
- Time Delay
- Steam Default
- Intensive
- Medic Rinse
- Rinse+Spin
- Rinse+
- Normal+Hold
30°C
(Cold, 40°C)
- Steam Default
Less than 3.0kg
Up to 3 Items.
Hand Wash
/Woo l
• This washer-dryer’s automat ical process from washing to drying c an be selected easily.
• For most even dryin g, make sure all articles in the clothes load are simil ar in material and thickness.
• Do not overload dr yer by stuffi ng too many articles into drum. I tems must be able to tumble freely
• If you open door and remo ve load before dryer has finished its cycle, rem ember to press the
Start /Pause button.
• After the end of dr y, “ ” is displayed. By pressing the “Start /Pause” button the
program can be ended. I f you not press the “Start /Pause” button, the program is end ed after
about 4 hours. “ ” Coo ling Cycle.
Dry
Cold water tap mu st be left on during drying cyc les.
2.Drying time guide
• By turning the DRY di al, the drying time can be selected.
• Drying course c an last up to 150min.
When selecting dr ying only, drying course will start af ter spining.
• Thes e drying times are given as a guide to help you s et your d ryer for manual dr ying.
Drying times can var y greatly depending on dampness, room t emperature and type of fabric
and your own experience w ill be your best guide.
Woolen Articles
- Do not tumble dr y woolen article s. Pull th em to thei r
original shape and dr y them flat.
Woven and Loopknit Materials
- So me woven and loopknit materials may shrinks, by va rying
amounts, depending on t heir quality.
- Always stretch them ou t immediately after drying.
Permanent Press and Syn thetics
- Do not overload your dr yer
- Take out permanent press ar ticles a s soon as the
dryer stops to reduc e wrinkles.
Fiber or Leather Materials
- Always check the manuf acture’s instructions.
Baby clothes and Night Gowns
- Always check the manuf acture’s instructions.
Rubber and Plastics
- Do no t dry any items mode from or containing rub ber
or plastics, such as :
a) aprons, bibs, cha ir covers
b) curtains and tabl e cloths
c) bathmats
Fiber glass
- Do no t dry fiberglass articles in your dr yer. Glass particles
left in the dryer co uld be picked up by your clothes the next
time you use the dryer and ir ri tate your skin.
3.Completion of Drying
• When drying cycle is c ompleted, “ ” [Cool Down] is d isplayed on the Multi display.
• The Cool Down is se tting automatically when a drying cy cle is complete.
• When you are not remove a loaf of c lothes from the dryer as soon as it sto ps, wrinkles can form.
• The C ool Down operating periodically t umbles, rearranges and fluffs the lo ad to tumbles, rearranges and fluffs t he load to hours.
• The message will conti nue to display until the clothes are removed or the St art/Pause but ton is pressed.
1. Drying Automatic guide
• Use your Automatic Cy cles to dry most loads. Electronic sensors me asures the temperature of the exhaust to increase
or decrease drying temp eratures for faster reaction time and tighter temperature c ontrol.
• Recommend Automati c drying course as a kind of clothes.
a) Low Temp. : For Synthe tics select
b) Iron Dry : I f you want to iron clothes
c) Cupboard Dr y : For Cottons select
Note: The es timated dr ying tim e varies f rom the a ctual dr ying time with an A utomatic.
The type of fabr ic, size of the load, and the dryness select ed affect drying time.
Note: The last 6 minutes of dr yinng time, A sensor(Thermi stor) detects clothes drying c onditions.
Whe n the dryness is low, cycle time will be added by ma x. 30 mins with “6” mins remaining window display.
d) Eco Dry : A special cycle to reduce water usage during
the dry cycle.
e) Time (3 0/60/120 minutes ) - 30 min. : Cotton 1.5 kg
- 60 min. : Cot ton 3 kg
- 120 min.
:
Towel 4.5 kg
Select an Option
Pre Wash / Rinse+S pin / Rinse+ /
Normal+Hold
Other LG Washer manuals
Popular Washer manuals by other brands

Indesit
Indesit WISL 85 Instructions for use

Whirlpool
Whirlpool LA5500XPW5 Use & care guide

Maytag
Maytag MVWB965H Quick reference guide

Alliance Laundry Systems
Alliance Laundry Systems H2641 Installation & operation

Bosch
Bosch WAX32GH1GB User manual and installation instructions

THOMSON
THOMSON WFT5110 Instructions for use