LG WD(M)-16341(6)FD User manual

P/No.:
3828ER3047W
For
U.K.
Customer
CUSTOMER
SERVICES
:
0870-592-9929(Service
Force)
Mon.-Fri.
8:30AM
-
5:30PM
LGEUK
SERVICE
WEB-SITE
:
www.lgelectronics.co.uk

Washing
Machine
OWNER'S
MANUAL
WD(M)-16341(6)FD
/
WD(M)-16340(5)FD
WD(M)-14341(6)FD
/
WD(M)-14340(5)FD
WD(M)-12341(6)FD
/
WD(M)-12340(5)FD
Thank
you
for
buying
a
LG
Fully
Automatic
Washing
machine.
Please
read
your
owner's
manual
carefully,
it
provides
instructions
on
safe
installation,
use
and
maintenance.
Retain
it
for
future
reference.
Record
the
model
and
serial
numbers
of
your
washing
machine.

2
roduct
Features
P
ontents
C
Warnings....................................................................................3
Specifications.............................................................................4
Installation..................................................................................5
Care
before
washing................................................................11
Adding
detergent
.....................................................................12
Function
...................................................................................13
How
to
use
washer
..................................................................14
Maintenance
............................................................................21
Troubleshooting
guide
.............................................................24
Terms
of
Warranty
...................................................................27
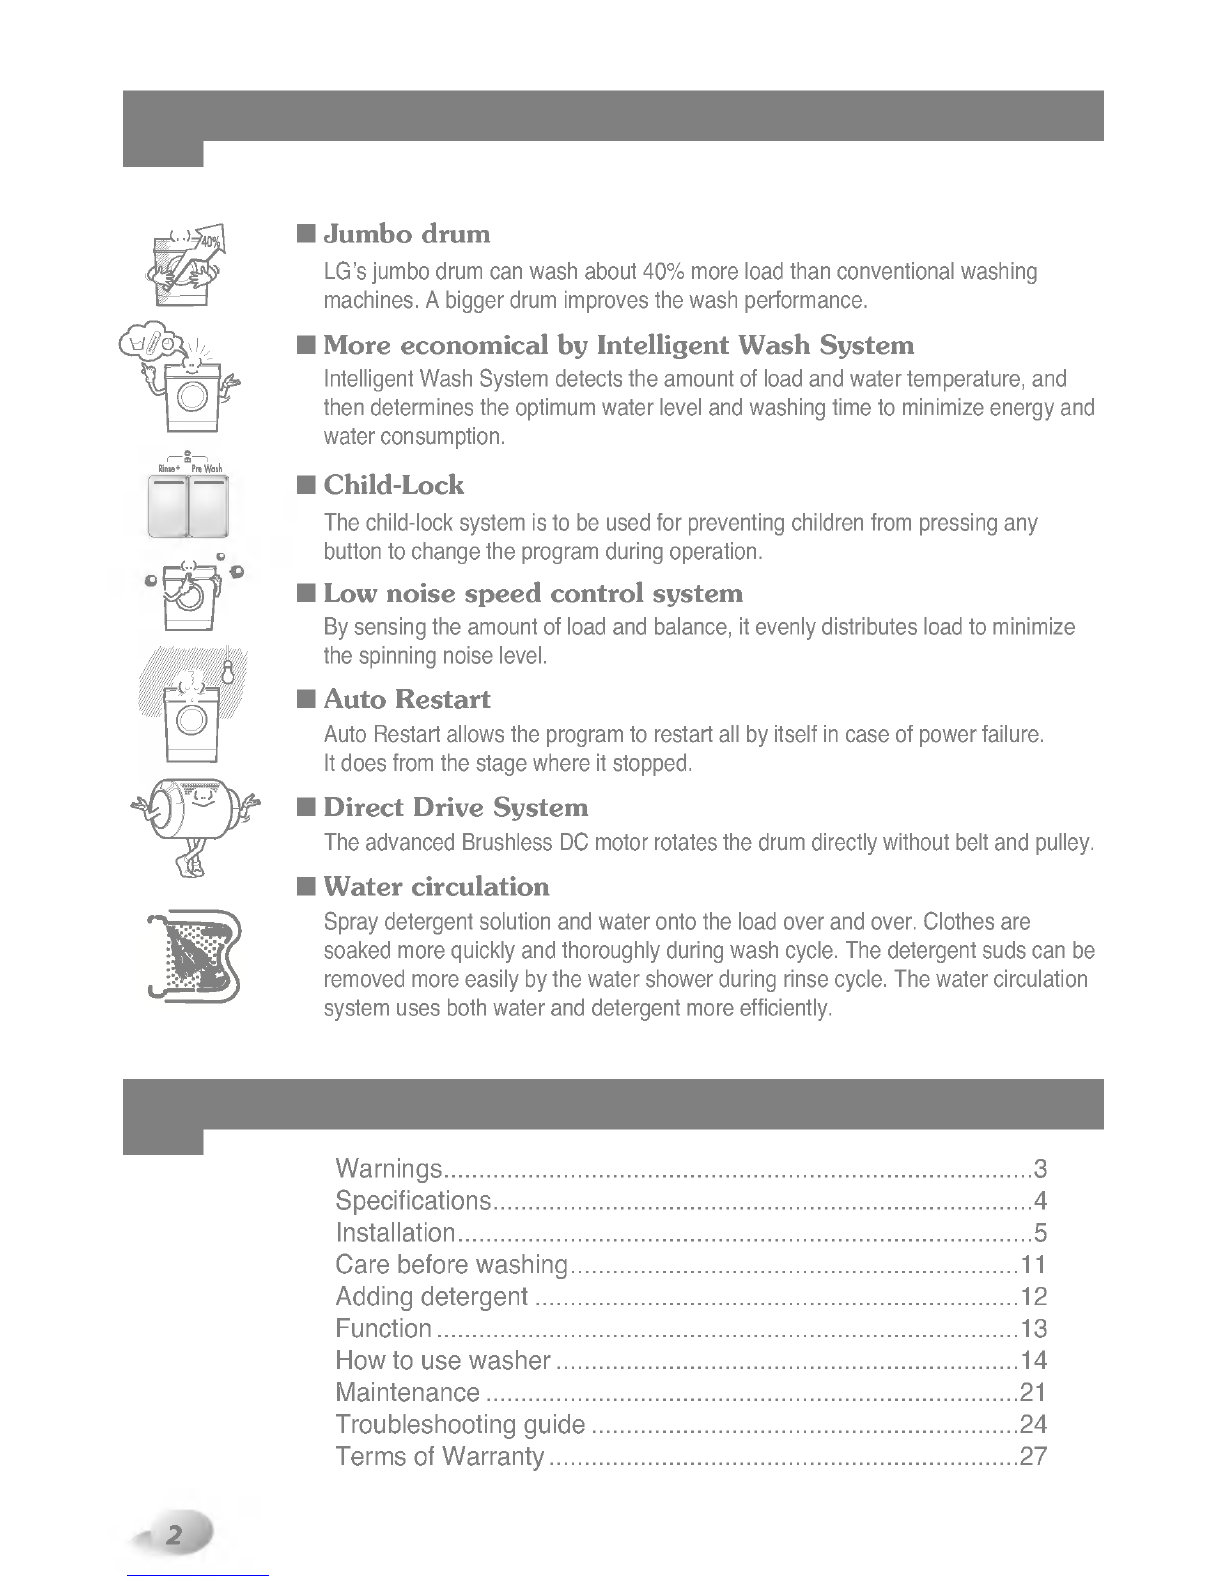
Jumbo
drum
LG's
jumbo
drum
can
wash
about
40%
more
load
than
conventional
washing
machines.
A
bigger
drum
improves
the
wash
performance.
More
economical
by
Intelligent
Wash
System
Intelligent
Wash
System
detects
the
amount
of
load
and
water
temperature,
and
then
determines
the
optimum
water
level
and
washing
time
to
minimize
energy
and
water
consumption.
Child-Lock
The
child-lock
system
is
to
be
used
for
preventing
children
from
pressing
any
button
to
change
the
program
during
operation.
Low
noise
speed
control
system
By
sensing
the
amount
of
load
and
balance,
it
evenly
distributes
load
to
minimize
the
spinning
noise
level.
Auto
Restart
Auto
Restart
allows
the
program
to
restart
all
by
itself
in
case
of
power
failure.
It
does
from
the
stage
where
it
stopped.
Direct
Drive
System
The
advanced
Brushless
DC
motor
rotates
the
drum
directly
without
belt
and
pulley.
Water
circulation
Spray
detergent
solution
and
water
onto
the
load
over
and
over.
Clothes
are
soaked
more
quickly
and
thoroughly
during
wash
cycle.
The
detergent
suds
can
be
removed
more
easily
by
the
water
shower
during
rinse
cycle.
The
water
circulation
system
uses
both
water
and
detergent
more
efficiently.

3
arnings
W
For
your
safety,
the
information
in
this
manual
must
be
followed
to
minimize
the
risk
of
fire
or
explosion,
electric
shock,
or
to
prevent
property
damage,
personal
injury,
or
loss
of
life.
!
READ
ALL
INSTRUCTIONS
AND
EXPLANATION
OF
THE
INSTALLATION
BEFORE
USE
WARNING!
Do
not
push
down
the
door
excessively,
when
washer
door
open.
This
could
topple
over
the
washer.
?
Before
installation,
check
exterior
damages.
If
it
has,
do
not
install.
?
Do
not
install
or
store
the
washer
where
it
will
be
exposed
to
the
weather.
?
Do
not
tamper
with
controls.
?
Do
not
repair
or
replace
any
part
of
the
washer
or
attempt
any
servicing
unless
specifically
recommended
in
the
user-maintenance
instructions
or
published
user-repair
instructions
that
you
understand
and
have
the
skills
to
carry
out.
?
Keep
the
area
underneath
and
around
your
appliances
free
of
combustible
materials
such
as
lint,
paper,
rags,
chemicals,
etc.
?
Close
supervision
is
necessary
if
this
appliance
is
used
by
or
near
children
or
infirm
persons.
Do
not
allow
them
to
play
on,
with,
or
inside
this
or
any
other
appliance.
?
Keep
washer
away
from
fire.
?
Do
not
leave
the
washer
door
open.
An
open
door
could
entice
children
to
hang
on
the
door
or
crawl
inside
the
washer.
?
Never
reach
into
washer
while
it
is
moving.
Wait
until
the
drum
has
completely
stopped.
?
The
laundry
process
can
reduce
the
flame
retardant
of
fabrics.
?
To
avoid
such
a
result,
carefully
follow
the
garment
manufacturer's
wash
and
care
instructions.
?
Do
not
wash
or
dry
articles
that
have been
cleaned
in,
washed
in,
soaked
in,
or
spotted
with
combustible
or
explosive
substances
(such
as
wax,
oil,
paint,
gasoline,
degreasers,
dry-cleaning
solvents,
kerosene,
etc.)
which
may
ignite
or
explode.
?
Do
not
slam
the
washer
door
closed
or
try
to
force
the
door
open
when
locked.
This
could
result
in
damage
to
the
washer.
?
When
the
machine
runs
high
temperature,
the
front
door
may
be
very
hot.
Don't
touch
it.
?
To
minimize
the
possibility
of
electric
shock,
unplug
this
appliance
from
the
power
supply
or
disconnect
the
washer
at
the
household
distribution
panel
by
removing
the
fuse
or
switching
off
the
circuit
breaker
before
attempting
any
maintenance
or
cleaning.
?
When
unplugging
power
cord,
do
not
pull
out
by
grasping
the
cord.
Otherwise,
the
power
cord
may
be
damaged.
?
Never
attempt
to
operate
this
appliance
if
it
is
damaged,
malfunctioning,
partially
disassembled,
or
has
missing
or
broken
parts,
including
a
damaged
cord
or
plug.
?
Before
discarding
an
old
machine
unplug
it.
Render
the
plug
useless.
Cut
off
the
cable
directly
behind
the
appliance
to
prevent
misuse.
GROUNDING
INSTRUCTIONS
This
appliance
must
be
grounded.
In
the
event
of
malfunction
or
breakdown,
grounding
will
reduce
the
risk of
electric
shock
by
providing
a
path
of
least
resistance
for
electric
current.
This
appliance
is
equipped
with
a
cord
having
an
equipment-grounding
conductor
and
grounding
plug.
The
plug
must
be
plugged
into
an
appropriate
outlet
that
is
properly
installed
and
grounded
in
accordance
with
all
local
codes
and
ordinance.
?
Do
not
use
an
adapter
or
otherwise
defeat
the
grounding
plug.
?
If
you
don't
have
the
proper
outlet,
consult
an
electrician.
IMPORTANT
SAFETY
INSTRUCTIONS
WARNING
:
To
reduce
the
risk
of
fire,
electric
shock,
or
injury
to
persons
when
using
the
washer,
follow
basic
precautions,
including
the
following:
SAVE
THESE
INSTRUCTIONS
WARNING
:
Improper
connection
of
the
equipment-grounding
conductor
can
result
in
risk
of
electric
shock.
Check
with
a
qualified
electrician
or
serviceman
if
you
are
in
doubt
as
to
whether
the
appliance
is
properly
grounded.
Do
not
modify
the
plug
provided
with
the
appliance
-
if it
does
not
fit
the
outlet,
have
a
proper
outlet
installed
by
a
qualified
electrician.

Spanner
Accessories
4
pecifications
S
Name
:
Front
loading
washing
machine
Power
supply
:
220-240
V~,
50
Hz
Size
:
600mm(W)
x
600mm(D)
x
850mm(H)
Weight
/
Max.Watt
:65kg/2100W
Wash
capacity
:
Refer
to
the
Rating
Label
Water
consumption
:50
Permissible
water
pressure
:
0.3-10
kgf/cm2
(30-1000
kPa)
Spin
speed
:
No
spin/400/600/800/1000/1200/1400/1600
[WD(M)-16341(6)FD
/
WD(M)-16340(5)FD]
No
spin/400/600/800/1000/1200/1400
[WD(M)-14341(6)FD
/
WD(M)-14340(5)FD]
No
spin/400/600/800/1000/1200
[WD(M)-12341(6)FD
/
WD(M)-12340(5)FD]
The
appearance
and
specifications
may
be
varied
without
notice
to
raise
the
units
quality.

5
nstallation
I
1.
To
prevent
internal
damage
during
transport,
the
special
4
bolts
are
locked.
Before
operating
the
washer,
remove
the
bolts
along
with
the
rubber
bungs.
?
If
they
are
not
removed,
it
may
cause
heavy
vibration,
noise
and
malfunction.
3.
Take
out
the
4
bolts
along
with
the
rubber
bungs
by
slightly
twisting
the
bung.
Keep
the
4
bolts
and
the
spanner
for
future
use.
?
Whenever
the
appliance
is
transported,
the
transit
bolts
must
be
refitted.
The
appliance
is
fitted
with
transit
bolts
to
prevent
internal
damage
during
transport.
?
Packing
and
all
transit
bolts
must
be
removed
before
using
the
washer.
When
unpacking
the
base,
be
sure
to
remove
the
additional
packing support
in
the
middle
of
the
base
packing.
2.
Unscrew
the
4
bolts
with
the
spanner
supplied.
4.
Close
the
holes
with
the
caps
supplied.
Transit
bolts
Install
or
store
where
it
will
not
be
exposed
to
temperatures
below
freezing
or
exposed
to
the
weather.
Properly
ground
washer
to
conform
with
all
governing
codes
and
ordinances.
The
base
opening
must
not
be
obstructed
by
carpeting
when
the
washing
machine
is
installed
on
a
carpeted
floor.
In
countries
where
there
are
areas
which
may
be
subject
to
infestation
by
cockroaches
or
other
vermin,
pay
particular
attention
to
keeping
the
appliance
and
its
surroundings
in
clean
condition
at
all
times.
Any
damage
which
may
be
cause
by
cockroaches
or
other
vermin
will
not
be
covered
by
the
appliance
guarantee.
Removing
transit
bolts
Base
Packing
Washer
Packing
Support
(Packing
support
may
not
be
used
depending
on
models.)

6
nstallation
I
Level
floor
:
Allowable
slope
under
entire
washer
is
1˚
Power
outlet
:
Must
be
within 1.5
meters
of
either
side
of
location
of
washer.
Do
not
overload
the
outlet
with
more
than
one
appliance.
Additional
Clearance
:
For
wall,
door
and
floor
modeling
is
required.
(10cm
:
rear
/
2cm:
right
&
left
side)
Do
not
place
or
store
laundry
products
on
top
of
washer
at
any
times.
They
can
damage
the
finish
or
controls.
Installation
place
requirement
Laundry
Tub
Washer
approx.
2cm
Drain
Hose
Positioning
Install
the
washer
on
a
flat
hard
floor.
Make
sure
that
air
circulation
around
the
washer
is
not
impeded
by
carpets,rug
etc.
?
Never
try
to
correct
any
unevenness
in
the
floor
with
pieces
of
wood,
cardboard
or
similar
materials
under
the
washer.
?
If
it
is
impossible
to
avoid
positioning
the
washer
next
to
a
gas
cooker
or
coal
burning
stove,an
insulating(85x60cm)
covered
with
aluminum
foil
on
the
side
facing
the
cooker
or
stove,must
be
inserted
between
the
two
appliance.
?
The
washer
must
not
be
installed
in
rooms
where
the
temperature
can
drop
below
0°C.
?
Please
ensure
that
when
the
washer
is
installed,
it
is
easily
accessible
for
the
engineer
in
the
event
of
a
breakdown.
?
With
the
washer
installed
adjust
all
four
feet
using
the
transit
bolt
spanner
provided
ensuring
the
appliance
is
stable,
and
a
clearance
of
approximately
20mm
is
left
between
the
top
of
the
washer
and
the
underside
of
the
work-top.
BS
Plug
Safety
Details
(For
U.K.
User)
IMPORTANT
THE
WIRES
IN
THIS
MAINS
LEAD
ARE
COLOURED
IN
ACCORDANCE
WITH
THE
FOLLOWING
CODE:
GREEN
AND
YELLOW:
EARTH
BLUE:
NEUTRAL
BROWN:
LIVE
This
appliance
must
be
earthed
As
the
colours
of
the
wires
in
the
mains
lead
of
this
apparatus
may
not
correspond
with
the
coloured
markings
identifying
the
terminals
in
your
plug,
proceed
as
follows:
The
wire
which
is
coloured
Green
and
Yellow
must
be
connected
to
the
terminal
in
the
plug
which
is
marked
with
the
letter
E
or
by
the
earth
symbol
or
coloured
Green
or
Green
and
Yellow.
The
wire
which
is
coloured
Blue
must
be
connected
to
the
terminal
which
is
marked
with
the
letter
N
or
coloured
Black.
The
wire
which
is
coloured
Brown
must
be
connected
to
the
terminal
which
is
marked
with
the
letter
L
or
coloured
Red.
If
a
13
amp
(BS
1363)
plug
is
used,
fit
a
13
amp
BS
1362
fuse.
Green
and
Yellow(Earth)
Brown(Live)
Blue(Neutral)
Fuse
Cord
grip
E
L
N

7
nstallation
I
Rubber
seal
Hose
connector
▶Water
supply
pressure
must
be
between
30kPa
and
1000kPa
(0.3~10kgf/cm2)
▶Don't
strip
or
crossthread
when
connecting
Inlet
hose
to
the
valve.
▶If
the
water
supply
pressure
is
more
than
1000kPa,
a
decompression
device
should
be
installed.
?
Two
rubber
seals
are
supplied
with
the
water
inlet
hoses
these
are
in
order
to
prevent
water
leaks.
?
Check
water
tightness
of
washing
machine
connections
by
turning
the
tap
completely
on.
?
Periodically
check
the
condition
of
the
hose
and
replace
the
hose
if
necessary.
?
Make
sure
that
there
is
no
kink
on
the
hose
and
that
it
is
not
crushed.
▶When
your
washer
has
two
valves.
?
The
Inlet
hose
which
has
red
connector
is
for
the
hot
water
tap.
?
If
the
washer
has
two
valves,
the
energy
is
saved
by
using
hot
valve.
Washing
Machine
is
to
be
connected
to
the
water
mains
using
new
hose-sets
and
that
old
hose-sets
should
not be
used.
Connecting
water
supply
hose
1.
Do
not
use
an
extension
cord
or
double
adapter.
2.
If
the
supply
cord
is
damaged,
it
must
be
replaced
by
the
manufacturer
or
its
service
agents
or
similarly
qualified
person
in
order
to
avoid
a
hazard.
3.
Always
unplug
the
machine
and
turn
off
the
water
supply
after
use.
4.
Connect
the
machine
to
an
earthed
socket
in
accordance
with
current
wiring
regulations.
5.
The
appliance
must
be
positioned
so
that
the
plug
is
easily
accessible.
?
Repairs
to
the
washing
machine
must
only
be
carried
out
qualified
personnel.
Repairs
carried
out
by
inexperienced
persons
may
cause
injury
or
serious
malfunctioning.
Contact
your
local
service
center
?
Do
not
install
your
washing
machine
in
rooms
where
temperatures
below
freezing
may
occur.
Frozen
hoses
may
burst
under
pressure.
The
reliability
of
the
electronic
control
unit
may
be
impaired
at
temperatures
below
freezing
point.
?
If
the
appliance
is
delivered
in
the
winter
months
and
temperatures
are
below
freezing
:
Store
the
washing
machine
at
room
temperature
for
a
few
hours
before
putting
it
into
operation.
Electrical
connection
CAUTION
concerning
the
Power
Cord
Most
appliances
recommend
they
be
placed
upon
a
dedicated
circuit;
that
is,
a
single
outlet
circuit
which
powers
only
that
appliance
and
has
no
additional
outlets
or
branch
circuits.
Check
the
specification
page
of
this
owner's
manual
to
be
certain.
Do
not
overload
wall
outlets.
Overloaded
wall
outlets,
loose
or
damaged
wall
outlets,
extension
cords,
frayed
power
cords,
or
damaged
or
cracked
wire
insulation
are
dangerous.
Any
of
these
conditions
could
result
in
electric
shock
or
fire.
Periodically
examine
the
cord
of
your
appliance,
and
if
its
appearance
indicates
damage
or
deterioration,
unplug
it,
discontinue
use
of
the
appliance,
and
have
the
cord
replaced
with
an
exact
replacement
part
by
an
authorized
servicer.
Protect
the
power
cord
from
physical
or
mechanical
abuse,
such
as
being
twisted,
kinked,
pinched,
closed
in
a
door,
or
walked
upon.
Pay
particular
attention
to
plugs,
wall
outlets,
and
the
point
where
the
cord
exits
the
appliance.
CAUTION
[WD(M)-16340(5)FD/
WD(M)-14340(5)FD/
WD(M)-12340(5)FD]
Rubber
seal
Hose
connector

8
nstallation
I
Normal
Tap
without
thread
&
screw
type
inlet
hose
Normal
Tap
without
thread
&
one
touch
type
inlet
hose
1.
Unscrew
the
fixing
screw
to
attach
the
tap.
2.
Push
the
connector
up
till
the
rubber
packing
is
in
tight
contact
with
the
tap.
Then
tighten
the
4
screws.
3.
Push
the
water
supply
hose
vertically
upwards
so
that
the
rubber
packing
within
in
the
hose
can
adhere
completely
to
the
tap
and
then
tighten
it
by
screwing
it
to
the
right.
1.
Untighten
the
upper
connector
screw.
2.
Push
the
upper
connector
up
till
the
rubber
packing
is
in
tight
contact
with
the
tap.
Then
tighten
the
4
screws.
3.
Connect
the
water
supply
hose
to
the
middle
connector,
pushing
the
plate
down.
?
Your
machine
comes
with
only
cold
water
connection.
?
Make
sure
that
there
are
no
kinks
in
the
hose
and
that
it
is
not
crushed.
?
Make
sure
that
the
rubber
seal
is
inside
the
hose
connector.
Upper
Connector
Rubber
packing
Middle
connector
Fixing
screw
Guide
plate
Connector
Rubber
seal
Hose
connector
Used
the
horizontal
tap
Horizontal
tap
Extension
tap
Square
tap
Rubber
packing
Upper
Connector
Middle
connector
Plate
Upper
Connector
Water
supply
hose
?
In
case
the
diameter
of
the
tap
is
large
remove
the
guide
plate.
?
Turn
the
middle
connector
not
to
have
water
leaked.
?
To
separate
the
water
supply
hose
from
the
middle
connector
shut
off
the
tap.
Then
pull
the
inlet
hose
down,
pushing
the
plate
down.

9
nstallation
I
Installation
of
drain
hose
?
The
drain
hose
should
not
be
placed
higher
than
100
cm
above
the
floor.
?
Proper
securing
of
the
drain
hose
will
protect
the
floor
from
damage
due
to
water
leakage.
?
When
the
drain
hose
is
too
long,
do
not
force
back
into
the
washer.
This
will
cause
abnormal
noise.
?
When
installing
the
drain
hose
sink,
secure
it
tightly
with
a
string.
?
Proper
securing
of
the
drain
hose
will
protect
the
floor
from
damage
due
to
water
leakage.
This
equipment
is
not
designed
for
maritime
use
or
for
use
mobile
installations
such
as
caravans,
aircraft
etc.
Turn
off
the
stopcock
if
the
machine
is
to
be
left
for
any
length
of
time
(e.g.
holiday),
especially
if
there
is
no
floor
drain(gully)
in
the
immediate
vicinity.
When
disposing
of
the
appliance,
cut
off
the
mains
cable,
and
destroy
the
plug
Disable
the
door
lock
to
prevent
young
children
being
trapped
inside.
Packaging
material
(e.g.
Films,
Styrofoam)
can
be
dangerous
for
children.
There
is
a
risk
of
suffocation
!
Keep
all
packaging
well
away
from
children

10
nstallation
I
Level
adjustment
Concrete
floors
Wooden
floors
(Suspended
floors)
1.
Adjusting
the
washing
machine
level
properly
prevents
excessive
noise
and
vibration.
Install
the
appliance
on a
solid
and
level floor
surface,
preferably
in
a
corner
of
the
room.
2.
If
the
floor
is
uneven,
adjust
the
adjustable
feet
as
required.
(do
not
insert
pieces
of
wood
etc.
under
the
feet)
Make
sure
that
all
four
feet
are
stable
and
resting
on
the
floor
and
then
check
that
the
appliance
is
perfectly
level.
(use
a
spirit
level)
※
After
the
washer
is
level,
tighten
the
lock
nuts
up
towards
of
the
base
of
the
washer.
All
lock
nuts
must
be
tightened.
Diagonal
Check
When
pushing
down
the
edges
of
the
washing
machine
top
plate
diagonally,
the
machine
should
not
move
up
and
down
at
all.
(Please,
check
both
of
two
directions)
If
machine
rocks
when
pushing
the
machine
top
plate
diagonally,
adjust
the
feet
again.
?
The
installation
surface
must
be
clean,
dry
and
level.
?
Install
washer
on a
flat
hard
floor.
Tile
floors
(Slippery
floors)
?
Position
each
foot
on
the
Tread
Mate
and
level
the
machine
to
suit.
(Cut
Tread
Mate
into
70x70
mm
sections
and
stick
the
pieces
on
to
the
dry
tile
where
machine
is
to
be
placed.)
※
Tread
Mate
is
a
self
adhesive
material
used
on
ladders
&
steps
that
prevents
slipping.
?
Wooden
floors
are
particularly
susceptible
to
vibration.
?
To
prevent
vibration
we
recommend
you
place
rubber
cups
under each
foot,
at
least
15mm
thick
under
the
washer,
secured
to
at
least
2
floor
beams
with
screws.
?
If
possible
install
the
washer
in
one
of
the
corners
of
the
room,
where
the
floor
is
more
stable.
※
Insert
the
rubber
cups
to
reduce
vibration.
※
You
can
obtain
the
rubber
cups
(p/no.4620ER4002B)
from
the
LG
spares
dept.
Important!
?
Proper
placement
and
levelling
of
the
washer
ensure
long,regular
and
reliable
operation.
?
The
washer
must
be
absolutely
horizontal
and
stand
firmly
in
position.
?
It
must
not
"Seesaw"
across
corners
under
load.
?
The
installation
surface
must
be
clean,
free
from
floor
wax
and
other
lubricant
coatings.
?
Do
not
let
the
feet
of
the
washer
get
wet.
If
feet
of
the
washer
get
wet,
slipping
may
occur.
Rubber
Cup
NOTE
Timber
or
suspended type
flooring
may
contribute
to
excessive
vibration
and
unblance
errors.
NOTE
In
the
case
that
the
washing
machine
is
installed
on
a
raised
platform,
it
must
be
securely
fastened
in
order
to
eliminate
the
risk
that
it
might
fall
off.

11
are
before
washing
C
1.
Care
Labels
Look
for
a
care
label
on
your
clothes.
This
will
tell
you
about
the
fabric
content
of
your
garment
and
how
it
should
be
washed.
2.
Sorting
To
get
the
best
results,
Sort
clothes
into
loads
that
can
be
washed
with
the
same
wash
cycle.
Water
temperature
and
spin
speed
and
different
fabrics
need
to
be
washed
in
different
ways.
Always
sort
dark
colors
from
pale
colors
and
whites.
Wash
separately
as
dye
and
lint
transfer
can
occur
causing
discoloration
of
white
etc.
If
possible,
do
not
wash
heavily
soiled
items
with
lightly
soiled
one.
Soil
(Heavy,
Normal,
Light)
Separate
clothes
according
to
amount
of
soil.
Color
(White,
Lights,
Darks)
Separate
white
fabrics
from
colored
fabrics.
Lint
(Lint
producers,
Collectors)
Wash
lint
producers
and
lint
collectors
separately.
3.
Caring
before
loading
Caring
before
washing
Before
the
first
washing
Combine
large
and
small
items
in
a
load.
Load
large
items
first.
Large
items
should
not
be
more
than
half
the
total
wash
load.
Do
not
wash
single
items.
This
may
cause
an
out-of-balance
load.
Add
one
or
two
similar
items.
?
Check
all
pockets
to
make
sure
that
they
are
empty.
Items
such
as
nails,
hair
clip,
matches,
pens,
coins
and
keys
can
damage
both
your
washer
and
your
clothes.
?
Close
zippers,
hooks
and
strings
to
make
sure
that
these
items
don't
snag
on
other
clothes.
?
Pre
treat
dirt
and
stains
by
brushing
a
little
detergent
dissolved
in
water
onto
stains
like
collars
and
cuffs
to
help
shift
dirt.
Select
a
cycle
(COTTON
60°C,
add
a
half
load
of
detergent)
allow
the
unit
to
wash
without
clothing.
This
will
remove
residues
from
the
drum
that
may
have
been
left
during
manufacturing.

12
dding
detergent
A
?
Main
wash
only
?PreWash+MainWash
?
Do
not
exceed
the
maximum
fill
line.
Overfilling
can
cause
early
dispensing
of
the
fabric
softener
which
could
stain
clothes.
?
Do
not
leave
the
fabric
softener
in
the
detergent
drawer
for
more
than
2
days.
(Fabric
softener
could
harden)
?
Softener
will
automatically
be
added
during
the
last
rinse
cycle.
?
Do
not
open
the
drawer
when
water
is
supplied.
?
Solvents(benzene,
etc)
are
not
allowable.
1.
The
Dispenser
Drawer
3.
Detergent
dosage
?
The
detergent
should
be
used
according
to
the
instruction
of
the
detergent
manufactrurers.
?
If
too
much
detergent
is
used
more
than
the
recommended
amount,
too
many
suds
can
occur
and
this
will
decrease
the
washing
result
or
cause
heavy
load
to
the
motor.
(Causing
malfunctions)
?
Use
powder
detergent
only
for
the
front
loading
washer.
?
Detergent
usage
may
need
to
be
adjusted
for
water
temperature,
water
hardness,
size
and
soil
level
of
the
load.
For
best
results,
avoid
oversudsing.
Tips
?
Full
load
:
according
to
manufacturer's
recommendation.
?
Part
load
:
3/4
of
the
normal
amount.
?
Minimum
load
:
1/2
of
full
load.
?
Detergent
is
flushed
from
the
dispenser
at
the
beginning
of
the
cycle.
2.
Adding
Fabric
Softener
Adding
detergent
and
fabric
softener
max
( )
125ml
MAX MAX
125
ml
NOTE
Do
not
pour
fabric
softener
directly
on
the
clothes

13
unction
F
Recommended
courses
according
to
the
laundry
types
( )
:
WD(M)-14341(6)FD
/
WD(M)-12341(6)FD
/
WD(M)-14340(5)FD
/
WD(M)-12340(5)FD
Intensive
:
If
the
laundry
is
heavily
soiled "Intensive"
option
is
effective.
Program
setting
with
"Intensive"
option
for
test
in
accordance
or
in
conformity
with
EN60456
and
IEC
60456.
Rinse+:
Used
to
introduce
an
additional
rinse,
which
may
assist
in
removing
traces
of
detergent
residue.
Pre
Wash
:
If
the
laundry
is
heavily
soiled,
"Pre
Wash"
course
is
recommended.
Pre
Wash
is
available
in
Cotton
and
Synthetic
Program.
Crease
Care
:
If
you
want
to
prevent
crease,
select
Crease
Care
button.
Fabric
Proper
Maximum
Energy
Time
Program
Option
in in
Type
Temp.
Load
kWh
Minutes
Cotton
Synthetic
Delicate
Wool/Silk
Hand
Wash
Quick
30
First
check
if
laundry
is
machine
washable.
(white
cotton,
linen
towel
and
sheets...)
Color
fast
gaments
(shirts,
night
dresses,
pajamas...)and
lightly
soiled
white
cotton(underwear...)
Polyamide,
Acryic,
Polyester
Delicate
laundry
easily
damaged
Machine
washable
woolens
with
pure
new
wool
or
silk
only
"Hand
Wash"
marked
delicate
and
wool
laundry
Colored
Laundry
which
is
lightly
soiled
fast.
95˚C
60˚C
(30˚C,
40˚C,
60˚C-Eco)
40˚C
(30˚C,
60˚C)
30˚C
(40˚C,
Cold)
30˚C
(40˚C,
Cold)
Cold
(30˚C)
30˚C
Rinse
Hold
Intensive
Rinse+
Pre
Wash
Crease
Care
Rinse
Hold
Intensive
Rinse+
Pre
Wash
Crease
Care
Rinse
Hold
Intensive
Rinse+
Pre
Wash
Crease
Care
Rinse
Hold
Intensive
Rinse+
Crease
Care
Rinse
Hold
Intensive
Rinse+
Crease
Care
Rinse
Hold
Intensive
Rinse+
Crease
Care
Rinse
Hold
Rinse+
Crease
Care
Rating
Rating
Less
than
3.5
kg
Less
than
3.0
kg
Less
than
2.0
kg
Less
than
2.0
kg
Less
than
2.0
kg
2.74
1.10
0.45
0.41
0.28
0.03
0.35
123
(117)
106
(100)
80
52
50
44
30

14
ow
to
use
washer
H
?
Press
the
Power(
)
button
to
start.
?
Press
the
Start/Pause(
)
button.
?
Initial
conditions
-
Wash
:
main
wash
-
Rinse
:
3
times
-
Spin
:
1600
rpm
[WD(M)-16341(6)FD
/
16340(5)FD]
1400
rpm
[WD(M)-14341(6)FD
/
14340(5)FD]
1200
rpm
[WD(M)-12341(6)FD
/
12340(5)FD]
-
Water
temperature
:
60˚C
-
Program
:
Cotton
?
Press
the
Power(
)
button
to
start.
?
Select
the
conditions
which
you
want
to
use,
by
turning
the
program
dial
and
pressing
each
button.
For
selecting
the
each
conditions,
please
refer
to
the
page15~page20
?
Press
the
Start/Pause(
)
button.
1.
Cotton
automatically
selected
upon
power
on.
2.
Manual
Selecting
Read
the
following
instructions
when
you
want
to
change
the
language
How
to
select
the
language
When
the
power
is
off,
press
the
time
delay
button
and
power
button
simultaneously.
1.
Turn
the
program
dial
to
select
the
language.
2.
The
language
is
finally
selected
by
pressing
the
spin
button.
3. 5.
Power
will
be
off
automatically,
after
changing
language.
Confirm
the
selected
language
after
power
on
again.
4.

15
ow
to
use
washer
H
(1)
Dial
:
Program
(2)
Button
:
Start
/
Pause
(3)
Button
:
Intensive
(4)
Button
:
Rinse
Hold
(5)
Button
:
Rinse+
(6)
Button
:
Pre
Wash
(7)
Button
:
Crease Care
(8)
Button
:
Child
Lock
(9)
Button
:
Power
(10)
Button
:
Spin
(11)
Button
:
Time
Delay
3.
Rinse+
Option
?
By
pressing
the
Option
button,
all
Option
functions
may
be
selected.
-
Intensive
-
Rinse
Hold
-
Rinse+
-
Pre
Wash
-
Crease
Care
?
For
additional
rinse
which
may
assist
in
removing
traces
of
detergent
residue.
?
By
selecting
Rinse+
function,
the
rinse
time
and
the
rinse
water
are
increased.
4.
Pre
Wash
?
If
the
laundry
is
heavily
soiled,
"Pre
Wash"
course
is
effective.
?
Pre
Wash
is
available
in
Cotton
and
Synthetic.
The
required
lamp
will
light
up
for
identification.
2.
Rinse
Hold
?
Is
selected
by
pressing
the
Rinse
Hold
button
this
function
leaves
clothes
in
the
machine;
suspended
in
the
water
after
a
rinse
without
entering
into
spin.
?
To
proceed
through
to
a
drain
or
spin,
once
the
rinse
hold
function
is
completed
using
to
program
dial
scroll
to
the
required
program.
5.
Crease
Care
?
If
you
want
to
prevent
crease,
select
this
button
with
spin
speed.
1.
Intensive
?
If
the
laundry
is
heavily
soiled
"Intensive"
option
is
effective.
?
By
selecting
the
Intensive
option,
the
wash
time
may
be
extended,
depending
on
the
program
selected.
?
This
Option
is
not
available
with
Quick
30
program.

16
ow
to
use
washer
H
2.Nospin(
)
Spin(
)
?
By
pressing
the
Spin
button,
the
spin
speed
can
be
chosen.
?
If
no
spin
is
selected,
the
washer
stops
after
draining
water.
[WD(M)-12341(6)FD
/
WD(M)-12340(5)FD]
[WD(M)-16341(6)FD
/
WD(M)-16340(5)FD]
[WD(M)-14341(6)FD
/
WD(M)-14340(5)FD]
1.
Spin
selection
?
Spin
Speed
is
available
according
to
the
program
as
follows.
?
WD(M)-16341(6)FD
/
WD(M)-16340(5)FD
-
Cotton,
Rinse+Spin,
Quick
30
NoSpin-400-600-
800
-
1000
-
1200-
1400
-
1600
-
Synthetic,
Wool/Silk,
Hand
Wash
NoSpin-400-600-800-1000
-
Delicate
NoSpin-400-600-800
?
WD(M)-14341(6)FD
/
WD(M)-14340(5)FD
-
Cotton,
Rinse+Spin,
Quick
30
NoSpin-400-600-
800-1000-1200-1400
-
Synthetic,
Wool/Silk,
Hand
Wash
NoSpin-400-600-800-1000
-
Delicate
NoSpin-400-600-800
?
WD(M)-12341(6)FD
/
WD(M)-12340(5)FD
-
Cotton,
Rinse+Spin,
Quick
30
NoSpin-400-600-800-1000-1200
-
Synthetic,
Wool/Silk,
Hand
Wash
NoSpin-400-600-800-1000
-
Delicate
NoSpin-400-600-800
Spin
only:
1.
Press
the
Power
buton.
2.
Set
the
desired
spin
speed
by
pressing
the
Spin
button.
3.
Press
the
Start/Pause
button.
(400--600--800--1000--1200)
(400--600--800--1000--1200--1400--1600)
(400--600--800--1000--1200--1400)

17
ow
to
use
washer
H
Water
Temp.
?
By
turning
the
Program
Dial,
the
water
temperature
can
be
selected.
-
Cold
-30˚C/40˚C/60˚C/95˚C
?
Water
temperature
can
be
selected
according
to
the
program.
The
required
temperature
lamp
will
light
up
for
identification.
For
the
more
detailed
information,
please
refer
to
the
page13.
Child
Lock
If
you
choose
to
lock
the
buttons
on
the
control
assembly
to
prevent
tampering
this
function
may
be
selected.
?
Child
Lock
can
be
set
by
pressing
the
Rinse+
button
and
Pre
Wash
button
simultaneously.
(About
three
seconds)
?
When
child
lock
is
set,
all
buttons
are
locked
except
for
power
button.
?
To
deactivate
Child
Lock
system,
press
Rinse+
and
Pre
Wash
buttons
simultaneously
again.
(About
three
seconds)
?
To
change
to
the
desired
program,
whilst
in
child
lock
mode.
1.
Press
both
Rinse+
and
Pre
Wash
together
once
again.
(About
three
seconds)
2.
Press
the
Start/Pause
button.
3.
Select
the
desired
program
and
press
the
Start/Pause
button
again.
?
The
child
lock
can
be
set
at
any
time
and
it
is
automatically
canceled
when
operational
errors
occur.
Also
Child
Lock
works
when
power
is
off.
1.
Child
Lock

18
Program
?
8
programs
are
available
according
to
the
laundry
type.
?
Lamp
will
light
up
to
indicate
selected
program.
?
When
Start/Pause
button
is
pressed,
the
Cotton
program
is
automatically
selected.
-
By
turning
the
Program
dial,
the
program
is
selected
in
order
of
"
Cotton
-
Delicate
-
Quick
30
-
Rinse+Spin
-
Drain
-
Hand
Wash
-
Wool/Silk
-
Synthetic".
Regarding
to
the
laundry
type
for
each
program
Please
refer
to
the
page13.
ow
to
use
washer
H
TimeDelay(
)
1.
Time
Delay
Preparing
washing
before
starting
"Time
Delay"
-
Turn
on
the
water
tap.
-
Load
laundry
and
close
the
door.
-
Place
the
detergent
and
fabric
softener
in
the
drawer.
?
How
to
set
"Time
Delay"
-
Press
Power
button.
-
Turn
the
Program
dial
to
select
the
program
you
require.
-
Press
Time
Delay
button
and
set
the
desired
time.
-
Press
the
Start/Pause
button.
?
If
Time
Delay
button
is
pressed,
"3:00"
is
displayed.
The
maximum
delayed
time
is
19
hours
and
the
minimum
time
is
3
hours.
?
Each
pressing
of
the
button
advances
on
time
delay
by
one
hour.
?
To
cancel
the
time
delay,
press
the
Power
button.
?
Time
Delay
is
'expected
time'
from
the
present
to
the
completion
of
washing
cycle
or
selected
process
(Wash,
Rinse,
Spin).
?
According
to
the
condition
of
water
supply
and
temperature,
the
delayed
time
and
the
actual
washing
time
may
vary.

19
ow
to
use
washer
H
Start/Pause
?
This
Start/Pause
button
is
used
to
start
wash
cycle
or
pause
the
wash
cycle.
?
If
temporary
stop
of
wash
cycle
is
needed,
press
the
Start/Pause
button.
?
When
in
Pause,
the
power
is
turned
off
automatically
after
4
minutes.
?
NB.
The
door
will
not
open
before
1
to
2
minutes
when
Pause
is
selected,
or
at
the
end
of
the
wash
cycle.
?
Lights
whenever
the
door
of
the
washer
is
locked.
?
The
door
can
be
unlocked
by
pressing
the
Start/Pause
button
to
stop
the
washer.
?
The
door
can
be
opened
after
a
short
delay.
1.
Start
2.
Pause
3.
Door
Lock
1.
Power
2.
Initial
Program
Power
?
Press
the
Power
button
to
turn
power
on
and
off
?
To
cancel
the
Time
Delay
function,
the
power
button
should
be
pressed.
?
When
the
Power
button
is
pressed,
the
washer
is
ready
for
Cotton
program.
And
the
other
initial
conditions
as
follows.
?
So,
if
you
want
to
advance
into
the
washing
cycle
without
changing
the
program,
just
press
the
Start/Pause
button
and
then
the
washer
will
proceed.
Initial
program
[WD(M)-16341(6)FD
/
WD(M)-16340(5)FD]
-
Cotton
Program
/
Main
wash
/
Normal
Rinse
/
1600
rpm
/
60˚C
[WD(M)-14341(6)FD
/
WD(M)-14340(5)FD]
-
Cotton
Program
/
Main
wash
/
Normal
Rinse
/
1400
rpm
/
60˚C
[WD(M)-12341(6)FD
/
WD(M)-12340(5)FD]
-
Cotton
Program
/
Main
wash
/
Normal
Rinse
/
1200
rpm
/
60˚C
Detecting
load
?
While
the
"Detecting"
is
shown
in
the
display
the
machine
rotates
slowly
and
detects
how
many
laundries
are
loaded
in
the
drum.
It
will
take
a
few
seconds.
?
Available
in
Cotton,
Cotton-Eco.
4.
Detecting
This manual suits for next models
5
Table of contents
Other LG Washer manuals

LG
LG WF-L777TC User manual

LG
LG FH0J3QDN Series User manual

LG
LG F1243KDS Series User manual

LG
LG TV2516DV3B User manual

LG
LG WM1455H A Series User manual

LG
LG WM2455HS Instruction Manual

LG
LG F14A8TDA Series User manual

LG
LG WASHTOWER FWT2116 S Series User manual

LG
LG WF-T1503TP User manual

LG
LG WM1388H User manual