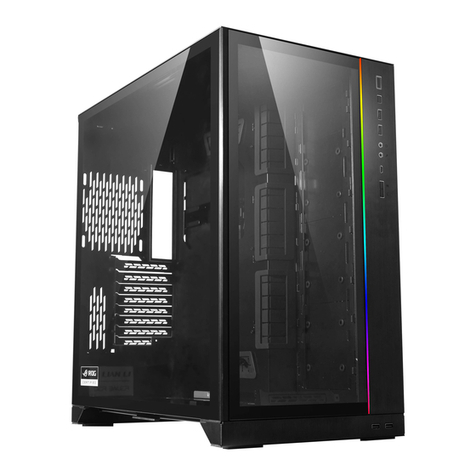
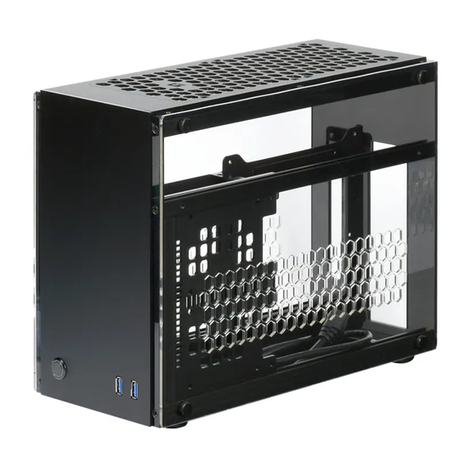
Lian-Li PC-O11 Dynamic EVO Svart User manual

- 1 -
Table of Contents
⽬次 / Table des matières / Inhaltsverzeichnis / Tabla de contenido/⽬次
Remove the Panels..............................................................................................................................................3
側板拆卸 / Retirer les panneaux / Entfernen Sie die Platten / Retire los paneles / パネルを取り外します
Case Mode Specifications................................................................................................................................4
機箱模式規格 / Spécifications du mode cas / Spezifikationen des Gehäusemodus / Especificaciones del modo de caja / ケースモード仕様
Hardware List.....................................................................................................................................................5
零件部品⼀覽表 / Liste du matériel / Hardwareliste / Lista de hardware / ハードウェアリスト
I/O Ports Function.............................................................................................................................................................6
I/O port / Installation du port I/O / I/O-Port installieren / Instalación de los puertos de I/O / I/O功能說明 ポート機能
PSU Installation..............................................................................................................................................7-8
電源供應器安裝 / Installation du plateau du bloc d'alimentation / PSU-Einsatz installieren / Instalación de la fuente de alimentación /
電源のインストール
SSD, HDD Installation............................................................................................................................7/11/14/15
SSD, HDD安裝 SSD ,HDD / SSD,HDD-Installation / Instalación de SSD,HDD / SSD ,HDD
/ Installation de の取り付け
IO Module Location...........................................................................................................................................9
IO port 位置變換 / Emplacement du module d'E/S / Position des E/A-Moduls / Ubicación del módulo IO /IOポートの位置の変更
Normal Installation Mode ........................................................................................7-17
Motherboard Installation..........................................................................................................................................................................10
主板安裝 / Installation de la carte mère / Mainboard-Installation / Instalación de la placa base /マザーボードの取り付け
Remove the Dust Filter....................................................................................................................................................10
卸下灰塵濾網/Retirez les filtres à poussière/Entfernen Sie die Staubfilter / Retire los filtros de polvo / ダストフィルターを取り外します
Adjust the Position of the HDD Cage and the Cable Management Bracket..............................................12
調整硬盤托盤和整線⽀架的位置/ Ajustez la position du plateau du disque dur et du support de gestion des câbles /
Passen Sie die Position des Festplattenfachs und der Kabelführungshalterung an / Ajuste la posición de la bandeja del
disco duro y el soporte de administración de cables / HDDトレイとケーブル管理ブラケットの位置を調整します
Cable Management.........................................................................................................................................12
線材整理 / Gestion des câbles / Kabelmanagement /Mantenimiento de cable/ ケーブル管理
Radiator & Cooling Support 1............................................................................................................................ 3
散熱器&⽔冷排⽀援/ Radiateur et ventilation compatibilité / Kühler- und Kühlungsunterstützung /
Soporte de refrigeración y radiador / ラジエーターと冷却のサポート
Remove the an racketBottom F B ......................................................................................................................13
卸除下⾵扇⽀架/ Retirez le support inférieur du ventilateur / Entfernen Sie die untere Lüfterhalterung /
Retire el soporte del ventilador inferior / 下部ファンブラケットを取り外します
Remove the Top Fan Bracket...........................................................................................................................14
卸除上⾵扇⽀架 / Retirez le support du ventilateur supérieur / Entfernen Sie die obere Lüfterhalterung /
Retire el soporte del ventilador superior/上部ファンブラケットを取り外します
Transform Bottom Fan Bracket to Drive Holder.........................................................................................................14
下⾵扇⽀架可安裝硬碟⽀架 Le support de ventilateur inférieur peut être installé avec un support de disque dur / /
Die untere Lüfterhalterung kann mit einer HDD-Halterung montiert werden / El soporte inferior del ventilador se puede
instalar con un soporte HDD/ 下部ファンブラケットはHDDブラケットと⼀緒に取り付けることができます
Remove the Side Fan Bracket..........................................................................................................................15
卸下側⾵扇⽀架 / Retirez le support du ventilateur latéral / Entfernen Sie die seitliche Lüfterhalterung /
Retire el soporte del ventilador lateral/サイドファンブラケットを取り外します
Graphic Card Anti-sag Bracket Installation............................................................................................................ 16
顯卡⽀撐架安裝 / Installation du support anti-affaissement de la carte graphique / Installation der Anti-Sag-Halterung für die Grafikkarte /
Instalación del soporte antideslizamiento de la tarjeta gráfica/グラフィックカードのたるみ防⽌ブラケットの取り付け
Install the panels..............................................................................................................................................................17
側板安裝 / Installer les panneaux / Installieren Sie die Paneele / Instale los paneles / パネルを取り付けます
Reverse Mode .........................................................................................18-31Installation
- 2 -
Steps to Install the Upper PS ....................................................................................................................................20U
安裝上置電源步驟 / Étapes pour installer le bloc d'alimentation supérieur / Schritte zum Installieren des oberen Netzteils /
Instale la fuente de alimentación superior / 上部PSUをインストールします
SSD, HDD Installation..................................................................................................................................20/23/26/27
SSD, HDD安裝 SSD ,HDD / SSD,HDD-Installation / Instalación de SSD,HDD / SSD ,HDD
/ Installation de の取り付け
IO Module Location.........................................................................................................................................21
IO port 位置變換 / Emplacement du module d'E/S / Position des E/A-Moduls / Ubicación del módulo IO /IOポートの位置の変更
Motherboard Installation.........................................................................................................................................................................22
主板安裝 / Installation de la carte mère / Mainboard-Installation / Instalación de la placa base /マザーボードの取り付け
Remove the Dust Filter...................................................................................................................................................22
卸下灰塵濾網/Retirez les filtres à poussière/Entfernen Sie die Staubfilter / Retire los filtros de polvo / ダストフィルターを取り外します
Adjust the Position of the HDD Cage and the Cable Management Bracket.............................................24
調整硬盤托盤和整線⽀架的位置/ Ajustez la position du plateau du disque dur et du support de gestion des câbles /
Passen Sie die Position des Festplattenfachs und der Kabelführungshalterung an / Ajuste la posición de la bandeja del
disco duro y el soporte de administración de cables / HDDトレイとケーブル管理ブラケットの位置を調整します
Cable Management..........................................................................................................................................24
線材整理 / Gestion des câbles / Kabelmanagement /Mantenimiento de cable/ ケーブル管理
Radiator & Cooling Support...........................................................................................................................25
散熱器&⽔冷排⽀援/ Radiateur et ventilation compatibilité / Kühler- und Kühlungsunterstützung /
Soporte de refrigeración y radiador / ラジエーターと冷却のサポート
Bottom Fan Bracket Installation..........................................................................................................25
安裝下⾵扇⽀架/ Installer le support de ventilateur inférieur / Installieren Sie die untere Lüfterhalterung /
Instale el soporte del ventilador inferior /下部ファンブラケットを取り付けます
Install the Top Fan Bracket.............................................................................................................................26
安裝上⾵扇⽀架 / Installer le support de ventilateur supérieur / Installieren Sie die obere Lüfterhalterung /
Instale el soporte del ventilador superior/上部ファンブラケットを取り付けます
Transform Bottom Fan Bracket to Drive Holder ......................................................................................................26
下⾵扇⽀架可安裝硬碟⽀架 Le support de ventilateur inférieur peut être installé avec un support de disque dur / /
Die untere Lüfterhalterung kann mit einer HDD-Halterung montiert werden / El soporte inferior del ventilador se puede
instalar con un soporte HDD/ 下部ファンブラケットはHDDブラケットと⼀緒に取り付けることができます
Remove the Side Fan Bracket.........................................................................................................................27
卸下側⾵扇⽀架 / Retirez le support du ventilateur latéral / Entfernen Sie die seitliche Lüfterhalterung /
Retire el soporte del ventilador lateral/サイドファンブラケットを取り外します
Graphic Card Anti-sag Bracket Installation...........................................................................................................28
顯卡⽀撐架安裝 / Installation du support anti-affaissement de la carte graphique / Installation der Anti-Sag-Halterung für die Grafikkarte /
Instalación del soporte antideslizamiento de la tarjeta gráfica/グラフィックカードのたるみ防⽌ブラケットの取り付け
Install the panels............................................................................................................................................................29
側板安裝 / Installer les panneaux / Installieren Sie die Paneele / Instale los paneles / パネルを取り付けます
Hardware Clearance...............................................................................................................................30
/ Liquidation du matériel / Hardware-Freigabe / Liquidación de hardware /ハードウェアクリアランス硬體擴充⽀援
Option Kits...........................................................................................................................................31
選配套件 / Kits d'options / Optionssätze / Kits de opciones/オプションキット
Table of Contents
⽬次 / Table des matières / Inhaltsverzeichnis / Tabla de contenido/⽬次

- 3 -
Remove the Right Side Panel and Top Cover
卸下右側板與上蓋 / Retirez le panneau latéral droit et le capot supérieur / Entfernen Sie die rechte Seitenwand und die obere
Abdeckung / Retire el panel lateral derecho y la cubierta superior/右側のサイドパネルとトップカバーを取り外します
2
1
2
13
2
3
1
Remove the Side Glass Panel
卸下側玻璃 / Retirer la vitre latérale / Entfernen Sie das Seitenglas / Retire el vidrio lateral/サイドガラスを取り外します
Remove the Glass Front Panel
卸下玻璃前⾯板 / Retirez le panneau avant en verre / Entfernen Sie die Glasfrontplatte / Retire el panel frontal de vidrio/
ガラスのフロントパネルを取り外します
1
2
3
此螺絲在平時不⽤鎖。
No need to screw normally.

- 4 -
Normal Mode Specifications
正常模式規格 / Spécifications du mode normal / Spezifikationen für den Normalmodus /
Especificaciones del modo normal / 通常モードの仕様
要 安 裝 此 模 式 , 請 參 閱 第 1 - 1 7,3 0 -3 1⾴
Refer to page 1-17, 28-29 to install this mode
Power Button, Reset Button, C button for color
control, M button for lighting mode control
IO ports: 1 x AUDIO / Microphone Combo Jack,
2 x USB 3.0, 1 x USB 3.1 Type C
Supporting 120 mm fan x 3 or 140 mm fan x 2
or 360 mm radiator x 1 or 280 radiator x 1
Supporting 120 mm fan x 3 or 140 mm fan x 2
or 360 mm radiator x 1 or 280 radiator x 1
or 2.5” SSD x 4 or 3.5” HDD x 2
Supporting 120 mm fan x 3 or 140 mm fan x 2
or 360 mm radiator x 1
or 2.5” SSD x 4 or 3.5” HDD x 2
Supporting 120 mm fan x 1
Supporting 2.5” SSD x 1 + 3.5” HDD x 2
or 2.5” SSD x 2 or PSU x 1
Removable HDD tray, Supporting 2.5” SSD x 2
要安裝此模式,請參閱第1 - 6,18-31⾴
Refer to page1-6, 18-31 to install this mode
Normal
Reverse Reverse Mode Specifications
倒置模式規格 / Spécifications du mode inversé / Spezifikationen für den Rückwärtsmodus /
Especificaciones del modo inverso / リバースモード仕様
Power Button, Reset Button, C button for color
control, M button for lighting mode control
IO ports: 1 x AUDIO / Microphone Combo Jack,
2 x USB 3.0, 1 x USB 3.1 Type C
Supporting 120 mm fan x 3 or 140 mm fan x 2
or 360 mm radiator x 1 or
Supporting 120 mm fan x 3 or 140 mm fan x 2
or 360 mm radiator x 1 or 280 radiator x 1
or 2.5” SSD x 4 or 3.5” HDD x 2
Supporting 120 mm fan x 3 or 140 mm fan x 2
or 360 mm radiator x 1 or 280 radiator x 1
or 2.5” SSD x 4 or 3.5” HDD x 2
Supporting 120 mm fan x 1
Supporting 2.5” SSD x 1 + 3.5” HDD x 2
or 2.5” SSD x 2 or PSU x 1
Removable HDD tray, Supporting 2.5” SSD x 2

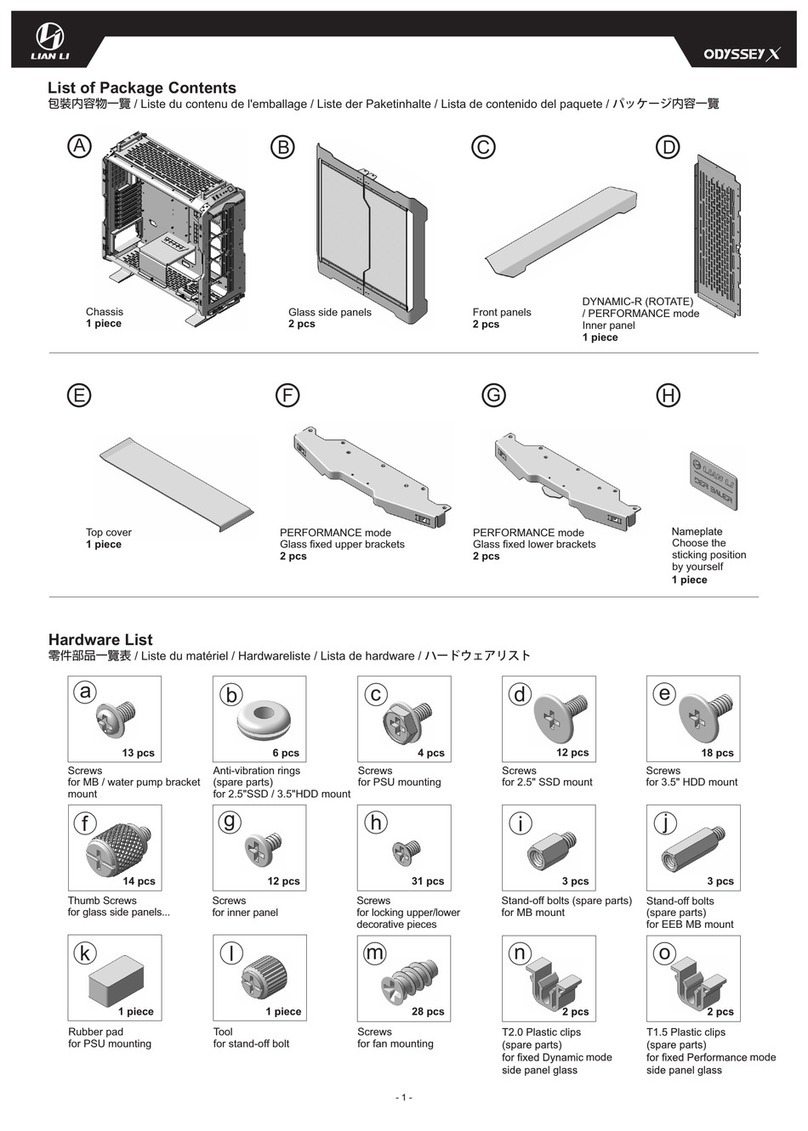
Hardware List
Anti-vibration rings
for 2.5" SSD /
3.5" HDD mount
Screws
for motherboard
mounting
Screws
for PSU mounting
Screws
for 2.5" SSD mount
Screws
for 3.5" HDD mount
Screws (spare parts)
Fixed front/side glass
HDD tray
for 2.5" SSD/
3.5" HDD mount
Stand-off bolt
(spare parts)
for M/B mount
Tool
for stand-off bolt Screws
for fan mounting
零件部品⼀覽表 / Liste du matériel / Hardwareliste / Lista de hardware / ハードウェアリスト
x 15 x 8 x 36
x 36 x 24 x 2
x 3 x 1 x 4x 1 x 2
HDD bracket
for HDD tray mount
Cable ties
for cable
management
Screws
for PSU / HDD
bracket
Female clips
(spare parts)
for side panel
Female clips
(spare parts)
for front/side glass
Name plate
Rubber block, Pad
between two PSUs
Rubber pad
for PSU
Velcro straps Screws
for 60 mm fan mount
op
qr s t
x 2 x 8 x 7x 1 x 2
x 4 x 4x 1 x 2
- 5 -
x 1
Graphic card
bracket
Gasket Rubber pad L-shaped
support bracket
x 2 x 2
Long stand-off bolt
x 2 x 2
for graphic card anti-sag bracket kit installation
u

I/O Ports Function
I/O port / Installation du port I/O / I/O-Port installieren / Instalación de los puertos de I/O / I/O功能說明 ポート機能
- 6 -
USB 3.1
Type C
POWER / RESET
HD AUDIO
USB 3.0 USB 3.1 GEN.2
A R G B光效 說明 :
⼀、 ⽀持A R G B ,灯 數:5 6顆
⼆、 模式 開關:
1.彩 虹快 速跑 。
2.⿈/橙 雙⾊ 反⽅ 向跑 ⾺燈 。
3.雙 ⾊燈 對撞 反向 跑⾺ 燈(⽩/綠,藍/綠,紫/⽩,藍/⽩,紅/紫,⿈/⽩,紅/綠,⿈/綠)。
4.紅 ⾊流 星。
5.彩 虹慢 速跑 。
6.俄 羅斯 ⽅塊 (⽩ ⾊, 紅⾊ ,綠 ⾊, 藍⾊ ,⿈ ⾊, 天藍 ⾊, 紫⾊ )。
7.不 同顏 ⾊切 換的 流星 (⽩ ⾊, 紅⾊ ,綠 ⾊, 藍⾊ ,⿈ ⾊, 天藍 ⾊, 紫⾊ )。
8.外 部AR GB信 號控 制,⾧按3秒 可關 燈。
三、 顏⾊ 開關:
⽩⾊/紅 ⾊/綠⾊/藍 ⾊/⿈⾊/天 藍⾊/紫 ⾊(七種 顏⾊)。
四、 帶記 憶功 能(預設 為⽩ 光定 ⾊模 式)。
ARGB light effect description:
a. Number of ARGB lamps supported: 56.
b. Mode switch:
1. Rainbow fast run.
2. Yellow/orange double color scroll in the opposite direction.
3. Two-color lights collide with reverse scroll (white/green, blue/green,
purple/white, blue/white, red/purple, yellow/white, red/green, yellow/green).
4. Red meteor.
5. Rainbow jog.
6. Tetris (white, red, green, blue, yellow, sky blue, purple).
7. Shooting stars with different colors
(white, red, green, blue, yellow, sky blue, purple).
8. External ARGB signal control, Long press for 3 seconds to turn off the light.
c. Color switch:
White/red/green/blue/yellow/sky blue/purple (seven colors).
d. Memoriable
(Default: White Static Color) .
Power
Reset
C-Color
M-Mode
Microphone Combo Jack
USB 3.0
USB 3.0

- 7 -
PSU Installation
電源供應器安裝/ Installation du plateau du bloc d'alimentation / PSU-Einsatz installieren /
Instalación de la fuente de alimentación / 電源のインストール
注意 先選擇PSU安裝位置(下或上)
Select the PSU position
(LOWER or UPPER).
2.5" SSD 安裝 /
/ Installation de 2.5" SSD
2.5" SSD-Installation / Instalación de 2.5" SSD /
2.5" SSD
の取り付け
2.5" SSD Installation
撕開背膠
Peal the
layer on adhesive 2
12
LOWER
r
撕開背膠
Peal the
layer on adhesive
。
3
1
1
此線材遮板可反向裝置。
Cable mangement bar
can be inverted.
注意
2

PSU Installation (UPPER)-Swap Location with HDD Cage
電源供應器安裝/ Installation du plateau du bloc d'alimentation / PSU-Einsatz installieren /
Instalación de la fuente de alimentación / 電源のインストール
2. Remove the HDD cage.
1
2
5. Install the PSU support bracket. 6. Installation the HDD cage.
1
7. PSU Installation (UPPER).
- 8 -
Rubber block for dual PSU scenario.
.
or
q
2.移除硬盤托盤。
4 .將機殼倒置,拆 除 電 源 ⽀ 撐 架 並 裝 回
蓋 ⼦ 與 I O線 。 5.安裝電源⽀撐架。 6.安裝硬 碟架 。
7.安 裝(上)電源 供應器 。 安裝 雙電 源狀 態-墊橡膠 塊。
撕開背膠
3. Detach the feet frame from the
chassis (Remove the IO module
before).
3.將腳座和機殼分離(先拔掉IO線)。
1. Remove the cover.
1.移除蓋⼦。
2
1
UPPER
Peal the
layer on adhesive
1
2
機殼往前推
4. Flip the chassis to remove the
PSU support bracket and reinstall
the feet frame and the IO module.
Push the
chassis

IO Module Location
I/O port 位置變換 / Changement de position du port d'E/S / Positionsänderung des I/O-Ports /
Cambio de posición del puerto de E / S / I/Oポートの位置変更
Location 1 ( Defualt mode)
位置1 (預 設模 式)
Remove the IO module
IO port卸除
Remove the cable clip
整線扣卸除
- 9 -
Install the cable clip
整線扣安裝
The possible position for
the cable clip
整線 扣 變換 位 置⽰ 意
Location 2
位置2
Location 3
位置3
按下
Push
往左推然後往下取出
Left push to remove
When mount at
Location 2,
remove the rubber
plug before..
使⽤ 位置2時,
先移 除橡 膠塞 。
注意

Motherboard Installation
主板安裝/
マザーボードの取り付け
Installation de la carte mère / Mainboard-Installation / Instalación de la placa base /
- 10 -
Remove the Dust Filters
MOTHERBOARD
j
c

2.5" SSD, 3.5" HDD Installation
2.5" SSD ,3.5" HDD安裝 2.5" SSD ,3.5" HDD / 2.5" SSD ,3.5" HDD-Installation /
/ Installation de
Instalación de 2.5" SSD ,3.5" HDD / 2.5" SSD ,3.5" HDD
の取り付け
- 11 -
1
2
2
1
1
t
Four position on HDD cage for
60 mm fan.
硬盤托盤可安裝60mm⾵扇散熱
(有四個位置可選擇)。
2.5" SSD Installation
3.5" HDD Installation
2
1
1.卸下硬碟蓋。
1. Remove the HDD cover.
2.卸下硬盤托盤。
2. Remove the HDD cage.

Adjust the Position of the HDD Cage and the Cable Management Bracket
調整硬盤托盤和整線⽀架的位置/ Ajustez la position du plateau du disque dur et du support de gestion des câbles /
Passen Sie die Position des Festplattenfachs und der Kabelführungshalterung an / Ajuste la posición de la bandeja del
disco duro y el soporte de administración de cables / HDDトレイとケーブル管理ブラケットの位置を調整します
1
- 12 -
Cable Management
線材整理/ Gestion des câbles / Kabelmanagement /
Mantenimiento de cable/ ケーブル管理
Organize the extra PSU cable to the hook.
可將PSU多餘的線材整在掛勾內。
可將硬碟出線先纏繞於此, 避免安裝時整線拉扯掉落。
注意
Select the drive cage position, detailed
installation please view PSU installation.
可選擇安裝在上或下。
Fix the storage drive cables on the bracket to
avoid disconnection during cable managing.
p
s

Radiator & Cooling Support
散熱器&⽔冷排⽀援/ Radiateur et ventilation compatibilité / Kühler- und Kühlungsunterstützung /
Soporte de refrigeración y radiador / ラジエーターと冷却のサポート
120 mm FAN x3
140 mm FAN x2
360 mm RADIATOR
280 mm RADIATOR
120 mm FAN x3
140 mm FAN x2
360 mm RADIATOR
280 mm RADIATOR
120 mm FAN x1
360 mm RADIATOR
120 mm FAN x3
140 mm FAN x2
Remove the Bottom Fan Bracket
卸除下⾵扇⽀架/ Retirez le support inférieur du ventilateur / Entfernen Sie die untere Lüfterhalterung /
Retire el soporte del ventilador inferior / 下部ファンブラケットを取り外します
- 13 -
Hint to mount the fan brackets
(Recommend to install bottom fan bracket before
install the top fan bracket for convenience).
安裝 扣位 提⽰(建 議先 安裝 下⽔ 冷架,⽅ 便對 位)。
注意
1

Remove the Top Fan Bracket
卸除上⾵扇⽀架 / Retirez le support du ventilateur supérieur / Entfernen Sie die obere Lüfterhalterung /
Retire el soporte del ventilador superior/上部ファンブラケットを取り外します
Fit in
安 裝 扣 位
翻轉 並由 底部 鎖上 硬碟
Transform Bottom Fan Bracket to Drive Holder
下⾵扇⽀架可安裝硬碟⽀架 Le support de ventilateur inférieur peut être installé avec un support de disque dur / /
Die untere Lüfterhalterung kann mit einer HDD-Halterung montiert werden / El soporte inferior del ventilador se puede
instalar con un soporte HDD/ 下部ファンブラケットはHDDブラケットと⼀緒に取り付けることができます
- 14 -
1
o
2
3
e
注意⽅向
Attention direction
Anti-vibration rings installation
避震 環安 裝
2.5" SSD installation
2.5"硬碟安裝
Turn over and fix the
2.5" SSD from the bottom
3.5" HDD bracket installation
3.5"硬碟⽀架安裝
o
注意⽅向
Attention direction
Anti-vibration rings installation
避震 環安 裝
e
注意⽅向
Attention direction
3.5" HDD installation
3.5"硬碟安裝
3
Turn over and fix the
3.5" HDD from the bottom
f
1
2
注意⽅向
Attention direction
2.5" SSD bracket installation
2.5"硬碟⽀架安裝
翻轉 並由 底部 鎖上 硬碟
1
2
3

- 15 -
Remove the Side Fan Bracket
卸下側⾵扇⽀架 / Retirez le support du ventilateur latéral / Entfernen Sie die seitliche Lüfterhalterung /
Retire el soporte del ventilador lateral/サイドファンブラケットを取り外します
1
PUSH
Attention
Two option scenario for
installation: inner or outer.
安 裝 時 有 正/反 ⾯ 兩 種 選 擇 。
注意
2
朝下
Downward
Can be replaced with a HDD tray
(Attention direction).
可替換成硬碟架(⽅ 向 注 意)。
Attention
注意
2.5" SSD, 3.5" HDD Installation
2.5" SSD ,3.5" HDD安裝 2.5" SSD ,3.5" HDD / 2.5" SSD ,3.5" HDD-Installation /
/ Installation de
Instalación de 2.5" SSD ,3.5" HDD / 2.5" SSD ,3.5" HDD
の取り付け
g

Graphic Card Anti-sag Bracket Installation
顯卡⽀撐架安裝 / Installation du support anti-affaissement de la carte graphique /
Installation der Anti-Sag-Halterung für die Grafikkarte / Instalación del soporte antideslizamiento de la tarjeta gráfica/
グラフィックカードのたるみ防⽌ブラケットの取り付け
- 16 -
u
撕開背膠
Peal the
layer on
adhesive
Loose the
screw
for adjustment

dngu"1"
Right Side Panel Installation
右側板安裝/ Installation du panneau latéral droit / Montage der rechten Seitenwand /
Instalación del panel lateral derecho/右側パネルの取り付け
Top Cover Installation
上蓋安裝/ Installation du capot supérieur / Montage der oberen Abdeckung / Instalación de la cubierta superior/
トップカバーの取り付け
- 17 -
Side & Front Glass Installation
側&前⾯玻璃安裝/ Pose des vitres latérales et frontales/ Seiten- und Frontglasinstallation /
Instalación de vidrio lateral y frontal/側⾯と前⾯のガラスの取り付け
1
2
Attention: Recommend to fix the screws of the side and front glass panel for transportation.
注意:如需運送,建議將側&前玻璃鎖上螺絲。
Optional
選擇性使⽤

Reverse Reverse Mode Installation
反向模式 / Installation en mode inverse / Installation im umgekehrten Modus / 安裝
Instalación en modo inverso / リバースモードのインストール
2
1
3
1
- 18 -
1.卸下線材遮板。
1. Remove the cable management bar.
5. Detach the feet frame from the chassis
(Remove the IO module before).
5.將腳座和機殼分離(先拔掉IO線)。
6. Remove the PSU support bracket.
2.卸下硬碟蓋。
2. Remove the HDD cage cover.
3.卸下硬碟架。
3. Remove the HDD cage.
1
2
2
1
4.卸下上板。
4. Remove the top panel.
1
6 .將 機 殼 倒 置,拆除電源⽀撐架並裝回蓋⼦與 I O線 。
1
2
機殼往前推
Push the chassis

7.卸除下⾵扇⽀架。
7. Remove the bottom fan bracket.
8.卸除上⾵扇⽀架。
8. Remove the top fan bracket.
Reverse Reverse Mode Installation
反向模式 / Installation en mode inverse / Installation im umgekehrten Modus / 安裝
Instalación en modo inverso / リバースモードのインストール
- 19 -
1
2
3
1 0 .若安 裝在 下置,請 先倒 置機 殼,鎖上
電源 ⽀架 。
10. If install on the LOWER position,
please flip the chassis and
install the PSU bracket.
1
2
3
1
11 . 移 除橡 膠塞 並鎖 上腳 座。
9.先選擇PSU安裝位置(下置或上置)
9. Select the PSU position (LOWER or UPPER).
r
撕開背膠
Peal the
layer on adhesive
11. Remove the rubber plug and
install the feet.
1 2 .下置 電源 供應 器安 裝。
12. LOWER PSU installation.
。
2
1
3
4

Reverse Steps to Install the Upper PSU
安裝上置電源步驟 / Étapes pour installer le bloc d'alimentation supérieur / Schritte zum Installieren
des oberen Netzteils / Instale la fuente de alimentación superior / 上部PSUをインストールします
1. Install the PSU support bracket
1.安裝電源⽀撐架
o
2. Install the HDD cage
2.安裝硬碟架
r
撕開背膠
Peal the
layer on adhesive
3.上置電源供應器安裝
3. UPPER PSU installation
Rubber block for dual PSU scenario.
安裝 雙電 源狀 態-墊橡 膠塊 。
2
12
Reverse 2.5" SSD Installation
2.5" SSD 安裝 / 2.5" SSD-Installation
/ Installation de 2.5" SSD
/ Instalación de 2.5" SSD / 2.5" SSD
の取り付け
- 20 -
撕開背膠
Tear the adhesive
1
2
3
此線材遮板可反向裝置。
Cable mangement bar
can be inverted.
注意
This manual suits for next models
1
Table of contents
Other Lian-Li Enclosure manuals

Lian-Li
Lian-Li O11 DYNAMIC XL User manual

Lian-Li
Lian-Li LANCOOL III User manual

Lian-Li
Lian-Li PC-V1000L User manual

Lian-Li
Lian-Li PC-A51B User manual

Lian-Li
Lian-Li LANCOOL II MESH User manual

Lian-Li
Lian-Li O11 DYNAMIC XL User manual

Lian-Li
Lian-Li ODYSSEY X User manual

Lian-Li
Lian-Li LANCOOL II User manual

Lian-Li
Lian-Li O11DE-4X User manual

Lian-Li
Lian-Li PC-Q39GWX User manual