manuals.online logo
Brands
  1. Home
  2. •
  3. Brands
  4. •
  5. Libre
  6. •
  7. Accessories
  8. •
  9. Libre V-Max II User manual

Libre V-Max II User manual

Am Fässlesgrund 8
78054 VS - Schwenningen
phone: 07720-33964
Fax: 07720-22177
http://www.libre.de
Am Fässlesgrund 8
78054 VS - Schwenningen
phone: 07720-33964
Fax: 07720-22177
http://www.libre.de
Am Fässlesgrund 8
78054 VS - Schwenningen
phone: 07720-33964
Fax: 07720-22177
http://www.libre.de
V-Max II
Instruction manual
Maintainance
Please avoid any penetration of sand into the drilling of the back/rear axle, the
nuts and balts. This will lead to any blocking of the bolts and nuts and will
destroy their drilling lines. If it happens that sand will penetrate into the
drillings the best way is to remove the sand by using a discarded tooth brush.
The drillings and wheel bearings should be treated with grease, anti-corrosion
spray or technically used vaseline as a protection against corrosion.
By doing so you can guarantee a far longer life of the bearings and helps you
to save money.
Damages to the painting may be avoided by using normal painting colours.
The treatment of zink for all frame parts avoids any pre-painting with metal
basic painting. When finishing the driving in or through salty water you should
clean the Buggy with fresh water and treat all bearings again with grease.
Ball bearings are the most sensetive expentable parts of the Buggy. Therefore
please care for an attentive treatment. It is especially recommended to clean
and newly oil the bearings. For this procedure please remove the plastic
coverings by using a small screw driver. Then please clean the ball bearings
by means of washing patrol and afterwards treat them with oil again. This
cleaning procedure will lead to a longer life of the ball bearings and will avoid
any blocking by corrosion.
Safety hints
This Buggy is only constructed and designed for kite sailing.
It may be used for the above mentioned purpose only.
It is forbidden to let the Buggy be pulled by any engine driven vehicles
and it is not in accordance with the official Road Traffic Regulations
STVO. Consequently it is not allowed to drive on official traffic roads.
Buggy pilots/drivers have to wear protective clothes which means that
they have to wear a helmet as well as gloves.
Please carefully respect passengers, animals and, above all, nature.
Liability exclusion
Due to the special exertion of the sport we do not assume liability of
accidents which are caused from using this Buggy.
A
B
3
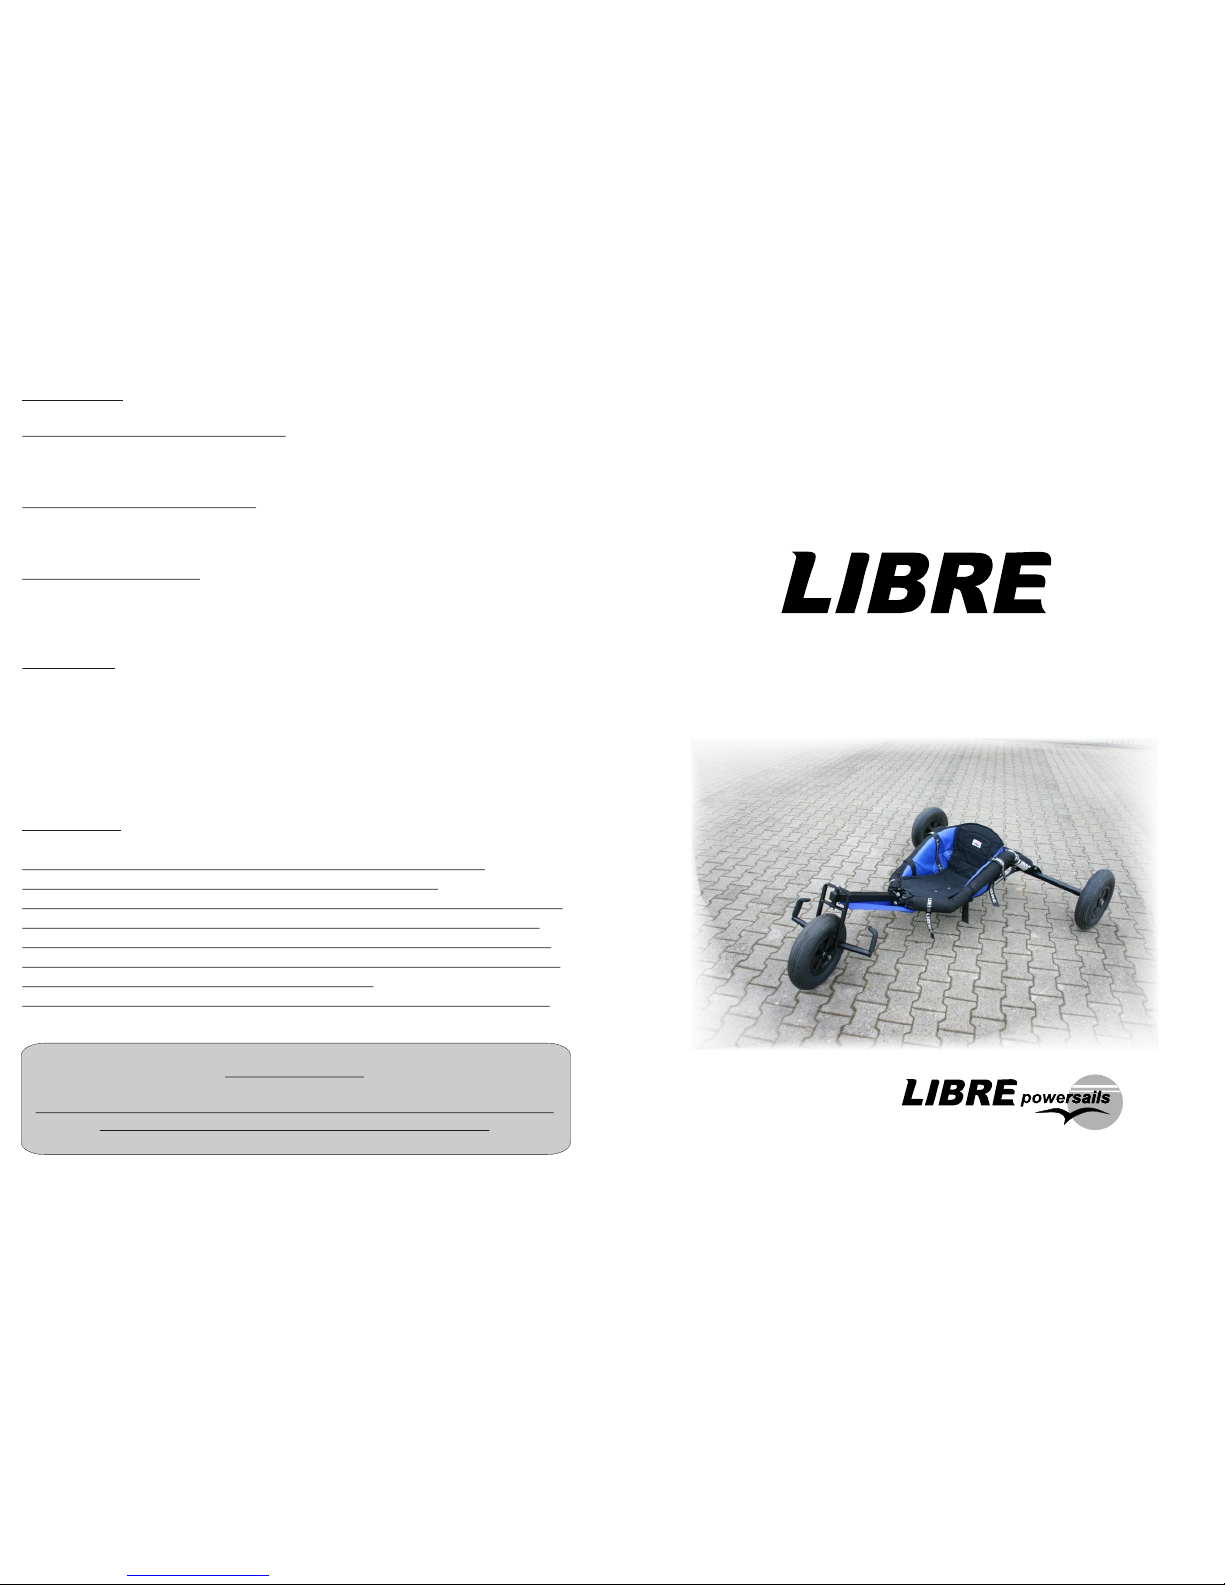
Congratulation for having bought your new LIBRE V-Max
This Buggy represents a first-class-sporting vehicle with a high quality
standard. The multi variable adjusting possibilities of the Buggy will offer
you the chance to adhere to any commitments of a competitive race and
it offers you any free driving just for fun.
The LIBRE V-Max has especially been developed for the use of high
performance kites and it is suitable for ambitions, beginners as well as
for champions. The LIBRE V-Max is fitted with a 135 cm long rear axle,
splash guard, feet webbing strings with a most specialized driver’s seat.
Contents of the box
One front fork with bolt fixed of the pre-assembled front wheel, splash guard
and foot arresting bolts.
Two horizontal tubes with a seat.
One back/rear axle measuring 135 cm.
Two back/rear wheels M20 with bolts and nuts.
Assembly Instructions
1. Please direct the back/rear axle through both webbing strap openings of the
seat and then fix them loose with a nut upwards to the side tubes together with
the fastening webbing straps.
2. Afterwards please loosen the 4M8 nuts and make a loosen connection
between the tow side bars which offers you enough distant space to shift the
front wheel axle easily between the two washers of the vertical tubes.
3. Now please slide and push the front wheel axle in between the washers of
the square tubes and gently fasten the nuts.
4. Afterwards please fasten the back/rear wheels to the back/rear axle and
then fix the foot bars against the front wheel fork.
5. Now please choose the correct length to the front wheel axle according to
the length of your legs and then adjust and fix the nuts of the adjusting bar
and of the back/rear axle.
6. For fixing the splash guard please put the tension straps around the
back/rear axle and lead them into the belt.
Fixing/fastening of the wheels
In order to prevent that the wheels get loose when you are driving with the
Buggy the wheel bolts M20 must be fixed to the back/rear axle by using the
self-fastening nuts as delivered after having fixed the bolts. This may be done
by holding tight the outside wheel bolt with a spanner and at the same time
turning and fixing the counter nut to the axle by using a second spanner for
fastening the opposite nut.
Air pressure of the wheel
The correct air pressure of the wheel leads to a better driving comfort and it will
be responsible for the speed of the Buggy on whatever underground may be
driven. Especially on soft sand you can raise your speed when the air pressure
is okay. We kindly recommend the following air pressure:
Front wheel: 0,4 to 0,6 Bars
Back/rear wheel: 0,6 to 1,0 Bars
Changing of the seat position
The deeper you adjust your seat position the more it will be protective against
your falling aside. If the underground on which
you drive is equally flat you may choose
a deep position of the seat. In case
of a soft and uneven underground the seat
should be adjusted at a higher position. The
adjustment of the seat position is done by
modifying the webbing strap within the vertical
klick belt (A) of the seat and the two backward
straps (B) which fix the seat to the back/rear axle.
We wish you a great success by the assembly of
the V-Max.
See you on the beach!
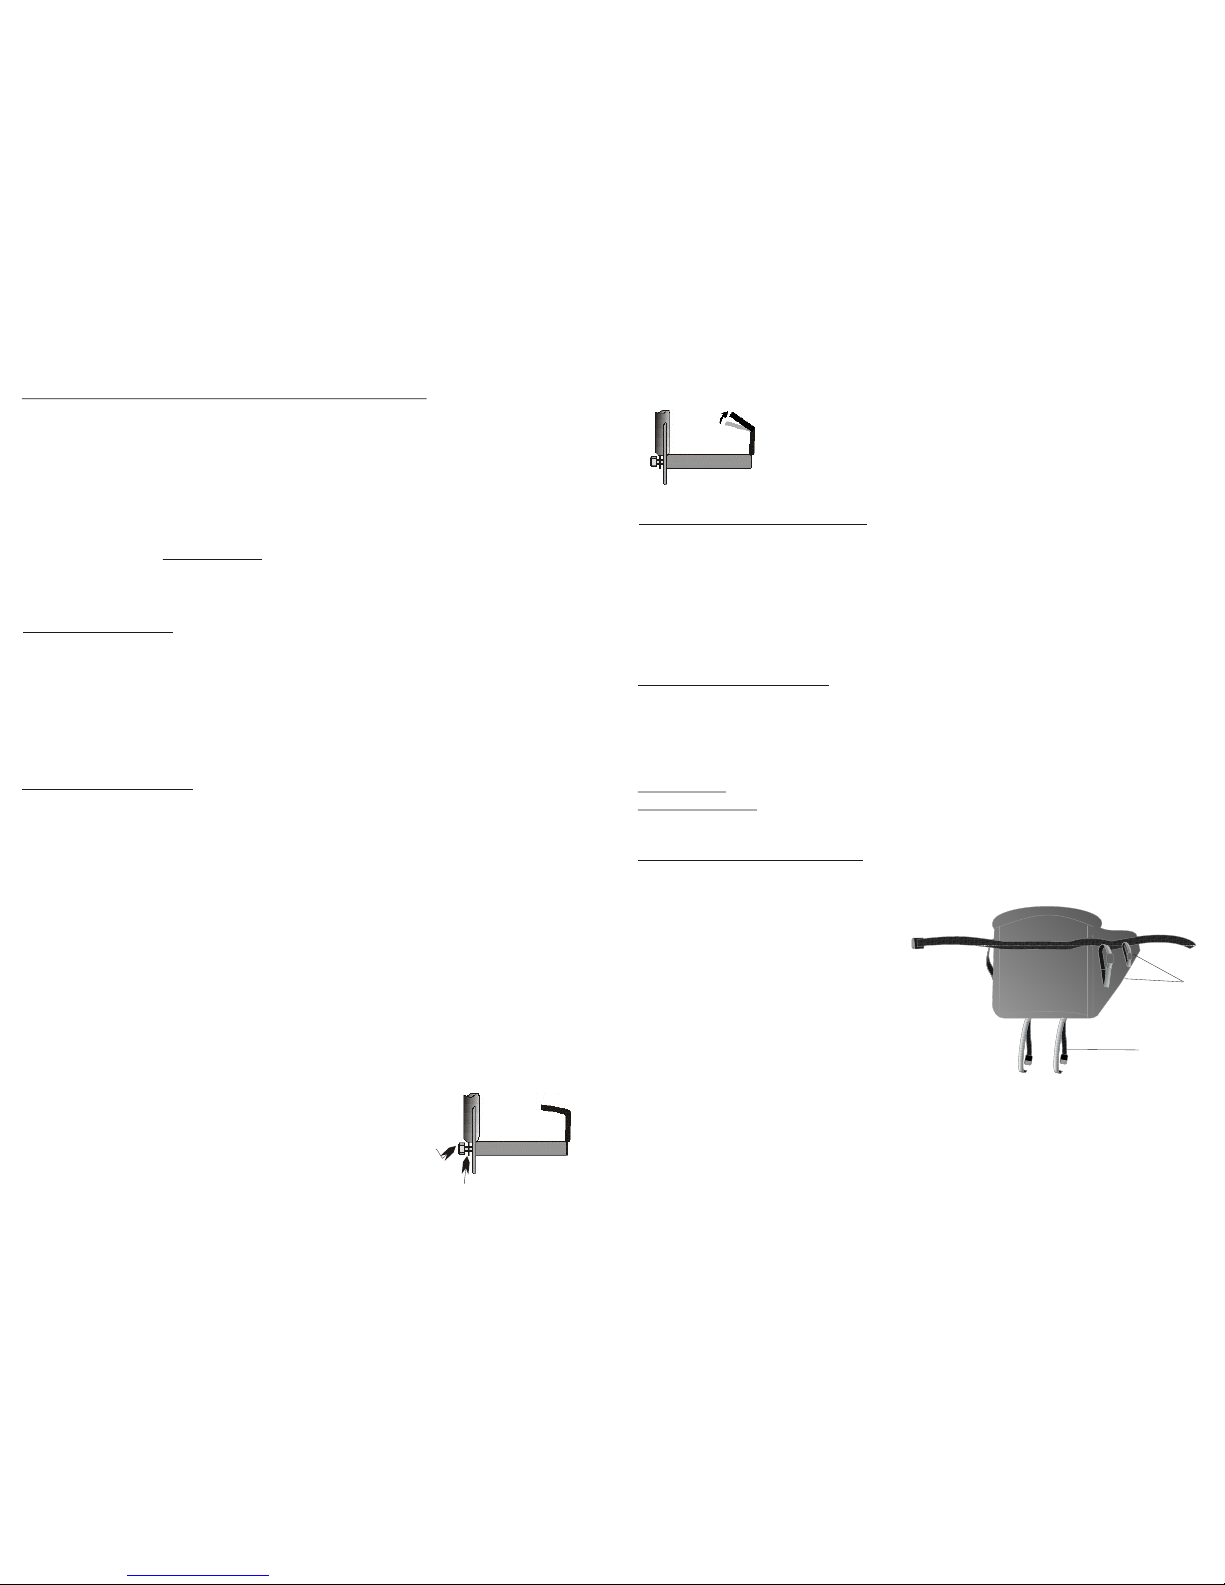
The foot straps must be fastened to the perforated
arresting bars and be fixed with the enclosed
tension strap to the upper vertical direction of
the fork. This bended ending prevents any slip
off with your feet to the top.
M10Stoppmutter
10 mm U-scheibe
10 mm washer
fnsel -fasteni g nut
In case the bended ending of the footpeg is too flat for you,
you can put the footpeg into a bench vice to steepen the top
ending (see the illustration aside)

Popular Accessories manuals by other brands

SICK SureSense HTB18L Series operating instructions

SICK

SICK SureSense HTB18L Series operating instructions

Balluff BOS 18M-PUV-RD30-S4 user manual

Balluff

Balluff BOS 18M-PUV-RD30-S4 user manual

LEGRAND neat PIR II user manual

LEGRAND

LEGRAND neat PIR II user manual

Waves DiGiGrid IOS user guide

Waves

Waves DiGiGrid IOS user guide

LOKAHI iSUP user guide

LOKAHI

LOKAHI iSUP user guide

Techly I-CHARGE-1000020W manual

Techly

Techly I-CHARGE-1000020W manual

MTS Sensors Temposonics T-Series Operation manual

MTS Sensors

MTS Sensors Temposonics T-Series Operation manual

Contours ELEMENT ZY025 manual

Contours

Contours ELEMENT ZY025 manual

Omron fh series Connection guide

Omron

Omron fh series Connection guide

Balluff BES M12MG2-GNX40F-S04G-EXC user guide

Balluff

Balluff BES M12MG2-GNX40F-S04G-EXC user guide

Bogen BAL2S Specifications

Bogen

Bogen BAL2S Specifications

fafnir torrix Technical documentation

fafnir

fafnir torrix Technical documentation

Lightolier Lytespan 8317 specification

Lightolier

Lightolier Lytespan 8317 specification

Hakki Pilke XL Conveyor 1 Instructions for assembly, operation and maintenance

Hakki Pilke

Hakki Pilke XL Conveyor 1 Instructions for assembly, operation and maintenance

Emerson Fisher 249W instruction manual

Emerson

Emerson Fisher 249W instruction manual

Carrier NSA-ASENSE-D-LCD-REL Owner's manual installation and operation

Carrier

Carrier NSA-ASENSE-D-LCD-REL Owner's manual installation and operation

Denver PSO-16758 manual

Denver

Denver PSO-16758 manual

Veris Industries AA01 installation guide

Veris Industries

Veris Industries AA01 installation guide

manuals.online logo
manuals.online logoBrands
  • About & Mission
  • Contact us
  • Privacy Policy
  • Terms and Conditions

Copyright 2025 Manuals.Online. All Rights Reserved.