TROUBLESHOOTING YOUR POOLCLEANER
49
INSTALLING THE POOLCLEANER cont.
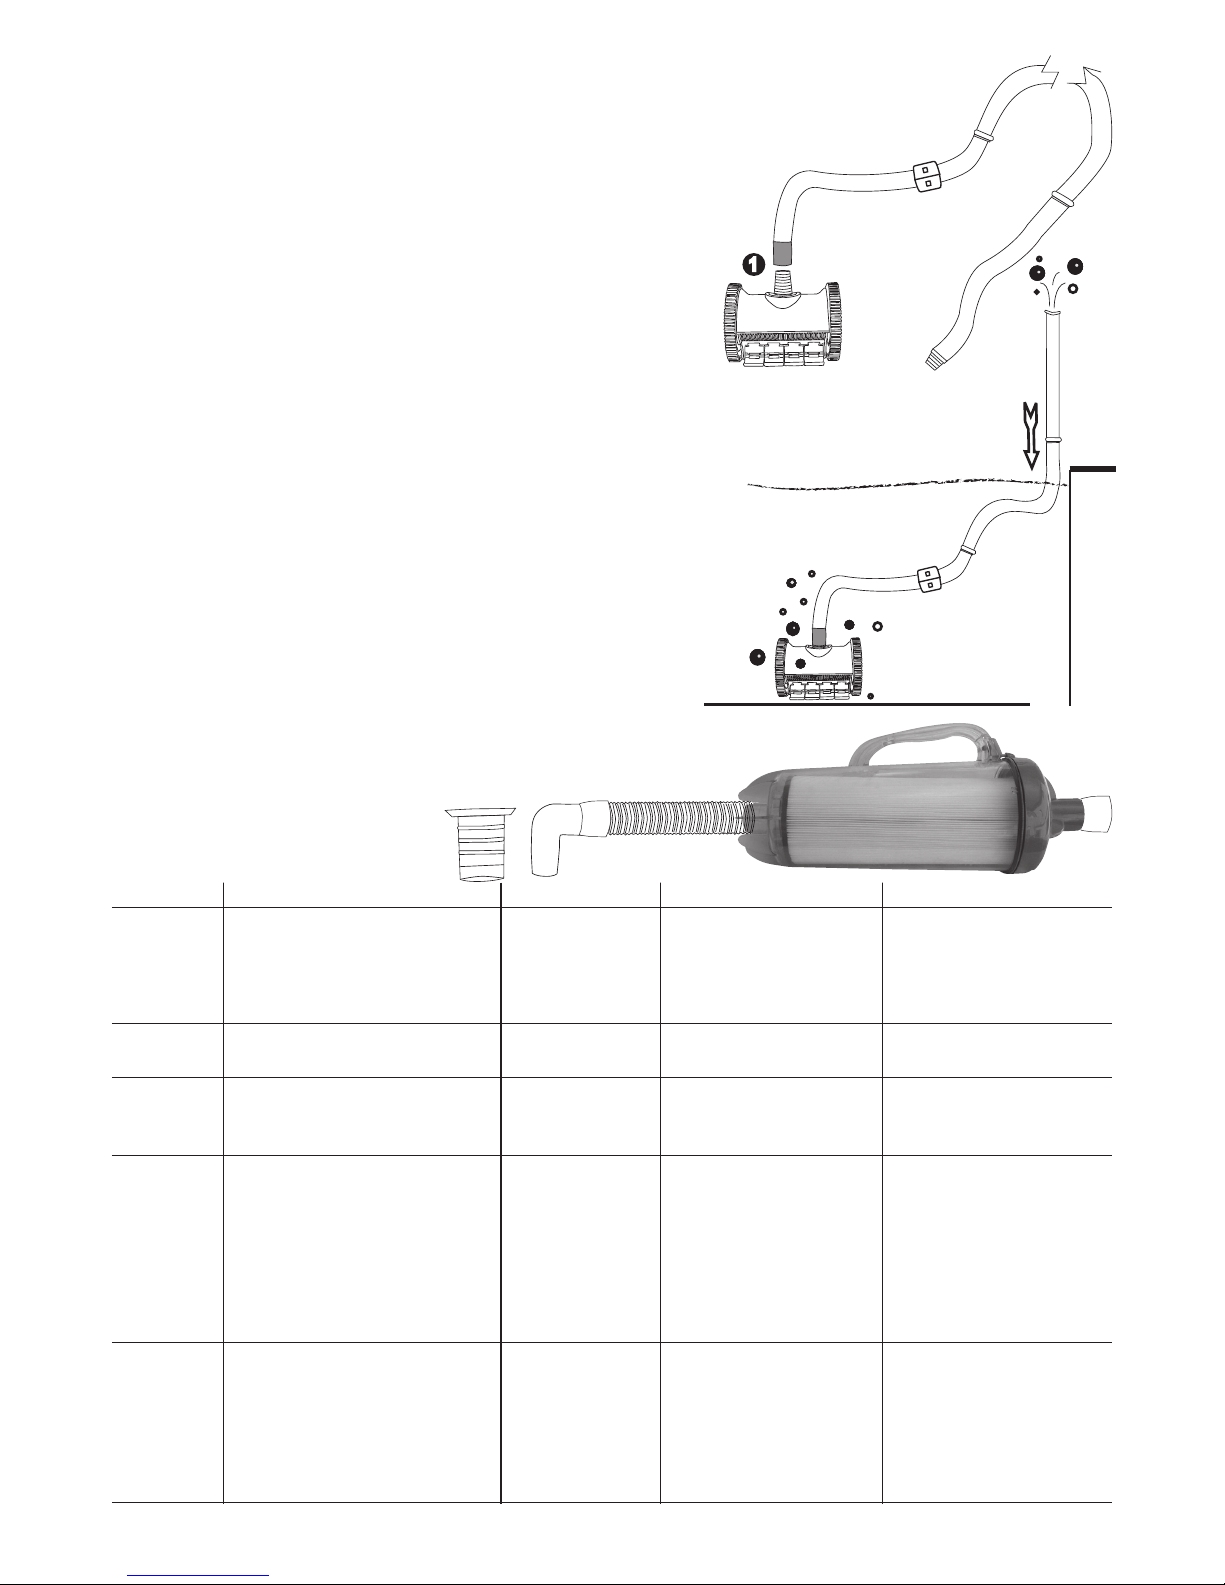
STEP 3 Attaching the PoolCleaner . . .
1. Connect the POOLCLEANER™ to the
grey cuff end on the leader hose.
STEP 5 Spa Fitting . . .
1. Connect the hose to the 90 degree
elbow or hose adaptor.
See chart below.
STEP 4 Getting your PoolCleaner wet . . .
With the pump turned off, lower the
POOLCLEANER™ and then vertically push
the hose down into the water until the
hose is completely filled with water.
YOU DO NOT WANT ANY AIR TO REMAIN
IN THE HOSE AND THE POOLCLEANER ™!!
Connect filter to between first and second
hose from skimmer box.
1AIR
push
hose
down
ALWAYS TURN OFF THE SYSTEM BEFORE PERFORMING ANY REPAIRS.
ALWAYS REMOVE THE POOLCLEANER AND TURN OFF SYSTEM BEFORE
SWIMMERS ENTER THE POOL. REMEMBER SAFETY FIRST !!!
PROBLEM SOLUTION
The PoolCleaner does not move.
The PoolCleaner moves too slow.
The right wheel will not turn when
rotated by hand.
The loops in the hoses won’t
come out.
The PoolCleaner does not clean
the entire pool.
The PoolCleaner climbs the wall
too much or climbs out.
The PoolCleaner won’t climb
the wall.
The hoses leak.
The pump may be turned off.
The pump may not be primed. Check for leaks in the
system (symptoms -- bubbles from the returns ?)
Problem or obstruction in the system.
Cart Needs cleaning.
Skimmer plugs installed correctly.
Pump impeller may be blocked (see pump manual).
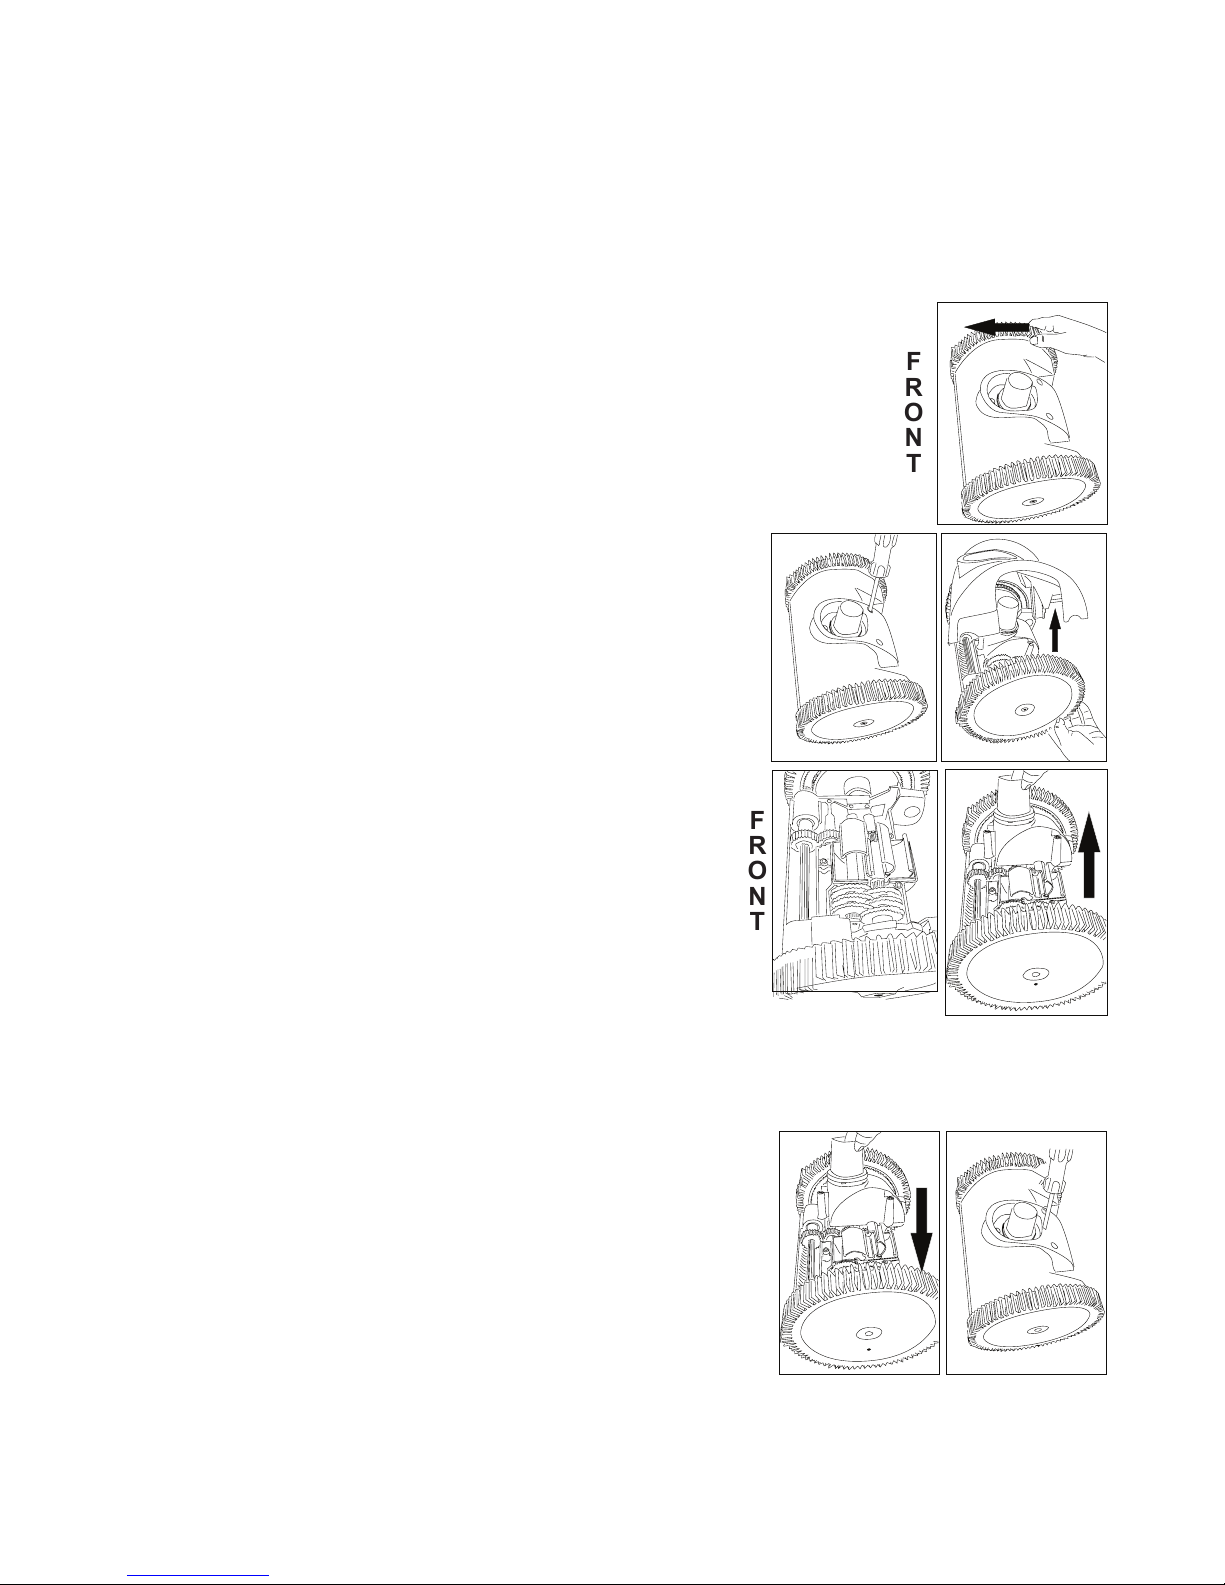
Obstruction in the PoolCleaner itself. See pg 9 to clear.
Problem or obstruction in the system.
Obstruction in the PoolCleaner itself.
Low wheel RPM (insufficient flow). See pg 7 to adjust.
Obstruction in the PoolCleaner itself. See pg 9 to clear.
(see also “does not move” above)
(see also “moves too slow” above)
The hoses have been stored in a coiled position.
Lay them straight in the sunlight.
Clean swivel on cleaner head by running it under a tap.
The hose is too short. See pg 4. Step 2
The float(s) may be in the wrong position. See pg 4. Step 2
The Hose Cone Swivel (on the turbine cover) may be dirty.
Clean it.
The return fittings may be pushing the PoolCleaner
hoses away. Point them down. See pg 4. Step 1
The tire treads and skirts may be worn down.
Too much suction or flow. See pg 6 to adjust.
Too little suction or flow. See pg 7 to adjust.
Float may be in the wrong position. See pg 4. Step 2
An animal may have bitten into the hose.
The PoolCleaner falls on its side
and takes too long to recover.
The float(s) may be in the wrong position. See pg 4. Step 2
The hose is too short. See pg 4. Step 2
The return fittings may be pushing the PoolCleaner
hoses away. Point them down. See pg 4. Step 1
Brand Model Filters Vacuum Fitting Elbow/Hose Adaptor
Bullfrog 454 Top Load Top Load Type Elbow
251 Top Load Top Load Type Elbow
252 Top Load Top Load Type Elbow
254 Top Load Top Load Type Elbow
Cyclone Swim Top Load Top Load Type Elbow
Super Swim Top Load Top Load Type Elbow
Designer X-Stream 126 Front Load Front Load Type Elbow
X-Stream 333 Front Load Front Load Type Hose Adaptor
X-Stream 659 Front Load Front Load Type Hose Adaptor
Signature V-Stream I Front Load Front Load Type Elbow
V-Stream II Front Load Front Load Type Hose Adaptor
V-Stream III Front Load Front Load Type Hose Adaptor
Aquazone I Top Load Top Load Type Elbow
Aquazone II Top Load Top Load Type Elbow
Aquazone III Top Load Top Load Type Elbow
W-Stream Top Load Top Load Type Elbow
Leisurerite My Win Swim Top Load Front Load Type Elbow
My Win Pro Top Load Front Load Type Elbow
My Win Expert Top Load Front Load Type Elbow
My Victory Swim Top Load Front Load Type Elbow
My Victory Pro Top Load Front Load Type Elbow
My Victory Expert Top Load Front Load Type Elbow