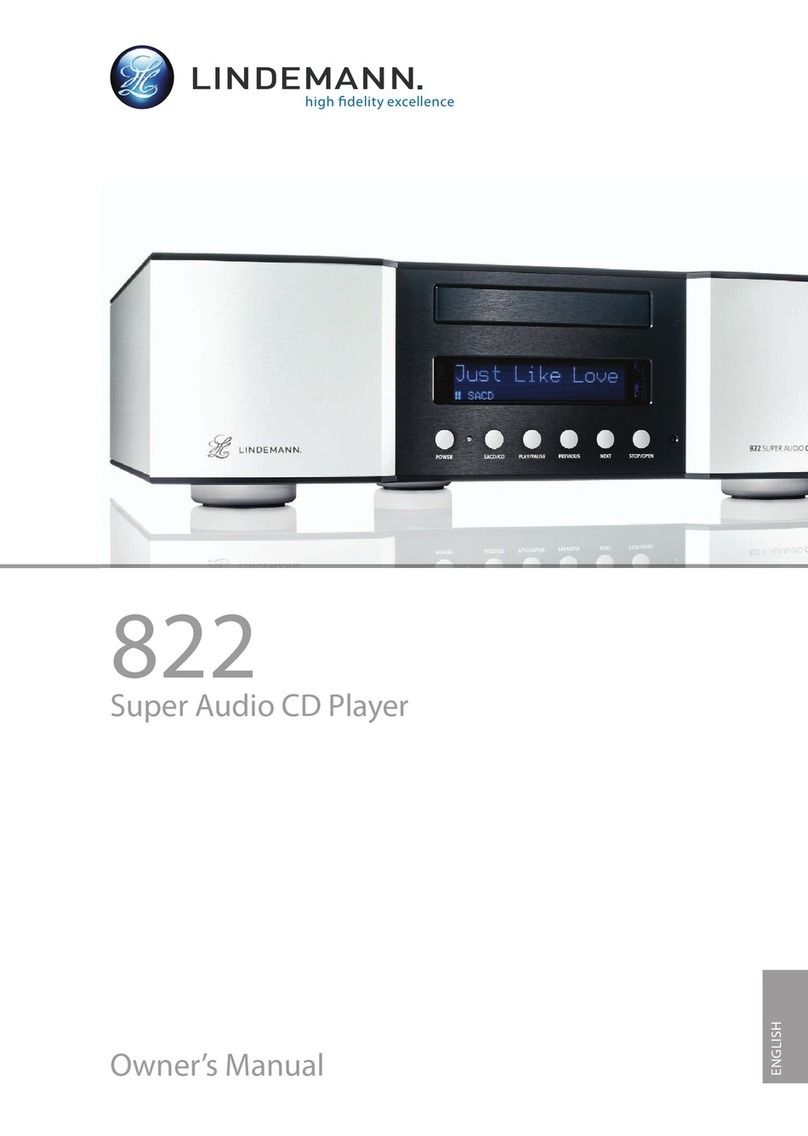
Lindemann 820S User manual

820S
Super Audio CD Player
Owner’s Manual
ENGLISH

820S Super Audio CD Player
Important Safety Precautions
•Use only an approved power cable and plug or distribution board to connect your
player to a power outlet. Do not use an extension cable.
•Never touch the mains plug if your hands are wet.
•Do not attempt to open the equipment. The invisible laser beam in this compact disc
player is harmful to the eyes. Refer servicing and repair to qualified service
personnel. Touching live components inside the case can result in a fatal electrical
shock!
•Read the Owner's Manual and Safety Precautions before operating the equipment.
•Keep this Manual in a safe place so that you can refer to it later.
•Please heed all warnings on the equipment itself and in the Owner's Manual.
•Please follow the instructions contained in your Owner's manual and never use this
equipment for any purpose other than is explained in this Owner's Manual.
•Only connect this equipment to a power source of the type described in the Owner's
Manual and specified for this equipment.
•Make sure that there is adequate ventilation around the equipment to allow proper
cooling. Keep the equipment away from direct sunlight. Avoid installing the unit
close to sources of heat or in spaces such as bookshelves or cupboards where heat
radiation may be obstructed. Avoid excessive temperatures in the room, as these
could ultimately damage sensitive components and reduce the service life of your
player.
•Never use the unit in damp rooms, at temperatures of below 10°C, or in the open air.
When bringing your player in from the cold, allow it time to achieve room
temperature before plugging it in.
•Always switch the unit off before removing or inserting interconnects. Doing this
with the player switched on can damage not only the player itself but also
equipment connected to it.
•If you ever spill water or any other liquid onto the equipment: Do not touch the case!
Remove the plug from the wall outlet and contact your dealer or our service
department.
•Never remove the earth connection from the plug. It is there to ensure your safety.
•Arrange the power cable so that no one can accidentally stand on it. Avoid locating it
under objects that might put pressure on the cable. Pay particular attention to areas
where the cable exits from plugs, AC outlets and from the unit itself.
•Never operate the unit without being present. Disconnect the plug from the wall
outlet and remove all aerial connections (including cable aerials) when: you clean
the unit, you do not expect to use the unit for long periods of time, during an
electrical storm.
•If you have an external antenna or cable antenna connected to your hi-fi system, we
recommend that you use a signal isolating filter to avoid interference or damage
during thunderstorms.
•Problems: If you lose the sound while the player is operating, or if you notice smoke
or burning, switch the unit off immediately and contact your dealer or our service
department.
•Only replace defective fuses after you have traced and removed the cause of the
fault and then only with a fuse of the same rating. Remove the mains plug before
changing fuses. Use an insulated screwdriver to remove and replace the fuse.
2

820S Super Audio CD Player
Copyright and trade mark acknowledgements
CD, Compact Disc DIGITAL AUDIO and their respective logos are registered
trademarks of SONY and PHILIPS.
SACD, Super Audio CD, DSD, Direct Stream Digital and their respective logos are
registered trademarks of SONY and PHILIPS.
HiDRA, Lindemann audiotechnik, Lindemann high fidelity excellence and the
Lindemann logo are registered trade marks of Lindemann audiotechnik GmbH.
Lindemann audiotechnik GmbH disclaims any proprietary interest in trade
marks and trade names other than its own.
The information in this manual is furnished for information use only, is subject
to change without notice, and should not be construed as a commitment by
Lindemann audiotechnik GmbH. Lindemann audiotechnik GmbH assumes no
responsibility or liability for any errors or inaccuracies that may appear in this
manual.
Copyright and Acknowledgements
Copyright © 2007 Lindemann audiotechnik GmbH. All rights reserved.
No part of this publication may be reproduced, stored in a retrieval system, or
transmitted, in any form or by any means, electronic, mechanical, photocopying,
recording, or otherwise, without the prior written permission of the publisher.
3

820S Super Audio CD Player
Dear Music Lover,
Congratulations on becoming the owner of this new SACD player. The 820S is an
exclusive high-end audio component, built in Germany in limited quantities.
Our team designed this CD player to the highest standards so that you could
enjoy the highest level of audio reproduction. Because we use only the finest
components and the most modern production technologies, we confidently
guarantee that our products will retain their superb qualities for many years.
Keep the carton and packaging materials that your 820S came in. They will
protect your CD player should you need to transport it in the future.
Transporting the 820S in anything other than the original packaging may result
in physical damage not covered by your warranty.
A final note: Please take the time to read this Owner's Manual before using the
equipment for the first time. It contains a number of useful tips gathered from
our many years of experience, which will help you get the most from your hi-fi
system.
4

820S Super Audio CD Player
Table of Contents
Accessories supplied 6
Front view 8
Rear view 9
Remote control 12
Setting up 14
Basic CD/SACD functions 15
Switching on and off 15
Loading a CD/SACD 15
Playing the disc 15
Switching between CD and SACD 15
Stopping playback 16
Playing a specific track 16
Skip/Search 16
Program play 17
CD Text 17
Basic preamplifier functions 18
Adjusting the volume 18
Balance 18
Mute 18
Digital inputs 18
Configuration menus 19
Balance 19
Volume display 20
Max. Volume 20
Mute Level 20
Digital Output 20
DAC Sample Rate 20
Display Info 21
Digital Input Name 21
Absolute Phase 21
Display Brightness 21
Reset to Default (factory settings) 21
Link Mode 22
The different CD formats 22
The different CD formats 23
Handling compact discs 24
Troubleshooting 25
Specification 26
CE declaration of conformity 28
Guarantee and Service 29
Directive on waste electrical and electronic equipment 30
5

820S Super Audio CD Player
Accessories supplied
•820S SUPER AUDIO CD PLAYER
•800 ANALOG POWER SUPPLY
•Two 2-metre power cables
•SUB-D connection cable, 1 metre
•SYSCOM cable, 1 metre
•Owner's Manual
We recommend that you keep the packaging for use when transporting
the 820S in the future.
6

820S Super Audio CD Player
•Place your SACD player on a stable support and use a spirit level to make sure
it is perfectly level. We recommend the use of a solidly constructed hi-fi rack
with adjustable shelves. In our experience, you will achieve good results with
racks using MDF shelves. Glass, metal or stone are less suitable for use as hi-fi
equipment supports. Avoid placing the player close to loudspeakers or any
other source of vibration. The 820S will respond to these measures by
performing at its best. Never stack the 820S directly on other items of
equipment. Vibrations from mains transformers and electromagnetic
interference from other components can have a negative impact on the
player's sound quality. Please do not place the outboard power supply next
to the SACD player, but at a reasonable distance - close to the power
distribution board is ideal. 800 series products are not suitable for installation
in enclosures such as 19” racks or cabinets. The on/off switch at the rear of
the unit must always be accessible.
•Take some time to organize your cabling. Try to keep power cables away
from interconnect and speaker cables. Shielded power cords can significantly
reduce the transfer of interference to your signal cables. The SUB-D cable
(special 15-pin cable) provided is intended to link the outboard power supply
with the SACD player. Never connect the SACD player and/or the ANALOG
POWER SUPPLY to a computer or computer peripheral, as it will damage
these components.
•Make sure that the polarity of the mains wiring is the same for all system
components. You can achieve this by connecting all system components
through a single high quality mains distribution board. The lower the
contact resistance between the power outlets of your signal source and your
amplifier, the less the audio signal will be polluted and the better your hi-fi
system will sound. Connecting your components with the correct mains
polarity is particularly important. Use a phase tester to determine which pole
is life. Mark the appropriate side. Connect the marked side of the 820S and
ANALOG POWER SUPPLY power plugs to the positive conductor of your
power outlet/distribution board.
•Cleaning and maintenance: To clean your CD player, use a soft cloth. Use a
proprietary glass cleaner to remove stubborn dirt from the front panel. Do
not use water! Never use solvents or white spirit. These will cause irreparable
damage to the surface of the unit.
7

820S Super Audio CD Player
Front view
1 2 3 4 5 6 7 8 9
1. Power button
2. Standby LED
3. CD/SACD button
4. Play/Pause button
5. Previous button
6. Next button
7. Stop/Open button
8. Infrared receiver
9. CD/SACD drawer
Power button
The power button switches the player on and off. To switch the unit on, plug it
into a power outlet and press the power switch on the rear panel (position I).
Standby LED
When the 820S is in standby mode, the standby LED will illuminate. When the
820S is operational, the standby LED goes out and only the display illuminates.
When you switch the unit off, the standby LED flashes for around 5 seconds. It is
not possible to switch the player on again during this time. When the 820S has
been unplugged from the wall socket, or when the power switch is in position 0,
neither the standby LED nor the display will illuminate.
8

820S Super Audio CD Player
CD/SACD button
Allows you to change between the CD or SACD format with hybrid SACDs. When
you load a hybrid CD, the 820S automatically selects the SACD format. If you
wish to play back the CD layer of the hybrid disc, press the STOP button and then
the CD/SACD button.
Infrared receiver
The infrared receiver picks up the commands sent from the remote control. For
the remote control system to operate properly, you should ensure that there is a
clear line of sight between the receiver and the remote handset.
Rear view
1 2 3 1 2 9 10
4 5 6 7 8
1. Analog output, XLR
2. Analog output, RCA phono
3. Input for analog power supply
4. Digital inputs, S/P DIF
5. Digital input, XLR (AES/EBU)
6. Digital output, XLR (AES/EBU)
7. Digital output, S/P DIF
8. SYSCOM connector
9. Power (on/off) switch
10. AC supply socket
9

820S Super Audio CD Player
Analog output
The D 820S has both balanced (XLR) and unbalanced (RCA) analog outputs.
Connect these to the appropriate inputs on your amplifier.
When inserting the cables, check that the plugs fit tightly in their sockets! Poorly
fitting phono plugs can detract considerably from the sound quality of your
system. Use gold-plated plugs whenever possible, as these have the lowest
contact resistance.
Digital output
The digital outputs carry a standard S/P DIF or AES/EBU 16-bit, 44.1 kHz signal for
connecting to an external DAC digital clock signal processor. An RCA phono
socket is provided for the coaxial S/P DIF output and an XLR socket for the
AES/EBU output. The digital output works only in CD mode.
XLR pin connections:
Pin 3: Signal -
Pin 1: Ground
Pin 2: Signal +
To ensure correct operation, use only high quality digital cable of appropriate
impedance (RCA = 75 ohm, XLR = 110 ohm).
Digital inputs
The digital inputs accept standard S/P DIF and AES/EBU signals. Only audio data
is recognized. Encoded formats such as Dolby Digital cannot be processed! The
digital inputs are for connecting external digital sources (DAT/DVB/MD/PC etc.).
They will handle signals up to and including 192kHz/24bit. RCA phono sockets
are provided for the coaxial S/P DIF inputs and an XLR socket for the AES/EBU
input.
XLR pin connections:
Pin 3: Signal -
Pin1: Ground
Pin 2: Signal +
To ensure correct operation, use only high quality digital cable of appropriate
impedance (RCA = 75 ohm, XLR = 110 ohm). Unsuitable cables can cause
problems, particularly with sample rates above 48 kHz, where the input may not
lock onto the digital signal.
10

820S Super Audio CD Player
Power connection
The power inlet is designed to take a removable IEC cable. We recommend you
use a high quality audiophile power cable. Your dealer will be able to advise you!
Power (on/off) switch
The on/off switch disconnects the 820S fully from the AC mains supply.
Input for 800 analog power supply
The 15-pin SUB-D connector for the analog supply voltage is for connecting the
800 ANALOG POWER SUPPLY only. Connect both units together first and only
then connect the power cable to the AC mains supply.
SYSCOM
This connection lets you network several 800 series products so that you can
control the switching and display operation of several components from a single
controller. To take advantage of this feature you need an appropriate power
amplifier or preamplifier. You should switch off all system components before
changing SYSCOM cables. Use only the SYSCOM cables supplied. Do not use any
other type of cable, as this could damage your equipment! If you need longer
SYSCOM cables, please contact Lindemann audiotechnik directly (see back page
for contact details) or your dealer. You will find a detailed description of all Link
Mode functions in the Link Mode section.
11

820S Super Audio CD Player
12
Remote control
1. Power button
1
2
3
4
5
6
7
Switches the unit on and off from standby.
2. Track select buttons
Direct track selection.
3. Menu selection
AMP menu:
selects the menu for configuring the preamplifier
functions.
DAC menu:
selects the menu for configuring the converter functions.
4. Mute
Silences the audio output
5. Cursor
Normal operation:
UP/DOWN: Adjusting the volume +/-
LEFT/RIGHT: Selecting the digital inputs
OK: To confirm your setting
Menu selection:
UP/DOWN/LEFT/RIGHT: Selecting the menu items
OK: Confirming your selection
6. Transport function
Please refer to 'Basic CD/SACD functions'
7. Additional functions
Info:
When you press the INFO button, the display will show all
important basic settings.
These settings are:
•Current volume level
•Play/Pause
•CD/SACD
•REPEAT
•Input Sample-Rate -> DAC Sample-Rate

820S Super Audio CD Player
program/ check/ clear
For programming the order of tracks. Please refer to 'Program play'.
time/text:
Changes the CD/SACD information display format. See 'CD TEXT'
A-B:
Repeating a section.
Repeat:
Repeating a track or an entire CD/SACD.
CD/SACD:
Changing from CD to SACD format, and vice versa.
When using the remote control, always point it directly at the player. Please
remember that direct sunlight or artificial light (particularly fluorescent lighting)
can affect the signal.
Weak batteries will considerably reduce the range of the remote control. Always
replace batteries with new ones of the same type.
To change the batteries, open the battery compartment cover on the rear of the
remote handset. Take out the discharged batteries and replace them with new
ones of the same type (Alkaline AAA), making sure that they are positioned as
shown on the drawing in the battery compartment.
Please dispose of your used batteries carefully. Stores that sell batteries often
provide containers for recycling used batteries. You can also dispose of them at
your nearest recycling centre.
13

820S Super Audio CD Player
Setting up
•Switch off the power switch on the rear of the 820S.
•Remove the transport screw from the bottom panel. Then remove the
protective strip from the CD drawer. Retain the transport screw and the
protective foil strip with your packaging. These will be needed if you wish to
transport the 820S at some time in the future.
•Always protect the player well before transporting it. To do this, proceed
as follows: With the player switched on, press the Stop/Open button to close
the drawer. Switch the unit off using the rear-mounted power switch. Insert
the foil strip in the gap between the drawer and the front panel. Turn the
player over so that it is standing vertically on its rear. (Place it on a soft
surface such as a carpet or tablecloth to avoid scratching the surface of your
player). Tighten the transport screw in the hole in the bottom panel. Use
hand pressure only. Do not use tools to tighten the screws!
•Connect the SACD player to the outboard power supply using the SUB-D
cable supplied. Connect the D 820S to your amplifier using a suitable
interconnect cable. Only now should you plug your SACD player and
outboard power supply into the AC outlet - preferably using a high quality
power cable. The cables supplied with your player are just to get you started.
We strongly recommend that you use a high quality power cable. Make sure
that the voltage shown on the model identification plate matches the
voltage of your mains supply. If you intend to swap interconnects at any time
in the future, always remember to switch the player off first. Failure to do so
could damage the unit. If you have other 800-Series components in your
system, connect these with the SYSCOM cables supplied.
•For safety reasons, the remote control is supplied without the batteries
installed. Please insert the batteries supplied, observing the polarity marks
shown on the battery compartment.
•We have provided controls on the front panel to allow you to access the
important control functions of the 820S. The remote control allows you to
access these and all the other functions of the unit.
•Turn the SACD player on using the on/off switch on the rear panel. Your
SACD player is now in standby mode and ready for use. This is indicated by
the blue Standby LED.
14

820S Super Audio CD Player
Basic CD/SACD functions
Switching on and off
To switch the unit on, press the Power button on the front panel or on the
remote control.
To switch the player off, press the Power button again. This will switch the SACD
player into standby mode. You will see this message in the display: Power Down...
This will disappear after a short interval. The blue standby LED will flash for about
5 seconds. It is not possible to switch the player on again during this time.
Use the Power button to switch the unit on and off in everyday use. When the
SACD player is connected via the SYSCOM cable to a Lindemann power
amplifier, the Power button will also control the power amp. If a preamplifier is
also connected, it will handle the switching of all the system components.
Loading a CD/SACD
Press the STOP/OPEN button to open the CD drawer. Wait until you see OPEN
showing on the display. Now place a CD or SACD in the drawer. The printed label
side must be at the top.
To close the drawer, press the STOP/OPEN button again. The drawer will retract.
If you fail to press the STOP/OPEN button within a minute, the drawer will close
automatically.
As the player reads the contents of the disc, the display window reads: TOC
Reading...
Once the player has scanned the CD/SACD, it displays the number of tracks, the
total playing time and the CD Text.
If you have loaded a hybrid disc, the SACD track will be selected automatically.
Playing the disc
Press the PLAY/PAUSE button to play the CD/SACD. The track number, the index
and the playback time will be shown in the display. If the disc supports CD Text,
the title is also displayed.
Switching between CD and SACD
With hybrid discs you can choose to play either the standard CD or the SACD
version. To change from SACD to CD and vice versa, first press the STOP/OPEN
button to stop playback. Then press the SACD/CD button to get the player to
rescan the disc. The playback format of the track being played appears in the
display. (If you wish to hide this information, you can do so via the Display menu)
15

820S Super Audio CD Player
Stopping playback
Use the PLAY/PAUSE button to pause playback. Press the PLAY/PAUSE button
once again to resume. Press the STOP/OPEN button to stop playback. If there is
no CD/SACD in the player, or if playback has finished, press the STOP/OPEN
button to open the drawer.
Playing a specific track
You can play a specific track by entering its number on the numeric keypad (1-9).
Use the -/-- button to enter numbers larger than 9. For example, if you wish to
play track 21, first press the -/-- button, then 2 and then 1.
Skip/Search
The SKIP button lets you go skip one or more tracks. Press the button on the
remote control, or the Next button on the front panel, to play the next track.
Press the button on the remote control, or the Previous button on the front
panel, to go back to the beginning of the track you are currently playing. You can
skip through several tracks by pressing the button repeatedly.
The SEARCH buttons on the remote control allow you to locate a specific
place within a track.
Repeat
The REPEAT button lets you repeat individual tracks, a complete CD, or specific
sections. Press the REPEAT button once to repeat the entire CD.
The display shows: < Repeat >
Press twice to repeat the last track played.
The display shows: < Repeat 1>
To cancel the REPEAT function, press the REPEAT button again.
The display shows: < Repeat off >
Display Info in the configuration menu provides you with an option to show or
hide Repeat in the display.
Repeating a section
You can repeat a specific passage within a track using the A-B button. A refers to
the beginning and B to the end of the passage.
•Press the A<->B button as soon as you reach the section of music that you
wish to repeat.
•You will see this message in the display: Repeat A.
•The flashing Awarns that you still have to set the finish point B.
•Press A<->B again when you reach the end of the passage that you wish to
repeat. The passage you have selected will now be repeated continuously
until you press the REPEAT button again.
16

820S Super Audio CD Player
Program play
You can programme the order in which the tracks of a CD/SACD are played.
When the player has read the contents of the CD/SACD, press the PROGRAM
button. Use the numeric keypad (1-9) and the - /-- button to enter the number of
each track you wish to play. Enter the tracks in the order in which you wish to
listen to them. The tracks will be stored automatically. The display will show the
number of tracks entered and the total playing time for the playlist.
You can store up to 32 tracks in one playlist. If you wish, you can store the same
track several times in the same playlist.
Use the CLEAR button if you wish to delete the last track you entered. You can
press the CLEAR button as often as you like to remove any number of tracks from
your list, starting from the end of your programme. Hold the CLEAR button down
for longer than 3 seconds to clear the entire playlist.
You can check the contents of your playlist using the CHECK button. Each time
you press the CHECK button, the number in the display advances by one track
(starting from the beginning of the playlist) and shows the total playing time to
date (up to the current track).
After programming your playlist, press the PLAY/PAUSE button to listen to your
selection.
CD Text
CD Text contains information about the CD/SACD such as the title or the name of
the artist. This data is stored in an area of the CD/SACD that is not used on
'normal' CDs.
When you load a CD/SACD containing text information, the player reads this
information and displays the album title. To display the artist's name, press the
TIME/TEXT button on your remote control. Pressing the TIME/TEXT button again
displays the total playing time and number of tracks.
The display shows the name of the current track while the CD/SACD is playing.
Pressing the TIME/TEXT button brings up the playing time of the current track,
the playing time of the whole CD/SACD and the remaining playing time of the
CD/SACD.
When a track or artist name has more than 12 characters, the display shows the
first 12 characters and then scrolls to the end of the name.
During playback of CD/SACDs with no CD Text content, only the time
information is displayed.
17

820S Super Audio CD Player
Basic preamplifier functions
The 820S incorporates a high quality preamplifier with a highly accurate
analogue volume control, which can also be used for the digital inputs. You can
activate the different preamplifier functions from the Volume Control and Input
Control menus in AMP setup.
Adjusting the volume
Use the UP or DOWN buttons on the remote control to set the volume level. The
speed at which the volume changes depends on how long you press the
UP/DOWN button. The volume control provides an adjustment range of 60 dB in
0.5 dB steps. The current volume setting will appear in the display for several
seconds in figures or dBs (depending on the settings). To exit volume
adjustment, press the OK button.
You have reached the lower volume adjustment limit when you see min in the
display. The display shows max to warn you that you have reached the upper
volume limit.
You can alter the maximum volume setting within a range of -20 dB to 0 dB in
the Max. Volume menu. This allows you to restrict the volume adjustment range
in order to prevent system overload.
Balance
You will find a description of how to set the balance in Configuration Menus –
Balance.
Mute
You can activate the Mute function by pressing the Mute button on the remote
control. To deactivate the Mute function, press the MUTE button once again or
adjust the volume control.
Digital inputs
The 820S has four digital inputs. These accept external digital sources and
process them via the 820S's DAC. To select a digital input, press the LEFT or
RIGHT button on the remote control. When you select a digital input, its name
(configurable), together with the sample rate of the input signal and the current
sample rate of the DAC (configurable) are shown in the display.
INPUT1 Sample rate of the digital input > Sample rate of the DAC
If you select an input to which no source component is connected, or if the
source is not supplying a signal, Unlock appears in the display. If the source
supplies a non-valid data signal such as a compressed format or Dolby Digital or
DTS, Non Audio Data appears in the display.
The volume control and mute functions are also available in the Input mode.
18

820S Super Audio CD Player
To return to the CD/SACD mode, skip through the digital inputs. CD/SACD mode
is after input 4 or before input 1. You can switch off the digital inputs in the Input
Control menu. (The digital inputs are not active when the unit leaves the factory).
Configuration menus
The 820S provides many adjustment options in addition to the basic controls.
You can access these via two menus. The AMP menu contains the preamplifier
settings and the DAC menu contains the settings for the D/A converter. To
access these setup menus, press the AMP or DAC button. Use the LEFT or RIGHT
buttons to navigate within the menus. Press the OK button to alter a setting. In
the menu, you can use the Setup button to navigate back, i.e. to move back one
level without changing any settings. To exit the setup menu, press the Setup
button repeatedly until you see the default view in the display.
The available settings are shown as follows:
AMP Setup
Balance
(± 5dB)
Volume Display
(Numeric/dB)
Max Volume
(-20dB to 0dB)
Mute Level
(min to -40dB)
Volume Control
(Enable/Disable)
Input Control
(Enable/Disable)
DAC Setup
Digital Output
(On/Off)
DAC Sample Rate (44kHz/88kHz/176kHz)
Display Info
Digital Input Name
Absolute Phase
(0°/180°)
Brightness
(75%/50%/25%)
Reset to Default
(Yes/No)
Balance
Adjusting the balance using the LEFT or RIGHT button. The balance can be
adjusted to the left or to the right in ten steps. The centre is the neutral setting.
One step alters the balance by 0.5 dB. The maximum available adjustment is ±
5dB. To confirm a change, press the OK button.
19

820S Super Audio CD Player
Volume display
Adjusting the volume display mode using the LEFT or RIGHT button. In the
Numeric mode, the volume level is displayed within a range of 0 to 60. In the
Decibel mode, the volume level is displayed within a range of -60 to - 0 dB. You
can switch between these using the LEFT or RIGHT button. To confirm a change,
press the OK button.
Max. Volume
Max. Volume lets you limit the maximum listening volume to a value anywhere
between 0 dB (max. volume) and -20 dB (party setting/child-proofing). Set the
maximum volume in 0.5 dB steps using the UP or DOWN button. Press OK to
confirm your selection.
Mute Level
Set the mute level in 0.5 dB steps using the UP or DOWN button. To confirm a
change, press the OK button. You cannot set the mute level higher than the
current volume setting.
Volume Control
You can use the LEFT or RIGHT button to enable or disable the volume setting.
When the volume setting is disabled, the volume control is bypassed and all
related controls such as balance, mute and max. volume are deactivated. The
full signal level is therefore available at the outputs whenever you switch to
disabled mode!
Input Control
You can use the LEFT or RIGHT button to enable or disable the digital inputs.
Digital Output
You can switch the digital output on or off using the LEFT or RIGHT button. To
confirm a change, press the OK button.
The digital output is only available in CD mode.
DAC Sample Rate
You can set the internal sample rate with the LEFT or RIGHT button. The
sampling frequency may be 44.1 kHz, 88.2 kHz or 176.4 kHz. To confirm a change,
press the OK button.
20
Table of contents
Other Lindemann CD Player manuals
