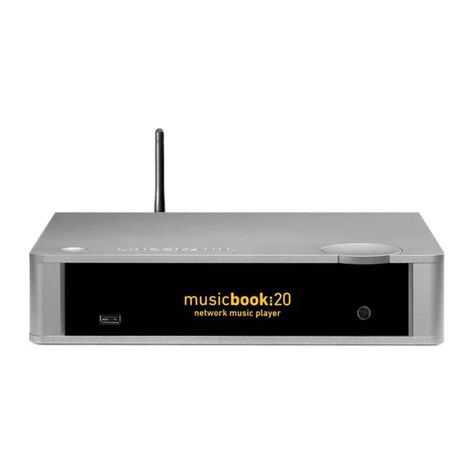
Lindemann musicbook DSD User manual

www.lindemann-audio.com
1
THE UNIVERSAL MUSIC SOURCE
User Manual
www.lindemann-audio.com

2
Table of ContentWelcome
Congratulations on the purchase of this device and thank you very much
for selecting a LINDEMANN product. We wish you pleasant hours of music
listening and long evenings with your favourite recordings.
With the musicbook series you have chosen one of the technologically most
advanced and best sounding audio systems. We develop and build our de-
vices in Germany and have put all our passion and more than 20 years of
experience into this exceptional product which soundwise leaves nothing
to be desired. Discover a new quality of music reproduction that opens up
large rooms in a completely relaxed manner and puts vocalists virtually
within reach in your living room. Happy listening!
Your LINDEMANN team
This product complies with the European directives 2006/95/EG (Low Voltage Directive),
2004/108/EG (EMV Directive) and 2009/125/EG (ErP Directive).
© 2016 Lindemann audiotechnik GmbH
Important safety
information 3⠸
Scope of Delivery 4⠸
Front View 5⠸
Rear View 6⠸
IR Remote Control 7⠸
Connection Variants I-III 8⠸
Network Connection 11 ⠸
CD Function 12 ⠸
Bluetooth 13 ⠸
USB-Audio Interface 14 ⠸
Device Settings 15 ⠸
Network Connection 19 ⠸
Network Congurations 20 ⠸
The musicbook app 22 ⠸
Navigation Bar 23 ⠸
Source View 24 ⠸
Music Server 25 ⠸
USB Input 27 ⠸
Online Services 28 ⠸
My Files 30 ⠸
Favourites 31 ⠸
CD 32 ⠸
Bluetooth 33 ⠸
USB-Audio 34 ⠸
Digital 1-4
Analog 1-2 35 ⠸
Settings 36 ⠸
Technical Specications 38 ⠸
Analog Inputs
Digital Inputs
USB Audio
Bluetooth
CD Player
Streamer
musicbook 10 DSD 0 0
musicbook 15 DSD 0
musicbook 20 DSD 0
musicbook 25 DSD
Overview
Model Versions

www.lindemann-audio.com
3
Important safety information
Read this user manual carefully.
Carefully observe all NOTES. The manual is designed to help you to prop-
erly use your new Lindemann product so that you can enjoy all its fea-
tures. Keep this user manual for future reference.
• Before connecting the device, check to see if your power supply matches the
values specied on the type plate. The type plate is located on the bottom of the
device.
• When connecting the device, use the included power cord or another appropri-
ate power cord. Operation without protective grounding is not permitted and is
dangerous.
• Connect the device with a proper power socket and route the cable so that it can-
not be crushed or kinked. Make sure that the power cord remains undamaged
and constantly accessible.
• To prevent re or electric shock, do not expose this device to rain or moisture.
The device must not be operated outdoors. Protect the product from dripping or
splashing uids, and do not place any objects lled with water (such as vases) on
the product or in its vicinity. As with all electronic devices, liquids should never
be allowed to penetrate into product.
• Do not make any changes to the product or its accessories. Unauthorized chang-
es may compromise safety, regulatory compliance, and proper function of the
device. The warranty is voided in such cases.
• Do not expose the device or the IR remote control to extreme heat, including di-
rect sunlight and re. Allow waste heat generated during operation to dissipate
freely. Never operate the device in closed cabinets or near heat sources such as
radiators or stoves.
• Set up the device so that the back of the device with the power switch is always
accessible. Do not use this device unattended. If you will not be operating the
device for an extended period of time, turn it o using the power switch on the
back or unplug the power cord. If you notice smoke or a burning smell during
operation, discontinue using the device immediately by turning o or unplugging
the power cable from the power socket.
• To clean the device, unplug the power cord and clean the surface with a dry cloth
or with a little glass cleaner. Make sure that the device is completely dry before
you reconnect it with the power cord. Never use solvents (such as acetone or
lacquer thinner) to clean the device.
• Have repair and maintenance work performed by qualied customer service
personnel only. Do not try to repair the device yourself. Do not remove or open
the device cover; otherwise, you could come into contact with dangerous volt-
ages or be exposed to other hazards. Contact your Lindemann dealer or Linde-
mann audiotechnik directly to receive qualied customer service.
• Electronic equipment is not household waste but must be disposed of properly
in accordance with Directive 2002/96/EC on electrical and electronic waste. At
the end of its useful life, dispose of this device at a designated public collection
point.

4
Scope of Delivery
⠸
musicbook DSD
The musicbook DSD is a converter-preamp with Bluetooth, USB Audio,
CD player (musicbook 15/25) and streamer (musicbook 20/25).
⠸
WLAN Antenna and Bluetooth Antenna
Antenna for rear side mounting on the musicbook DSD. Will be required for WLAN and/or
Bluetooth operation.
⠸Infrared Remote Control
IR remote control with built-in rechargeable lithium ion accumulator.
⠸LAN Cable
CAT 6 patch cable (5 m /16 ft.) for connecting the musicbook DSD to the router.
⠸USB Charging Cable
USB charging cable (1 m / 3 ft.) for recharging the IR remote control.
⠸USB Cable
USB cable (1 m / 3 ft.) for connecting the musicbook DSD to your computer.
⠸Power Cord
Power cord with Schuko plug (2 m / 6 ft.) for connecting the unit to the mains grid.

www.lindemann-audio.com
5
Front View
Headphone output (¼“ / 6.35 mm): analog class A amplier for consummate enjoyment of music with
headphones. (32–300 ohms). Volume control via app, IR remote and multi-function wheel. ⠸
Multi-function wheel for volume control (turn left/right), mute (tip once
briey), input selection (tip and turn left/right at the same time) and CD
player functions. All other functions can be controlled by means of the
included IR remote control or via the app.
⠸
⠸
OLED Graphics Display
(optically bonded)
with nearly 180° viewing
angle.
⠸
USB-A port (USB host) (only musicbook 20/25) for docking storage media such as external harddisks or USB
sticks. Recharge function for tablets and smartphones up to 2.1 A (depending on device). Recharge port for
remote control.
⠸Standby LED
ashing yellow in standby mode.
⠸High-class CD drive (only musicbook 15/25) for CD playback. CD text ready. All CD functions controllable via app,
IR remote and multi-function wheel.
⠸
Standby Key for turning on and o the unit. Very low energy consumption in operation mode due to intelligent
power supply. Standby function selectable via app between energy saving (0.5 W consumption) and network
standby (4 W consumption).

6
Rear View
Four digital inputs: optical and coaxial. Max. resolution up to 24 bit and
192 kHz coaxial or 24 bit and 96 kHz optical. Connectivity for external digital
sources like TV, Blu-ray player or an external CD drive.
Intelligent DSD re-sampling of all digital inputs and sources.
⠸
⠸
Ethernet LAN connection for using the
network player on the router.
Playback of music les up to 24 bit and
192 kHz and DSD 64 in LAN mode.
⠸
WLAN antenna for the wireless connection between
your musicbook DSD and the WLAN router. Playback of
music les up to 24 bit and 96 kHz in WLAN mode.
⠸
Two analog inputs for connecting e. g. a phono preamp or a tuner.
Analog preamp circuitry and analog volume control for optimum
resolution and trouble-free operation even with low volume levels.
Non-magnetic, hard gold-plated RCA sockets for a loss-free signal
transmission.
USB-B port (USB device) to operate the musicbook DSD on a computer.
Music playback in studio quality (PCM, DSD, DXD) up to 24 bit and 384 kHz
and of DSD les up to DSD 256 in native mode.
⠸
Bluetooth antenna for the wireless connection
between your musicbook DSD and e. g. a smartphone
or tablet. High sound quality due to AAC and aptX.
⠸Power switch for a full disconnection of the
musicbook DSD from the mains grid. ⠸
IEC plug for connection to the mains grid. ⠸
Balanced (XLR) and unbalanced (RCA) line outputs which can be used independently and
simultaneously. Load stable output stages for use with long cables, e. g. to connect active
speakers or a subwoofer.
⠸

www.lindemann-audio.com
7
IR Remote Control
SET keys: used for input selection. Those keys also
double as navigation keys (up, down) in the settings menu. ⠸
LED: glows yellow in transmission mode or red when recharging the
accumulator (goes o when fully charged). Flashes red in case of a
charging fault.
⠸
OK key: conrms any selection in the settings menu. ⠸
Mute key: mutes the audio playback. ⠸
Repeat key: to repeat a single track or the whole album.⠸
Search keys: forward and backward search function.⠸
NOTE: The network functions can be controlled
only via the app.
CD Function Block:
⠸Standby key: turns the unit on and o.
⠸Set key: opens the menu for the device conguration.
⠸Display key: switches between track, artist, album and
time/track display of CD text or meta data.
⠸Info key: for the status display of the most important settings.
Use the up/down keys to call up additional information.
⠸
Volume keys: to lower (Vol -) or increase (Vol +) the volume level.
Those keys also double as navigation keys (left, right) in the
settings menu.
⠸Play/Pause key: play or pause with CD playback,
Bluetooth, USB Audio and streamer.
⠸Stop/eject key: stops the CD when pressing the key once /
ejects the CD upon a second push.
⠸Number keys: for the direct selection of a CD track and
also to input numbers in the settings menu.
⠸Skip keys: skip to the next/previous track with CD playback,
Bluetooth, USB Audio and streamer.
⠸USB mini port: to recharge the lithium ion accumulator.
Charge status may be called up with the Info key.

8
Connection Variant I
musicbook DSD with active speakers
⠸
Connection Variant I:
Connecting active loudspeakers is the easiest way to enjoy music with the musicbook
DSD. You only need signal cables of appropriate length to establish the connection
between the outputs of the musicbook DSD and the inputs of the active speakers. The
musicbook DSD can easily drive long cables and delivers up to 8 V of output voltage into
600 ohms in balanced operation mode. The integrated preamp, the ample connectivity
for analog and digital sources and the possibility to play back CDs or listen to music from
a network harddisk drive, a streaming service or web radio make the musicbook DSD an
extremely versatile signal source.
Active loudspeakers wired
through the balanced outputs
Active loudspeakers wired
through the unbalanced outputs

www.lindemann-audio.com
9
Connection Variant II
musicbook DSD with power amp
musicbook 50/55 + passive speakers
musicbook 50/55
musicbook 20/25 DSD
⠸
Connection Variant II:
For using passive speakers on the musicbook DSD, you need a suitable power amplier.
With the musicbook 50 or the musicbook 55 we are presenting class D power amps
which meet the very highest demands on sound quality. An intelligent signal detector
switches on the amplier automatically when a music signal is present and turn it o
again if the music has stopped. But the musicbook DSD can also be ideally combined
with existing power amps. Since both outputs can be used simultaneously, you may link
e. g. a power amplier and an additional subwoofer to the device.

10
Connection Variant III
musicbook DSD in combination with an existing hi- system
⠸
Connection Variant III:
If you are already using a complete hi- system with a preamp or an integrated am-
plier, you can connect the musicbook DSD to an analog input of the amplier. To this
end the onboard volume control of the preamp in the musicbook DSD can be bypassed
(menu item uFixed Line Outputt in the settings menu) and will then become eective
only when used with a headphone.

www.lindemann-audio.com
11
Selection of Digital and Analog Inputs
musicbook DSD
Selection via the app (mb 20/25 only)
• Start the musicbook app.
• Open the source view and select the desired
• input Digital 1–4 or Analog 1–2.
• After selecting the source, you will enter the
• play view of the app.
• The sources may be renamed in the source view of the
app. See page 35.
Selection via the multi-function wheel
• Press on the centre of the multi-function wheel on the
musicbook. Keep the wheel pressed while turning it
clockwise or counterclockwise.
• The display will show the inputs Digital 1–4 and Analog
1–2 from which you may pick your choice.
Selection via the IR remote control
PCM DSD
48 128
Digital 3
• Tip the SET up or SET down keys on the remote until
the desired input is shown.
• Under Inputs in the settings menu you can rename the
inputs and fade out inputs which are not needed.
The musicbook DSD oers 4 digital and 2 analog inputs. These can be selected in three
dierent ways:
• via the musicbook app......
• via the IR remote control.....................
• via the multi-function wheel.................................

12
musicbook DSD
Using the CD Player
• With the label side face up, gently push an audio CD into
the CD drive slot until the CD is automatically pulled in.
Important note: The drive pulls in the CDs and also ejects them again automatically.
Don’t try to push a CD into the device or pull it out against the resistance of the
drive. This will damage the load mechanism. Damages to the load mechanism are
not covered by warranty.
• After a few seconds the display will show the number of
tracks and the overall playtime of the CD.
PCM DSD
44.1 128
7 23:06
• For all other user functions you can either use the
remote control, the app or the multi-function wheel on
the unit.
Device control via app and IR remote control
• Play/Pause.
• Search (only on IR remote).
• Search/Skip (app).
• Skip (skip to the next or previous track).
• Repeat one (repeat a single track).
• Repeat all (repeat the whole album).
• Stop/Eject (only on IR remote)
• Number keys for direct track selection. 1234545......
• Icon for CD ejection: in the CD line of the app’s source
view.
• By pressing the display key on the remote control, you
can switch the display between time/track, album,
artist and track (only if CD text is available).
PCM DSD
44.1 128
Pink Floyd
PCM DSD
44.1 128
Another Brick in
Device control via multi-function wheel (wheel control)
• Volume control (turn left/right).
• Play/Pause: press shortly.
• Stop/Eject: press and hold > 1 sec.
• Skip: press and hold while turning left/right.
Note: Under uCD Drivetin the remote settings menu, uWheel Controlt
and uResumet can be turned on and o. See page 17.

www.lindemann-audio.com
13
Bluetooth Playback
musicbook DSD
The musicbook DSD is equipped with a top-class Bluetooth adapter. It supports the aptX and
AAC transmission standards. Both deliver a sound quality which is barely dierent from CD
reproduction.
However, the connected smartphone also must support those standards.
The music playback via Bluetooth can be controlled with the Play/Pause and Skip +/Skip -
keys on the remote or the app. If meta data are available, you can select between album,
artist and track with the display key on the remote.
Connecting your smartphone to the musicbook
1. First mount the supplied screw antenna to the corresponding connector.
2. Using the IR remote or app select uBluetoothtas source.
3. Open the settings on your smartphone and go to Bluetooth.
4. Select the musicbook here.
5. After a few seconds the display will read uConnectedt.
6. After the connection has been established successfully, the display will show the
name of the smartphone and the transmission standard.
Note: More setting options such as uPairingt, uAutoconnecttand uVisibletcan be
found in the settings menu of the remote under uBluetootht. See page 17.

14
USB Audio Interface
musicbook DSD
The musicbook DSD is equipped with a USB interface which enables you to play back
music from a computer in studio quality. In this operation mode the musicbook replaces
the internal soundcard of the computer. The interface supports high-resultion music
les up to 384 kHz PCM and DSD playback up to DSD 256 in native mode. The interface
of the musicbook DSD is fully compatible with USB Audio Class 2.
A crucial prerequisite for an optimum sound experience with a computer is the use of a
high-quality USB cable and a playback software that supports high-resolution formats
and oers some comfort such as an automatic sample rate switching. We have had
positive experiences with software programmes like Audirvana, Pure Music and J.River
Media Center.
For the use of an Apple computer no special driver is required.
Windows computers, however, need to be run with a special driver for high resolutions.
This driver can be found in the download area on our website together with a driver
installation guide.
USB operation on the Mac (OSX 10.6.4 or higher)
1. Using the supplied USB cable, connect the USB input on the rear of the musicbook DSD
to a free USB port on your Mac.
2. Now open the uAudio MIDI Setuptutility and select the musicbook from the list of the
shown devices which appears as uLINDEMANN HighResAudiot. In the settings menu
select uUse this Device for Sound Outputt. Under uFormattyou can now manually
set the sample rate and the bit resolution. A detailed installation guide is found on our
website.
We recommend the use of an audiophile playback software such as Audirvana, Pure Music
or J.River Media Center. Only that way you will be able to enjoy all features like automatic
sample rate switching, sample rate converter or DSD playback. For more information con-
tact the respective supplier.
USB operation on Windows PC (Windows 7, 8, 10)
1. Windows computers require an ASIO driver for running high-resolution USB Audio
devices. This is available on our website in the "Downloads" area. Install the driver
before connecting the musicbook to your computer for the rst time. Please follow the
installation guide on our website.
2. After successful installation connect the USB input of the musicbook to a free USB
port on your computer. Open the usoundtsettings in the PC’s usystem control
panelt. Dene the musicbook, which appears as uLINDEMANN HighResAudiot, as
standard output device and set the desired resolution and sample rate manually under
uProperties/Advancedt. A detailed installation guide can be found on our website.
We recommend the use of an audiophile playback software like J.River Media Center or
Foobar to take full advantage of all features such as automatic sample rate setting and
up-sampling. You will nd the installation guides at the respective suppliers.

www.lindemann-audio.com
15
The settings menu of the musicbook is only navigated by the IR remote control. With it you
can congurate the hardware of the musicbook according to your personal preferences.
There is a multitude of setting options which will be described hereafter. Please note: this
menu is not identical with the settings of the app.
• First make yourself a little familiar with the navigation
in the menu:
• Pressing the uSettings keytwill take you into the
menu, a second push will get you out again.
• The display will read:
Main Menu
Inputs
General
Network
• The menu is navigated with the uupt, udownt, uleftt,
urighttkeys and the uOK buttonton the remote.
• The current selection is indicated by the softkey high-
lighted in yellow. Conrm your selection each time by
pressing the uOK buttont.
Line Output Level
Headphone Level
Fixed Line Output
Balance
Filter PCM
Re-Sampling
Digital 1 - Digital 4
Analog 1 - Analog 2
Bluetooth
USB-Audio
Display & Brightness
DAC Settings
PreAmp Settings
Factory Default
Pairing
Autoconnect
Visible
WLAN Setting
Status
Wheel Control
Resume
Scrolling
Brightness
Main View
Metadata
Inputs
General
Network
CD Drive
Bluetooth
Settings Menu
musicbook DSD

16
Inputs - Digital 2
1. Go to Inputs, select the desired input, followed by Name or Enabled.
2. With uNamet you can assign new names to the inputs. For this purpose use the up,
down and left, right keys. Conrm each time with the OK button. Use the left, right
arrows to create blank spaces or for corrections. Conrm the new naming in the OK
softkey.
3. With uEnabledtthose inputs which are not needed can be removed from the
selection. Select uInput enabledtfor an active input and uInput disabledtfor a
disabled input. Conrm each time with the uOK buttont.
General - Display & Brightness - Metadata
1. Go to General, select Display & Brightness, followed by Metadata.
2. With uMetadatatyou can enable or disable the display of the meta data text.
If uMetadatathas been disabled, only the respective active source is displayed.
General - Display & Brightness - Scrolling
1. Go to General, select Display & Brightness, followed by Scrolling.
2. By uScrollingtwe understand the scrolling of the meta data text. You can select
between uot, uone timetand uont. With o the text will never run through,
with uontthe text will run through repeatedly within short intervals, and with
uone timetonly after the text has been altered.
General - DAC Settings - Filter PCM
1. Go to General, select DAC Settings, followed by Filter PCM.
2. With uFilter PCMt the characteristic of the anti-aliasing lter in PCM mode can
be switched between uSlow Roll-Otand uSharp Roll-Ot. This setting has no
inuence on the DSD operation!
General - Display & Brightness - Brightness
1. Go to General, select Display & Brightness, followed by Brightness.
2. With uBrightnesstthe display brightness is adjusted. Select between
ulowt, umidtand uhight.
General - DAC Settings - Re-Sampling
1. Go to General, select DAC Settings, followed by Re-Sampling.
2. With uRe-Samplingtthe function of the integrated sample rate converter is deter-
mined. In the unativetsetting the SRC is not enabled and the digital data are pro-
cessed unalteredly. In the uPCMx2x4x8tsetting the digital data are converted into
the DXD studio format (352.8 or 384 kHz respectively). In the uDSDx2x4tsetting the
digital data are converted into the DSD 128 or DSD 256 format.
General - Display & Brightness - Main View
1. Go to General, select Display & Brightness, followed by Main View.
2. With uMain Viewt you can change between three dierent display views: uTextt,
uText + Infotand uVolume + Infot. In the Text setting only uTexttwill be shown,
the uText + Infotsetting will show you the text together with the information about
the current sample rate, and in the uVolume + Infotsetting you will see a volume
display together with the information about the current sample rate.
General - PreAmp Settings - Line output Level
1. Go to General, select PreAmp Settings, followed by Line Output Level.
2. With uLine Output Leveltthe output level at the outputs is set. Select between
ulowt, umidtand uhight. The maximum output voltage corresponds to 1V, 2V and
4V (unbalanced) or 2V, 4V and 8V (balanced).
General - PreAmp Settings - Headphone Level
1. Go to General, select PreAmp Settings, followed by Headphone Level.
2. With uHeadphone Leveltthe output voltage at the headphone output is set. Select
between ulowt, umidtand uhight. The maximum output voltage corresponds to
1V, 2V and 4V.
General - PreAmp Settings - Fixed Line Output
1. Go to General, select PreAmp Settings, followed by Fixed Line Output.
2. With uFixed Line Outputt you can turn on or o the volume control on the musicbook.
The output voltage is then set to maximum (which corresponds to a set value of 99).
Caution: only select this setting option if you are running an amplier with a volume
control after the musicbook. Otherwise your power amplier will be overdriven and
might destroy your speakers.
Settings Menu
musicbook DSD

www.lindemann-audio.com
17
CD Drive - Wheel Control
1. Go to CD Drive and select Wheel Control.
2. With uWheel Controltthe CD player control via the multi-function wheel can be
enabled or disabled.
Bluetooth - Visible
1. Go to Bluetooth and select Visible.
2. With uVisibletyou can determine if the musicbook shall be visible for other Blue-
tooth devices. In the uNotmode the musicbook is not shown to other Bluetooth
devices. In the uYestmode it is visible as standard. This function can be useful, if
you want to prevent external devices from getting access to the musicbook.
CD Drive - Resume
1. Go to CD Drive and select Resume.
2. With uResumetyou can determine the properties of the CD player upon selecting a
dierent input. With Resume disabled, the CD player will continue to run in the back-
ground; with Resume enabled, it will restart from the track location where the other
input was selected before.
Bluetooth - Pairing
1. Go to Bluetooth and select Pairing.
2. With uPairingtyou can edit the stored list of devices which were recently con-
nected successfully to the musicbook. In Autoconnect mode the musicbook will
connect automatically as soon as it nds a device that was already connected to the
musicbook. With uUnpairtthis list will be deleted. With uPairtthe musicbook is
manually set to standby mode and ready to connect to other Bluetooth equipment.
Bluetooth - Autoconnect
1. Go to Bluetooth and select Autoconnect.
2. With uAutoconnecttthe musicbook will automatically connect to the last connected
device. All devices that were previously connected to the musicbook are stored in an
internal list. If a device is not available, the musicbook will try to connect to the next
device in the list. With uUnpairtthis list will be deleted.
General - PreAmp Settings - Balance
1. Go to General, select PreAmp Settings, followed by Balance.
2. With uBalancet volume dierences between the channels can be levelled if the
listening position is not ideal. Use the left, right keys to adjust the balance. Conrm
with the uOK buttont.
General - Factory Default
1. Go to General and select Factory Default.
2. With uFactory Defaultt the device can be reset to delivery condition. Conrm with
the OK button to start the procedure. Please note: all settings you have done so far
will be reset.
Network - WLAN Setting
1. Go to Network and select WLAN Setting.
2. With uWLAN Settingtthe password for the WLAN operation can be entered via the
remote control. For this purpose use the up, down and left, right keys. Conrm with the
uOK buttonteach time. Use the left, right arrows to create blank spaces or for correc-
tions. Conrm the input in the OK softkey. See also page 20: WLAN conguration.
Network - Status
1. Go to Network and select Status.
2. With uStatustyou can call up essential information about the WLAN connection.
Use the uupt, udowntkeys to have further information displayed.
Settings Menu
musicbook DSD

1818
musicbook DSD
Note: The following pages apply only to streaming models musicbook 20/25 DSD
Lindemann Audiotechnik de.pinterest.com/LindemannAudio
pinterest
facebook

www.lindemann-audio.com
19
Music Server (NAS)
WLAN
router
Control point
smartphone
or tablet
⠸
musicbook 20/25 DSD
Network Connection
Netwok Connection:
The musicbook 20/25 DSD is equipped with a UPnP/DLNA network player. This allows
to play back music from various digital media like e. g. streaming services, web radio,
network attached storage (NAS) as well as USB storage media. For network operation
you will need a WLAN router with internet access, a smartphone or tablet (WLAN oper-
ation) with the musicbook app and a storage medium like an NAS (Network Attached
Storage). The versatile functions of the musicbook 20/25 DSD can be conveniently oper-
ated via the app. The core element within the network is the WLAN router. It receives the
commands from the app and passes them on to the musicbook.

20
musicbook 20/25 DSD
Network Conguration
One condition for the use of the network player is a functional home network which com-
prises at least a WLAN router with internet access and a smartphone logged in on this rout-
er for running the app. Please download the musicbook app from the App Store (Apple) or
from Google Play (Android). If you have already a music collection on an NAS, connect this
one to the WLAN router as well. To ensure a troublefree operation of the musicbook 20/25
DSD in a local network, please follow the instructions in this chapter step by step. However,
in case of problems it is advisable to consult a network expert.
NOTE: Even if you have planned a wireless only operation via WLAN, it does make sense for
the initial start-up to connect the musicbook 20/25 DSD to your router via a LAN cable. You
should acquaint yourself a little with the operation of the network player and the app before
switching to WLAN mode. For entering the WLAN access data via the app a LAN connection
is absolutely necessary. The LAN cable will only be removed after entering the WLAN data.
Operation with a LAN cable:
1. If you had switched on the musicbook, you need to turn it o now and connect the
device to a free LAN port on your WLAN router by means of the supplied LAN cable.
2. Now turn the device on again. The device will
log in to the network. This may take some time
(up to 5 minutes).
3. The network status can be requested with the
uINFO buttonton the remote control.
Info
Network: LAN
IP Mode: DHCP
IP: 192.168.1.XXX
4. Now open the musicbook app on your
smartphone or tablet.
5. The app will now show the musicbook and its IP address (Discover Devices).
6. Tip on the musicbook to link it with the app.
7. The musicbook is now ready for network operation.
Wireless operation via WLAN:
For the conguration of the WLAN connection it is necessary to perform the above steps
rst. During the input of the WLAN data the musicbook remains connected to the WLAN
router via the LAN cable. Before starting the procedure, please mount the WLAN antenna.
WLAN conguration with the musicbook app
1. Select the Settings icon in the app.
2. Select uDevice Settingst.
Settings u
Discover Devices
Application Settings
Device Settings
About
3. Select uNetworkt.
Device Settings u
Device Name
Network
Sound
UPnP Control
Energy Saving
Software
Table of contents
Other Lindemann Media Player manuals
Popular Media Player manuals by other brands
I.D. AL
I.D. AL EventPlayer AP303v2 user manual
Seagate
Seagate ST905004CEA2E1-RK - FreeAgent Theater+ - Digital Multimedia... user guide
Atoll Electronique
Atoll Electronique ST200 SIGNATURE owner's manual
Sony
Sony XAV-W650BT operating instructions
Power Dynamics
Power Dynamics PDC-80 user manual
GPX
GPX ML861 user guide

Solution
Solution Digital-Player 541 user manual
Flyron Technology
Flyron Technology FNM-706 user manual
Cayin
Cayin SMP-WEB4 user manual
Western Digital
Western Digital WDBABF0000NBK - TV HD Media Player Product specifications

Syvio
Syvio HD Media Player 200A instruction manual
Red Digital Cinema
Red Digital Cinema REDRAY Operation guide
