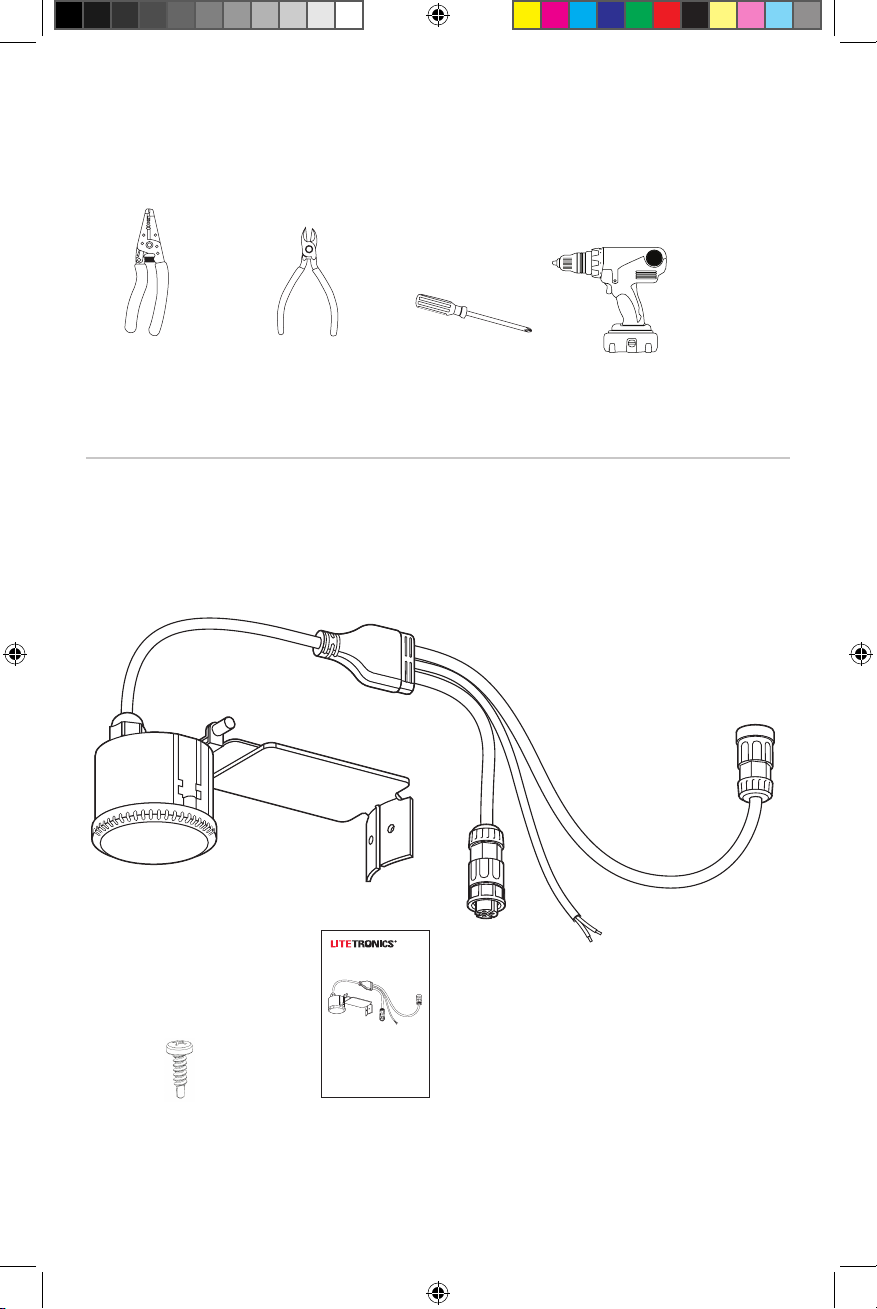
LITETRONICS HBAS47 User manual

Motion & Light Sensor Kit HBAS47
Installation Instructions
For Round High Bay Fixtures
PLEASE READ THESE INSTRUCTIONS BEFORE INSTALLATION
Motion Sensor_Installation Instructions_v1.indd 1 2/16/2018 8:37:35 AM

Sensor (MC031V)
Bracket
WARNING:
READ CAREFULLY BEFORE INSTALLING
RETAIN THESE INSTRUCTIONS FOR FUTURE REFERENCE.
Sensor must be wired in accordance with the National Electrical Code and all applicable local codes.
Risk of fire or electric shock. Sensor installation requires knowledge of luminaire electrical systems. If not qualified,
do not attempt installation. Contact a qualified electrician.
Be certain electrical power is OFF before and during installation and maintenance.
Make sure the supply voltage is same as the rated Sensor voltage
Only those open holes indicated in the photographs and/or drawings may be made or altered as a result of this kit
installation. Do not leave any other open holes in an enclosure of wiring or electrical components.
Review the ADJUSTMENTS section and complete any necessary DIP switch setting changes.
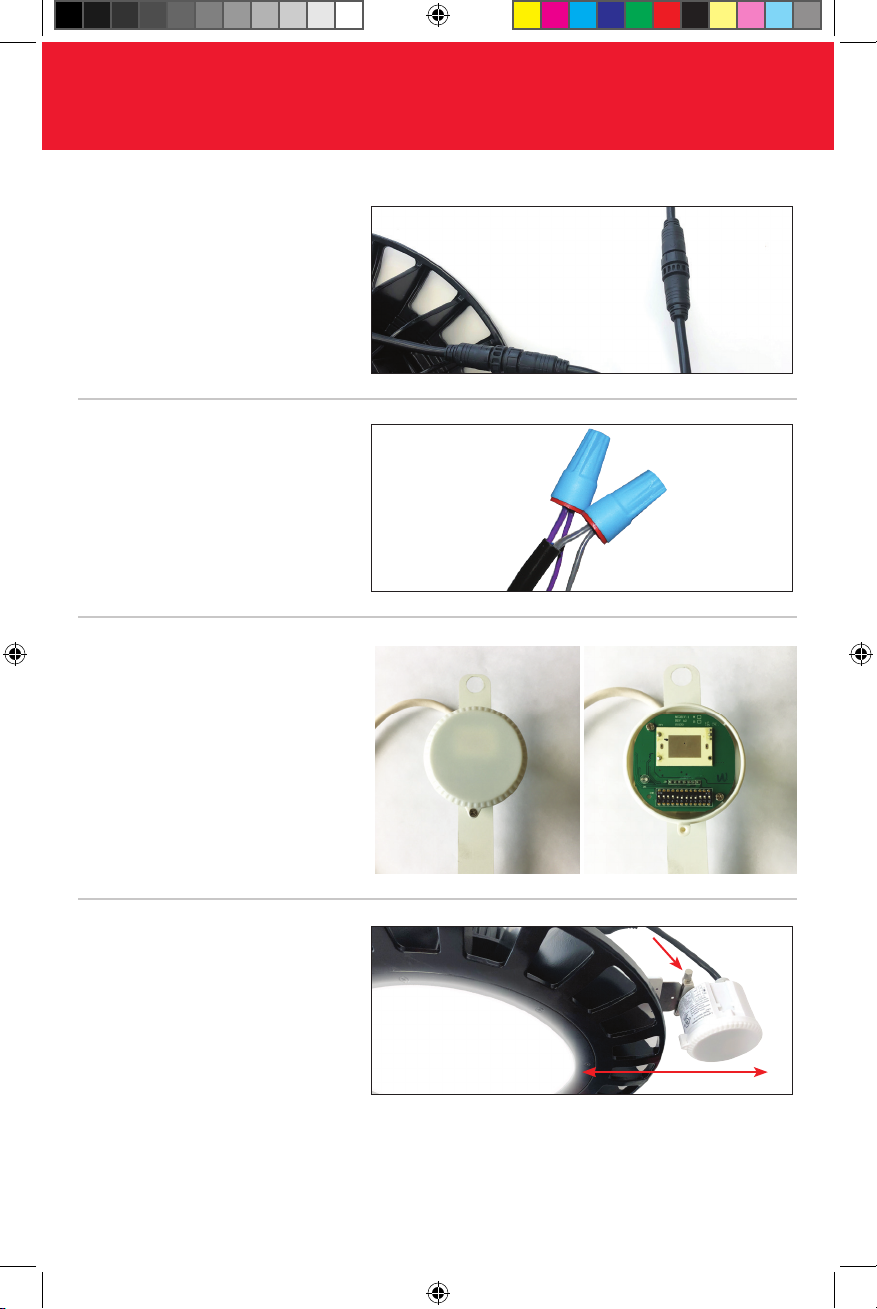
Mount the sensor vertically so the lens is parallel to the edge of the fixture.
Connect the line voltage and load wires to the sensor leads as shown in the applicable wiring diagram for the sensor
module.
Do not allow exposed bare wires.
Make sure all connections are secure.
SAFETY INSTRUCTIONS AND WARNINGS
Motion Sensor_Installation Instructions_v1.indd 2 2/16/2018 8:37:36 AM

3
Wire Stripper
(optional)
Wire Cutter
(optional)
WHAT COMES IN THE BOX
Motion Sensor base product comes with following standard parts:
Before Installation, carefully remove all parts from the packaging.
Inspect product for defects due to shipping.
Sensor
Bracket
Adjustable Hinge
(2) Self-tapping screws (1) Installation Instructions
Phillips Screwdriver
1312
Drill
TOOLS TYPICALLY USED FOR INSTALLATIONS
Moti on and Lig ht Sensor
Kit HBA S47
PLEASEREAD THESE INSTRUCTIONS BEFORE INSTALLATION
Motion Sensor_Installation Instructions_v1.indd 3 2/16/2018 8:37:36 AM

4
MOTION SENSOR
INSTALLATION
1. Turn off power to fixture. Look for 2 holes
on curved surface of housing where bracket
of sensor will be installed.
2. Install bracket with help of 2 self-
tapping screws.
3. Remove pre-connected input cable with 3
stripped wires by twisting connector counter
clockwise.
4. Mate waterproof twist male connector of
High Bay driver with female connector of
sensor by twisting clockwise to lock.
Motion Sensor_Installation Instructions_v1.indd 4 2/16/2018 8:37:37 AM

5
MOTION SENSOR
INSTALLATION
5. Mate male connector of sensor and
pre-connected input cable (removed in
step 3) or any chosen Litetronics cable
accessory by twisting clockwise.
7. To set sensor functionality, remove screw
from plastic cover and then unscrew top
cover from sensor assembly. You will see
dip switch. See MC031V settings on next
page (6). Replace sensor cover and screw.
8. Restore power at circuit breaker and
subsequently switch on dimmer
(if applicable) and enjoy High Bay
luminaire.
6. Connect 0-10V gray and purple wire of
High Bay and sensor with help of wire nuts
(waterproof) provided with High Bay.
Assure that sensor lens is parallel to surface of lens by adjusting the
hinge screws.
Motion Sensor_Installation Instructions_v1.indd 5 2/16/2018 8:37:39 AM

6
Stand-by period
Controls the time period the lamp remains at a low light level before it
completely switches off in the long absence of people. When set to +∞,
the low light is maintained until motion is detected.
Stand-by dimming level
Determines the light level you would like to have after the hold time in
the long absence of people.
Daylight sensor
The sensor can be set to only allow the lamp to illuminate below a
defined ambient brightness threshold.
When set to Disable mode, the daylight sensor will switch on the lamp
when motion is detected regardless of ambient light level.
Note that daylight sensor is active only when lamp totally switches off.
ON
567
ION ON ON +∞
II —ON ON 60min
III ON —ON 30min
IV — — ON 10min
VON ON —5min
VI ——— 5s
ON
10 11 12
ION ON ON Disable
II —ON —200lux
III ON — — 100lux
IV ———50lux
ON
8 9
ION ON 50%
II —ON 30%
III ON —20%
IV — — 10%
MOTION SENSOR
INSTALLATION
Hold Time
Sets the time period the lamp remains at 100% illumination after
no motion detected.
ON
234
ION ON ON 5s
II —ON ON 30s
III ON —ON 90s
IV — — ON 3min
VON ON —20min
VI ———30min
MOTION SENSOR
INSTALLATION
MC031V SENSOR SETTINGS
By selecting the combination on the DIP switch, sensor data can be precisely set for each specific application.
Detection area
Detection area can be reduced by selecting the appropriate
combination on the DIP switches.
ON 1
ION 100%
II —50%
Motion Sensor_Installation Instructions_v1.indd 6 2/16/2018 8:37:39 AM

7
TROUBLESHOOTING
REASON CAUSE REMEDY
The load will not
illuminate
Incorrect daylight sensor setting selected. Adjust setting.
Load had failed. Replace load.
Power is switched off. Switch on.
The load is permanently
illuminated.
Continuous movement in the detection area. Check detection area setting.
The lamp (Containing sensor) is installed in an
area too close to reflective surfaces, i.e. metal,
glass or concrete walls.
• Make sure installation area suitable with at least 30
cm space between lamp and surrounding reflective
surfaces.
• Reduce sensitivity (Detection are).
The load will not
illuminate despite
movement.
Speed of moving object is not in the range of 0.
5~3m/s or the detection radius is too small.
Check detection area setting.
MOTION SENSOR
INSTALLATION
MOTION SENSOR
INSTALLATION
Motion Sensor_Installation Instructions_v1.indd 7 2/16/2018 8:37:39 AM

v1 (2-15-18)
WWW.LITETRONICS.COM
CustomerService@Litetronics.com or 1-800-860-3392
6969 W. 73rd Street
Bedford Park, IL 60638
Thank you for choosing
Motion Sensor_Installation Instructions_v1.indd 8 2/16/2018 8:37:39 AM
Table of contents
Popular Accessories manuals by other brands

HIK VISION
HIK VISION DS-PD2-D10P-W user manual

ACU-RITE
ACU-RITE PRO+ 06014 instruction manual

Bigben
Bigben 3DS Parental Control user manual

PRO-DESIGN
PRO-DESIGN B-SAFE 105 owner's manual

Functional Devices
Functional Devices RIB LSDUALC Installation & operating instructions

HIK VISION
HIK VISION DS-KB8113-IME1 manual