Contents:
1 - Right Side Panel 1 - Bottom Shelf 3 - Pegs
1 - Left Side Panel 2 - Trim Panels 3 - Washers
1 - Center panel 1 - Hanger Rod 3 - #8 x 5/8” Screws
1 - Shelf Back 22 - Bolts 1 - Allen Wrench
4 - Shelves 22 - Barrel Nuts
Revised 06/17
by
D. Dominguez
Page 1 of 2
Assembly Instructions for Child’s Wardrobe Item #35
Quality Wooden Children’s Furniture and Accessories
Made in America •Established 1987
www.littlecolorado.com
1. Please inspect the parts for damage during shipping and for any missing items. If you suspect that there may be damage
or a shortage, please contact us so we can send any replacement parts that may be needed. At this time, please visualize
how the components t together per the drawings and make sure that you have everything identied. Do not remove the
protective paper or plastic cover from the mirror until assembly is complete.
WARNING: ADULT ASSEMBLY REQUIRED
WARNING: Assembly kit contains parts with sharp edges.
WARNING: Assembly kit contains parts with sharp points.
WARNING: Package contains plastic bags that present suffocation risks for children.
WARNING: Assembly kit contains small parts that present choking hazards for children.
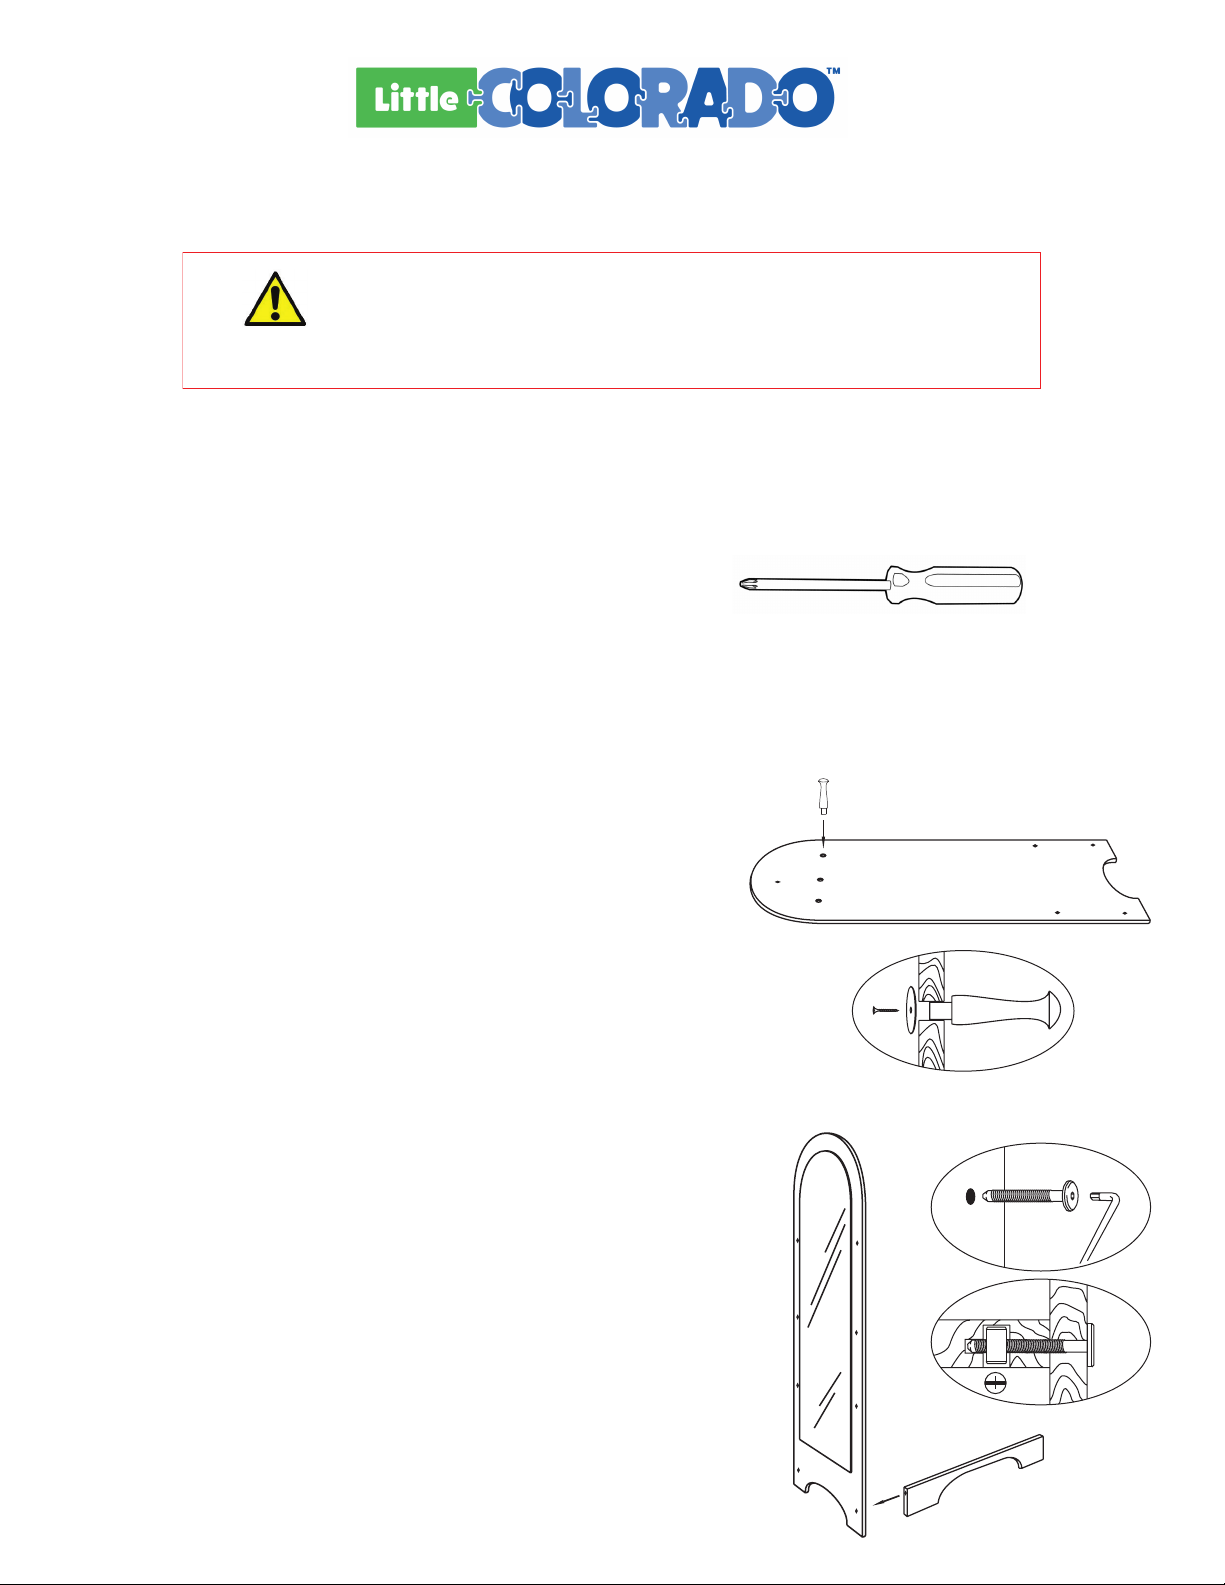
You will need a standard phillips
screwdriver to complete assembly.
(x3)
Locate the large wooden panel that has three holes aligned horizontally
near the top of the panel. Place the panel on a carpeted oor with the shelf
grooves facing down (toward the carpet).
Push the three wooden pegs into the three 1/2” holes. If the wooden pegs
do not go all the way into the holes they can be hammered into place.
Protect the end of the peg with a soft towel or cloth before hammering the
pegs into place.
Place one of the #8 x 5/8” screws through a washer and into the center of
the peg shank as shown and tighten snug with a phillips screwdriver. Repeat
this step to secure the other two pegs.
*After the pegs have been installed, set this panel aside for later installation.
2.
Locate the large wooden panel with the mirror attached to it. Using two bolts
and two barrel nuts, attach the two bottom trim pieces to the mirror panel.
The two trim panels should t snugly into the two vertical grooves on the
backside of the mirror panel.
Place the barrel nut into the bottom trim piece and insert a bolt through the
mirror panel and into the barrel nut. Tighten the bolt snug and then back
the bolt out two complete turns (counter-clockwise).
3.
(x2)


