Step 3 - requires D, W, X
Step 4 - requires J, W, X St
Model No. 068-7561-2
6Model No. 068-7558-2
Assembly
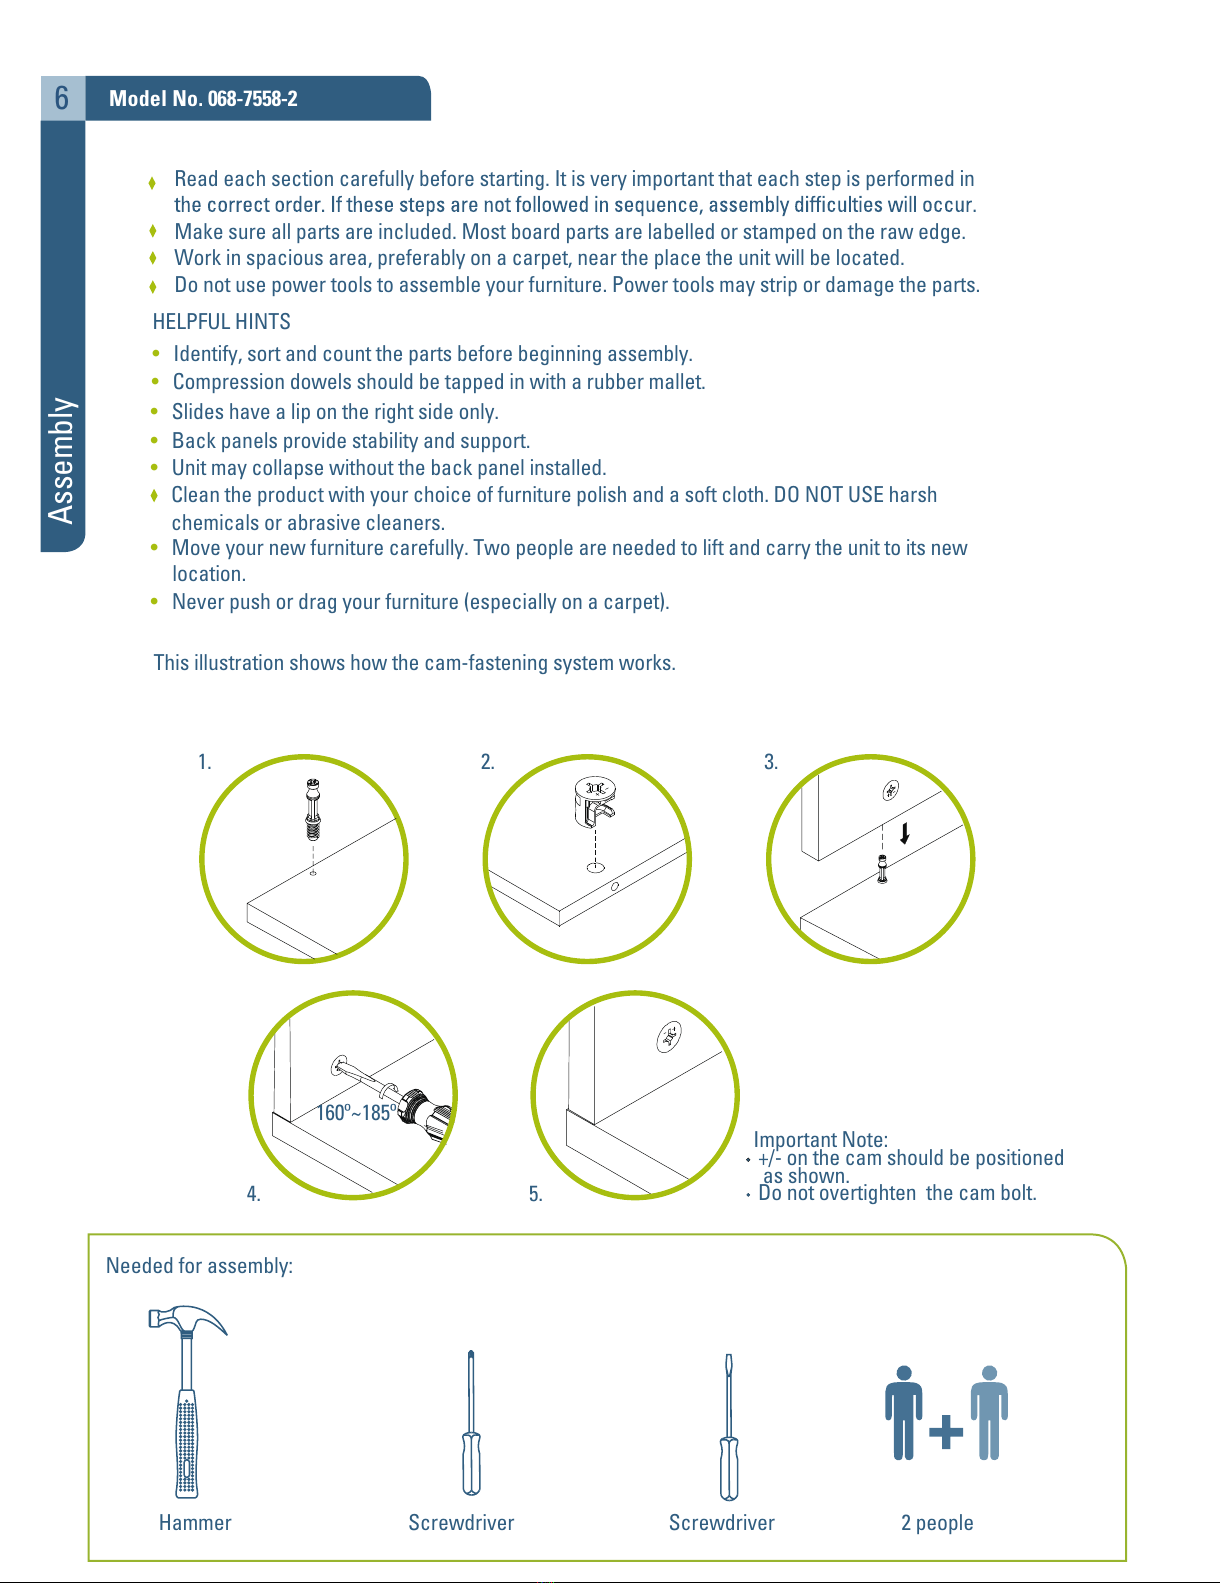
ImportantNote:
+/- on the cam should be positioned
as shown.
Do not overtighten the cam bolt.
1. 2. 3.
4. 5.
HELPFUL HINTS
Readeach section carefully before starting. It is very importantthateach step is performed in
Makesure all parts are included. Most board parts are labelled or stamped on the raw edge.
Work in spacious area, preferably on a carpet, near the place theunitwill be located.
Do not use power tools to assemble yourfurniture. Power tools may strip ordamage the parts.
•Identify, sort and count the parts beforebeginning assembly.
•Compression dowels should be tappedinwith arubber mallet.
•Slides have a lip on the right side only.
•Back panels provide stability and support.
•Unit may collapse withoutthe back panel installed.
Clean the productwith your choice of furniture polish and asoft cloth. DO NOT USE harsh
chemicals or abrasive cleaners.
•Move your new furniture carefully. Twopeople are needed to liftandcarry the unit to its new
location.
•Neverpush or drag your furniture (especially on acarpet).
This illustration shows how the cam-fastening system works.
Needed for assembly:
HammerScrewdriverScrewdriver2 people
160º~185º