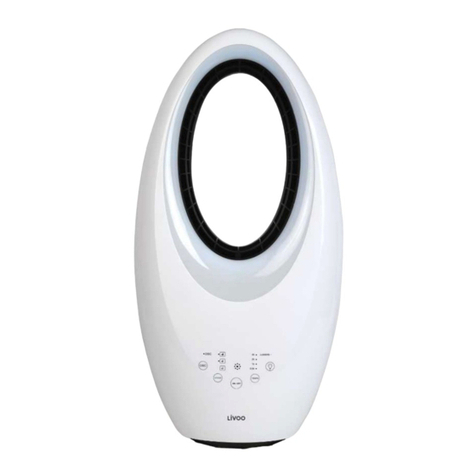
Livoo DOM449 User manual

Instruction Manual
WWW.LIVOO.FR
Reference: DOM449
Version: 1.4
Language: English
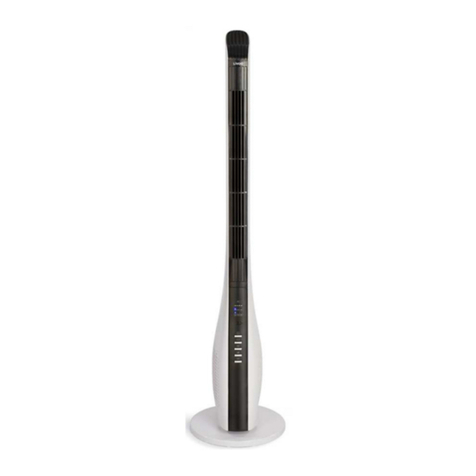
Stan wireless fan

Instruction Manual
1
You have purchase a LIVOO bran pro uct an we thank you for it. We give great attention to the esign,
ergonomics an ease of use of our pro ucts. We hope that this pro uct will give you complete satisfaction.
SAFETY INSTRUCTIONS
1. Before connecting your appliance, verify that the
supply voltage in icate on the in icator plate of the
appliance correspon s properly to that of your
electrical installation.
2. No responsibility may be assume in case of amages
cause by non-compliance of this manual by the user
or by faulty use or han ling.
3. This appliance is meant for ONLY DOMESTIC USE an
FOR INTERNAL USE.
4. Use this appliance only as in icate in the instruction
manual.
5. Before each use, ensure that the supply cor is in
goo con ition.
6. If the supply cor is amage , it must be replace by
the manufacturer, its service agent or similarly
qualifie persons (*) in or er to avoi a hazar .
7. Never plunge the appliance, its supply cor or the plug
in water or any other liqui .
8. Do not han le the plug on the appliance with wet
han s.
9. This appliance can be use by chil ren age from 8
years an above an persons with re uce physical,
sensory or mental capabilities, or lack of experience

Instruction Manual
2
an knowle ge if they have been given supervision or
instruction concerning use of the appliance in a safe
way an un erstan the hazar s involve . Chil ren
shall not play with the appliance. Cleaning an user
maintenance shall not be ma e by chil ren without
supervision.
10. Young chil ren, ol people or isable people must
not be irectly expose to the air from the fan for
long perio s.
11. When you isconnect the supply cor , always remove
it from the plug. Do not pull on the cor itself.
12. Always isconnect the appliance from its plug point
when the appliance is not use , before moving it or
cleaning it.
13. Ensure that the fan is switche off from the supply
mains before removing the guar .
14. Never insert your fingers, crayons or any other object
across the ventilation grills.
15. Ensure that the fan is always place on a flat surface,
ry an stable.
16. Do not use your fan close to a win ow. Rain may
cause risks of electric shocks.
17. Do not use chemical pro ucts or abrasive etergents
for cleaning, which may easily amage or eform your
appliance.
18. Do not place either the fan or its parts near an over, a
cooking appliance or any other source of heat.

Instruction Manual
3
19. Do not use the appliance in the presence of explosive
or inflammable vapours.
20. Never try to isassemble or repair your appliance
yourself. In case of repair by an unqualifie person,
the guarantee is cancelle .
21. For re ucing the risk of electric shock, never use this
pro uct with wet han s, never spill a liqui on the
pro uct or submerge it in water.
22. Direct surveillance is necessary when your appliance
is use near chil ren or isable persons.
23. Do not place the appliance on or near a hot gas or in a
heate oven.
24. Do not use outsi e (For internal use only). This
appliance is not suitable for in ustrial or open air use.
25. Never leave the appliance working without
surveillance.
26. Avoi overheating the evice by preventing the
blocking of entry an exit of air. Clean all the entries
an exits from time to time to remove the
accumulate ust.
27. Leave a safe space of 50 cm aroun the fan, on above
an on the si es, an a safe space of 120 cm on the
front.
28. This appliance is not esigne to be use with an
external timer or a separate remote control system.
29. Do not try to remove the parts an o not insert a
metallic object insi e the appliance.

Instruction Manual
4
30. This appliance is inten e to be use in househol an
similar applications such as:
•staff kitchen areas in shops, offices an other
working environments
•farm houses
•by clients in hotels, motels an other
resi ential type environments
•be an breakfast type environments.
(*)
Authorised qualified electrician: after-sales epartment of the manufacturer or the importer or any other
qualifie person, approve an authorise for carrying out this kin of repair for avoi ing any anger. In any case,
you must sen the appliance to this electrician.
This instruction manual is available too on our website www.livoo.fr
SPECIAL SAFETY INSTRUCTIONS
Information :
-NEVER COVER THE APPLIANCE, even temporarily, because it
may overheat an generate a risk of fire.
-Do not use the fan near a shower, bathtub or a swimming
pool.
TECHNICAL SPECIFICATIONS
Voltage: 220-240V~ 50-60Hz
Power: 30W
12 spee s
Rechargeable battery: 2600 mAh
Class II

Instruction Manual
5
Parts list:
Power Cor
Base
Remote control
Rear protective grille
Rear Guar nut
Fans bla es
Nut of fan bla es
Front protective grille
Connecting tube
Fan hea
Allen wrench
Allen screw M6
Screw (protective gri )

Instruction Manual
6
EXPOSION VIEW
ASSEMBLY
Installation of the protective grilles
•Mount the front guar grille as shown in the evice overview an then rotate it clockwise to bring
the positioning point into a vertical position.
•Tighten the screws to complete the installation.
Signal receiver

Instruction Manual
7
Installing the base
Place the connecting tube on the base. Insert the Allen screw M6 into the base from below an tighten the
screw clockwise with the Allen wrench.
Installing the power supply
•Plug one si e of the power cor into the rectangular connector on the base of the unit.
•Plug the power plug at the other en of the power

Instruction Manual
8
Installing of the fan head
DESCRIPTION
Control panel
•Place the fan hea on the capillary tube by aligning the
groove on the capillary tube (see the image on the left si e).
•Tighten the capillary tube nut. Finish installing the fan hea by
making sure it oes not wobble.
ON/OFF
OSCILLIATION
BOUTON DE
VITESSE
INDICATOR
LIGHT

Instruction Manual
9
isplay
Remote control
SLEEP MODE
NORMAL MODE
TIMER
POWER
OSCILLIATION
TIMER / SPEED
BATTERY LEVEL
SWING ANGLE LEVEL
NATURAL MODE
Transmitter
Timer
On/Off
Increase Spee
Decrease Spee
Mo e
Swing

Instruction Manual
10
OPERATION
Before the first use
.Rea these instructions before use an keep them safe. If you give this fan to someone, also give them
the instructions.
.Remove all the packaging but retain them till you are satisfie that the fan works.
.Completely unwin the supply cor an insert the electric plug in an earthe plug point on the wall.
.The fan is now rea y.
Remark: Ensure that the local voltage corresponds to the voltage of the appliance.
ON/OFF:
Presse On/Off button on the fan hea . A beep will soun an in icate that the fan is starting. The spee
controller lights on, the fan symbol in the igital isplay lights up an the fan starts working. Press the
button again to turn off the fan.
SPEE :
Press the SPEED button repeate ly to select the spee level from 1 to 12. There is a isplay on the fan hea
in icating the currently set spee .
SWING:
Press the SWING button on the fan hea . A beep will soun an the fan will begin to oscillate. The efault
angle is 30°. The swing in icator lights up an the green circle of the igital in icator lights up. Press the
SWING button several time to select the following swing angles: 30°-60°-90°-120°. The green circle of the
igital isplay changes accor ingly. Press an hol this button to stop the swing function.
In icating light

Instruction Manual
11
TIMER:
Press the TIMER button on the fan hea . As soon as the time in icator lights up after the beep, you can set
the off timer. Press the button repeate ly to set the timer between 0 to 12 hours.
•From 0-6 hours, the time can be set in 0.5-hour increments.
•From 6-12 hours, the time can be set in 1-hour increments.
•If you select 0 hours, the time function is cancelle .
Remark: When setting the timer using the remote control, first press the TIMER button and then use the (+
or (- buttons to set the desired time. Wait 6 seconds until the set time is automatically set.
MO E:
Press MODE button to choose airflow: Normal - Nature - Sleep.
•Natural mo e: The win imitates the blow of natural win base on strong an soft win .
•Sleep mo e: the unit simulates a soft breeze suitable for night time use.
•Normal mo e: The win blow base on Low/Me /High spee .
Wireless use:
Unplug the power cor from the outlet an remove the power cor from the base. Press the battery
control button on the base. A beep will soun , in icating that the unit is now powere by the built-in
battery. Press the ON/OFF button on the fan hea or remote control to start the fan.

Instruction Manual
12
Remote control:
•The remote control is supplie with 1 battery CR2032L. Do not use other types of batteries.
•In case of prolonge non-operation, remove the battery from the remote control.
escription Symbol
Value
Unit
Maximum fan flow rate F 25,52 m3/min
Fan power input P 29,23 W
Service value SV 1,01 (m3/min)/W
Stan by power consumption P
SB
0,46 W
Off mo e power consumption P
off
- W
Fan soun power level L
WA
55,50 B(A)
Maximum air velocity c 4,58 meters/sec
Seasonal electricity consumption Q 9,35 kWh/a
Meansurement stan ar for service value IEC 60879:1986
(corr.1992)
Contact etails for obtaining more information
DELTA
BP61071
67452 Mun olsheim – France

Instruction Manual
13
CLEANING AND MAINTENANCE
1. First ensure that the fan is off an remove the electric plug from the outlet.
2. Do not clean until the appliance is completely col .
3. Cleaning of the external bo y: Wipe the external bo y with a soft cloth.
4. Remove the protection an the bla es carefully.
5. Do not let the bla es fall! First use a soft cloth with a little soap for removing grease stains. Rinse
an ry completely, then wipe an polish with a ry cloth.
6. Always ensure that the bla es are returne an locke in position after cleaning an before
inserting the plug into the plug point.
7. Never use abrasive cleaning agents or pointy objects (for e.g. scrub brush or knife) for cleaning.
Never use a corrosive liqui which woul amage the paint, metal or plastic!
8. Warning: Do not submerge the appliance in water or other liqui s. It is a anger to life ue to an
electric shock.
9. When the appliance is not use , store it as well as all its accessories an the instruction manual in a
safe an ry place.

Instruction Manual
14
Procedure to observe for battery’s end of life
The appliance batteries must be remove before iscar ing the equipment. Please follow the proce ure
below:
Ensure that your appliance is isconnecte so as to re uce any risk of electrical shock. Discharge the
batteries fully.
Remove the protection cover situate in a location where you connect the mains voltage a apter an it is
remove so as to access the batteries compartment. Carry a screw river to remove the screw.
Remove the batteries from the equipment. Cut the cables an tab connecting the batteries in the printe
circuit an remove them.
ATTENTION: THESE NI-MH CELLS MUST BE RECYCLE OR ELIMINATE IN ACCOR ANCE WITH THE
EQUIPMENT SCRAPPING.
Do not burn, ismantle, crush or break out the batteries because they can release toxic substances.
Do not expose them to extreme temperatures.
Drop them in the batteries recycling bins esigne for this purpose or return them to your retailer.
Correct disposal of the unit
(Electrical and Electronic Equipment)
(Applicable in the European Union an the rest of Europe that have a opte separate collection systems
countries)
The European Directive 2012/19/EU on Waste Electrical an Electronic Equipment (WEEE), requires that
ol househol electrical appliances must not be ispose of in the normal househol waste stream.
Ol appliances must be collecte separately in or er to optimize the recovery an recycling of the materials they contain an
re uce the impact on human health an the environment.
The symbol of the crosse out ustbin is marke on all pro ucts to remin the obligations of separate collection.
Consumers shoul contact their local authority or retailer for information concerning the correct isposal of their pro uct.
•Photo no contractual
• Worrie about the quality of his pro ucts the manufacturer reserves the right to make mo ifications without a vance
LIVOO
BP 61071
67452 Mundolsheim cedex - FRANCE
Table of contents
Other Livoo Fan manuals