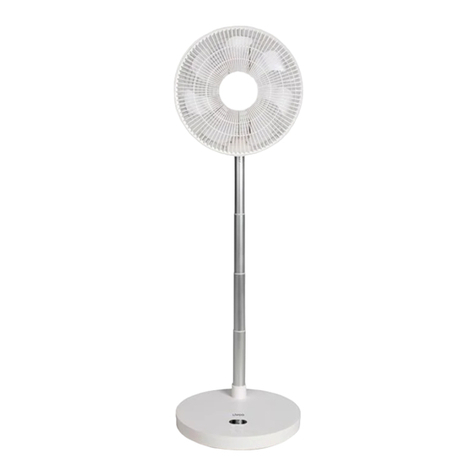
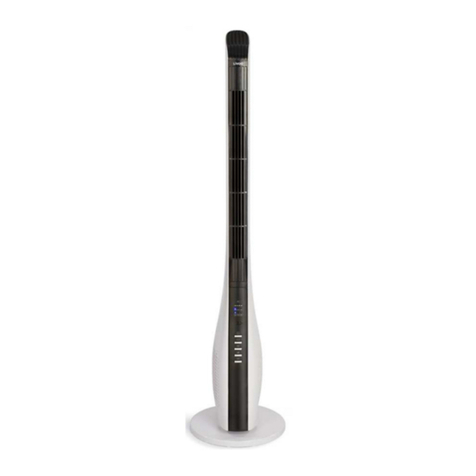
Livoo DOM385 User manual

Instruction Manual
WWW.LIVOO.FR
Reference: DOM385
Version: 1.4
Language: Englis
Mist fan

Instruction Manual
1
You ave purc ased a LIVOO brand product and we t ank you for it. We give great attention to t e design,
ergonomics and ease of use of our products. We ope t at t is product will give you complete satisfaction.
SAFETY INSTRUCTIONS
PLEASE, TAKE TIME TO READ WELL THE INSTRUCTIONS FOR USE
PARTICULARLY BEFORE THE FIRST USE.
A misuse of t e appliance can damage it or urt t e user. Assure
t at you use t e appliance for t e use for w ic it is designed, we
refuse any responsibilities as for t e damages by an incorrect use
or a bad manipulation.
1. Before connecting your appliance, verify t at t e
supply voltage indicated on t e indicator plate of t e
appliance corresponds properly to t at of your
electrical installation.
2. No responsibility may be assumed in case of damages
caused by non-compliance of t is manual by t e user
or by faulty use or andling.
3. T is appliance is meant for ONLY DOMESTIC USE and
FOR INTERNAL USE.
4. Use t is appliance only as indicated in t e instruction
manual.
5. Completely assemble t e fan before starting it.
6. Before eac use, ensue t at t e supply cord is in good
condition.
7. If t e supply cord is damaged, it must be replaced by
t e manufacturer, its service agent or similarly

Instruction Manual
2
qualified persons (*) in order to avoid a azard.
8. Never plunge t e appliance, its supply cord or t e plug
in water or any ot er liquid.
9. Do not andle t e plug on t e appliance wit wet
ands.
10.T is appliance can be used by c ildren aged from 8
years and above and persons wit reduced p ysical,
sensory or mental capabilities, or lack of experience
and knowledge if t ey ave been given supervision or
instruction concerning use of t e appliance in a safe
way and understand t e azards involved. C ildren
s all not play wit t e appliance. Cleaning and user
maintenance s all not be made by c ildren wit out
supervision.
11. Young c ildren, old people or disabled people must not
be directly exposed to t e air from t e fan for long
periods.
12. W en you disconnect t e supply cord, always remove
it from t e plug. Do not pull on t e cord itself.
13. Always disconnect t e appliance from its plug point
w en filling or cleaning, w en t e appliance is not used
or before moving it.
14. Ensure t at t e fan is switc ed off from t e supply
mains before removing t e guard.
15. Never insert your fingers, crayons or any ot er object
across t e ventilation grills.
16. Ensure t at t e fan is always placed on a flat surface,
dry and stable.

Instruction Manual
3
17. Do not use your fan close to a window. Rain may cause
risks of electric s ocks.
18. Do not use c emical products or abrasive detergents
for cleaning, w ic may easily damage or deform your
appliance.
19. Do not place eit er t e fan or its parts near an over, a
cooking appliance or any ot er source of eat.
20. Do not use t e appliance in t e presence of explosive
or inflammable vapours.
21. Never try to disassemble or repair your appliance
yourself. In case of repair by an unqualified person, t e
guarantee is cancelled.
22. For reducing t e risk of electric s ock, never use t is
product wit wet ands, never spill a liquid on t e
product or submerge it in water.
23. Direct surveillance is necessary w en your appliance is
used near c ildren or disabled persons.
24. Do not place t e appliance on or near a ot gas or in a
eated oven.
25. Do not use outside (For internal use only). T is
appliance is not suitable for industrial or open air use.
26. Never leave t e appliance working wit out
surveillance.
27. Avoid over eating t e device by preventing t e
blocking of entry and exit of air. Clean all t e entries
and exits from time to time to remove t e accumulated
dust.
28. Leave a safe space of 50 cm around t e fan, on above

Instruction Manual
4
and on t e sides, and a safe space of 120 cm on t e
front.
29. T is appliance is not designed to be used wit an
external timer or a separate remote control system.
30. Do not try to remove t e parts and do not insert a
metallic object inside t e appliance.
31. T is appliance is intended to be used in ouse old and
similar applications suc as:
•staff kitc en areas in s ops, offices and ot er
working environments
•farm ouses
•by clients in otels, motels and ot er
residential type environments
•bed and breakfast type environments
.
(*)
Authorised qualified electrician: after-sales department of t e manufacturer or t e importer or any
ot er qualified person, approved and aut orised for carrying out t is kind of repair for avoiding any
danger. In any case, you must send t e appliance to t is electrician.
T is instruction manual is available too on our website www.livoo.fr
SPECIAL SAFETY INSTRUCTIONS
Information:
NEVER COVER THE APPLIANCE , even temporarily, because it
may over eat and generate a risk of fire.
Do not use t e fan near a s ower, bat tub or a swimming pool.

Instruction Manual
5
DESCRIPTION
1
. Misting Board
2. Front Grill
3. Misting Board Lock Screws
4. Blade Lock Nut
5. Blades
6. Grill Lock Nut
7. Back Grill
8. Motor S aft
9. Motor Cover
10.Grill Ring
11. Grill Lock Nut
12. Motor Holder
13. Connection Holder
14. Main Holder
15. Power Connection Line
16. Holder Fixed Screw
17. Main body
18. Water tank
19. Water Outlet Lock nut
20. Base
21. w eels
22. Base Lock Nut
23. Misting tube
24. Control panel
25. Remote panel
26. Decorate Panel

Instruction Manual
6
27. water Indicator
Control panel Remote Control
1. ON/OFF
2. MIST
3. TIMER
4. ION
5. SPEED
6. MODE
7. OSCILLIATION
8. MOSQUITO
TECHNICAL SPECIFICATIONS
Voltage : 220-240V~50-60Hz
Puissance : 90W
3 speeds
Water tank capacity: 3,1 L
Misting: 220ml/
Class II
Remote control works wit battery: 1X CR2025 included
Description Symbol
Value
nit
Maximum fan flow rate F 51,48 m3/min
Fan power input P 52,50 W
Service value SV 0,98 (m3/min)/W
Standby power consumption P
SB
0,24 W

Instruction Manual
7
Off mode power consumption P
off
0,23 W
Fan sound power level L
WA
66,14 dB(A)
Maximum air velocity c 3,70 meters/sec
Seasonal electricity consumption Q 17,07 kW /a
Meansurement standard for service value IEC 60879:1986
(corr.1992)
Contact details for obtaining more information
DELTA
BP61071
67452 Mundols eim – France
ASSEMBLING
Before first use, be sure to remove all packaging. Do not leave packaging suc as plastic bags, polystyrene,
cords wit in reac of c ildren to avoid any risk of accidents.
Warning: t e fan can be used only if completely and correctly assembled, i.e. wit base, support and
protective grill. If in doubt, ave it c ecked by professionally qualified personnel or ask t em to assemble
it.
Note: before assembling t e fan, ensure t at it is not plugged into t e mains. Refer to t e diagrams for
assembly.
1. Install t e five castors (21) on t e base (20).
2. Install t e body (17) into t e base (20), and use t e base lock nut (22) to screw on t e base tig tly.
3. Connect power connection line (15), and put it into t e main body (17), and tig t up by older fixed
screw (16).
4. Install t e back grill (7), and tig t up by grill lock nut (6) on t e motor cover (12)
5. Install t e blades (5) on to t e motor s aft (8), and anticlockwise by blade lock nut (4).
Installation
- Be sure to remove all packaging material from inside
t e appliance.
- Ensure t at t e fan is switc ed off from t e supply mains before start any installation or assembly
operation.
- T e appliance s ould be used wit its base fitted.
- Install misting board (1) on t e front grill (2) and screw up by misting board lock screws (3).
- Put t e front grill (2) and back grill (7) toget er, and screw to fasten by grill ring, and tig t up by grill lock
nut (11).

Instruction Manual
8
ATTENTION!
• Make sure t e product is unplugged from t e mains before filling or refilling t e water tank.
• Only use water in t e water tank. Do not add any c emicals, oils or ot er additives.
• Only use cold or lukewarm water in t e water tank. T e water must not be warmer t an 40°C.
Place the fan on a dry and stable surface and insert the plug on the socket; the unit will emit a short “BIP”
sound indicating that power is supplied. For your convenience the unit can be operated by using control
panel in the main body or by using remote control included.
Filling water:
- Pus t e water tank upward and remove t e water tank.
- Unscrew t e filler cap and fill wit water.
- Screw t e filler cap and put t e water tank back in position.
- CA TION: T e temperature of water s ould not be 40ºC above.
Operating t e ice box:
- Turn off t e appliance and pull out plug from t e electrical outlet.
- Take out water tank, and t en take out t e ice box from appliance.
- Put t e ice box into refrigerator for freezing
- After freezing, put t e ice box on water older make temperature lower.
- It can be reused.
Operating aroma tank:
- Take aroma case out on t e body rear s ell.
- Put several drops aroma liquid into t e aroma case, and
put t e aroma case back in position.
- Slowly t e aroma evaporates and be full of room w ile t e mist fan working.
Remote control:
T e remote control of your device works wit 1 x CR2025 battery. Insert t e battery into t e
compartment and close t e lid. Pay attention to t e insertion direction of t e battery.
If you do not use your remote for a long time, pull t e battery.

Instruction Manual
9
Fan function:
-Insert t e power cord into plug socket and ear a “beep” sound after power is connected work.
-Use remote control point to receive window and pus any button, various function work accordingly.
ON/OFF button:
- Firstly, pus ON/OFF button, t e indicator lig t is on.
- Secondly pus ON/OFF button, t e wind speed is in t e low level by default. Meanw ile, t e indoor
temperature s ows on t e panel.
T irdly pus ON/OFF button, all stop working, all indicator lig ts off.
Speed button:
- Firstly, pus speed button, t e wing speed is in t e medium level
- Secondly pus speed button, t e wind speed is in t e ig level
- T irdly pus speed button, t e wind speed returns to t e low level.
Mode button:
- Natural mode → Sleep mode → Normal mode
Natural mode: T e wind imitates t e blow of natural wind based on strong and soft wind.
Sleep mode: t e first alf our after running as strong and soft natural wind, it becomes med natural wind
and t e second alf our it c anges to soft natural wind until t e end of preset time.
Normal mode: T e wind blow based on Low/Med/Hig speed.
Mist function:
- Mist function can be used separately, or worked toget er wit t e fan.
- Firstly pus Mist button, t e mist spray in low volume.
- Secondly pus Mist button, t e mist spray in medium volume.
- T irdly pus Mist button, t e mist spray in ig volume.
- Note: W ile t e mist function work normally, t e indicator lig t on t e body s ell is blue, w ile t e water
is lacking, t e indicator lig t is red.
Oscillation function:
- T e oscillation function makes it possible to direct t e flow from t e apparatus so t at it automatically
alternates

Instruction Manual
10
over a range of 75º
- To activate t is function, pus t e OSC button. T e yellow lig t of OSC on .
- Press it again to stop oscillation, yellow lig t of Osc off.
Ionic function:
t is feature uses negative ions to remove some armful particles from t e air in your ome. It can
also destroy bad smells.
- T is function can be used separately, or worked toget er wit t e fan.
- Pus t e ion button, green lig t of Ion function on,
- Pus it again to stop working, t e green lig t of Ion function off.
Mosquito repellent function
- Mosquito repellent function can be used separately, or worked toget er
wit t e fan.
- Put t e mosquito repellent tablet (not included wit t e product) into its
ole on t e body rear s ell.
- W en t e unit is turned on in t e standby or ventilation mode, press t e Mosquito Repellent button and a
buzzer will sound and a lig t and room temperature will be displayed on t e control panel.
- Pus it again on mosquito button to stop working.
Note:
- Turn off t e power w en you replacing t e mosquito repellent tablet, wait for 10 minutes t en replacement
in order to avoid burns or electric s ock.
- Please keep t e mosquito repellent tablet out of reac c ildren and vulnerable people.
- Do put t e mosquito repellent tablet in contact wit eyes or mout . If put in mout by accident, was
mout and seek medical care immediately.
Timer function:
-
W en t e unit is in operation press t e Timer button, a beep sound.
- Eac pressure adds 1 of operation from 1 to 12 and t e selection is displayed on t e control screen.
- During t e timer setting t e selected time and room temperature will be displayed on t e control panel
every 5 seconds alternately. T e number of ours displayed on t e screen will decrease as you go.
- After t e selected time is complete, t e unit will stop automatically.
- Note: W ile t e mist function work normally, t e indicator lig t on t e body s ell is blue, w ile t e water
is lacking, t e indicator lig t is red.
plus or minus pole.

Instruction Manual
11
CLEANING AND MAINTENANCE
1. First ensure t at t e fan is off and remove t e electric plug from t e outlet.
2. Do not clean until t e appliance is completely cold.
3. Remove t e protection and t e blades carefully. Do not let t e blades fall!!
4. First use a soft clot wit a little soap for removing stains. T en wipe wit a dry clot . Never use a
corrosive liquid w ic would damage t e paint, metal or plastic!
5. Reassemble t e fan after t e fan parts ave been dried completely. Do not connect t e fan to
power supply until it is fully reassembled.
6. Maintenance s ould be done by qualified personnel. T e motor bearings ave been lubricated at
t e factory and s ould not require any additional lubrication.
7. Never use abrasive cleaning agents or pointy objects (for e.g. scrub brus or knife) for cleaning.
Never use a corrosive liquid w ic would damage t e paint, metal or plastic!
8. Warning: Do not submerge t e appliance in water or ot er liquids. It is a danger to life due to an
electric s ock.
9. W en t e appliance is not used, store it as well as all its accessories and t e instruction manual in
a safe and dry place.
Correct disposal of the unit
(Electrical and Electronic Equipment)
(Applicable in t e European Union and t e rest of Europe t at ave adopted separate collection systems
countries)
T e European Directive 2012/19/EU on Waste Electrical and Electronic Equipment (WEEE), requires t at old
ouse old electrical appliances must not be disposed of in t e normal ouse old waste stream.
Old appliances must be collected separately in order to optimize t e recovery and recycling of t e materials t ey contain and
reduce t e impact on uman ealt and t e environment.
T e symbol of t e crossed out dustbin is marked on all products to remind t e obligations of separate collection.
Consumers s ould contact t eir local aut ority or retailer for information concerning t e correct disposal of t eir product.
•P oto no contractual
• Worried about t e quality of is products t e manufacturer reserves t e rig t to make modifications wit out advance
LIVOO
BP 61071
67452 Mundolsheim cedex - FRANCE
Table of contents
Other Livoo Fan manuals
Popular Fan manuals by other brands

nedis
nedis FNCL10 20 Series quick start guide

Broan
Broan ULTRA SILENT QTXE150 Specification sheet

Applica
Applica C163CM Use and care book

Harbor Breeze
Harbor Breeze E-TM52BNK5LED installation guide

Valor
Valor Legend G4 Series Installation and operating instructions

Home Decorators Collection
Home Decorators Collection HERITAGE POINT AM909-CB manual

Xpelair
Xpelair GX12 Installation and operating instructions

Kambrook
Kambrook KTF840 Instruction booklet

JOCCA
JOCCA 2236 instruction manual

Monte Carlo Fan Company
Monte Carlo Fan Company 5GP60 Series owner's manual

Fanimation
Fanimation ROTATION FP8018 series manual

Stadler Form
Stadler Form Leo operating instructions