Livoo DOM446 User manual

Instruction Manual
WWW.LIVOO.FR
Reference: DOM446
Version: 1.4
Language: English
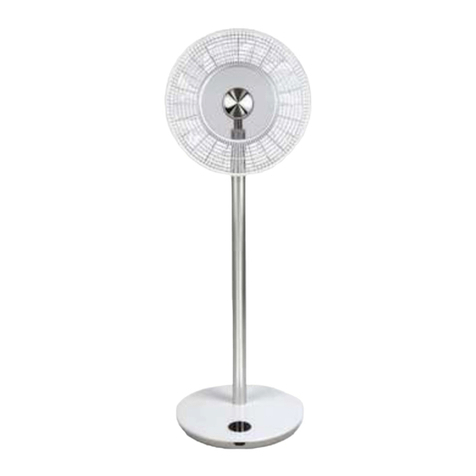
Tri od fan

Instruction Manual
1
You have urchased a LIVOO brand roduct and we thank you for it. We give great attention to the design,
ergonomics and ease of use of our roducts. We ho e that this roduct will give you com lete satisfaction.
SAFETY INSTRUCTIONS
PLEASE, TAKE TIME TO READ WELL THE INSTRUCTIONS FOR USE
PARTICULARLY BEFORE THE FIRST USE.
A misuse of the a liance can damage it or hurt the user. Assure
that you use the a liance for the use for which it is designed, we
refuse any res onsibilities as for the damages by an incorrect use
or a bad mani ulation.
1. Before connecting your a liance, verify that the
su ly voltage indicated on the indicator late of the
a liance corres onds ro erly to that of your
electrical installation.
2. No res onsibility may be assumed in case of damages
caused by non-com liance of this manual by the user
or by faulty use or handling.
3. This a liance is meant for ONLY DOMESTIC USE and
FOR INTERNAL USE.
4. Use this a liance only as indicated in the instruction
manual.
5. Com letely assemble the fan before starting it.
6. Before each use, ensue that the su ly cord is in good
condition.
7. If the su ly cord is damaged, it must be re laced by
the manufacturer, its service agent or similarly
qualified ersons (*) in order to avoid a hazard.

Instruction Manual
2
8. Never lunge the a liance, its su ly cord or the lug
in water or any other liquid.
9. Do not handle the lug on the a liance with wet
hands.
10.This a liance can be used by children aged from 8
years and above and ersons with reduced hysical,
sensory or mental ca abilities, or lack of ex erience
and knowledge if they have been given su ervision or
instruction concerning use of the a liance in a safe
way and understand the hazards involved. Children
shall not lay with the a liance. Cleaning and user
maintenance shall not be made by children without
su ervision.
11. Young children, old eo le or disabled eo le must not
be directly ex osed to the air from the fan for long
eriods.
12. When you disconnect the su ly cord, always remove
it from the lug. Do not ull on the cord itself.
13. Always disconnect the a liance from its lug oint
when the a liance is not used, before moving it or
cleaning it.
14. Ensure that the fan is switched off from the su ly
mains before removing the guard.
15. Never insert your fingers, crayons or any other object
across the ventilation grills.
16. Ensure that the fan is always laced on a flat surface,
dry and stable.
17. Do not use your fan close to a window. Rain may cause

Instruction Manual
3
risks of electric shocks.
18. Do not use chemical roducts or abrasive detergents
for cleaning, which may easily damage or deform your
a liance.
19. Do not lace either the fan or its arts near an over, a
cooking a liance or any other source of heat.
20. Do not use the a liance in the resence of ex losive
or inflammable va ours.
21. Never try to disassemble or re air your a liance
yourself. In case of re air by an unqualified erson, the
guarantee is cancelled.
22. For reducing the risk of electric shock, never use this
roduct with wet hands, never s ill a liquid on the
roduct or submerge it in water.
23. Direct surveillance is necessary when your a liance is
used near children or disabled ersons.
24. Do not lace the a liance on or near a hot gas or in a
heated oven.
25. Do not use outside (For internal use only). This
a liance is not suitable for industrial or o en air use.
26. Never leave the a liance working without
surveillance.
27. Avoid overheating the device by reventing the
blocking of entry and exit of air. Clean all the entries
and exits from time to time to remove the accumulated
dust.
28. Leave a safe s ace of 50 cm around the fan, on above
and on the sides, and a safe s ace of 120 cm on the

Instruction Manual
4
front.
29. This a liance is not designed to be used with an
external timer or a se arate remote control system.
30. Do not try to remove the arts and do not insert a
metallic object inside the a liance.
31. Ensure that the fan is switched off from the su ly
mains before removing the guard.
32. This a liance is intended to be used in household and
similar a lications such as:
•staff kitchen areas in sho s, offices and other
working environments
•farm houses
•by clients in hotels, motels and other
residential ty e environments
•bed and breakfast ty e environments.
(*)
Authorised qualified electrician: after-sales de artment of the manufacturer or the im orter or any
other qualified erson, a roved and authorised for carrying out this kind of re air for avoiding any
danger. In any case, you must send the a liance to this electrician.
This instruction manual is available too on our website www.livoo.fr
SPECIAL SAFETY INSTRUCTIONS
Information:
NEVER COVER THE APPLIANCE , even tem orarily, because it
may overheat and generate a risk of fire.
Do not use the fan near a shower, bathtub or a swimming ool.

Instruction Manual
5
TECHNICAL SPECIFICATIONS
Voltage: 220-240V~ 50 Hz
Power: 50W
3 S eeds
Description Symbol
Value
Unit
Maximum fan flow rate F 52,40 m3/min
Fan ower in ut P 42,90 W
Service value SV 1,20 (m3/min)/W
Standby ower consum tion P SB N/A W
Off mode ower consum tion P off N/A W
Fan sound ower level L WA 67 dB(A)
Maximum air velocity c 3,4 meters/sec
Seasonal electricity consum tion Q 13,70 kWh/a
Meansurement standard for service value IEC 60879:1986
(corr.1992)
Contact details for obtaining more information
DELTA
BP61071
67452 Mundolsheim – France

Instruction Manual
6
DESCRIPTION
1. Front Guard
2. Fan Blade
3. Blade Screw
4. Rear Grill Screw x 4
5. Real Grill
6. Carry Handle
7. Motor Shaft
8. Oscillation Knob
9. S eed Control
10. Motor Unit
11. Tilt Adjustment
Screw
12. (Neck) Fixing Bolt
13. Locating Screw
14. Neck fixing Nut
15. Inner Pi e
16. Tri od Bracket with
Height Adjustment
Screw (not shown)
17. Tri od base
18. Plastic Ring
19. Grill
20. Grill Locking Screw
21. Front Name Plate
22. End Ca (for legs)

Instruction Manual
7
TRIPOD ASSEMBLING
1. To Ensure stability of the Tri od base ull each leg outwards until it latches or clicks in lace on the
Tri od bracket. Place the Tri od base u right on the floor.
2. Loosen the height adjustment screw and insert the inner i e to the tri od base.
3. Slide the lastic ring onto the inner i e from the bottom of the assembly. Fix it in lace using the
screw. This revents the inner i e from being ushed out when adjusting the height.
4. Attach the end ca to the bottom of the Inner i e.
FAN GRILL ASSEMBLING
1. Align the rear grill on the motor unit (with carry handle u wards) and screw in the 4 rear grill
screws to fix it in lace.
2. Place the fan blade on to the motor shaft and secure it using the blade screw.
3. Hold the front grill against the rear grill making sure that the front name late is horizontal secure it
together by sna ing the grill cli s into lace.
4. To finish assembly, tighten the grill locking screw at the bottom of the rear grill.

Instruction Manual
8
USE
Before the first usage
-Read these instructions before use and kee them safe. If you give this fan to someone, also give them
the instructions.
-Remove all the ackaging but retain them till you are satisfied that the fan works.
-Com letely unwind the su ly cord and insert the electric lug in a earthed lug oint on the wall.
-The fan is now ready
1. Ensure that the local voltage corres onds to the voltage of the a liance.
2. Turn the s eed knob for selecting the s eed: 0 (off) and s eeds I, II, III corres ond to Low,
Medium, and High.
3. Pull or ush oscillation knob to turn oscillation on/off
4. By su orting the slo e rotection, you can adjust the height and angle to your choice.
5. Never touch the blades with hands or an object!
6. Do not ull too much on the cord. If it is damaged after a long use, get it re aired by an
electrician.

Instruction Manual
9
CLEANING AND MAINTENANCE
1. First ensure that the fan is off and remove the electric lug from the outlet.
2. Do not clean until the a liance is com letely cold.
3. Remove the rotection and the blades carefully. Do not let the blades fall!!
4. First use a soft cloth with a little soa for removing grease stains. Then wi e and olish with a dry
cloth. Never use a corrosive liquid which would damage the aint, metal or lastic!
5. Reassemble the fan after the fan arts have been dried com letely. Do not connect the fan to
ower su ly until it is fully reassembled.
6. Always ensure that the blades are returned and locked in osition after cleaning and before
inserting the lug into the lug oint.
7. Maintenance should be done by a qualified ersonnel. The motor bearings have been lubricated
at the factory and should not require any additional lubrication.
8. Never use abrasive cleaning agents or ointy objects (for e.g. scrub brush or knife) for cleaning.
Never use a corrosive liquid which would damage the aint, metal or lastic!
9. Warnin : Do not submerge the a liance in water or other liquids. It is a danger to life due to an
electric shock.
10. When the a liance is not used, store it as well as all its accessories and the instruction manual in
a safe and dry lace.

Instruction Manual
10
Correct disposal of the unit
(Electrical and Electronic Equipment)
(A licable in the Euro ean Union and the rest of Euro e that have ado ted se arate collection systems
countries)
The Euro ean Directive 2012/19/EU on Waste Electrical and Electronic Equi ment (WEEE), requires that
old household electrical a liances must not be dis osed of in the normal household waste stream.
Old a liances must be collected se arately in order to o timize the recovery and recycling of the
materials they contain and reduce the im act on human health and the environment.
The symbol of the crossed out dustbin is marked on all roducts to remind the obligations of se arate collection.
Consumers should contact their local authority or retailer for information concerning the correct dis osal of their roduct.
•Photo no contractual
• Worried about the quality of his roducts the manufacturer reserves the right to make modifications without advance
LIVOO
BP 61071
67452 Mundolsheim cedex - FRANCE
Table of contents
Other Livoo Fan manuals