Logik LCXW32HD1 User manual

LCXW32HD1
LCXW37HD1

- 1 -
TVSafetyWarning
Damage
Never use your TV if it is damaged in any way. Always place your TV on a flat level surface avoiding
anywhere that may be subject to strong vibration.
Weather
It is advisable to unplug the aerial during an electrical storm.
Temperature
Avoid extremes of temperature, either hot or cold, place your TV well away from heat sources such as
radiators or gas/electric fires.
Naked Flames
Naked flames such as candles and night-lights should not be placed on or near your TV.
Ornaments
Vases and other water containers or lamps should not be put on top of your TV set.
Moisture
Do not allow your TV to be exposed to rain, moisture, dust. If any liquid is spilt into your TV it can cause
serious damage. If you spill any liquid into your TV switch it off at the mains immediately. Contact your store.
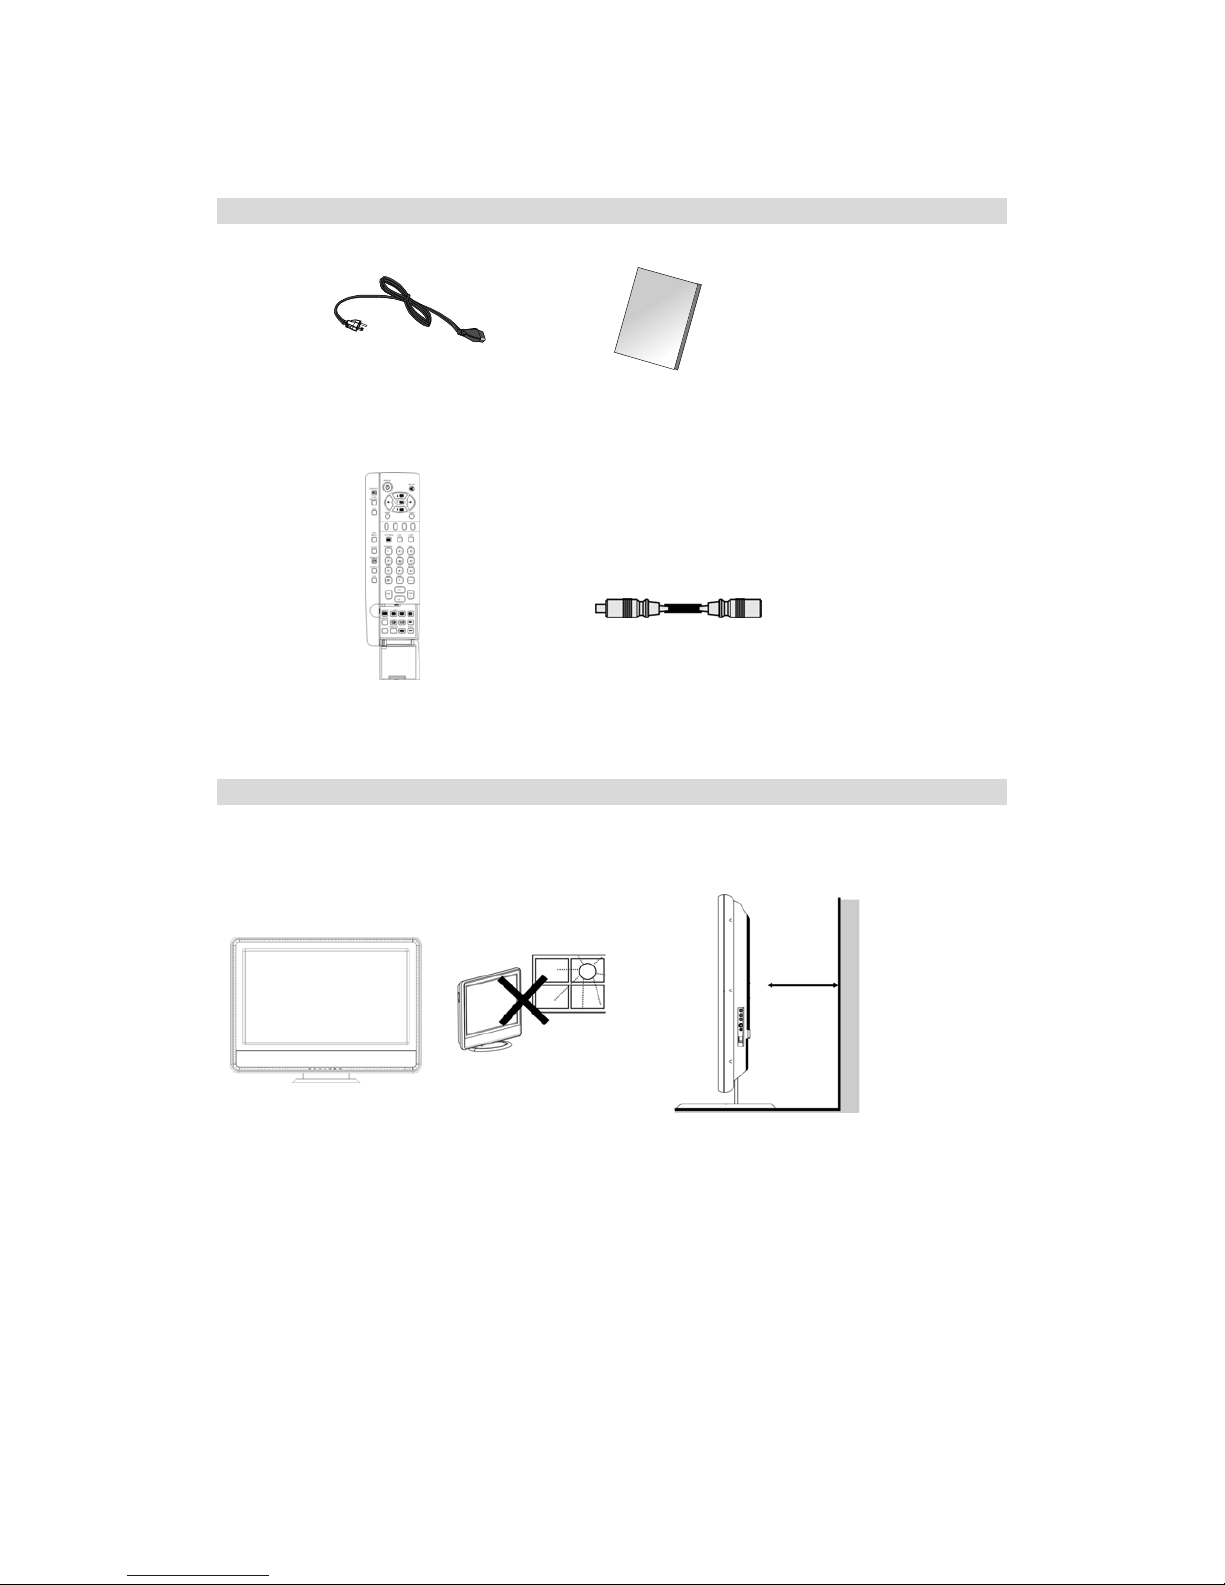
Ventilation
The TV must be well ventilated. Do not cover your TV or place it inside a small confined space. Make sure
that there is a gap of at least 10cm on both sides and 20 cms at the top.
Interference
Do not place your TV on or near appliances that may cause electromagnetic interference (TV or Hi-Fi
speakers). If you do, it may adversely affect the working of the unit, and cause a distorted picture or sound.
Batteries
Young children easily swallow batteries. Do not allow young children to play with the remote control unit.
Covers
Do not remove any fixed covers as this may expose dangerous voltages.
Standby
The standby button on the remote control doesn't switch off the TV completely and the TV will continue to
draw electricity from the mains supply. Therefore in the interests of safety and to avoid unnecessary energy
consumption, never leave your TV in standby while unattended for long periods of time, eg. overnight, while
on holiday or while out of the house.
Power Cord
Make sure your TV or TV stand is not resting on top of the power cord, as the weight of the TV may damage
the cord and create a safety hazard.
Packaging
If you can store the packaging it will prove useful should you need to transport the TV to protect it while it is in
transit. Try to reuse packaging wherever you can. If you cannot store it, contact your local authority for details
of your nearest recycling facilities.

- 2 -
Contents
TV Safety Warning……………………………………………………………………………………………………………..….
Accessory List…………………………………………………………………………………………………………………..….
Where to place the TV……………………………………………………………………………………………………………..
Overview Description
Panel Description……………………………………………………………………………………………………………..……. 7
Bake Panel Description…………………………………………………………………………………………………………..…8
Remote Control Unit……………………………………………………………………………………………………...……….
Inserting The Batteries……………………………………………………………………………………………………………
Connections
Antenna Connections………………………………………………………………………………………………………………12
YPbPr/YCbCr (Component) Connections ……………………………………………………………………………….……….13
Select viewing source ………………………………………………………………………………………………………..……..13
S-Video and Video(Component) Connections…………………………………………………………………………..………..14
PC Connections ………………………………………………………………………………………………………………..……14
Scart Connections ………………………………………………………………………………………………………..…………15
HDMI/DVI Connections ……………………………………………………………………………………………………..……...16
Basic Operation(TV) …………………………………………………………………………………………………….…….15-20
Menu Operation
Picture Menu……………………………………………………………………………………………………………………..
Sound Menu………………………………………………………………………………………………………………………
Channel Menu……………………………………………………………………………………………………………………
Window Menu…………………………………………………………………………………………………………………….
Setting Menu……………………………………………………………………………………………………………………..
VOG………………………………………………………………………………………………………………………………….32
Teletext…………………………………………………………………………………………………………………………….33-34
Section of DVB-T
Preparation
Connection………………………………………………………………………………………………………………………...
Switching On…………………………………………………………………………………………………………………….…
Tuning In………………………………………………………………………………………………………………………..…
1
4
4
5
6
7-8
9
10
11
11
12
12
13
14
21
22
23-27
28
29-31
35
35
35

- 3 -
Contents
Base operation (DTV)
Change Channel……………………………………………………………………………………………………………………..
Information Banner…………………………………………………………………………………………………………………..
Audio Control…………………………………………………………………………………………………………………………
Digital Teletext…………………………………………………………………………………………………………………………
Remote Control……………………………………………………………………………………………………………………….
Channel List Management……………………………………………………………………… ……………………………...39-40
Favourite List Management………………………………………………………………………………………………………...41
Using EPG(Electronic Programme Guide)
Now/Next EPG…………………………………………………………………………………………………………………………42
List Schedule EPG…………………………………………………………………………………………………………………….42
Timeline Schedule EPG……………………………………………………………………………………………………………….43
Common Interface…………………………………………………………………………………………………………………...44
Timers………………………………………………………………………………………………………………………………….45
Setting
Configuration……………………………………………………………………………………………………………………….46-48
Language……………………………………………………………………………………………………………………………….49
Installation…………………………………………………………………………………………………………………………..49-50
Trouble Shooting…………………………………………………………………………………………………………………….
Screen Burn…………………………………………………………………………………………………………………………
Maintenance…………………………………………………………………………………………………………………………
Specifications………………………………………………………………………………………………………………………..
Visit Partmaster.co.uk today for the easiest way to buy electrical spares and accessories.
With over 50,000 products in stock we can deliver direct to your door the very next day.
Visit www.partmaster.co.uk
or call
0870 6001 338
(UK customers only)
Calls charged at National Rate.
51
52
53
54
36
36
37
37
38

- 4 -
Accessory List
Where to place the TV
1.First select the location where to place the TV. 2.Setting the TV
SelectingthelocationoftheTV HandlingtheDisplay
Caution:
•Select a place with no direct sunlight and good ventilation.
•Do not remove the stand from the display unless using a proper bracket to mount it.
•Keep enough space above and behind the display.
•Make sure to move the TV with two or more people.
•When you move the display, hold the part of the display, not the speaker.
4 inches
(10 cm)
or more
User'smanual
Power Cord (×1)
*062227/8
Ope
r
a
ti
o
n m
a
n
ua
l
Remote control unit (×1)
*VURRC301V5
A
ntenna cable (×1)
(Aerial)

- 5 -
PanelDescription
①Bottom speaker
②Bottom speaker
③Remote control sensor
④Standby indicator
⑤SOURCE
Press to display the menu of the available viewing source.
⑥MENU
Press to display the OSD menu. The button also acts as select button ‘’OK’’ in source
menu.
⑦CH+/-
Press to change the channel. The two buttons also act as direction buttons in menu
display.
Under the DTV station, only the CH+/- button on the remote control can be worked
for channels changing; the CH+/- button on the front board can't work.
⑧VOL+/-
Press to adjust volume. The two buttons also act as direction buttons in menu
display.
⑨STANDBY
Turn on/standby the TV.

- 6 -
Back Panel Description
Power Switch
Headphone Output
EXT2
EXT1 PC IN HDMI/DVI IN
Rear interface:
S
i
de
int
e
rf
ace
:
DVB Update
POWER
A
udio In Component In
PC Audio In
Optical
TV Update
Digital Out Digital Antenna In
PCMCIA PlugRF
S-Video input
A
udio input
Video in put

- 7 -
Remotecontrolunit
1 STANDBY
Turn on/standby the TV.
2 SOURCE
Select an input source. (TV, AV, PC,EXT1, EXT2, DTV, HDMI,
Component)
3 LAST SOURCE
4 DTV/TV
Switch to Digital-TV mode / TV mode .
5 MENU
Display the menu screen.
6 Colour (RED/GREEN/YELLOW/BLUE)
TELETEXT mode: Select a page.
DTV input mode: The coloured buttons are used to select
correspondingly to the coloured items in the menu screen.
7 DTV MENU
DTV input mode: Display the digital TV menu screen.
8 TXT/MIX
Select the TELETEXT mode.
9 GUIDE
DTV input mode: To Display EPG
(Electronic Programme Guide) screen.
10 DISPLAY
Display the programme information.
11 SUBTITLE
To turn the subtitles on and off.
12 VOG
VOG means video on graphic.
13 LAST
Press to return to the previous channel.
14 VOL-/VOL+
Set the volume.
15 ASPECT
Picture proportion.
16 Teletext Sub page
17 FREEZE
TV/External input mode: Change the still image mode.

- 8 -
Remotecontrolunit
18 Teletext Sub page up
19 Workless button
20 VIDEO OFF
Nor-Picture
21 MUTE
Mute the sound.
22 ▲▼◄► (Direction)
Select a desired item on the setting screen.
23 OK
Execute a command.
24 EXIT
Turn off the On Screen Display.
25 LIST
Browse the channel list.
26 FAV
DTV input mode: Browse the favourite list.
27 0-9
TV/DTV/External input mode: Set the channel.
TELETEXT mode: Set the page.
28 DUAL
Set the dual mode.
29 CH+/ CH -
Select the channel.
30 TELETEXT HOLD
TELETEXT mode: Freeze a multi-page on screen
while other pages are automatically updated.
31 Reveal hidden for TELETEXT
TELETEXT mode: Display hidden characters.
32 TELETEXT Sub page down
33 PAGE
34 SIZE
TELETEXT mode: Teletext Characters zoom in.

- 9 -
Insertingthebatteries
Before using the System for the first time, insert two “AA” size batteries. When the batteries become depleted
and the remote control fails to operate, replace the batteries with new “AA” size batteries.
1 Open the battery cover. 2Insert two supplied “AA” size batteries. 3Close the battery cover.
• Place batteries with their terminals
corresponding to the (+) and (-)
indicationsinthebatterycompartment.
Caution
Improper use of batteries can result in chemical leakage or explosion. Be sure to follow the instructions
below.
• Place the batteries with their terminals corresponding to the (+) and (-) indications.
• Do not mix batteries of different types. Different types of batteries have different characteristics.
• Do not mix old and new batteries. Mixing old and new batteries can shorten the life of new batteries or
cause chemical leakage in old batteries.
• Remove batteries as soon as they have worn out. Chemicals that leak from batteries can cause a rash.
If you find any chemical leakage, wipe thoroughly with a cloth.
• The batteries supplied with this product may have a shorter life expectancy due to storage conditions.
• If you will not be using the remote control unit for an extended period of time, remove the batteries from it.
Using the remote control unit
1 Make sure there are no objects between the remote control and its sensor.
2 Don't place the remote control near a heater or in a damp place. A strong impact on remote control may
damage it.
3 Signal from the remote control may be disturbed by sun light or other strong light. In this case, darken the
room.
4 When using the remote control, please aim at the sensor within 7 meters and don't deflect angle more than
30 degrees.

- 10 -
Antenna(Aerial)Connections
To enjoy a clearer picture, use an outdoor antenna. The following is a brief explanation of the types of
connections that are used for coaxial cable.
For Example: For viewing both analog and digital broadcasts
For Example: For viewing analog broadcasts
*If you have a 75 ohm round cable, insert the bronze wire and then tighten the connection nut.
*When using 75 ohm round cable, please do not bend the bronze wire, it may make the video quality poor.
7
5
o
hm R
ou
n
d
Cab
l
e
For viewing only digital broadcasts, you do not need to connect the
antenna cable (supplied).
7
5
o
hm R
ou
n
d
Cab
l
e

- 11 -
YPbPr/YCbCr(Component)Connections
Note:
Please refer to the illustration above to connect TV with DVD player or other component signal sources.
Connect YPbPr/YCbCr Cable and Audio Cable to corresponding jacks of DVD player or other component
signal sources.
Please choose "Component" in the Source menu when you connect component signal source.
Select viewing source:
Press the "SOURCE" button to display the sources list.
Please use numerical buttons directly to select desired signal, or use the direction to select desired signal and
then press the "OK" button to confirm.
Aud
i
o
YP
b
Pr
/
Y
CbC
r

- 12 -
S-VideoandVideo(Composite)Connections
Note:
1.Please refer to the illustration above and in the last page to connect TV with S-Video or other composite
signal sources. Connect S-Video/composite video cable and audio cable to corresponding jacks of DVD
player or other composite signal sources. Please choose "AV" in the Source menu when you connect DVD
player.
2.When S-Video and composite video are connected at the same time, S-Video would be employed to
approach the best video effect. If composite video is necessary, please disconnect S-Video.
How to select viewing source (''AV'')
Please refer to page 11.
PC Connection
Note:
1.Please refer to the illustration above to connect TV with PC or DVD player. Connect VGA Cable and
Audio Cable to the corresponding jacks of PC and select the signal source as "PC".
2.If you connect VGA Cable to disc player or STB, please select "PC" and set the output mode as "PC".
Please choose PC in the Source menu when you connect disc player or STB with VGA source out.
How to select viewing source (''PC'')
Please refer to page 11.
S-Video or composite signal output
A
V Cable
S
-Vi
deo
Cab
l
e
VGA Cable
Aud
i
o
Cab
l
e

- 13 -
Scart Connections
Scart connections (Example)
Note:
Please refer to the above illustration to connect TV with DVD player.
Connect Scart Cable to the corresponding jacks of DVD player or other devices. Please choose "EXT1",
EXT2 in the Source menu when you connect DVD player or other sources with Scart connection.
How to select viewing source (''EXT1/EXT2'')
Please refer to page 11.
Input/Output Specification:
Input Output
Connector CVBS S-Video RGB CVBS
EXT1 √√TV
EXT2 √√TV/AV(CVBS)/EXT1(CVBS)/EXT2(CVBS)
Note:
1.The signal type inputted to EXT1 will be detected automatically.
2.Select the desired signal type on "Source Setting” in the "Setting" menu---only for EXT2.
The setting will be stored and can be viewed on "SOURCE" menu.(See page 30)
Scart Auto Playback Function:
1. Support the Auto Playback between TV and EXT sources.
2. When signal is lost , the searching preference: EXT1,EXT2,TV.
For example:
1. If you connect EXT 2 when you are watching program signal from EXT 1, the TV will display signal
from EXT 2 automatically.
2.If you disconnect EXT 1 when you are watching program from it (or turn off the signal source from
EXT 1, and there are no signals from EXT 2, the TV will play TV source automatically).
Scart Cable

- 14 -
HDMI/DVIConnections
Picture A
Picture B
Connect TV with corresponding jacks on DVD or STB, and switch the source to HDMI in Source menu.
(Picture A/B)
1.If connecting with an HDMI cable, it is not necessary to connect an audio cable.
2.If connecting to equipment that has only a DVI output terminal, DVI -HDMI adapter cable and an audio
cable are necessary. Audio cable is necessary (Picture B).
When connecting with HDMI, you can get better audio effect by connecting digital audio signal device to other
playing devices like an amplifier through Optical connector. (Picture C)。
How to select viewing source (''HDMI'')
Please refer to page 11.
HDMI
Cab
l
e
HDMI/DVI
A
udio Cable
DIGITAL OUT (HDMI)
O
p
tical Cable
(
Pi
c
t
u
r
eC)

- 15 -
BasicOperation
Power on/Power off
1.Plug the power cable into the jack; make sure the output voltage and frequency of the power is consistent
with this machine.
2.Power on the switch on the side cover, the red light on the front board will be lighted, then the TV enter
standby mode. Press " STANDBY " button in remote control or "STANDBY" touch key on the front board,
the indicator change into green. The TV enter Play mode.
3.Press " STANDBY " button on the remote control to power off the TV, and the TV will enter standby mode,
the indicator change from green to red. Close the main power switch and it will stop working.
Note: Please draw out the plug when you won't use it for long time.
Initial Auto Installation
When the TV powers on for the first time after purchase, the Initial Auto Installation is involved.
You can automatically set teletext language, sound system and channels in successive operations.
Note: The initial auto installation functions only once.
1.This menu will display on the TV screen automatically after the
TV being turned on for the first time.
Press "OK" button to choose "Next" to start.
2.Settingtheteletextlanguage
Press "▲/▼/◄/►" button to select your teletext language on the
screen.
Press "OK "to enter the setting.
Then select the "Next" and press "OK" button to enter
next the setting,
3. Set sound system
Press "▲/▼/◄/►" buttons to choose the optimum
sound system among locally receivable broadcasting systems
"DK/BG/I/L’/L". Then press "OK" to confirm.
Press "►" to enter "Next" and then press "OK" to enter the setting,
or press "◄/►" to choose "Cancel" or "Back".

- 16 -
BasicOperation
4.Channel Preset
Press "OK" to start the auto search, or press " ◄/►" to choose
"Back" or "No".
You do not need to do anything during the auto search.
5. Auto Search
Press "EXIT" to stop the auto search, but you are recommended
not to stop it during the search process since the initial auto
installation functions only once.
6. After the auto search finished, the finishing sign menu will display on the screen. Then the TV will stop at
channel one.
7. Watching TV
The set up menu disappears and you can watch the program on channel 1. To arrange these channels into
your chosen order please see "Exchange Channel" on page 24.

- 17 -
BasicOperation
Channel Shift
●In TV mode, press " " button to select next channel, and press " " button to select previous
channel. Or use the touch button "CH+/- " to adjust (P7).
●Press " " button to return to the previous channel which you were watching just now.
For example:
Channel 5 is the previous one you just watched, and channel 10 is the current one you are watching. If you
press the button, the TV set will skip to channel 5. Press it again to return to channel 10.
Direct Select
●Select a one-digit channel: Press (1-9) directly to select your desired channel.
●Select two-digit channel: Press (1-9 )to input the first digit and press 0-9 to input the second digit.
●Select three-digit channel: Press (0-9) to input the three digits in turn(100-199).
Volume Adjust
●Press " / " button to increase or decrease the speaker volume.
Or use the touch button "VOL+/- " to adjust (P5).
Earphone Volume Adjust
In Earphone works:
●Press " / " button to increase or decrease the earphone volume.
Or use the touch button "VOL+/- " to adjust (P5).

- 18 -
BasicOperation
Display Status
●In TV mode, press the " " button, the screen will display the Current channel number/Channel
name/Sound System/Dual Mode/Mute Status/Freeze Status.
●In PC / Component / HDMI mode, press the '' '' button, the screen will display Resolution/
Source/Mute Status/Freeze Status.
●In DTV mode, press " " at any time will display the information banner, Press the " " key again
removes the banner.
●In other modes different from above, the screen will display Source/Mute Status/Freeze Status.
Aspect Ratio
●Press " " button, the following window will be displayed on the screen.
Press '' ◄/►'' buttons or ''Aspect'' button to select your favourite mode. Seven options:
Full Screen/4:3/Wide/Subtitle/zoom 14:9/zoom 16:9 / Standard.
Note:
1. Support "Auto Scale Mode".
2. Auto scale mode: In " Standard" mode, AV,TV,EXT source will change the aspect ratio automatically
according to the input signal to get perfect aspect ratio.
Close video
●Press " " button to enjoy music without video. Press again to recover video.
A
spect Ratio Full Screen

- 19 -
BasicOperation
Browse the channel list
●Press " " button, the Channel list will display on screen.
Use direction buttons to select specific channel. Use " " and " " button to switch the listing page.
Press the "EXIT" button to quit.
Rename Channel
You can rename the channel when you are browsing the channel list.
●Press "LIST" button, the Channel list will be displayed on screen.
Use direction buttons to select specific channel. Press "OK" button confirm.
●Press "OK" button again, the Rename Channel window will be displayed on the screen as follows.
Note: You can input letters by numerical buttons on the remote control.
For example:
If you want enter "AV01", press twice, press four times continuously,
then enter the once & once . When finishing, you can press ''OK'' to save it.
This manual suits for next models
1
Table of contents
Other Logik TV manuals

Logik
Logik LCX17LN2 User manual

Logik
Logik L423ED11 User manual

Logik
Logik LCXW30NN6 User manual

Logik
Logik L32HE13 User manual

Logik
Logik L23IP11 User manual

Logik
Logik L26FE12 User manual

Logik
Logik L19HE12 User manual

Logik
Logik L26DVDB20 User manual

Logik
Logik L17LID648 User manual

Logik
Logik L323ED11 User manual

Logik
Logik L32LW783 User manual

Logik
Logik L22FEDV12 User manual

Logik
Logik L26DVDB21 User manual

Logik
Logik L32HED12 User manual

Logik
Logik L24FE13 User manual

Logik
Logik LCXW19LN2D User manual

Logik
Logik L26FE12I User manual

Logik
Logik L323CD11 User manual

Logik
Logik LOG32LW782 User manual

Logik
Logik L423CD11 User manual