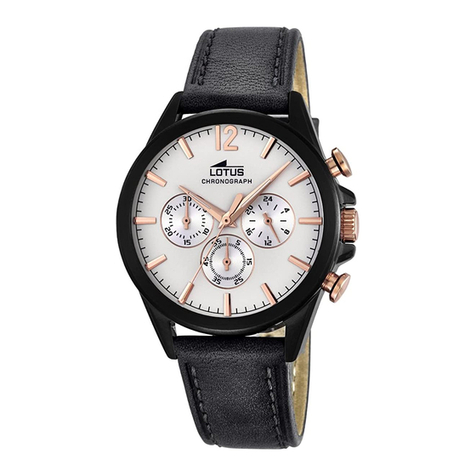
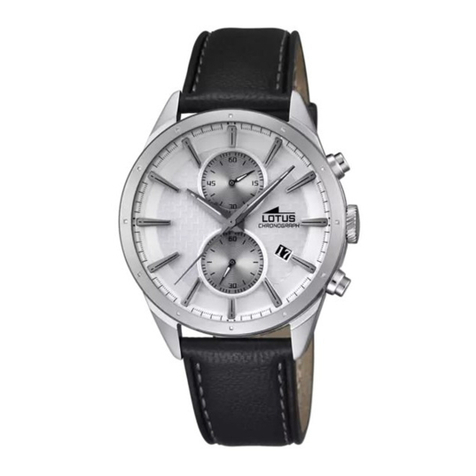
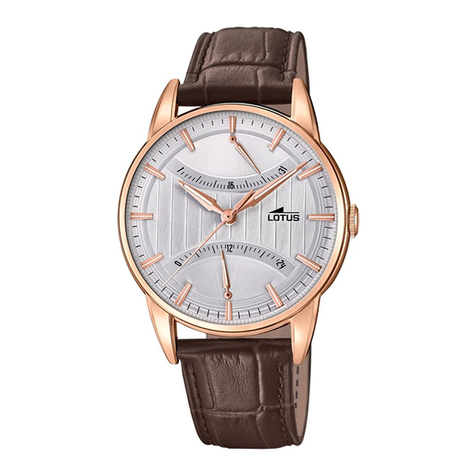
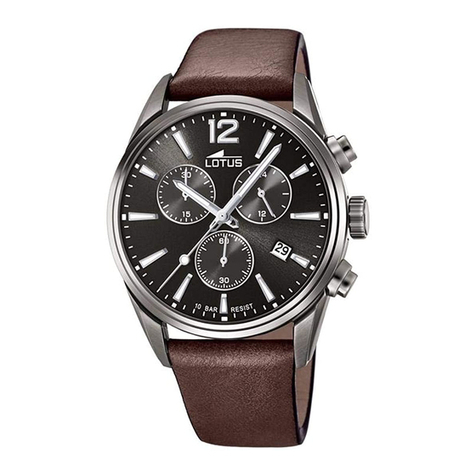
Lotus ILM0S49 User manual

CHRONOGRAPH
CALENDAR
ILM0S49
MANUAL DE INSTRUCCIONES
INSTRUCTION MANUAL
MANUEL D’INSTRUCTION
BETRIEBSANLEITUNG
MANUALE DI FUNZIONAMENTO

ILM0S49
CRONOGRAPH
CALENDAR
MANUAL DE INSTRUCCIONES_____________________________________________________________________________________________5
INSTRUCTION MANUAL_______________________________________________________________________________________________________ 13
MANUEL D’INSTRUCTION___________________________________________________________________________________________________ 21
BETRIEBSANLEITUNG____________________________________________________________________________________________________________ 29
MANUALE DI FUNZIONAMENTO_____________________________________________________________________________________ 37

5
MANUAL DE INSTRUCCIONES
CRONÓMETRO
ESPAÑOL
ILM0S49
Visualización y botones_____________________________________________________________________________________________________________________ 6
Ajuste de la hora _______________________________________________________________________________________________________________________________ 7
Ajuste de la fecha______________________________________________________________________________________________________________________________ 7
Uso del cronógrafo ___________________________________________________________________________________________________________________________ 8
Reinicio del cronógrafo (incluso después de cambiar la pila)__________________________________________________ 9
Ajuste de las manecillas _______________________________________________________________________________________________________________ 10
Taquímetro ______________________________________________________________________________________________________________________________________ 11

67
ILM0S49 ILM0S49
Español
VISUALIZACIÓN Y BOTONES
1. Tire de la corona y sitúela en la segunda posición, de manera que el segundero
se detenga en la posición de CERO.
2. Gire la corona para ajustar las manecillas de la hora y el minutero.
3. Si vuelve a situar la corona en su posición normal en sincronización con la señal
de tiempo el pequeño segundero empieza a funcionar.
1. Tire de la corona y sitúela en la 1.ª posición.
2. Gire la corona en sentido antihorario para ajustar la fecha.
* Si ajusta la fecha entre las 9:00 pm y la 1:00 am, es posible que la fecha no
cambie al día siguiente.
3. Cuando termine de ajustar la fecha, vuelva a colocar la corona en posición
normal.
AJUSTE DE LA HORA
AJUSTE DE LA FECHA
Botón A
Botón B
Posición del
1rclic
Posición del
2.º clic
Manecilla de
las horas
24 horas
Calendario
Posición
normal de
la corona
Minutero del
cronógrafo Minutero
Segundero o manecilla de
1/20 seg. del cronógrafo
Segundero del
cronógrafo

89
ILM0S49 ILM0S49
EspañolESPAÑOL
Este cronógrafo es capaz de medir y mostrar el tiempo en 1/20(1/1) de segundo hasta un
máximo de 60 minutos.
La manecilla de 1/20(1/1) de segundos del cronógrafo retrógrado avanza durante 60
segundos después del inicio y se detiene en la posición de CERO.
[Medir el tiempo con el cronómetro]
1. Pulse el botón “B” para pasar al modo cronógrafo. El segundero se detiene en la posición
CERO y cambia al segundero de 1/20(1/1) segundos del cronógrafo.
2. Pulsando el botón “A” el cronógrafo se inicia y se detiene. Sesenta segundos después del
inicio, la manecilla de 1/20(1/1) de segundos del cronógrafo se detiene en la posición
CERO. Al pulsar “A” para detener el cronógrafo, la manecilla de 1/20(1/1) del cronógrafo
avanza rápidamente para señalar el tiempo medido.
3. Pulse el botón “B” para poner a cero el cronógrafo y todas las manecillas vuelven a sus
posiciones de CERO.
USO DEL CRONÓGRAFO REINICIO DEL CRONÓGRAFO
(INCLUSO DESPUÉS DE CAMBIAR LA PILA)
Siga este procedimiento si el segundero del cronógrafo y la manecilla de 1/20(1/1) no
vuelven a la posición “0” después de poner a cero el cronógrafo.
Reinicio StopMedición de tiempo
1. Tire de la corona hacia fuera y sitúela en la segunda posición de clic.
2. Pulse el botón “A” para ajustar el segundero del cronógrafo en la posición de cero.
3. Pulse el botón “B” para ajustar la manecilla de 1/20 de segundos del cronógrafo
en la posición de cero. Para hacer que las manecillas del cronógrafo avancen con
rapidez mantenga pulsado el botón “A” o “B”.
4. Cuando las manecillas se encuentren en posición “0”, ponga la hora a cero y
devuelva la corona a su posición normal.
5. Pulse el botón “B” para comprobar que las manecillas del cronógrafo se restablecen
en la posición de CERO.
* No vuelva a situar la corona a su posición normal mientras el segundero del
cronógrafo y la manecilla de 1/20 están volviendo a la posición CERO.
Cuando la corona vuelve a su posición normal cada manecilla se detiene en una
posición y estas posiciones se consideran la posición CERO.

10 11
ILM0S49 ILM0S49
EspañolESPAÑOL
Coloque el módulo en la caja que se muestra en la figura y posicione la manecilla de referencia,
a continuación ajuste las manecillas siguiendo este procedimiento.
1. Tire de la corona y sitúela en la posición de ajuste de la hora (posición del 2.º clic)
2. Gire la corona en sentido antihorario y deje de girarla tan pronto como cambie la fecha.
Cuando la fecha empiece a cambiar, gire la corona despacio.
3. Empuje la corona hacia dentro un paso, con cuidado de no girarla.
4. Coloque la manecilla de referencia, la manecilla de la hora y el minutero en la posición de
las 12 en punto. Para ajustar las manecillas, retire la caja trasera y coloque el mecanismo
en el soporte de trabajo.
* La demostración de la manecilla de 1/20 de segundos en la posición actual (8H-4H)
puede hacerse cuando la manecilla se ajusta a las 12 h como posición CERO.
* Para hacer una demostración en otra posición, ajuste la manecilla de 1/20 de
segundo del cronógrafo en la marca 20 (escala) antes de ajustar la POSICIÓN INICIAL
RETRÓGRADA como posición CERO.
AJUSTE DE LAS MANECILLAS
El taquímetro es el instrumento que mide la velocidad de un automóvil.
Teniendo en cuenta que en el transcurso de muchos segundos un vehículo cubre la
distancia de 1 km, el medidor puede medir la velocidad media aproximada por hora
durante un viaje (el rango de medición máximo de un taquímetro son 60 segundos.)Si el
cronógrafo se inicia al mismo tiempo que la medición y se detiene después de 1 km, es
posible determinar la velocidad media por hora según la posición del segundero.
Si el vehículo cubre una distancia de 1 km en 45 segundos, la velocidad media por hora
durante
TAQUÍMETRO

En aplicación de la normativa sobre los desechos de equipos eléctricos y electrónicos,
los productos de relojería de cuarzo que se encuentran al final de su vida útil deben
ser sometidos a una recogida selectiva en vistas a su posterior tratamiento. También
puede depositar nuestros productos de relojería de cuarzo en uno de nuestros puntos de
venta autorizados, así como en cualquier punto de recogida habilitado. La recogida selectiva, el
tratamiento, la valoración y el reciclaje contribuyen a la salvaguarda de nuestro medio ambiente y a
la protección de nuestra salud.
12 13
ENGLISH
13
INSTRUCTION MANUAL
CHRONOGRAPH
ILM0S49
Displays and buttons _____________________________________________________________________________________________________________________ 14
Setting the time ______________________________________________________________________________________________________________________________ 15
Setting the date______________________________________________________________________________________________________________________________ 15
Using the chronograph________________________________________________________________________________________________________________ 116
Chronograph reset (incl. After replacing battery)__________________________________________________________________ 17
Fitting method of hands________________________________________________________________________________________________________________ 18
Tachymeter _____________________________________________________________________________________________________________________________________ 19

14 15
ILM0S49 ILM0S49
English
SETTING THE TIME
ENGLISH
DISPLAYS AND BUTTONS
Button A
Button B
1st Click
Position
2nd Click
Position
Hour hand
24 hour
Calendar
Normal
crown
position
Chronograph
minute hand Minute hand
Second hand of 1/20 sec
Chronograph hand
Chronograph
second hand 1. Pull the crown out to the 2nd position so that the second hand stops at ZERO
position.
2. Turn the crown to set hour and minute hands.
3. When the crown is pushed back to the normal position in synchronization with a
time signal, small second hand begins to run.
1. Pull the crown out to the 1st position.
2. Turn the crown to anticlockwise to set the date.
* If the date is set between the hours of around 9:00 PM and 1:00 AM, the
date may not change on the following day.
3. After the date has been set, push the crown back to the normal position.
SETTING THE DATE

16 17
ILM0S49 ILM0S49
English
This chronograph is able to measure and display time in 1/20(1/1) second united up to
maximum of 60minutes.
The retrograde chronograph 1/20(1/1) second hand keeps continuously for 60 seconds
after starting, and then stops at ZERO position.
[Measuring time with the stopwatch]
1. Press button “B” to change the watch to the chronograph mode. The second hand stops at
the ZERO second position, and changes to the chronograph 1/20(1/1) second hand.
2. The chronograph can be started and stopped each time button “A” is pressed.The
chronograph 1/20(1/1) second hand stops at the ZERO second position 60 seconds
after starting, When button “A” is pressed to stop the chronograph, the chronograph
1/20(1/1) second hand advances rapidly to display the measured time.
3. Pressing button “B” resets the chronograph and all hands return to their ZERO positions.
Reset StopTime measurement
USING THE CHRONOGRAPH
1. Pull the crown out to the 2nd position.
2. Press button “A” to set the chronograph second hand to the ZERO position.
3. Press button “B” to set the chronograph 1/20 second hand to ZERO position.
The chronograph hands can be advanced rapidly by continuously pressing button “A”
or “B”.
4. Once the hands have been zeroed, reset the time and return the crown to its normal
position.
5. Press button “B” to check that the chronograph hands are reset to the ZERO position.
* Do not return crown to the normal position while chronograph second hand and
1/20 chronograph second hand return to ZERO position.
Each hands stop on the way when crown are returned to normal position and these
positions are recognized as ZERO position.
This procedure should be performed when the chronograph second hand and
chronograph 1/20(1/1) second hand do not return to the ZERO second position after
the chronograph has been reset, and including after the battery has been replaced.
CHRONOGRAPH RESET
(INCL. AFTER REPLACING BATTERY)

18 19
ILM0S49 ILM0S49
English
Place the module on case back shown in the figure and position the reference hand, then fit
the hands according to the following procedures.
1. Pull out the crown to the time setting position. (2nd Click Position)
2. Turn the crown anticlockwise, and stop turning right after the date changes. After the date
starts changing, turn the crown slowly.
3. Push in the crown by one step. Be careful of not turning the crown.
4. Fit the reference hand, hour hand and minute hand to the 12-o’clock position. When fitting
the hands, remove the case back and place the movement on work stand (mount).
* Demonstration of 1/20 Second Chronograph Hand at the actual position (8H-4H) can be
made when the hand is fit at 12H as ZERO position.
* For demonstration at other position, fit the 1/20 Second Chronograph Hand at 20 tick
marks (scale) before the RETROGRADE STARTING POSITION as the ZERO position.
FITTING METHOD OF HANDS
The tachymeter is the device which measures the speed of an automobile. Knowing
is how many seconds the car covers a distance of 1km, the meter can measure the
approximate average speed per hour during a journey (up to the maximum measurable
range of tachymeter is 60 seconds.)
If the chronograph is started at the same time as measurement, and stopped after
1 km, the average speed per hour can be determined according to the position of the
second hand. If the car covers the distance of 1km in 45second, the average hourly
speed during the journey will be about 80 km.
TACHYMETER

By virtue of the regulations pursuant to the handling of waste products deriving from
electronic and electrical equipment, end of lifecycle watch making products must be
selectively collected for processing. You may therefore dispose of your quartz watch
making products at any of our retail outlets or any other authorized collection point. The selective
collection, processing, rating and recycling of these products helps contribute to safeguarding the
environment and protecting our health.
21
FRANÇAIS
MANUEL D’ INSTRUCTION
CHRONOGRAPHE
ILM0S49
Indications et boutons___________________________________________________________________________________________________________________ 22
Réglage de l’heure _________________________________________________________________________________________________________________________ 23
Réglage de la date__________________________________________________________________________________________________________________________ 23
Utilisation du chronographe________________________________________________________________________________________________________ 124
Réinitialisation du chronographe (y compris après remplacement de la pile)__________________ 25
Methode de réglage des aiguilles _______________________________________________________________________________________________ 26
Tachymètre _____________________________________________________________________________________________________________________________________ 27

22 23
ILM0S49 ILM0S49
FrançaisFRANÇAIS
RÉGLAGE DE L’HEUREINDICATIONS ET BOUTONS
RÉGLAGE DE LA DATE
1. Tirez la couronne de la seconde position afin que l’aiguille des secondes s’arrête à la
position ZÉRO.
2. Tourner la couronne pour régler les aiguilles de l’heure et des minutes.
3. Lorsque la couronne reviendra à sa position normale en synchronizationavec un
signal horaire, la petite aiguille des secondes commencera à marcher.
1. Tirez la couronne jusqu’à la position du premier clic.
2. Tournez la couronne dans le sens contraire des aiguilles d’une montre pour régler
la date.
* Si la date a été réglée entre les heures qui vont de 21:00 et 1:00, il se peut que la
date ne change pas le jour suivant.
3. Après avoir réglé la date, réenclenchez la couronne à sa position normale.
Bouton A
Bouton B
Position du
1e clic
Position du
2nd clic
Aiguille de l’heure
24 heures
Calendrier
Position
normale de
la couronne
Aiguille des
minutes du
chronographe
Aiguille des minutes
Second hand of 1/20 sec
Chronograph hand
Aiguille des secondes
du chronographe

24 25
ILM0S49 ILM0S49
Français
UTILISATION DU CHRONOMÈTRE
FRANÇAIS
Ce chronographe rétrograde est capable de mesurer et de montrer le temps en 20es de
seconde pendant un maximum de 60 minutes.
L’aiguile de 20es de seconde du chronographe rétrograde continue sans s’arrêter pendant
60 secondes après le démarrage et après elle s’arrête et elle revient à la position ZÉRO.
[Mesurer le temps à l’aide du chronomètre]
1. Pressez le bouton “B” pour changer la montre en mode chronographe. L’aiguille des secondes
s’arrête à la position ZÉRO, et change l’aiguille de 20es de seconde du chronographe.
2. Le chronographe peut être démarré et arrêté à chaque fois que le bouton “A” est pressé.
L’aiguille des 20es de seconde du chronographe s’arrête à la seconde position ZÉRO 60
secondes après avoir démarré, Lorsque le bouton “A” est pressé pour arrêter le chronographe,
l’aiguille des 20es de seconde du chronographe avance rapidement pour montrer le temps
mesuré.
3. En pressant le bouton “B” nous réinitialisations le chronographe et toutes les aiguilles
reviennent à la position ZÉRO.
RÉINITIALISATION DU CHRONOGRAPHE
(ÉGALEMENT APRÈS REMPLACEMENT DE LA PILE)
Ce procédé devra être mené à bien lorsque l’aiguille des secondes du chronographe et l’aiguille
des 20es de seconde du chronographe ne reviennent pas à la seconde position ZÉRO après
que le chronographe ait été réinilisialisé, y compris après le remplacement de la batterie.
1. Tirez la couronne de la position du 2nd clic.
2. Pressez le bouton “A” pour régler l’aiguille des secondes du chronographe à la position ZÉRO.
3. Pressez le boutton “B” pour régler l’aiguille des 20es de seconde à la position ZÉRO. Les
aiguilles du chronographe peuvent être avancées rapidement en pressant de manière
continue le bouton “A” ou “B”.
4. Une fois que les aiguilles ont été mises à zéro, réinitialisez l’heure et remettez la couronne
à sa position normale.
5. Pressez le bouton “B” afin de vérifier que les aiguilles du chronographe ont été réInitialisées
à la position ZÉRO.
* Ne remmettez pas la couronne à sa position normale jusqu’à ce que l’aiguille des
secondes du chronographe et celles de 20es de seconde ne revienne pas à la position
ZÉRO. Chaque aiguille s’arrête en chemin lorsque la couronne revient à la position
normale et ces positions sont considérées comme position ZÉRO.
UTILISATION DU CHRONOGRAPHE
Remise à Zéro ArrêtMesure du temps

26 27
ILM0S49 ILM0S49
FrançaisFRANÇAIS
Placez le module dans la boîte montrée comme la figure et positionnez l’aiguille de référence,
puis réglez les aiguilles conformément aux procédés suivants.
1. Tirez de la couronne jusqu’à la position de réglage de l’heure. (Position du second clic)
2. Tournez la couronne dans le sens inverse des aiguilles d’une montre, et arrêtez de tourner
juste après le changement de la date. Une fois que la date commence à changer, tournez la
couronne doucement.
3. Pressez sur le couronne une seule fois. Faites attention à ne pas tourner la couronne.
4. Règlez l’aiguille de référence, l’aiguille de l’heure et l’aiguille des minutes jusqu’à la position
de midi. Lors du réglage des aiguilles, enlevez la boîte et placez la tige de mouvement au
travail (montage).
* Une démonstration de l’aiguille des 20es de seconde du chronographe à la position actuelle
(8H-4H) peut être faite lorsque l’aiguille est réglée à midi comme si c’était la position ZÉRO.
* Pour faire une démonstration dans une autre position, règlez l’aiguille des 20es de seconde
du chronographe au niveau des symboles de l’encoche 20 (scale) avant la POSITION DE
DÉMARRAGE RÉTROGRADE comme la position ZÉRO.
METHODE DE RÉGLAGE DES AIGUILLES
Le tachymètre est un dispositif qui mesure la vitesse d’un automobile. Sachant en
combien des secondes la voiture couvre une distance d’1km, le mètre peut mesurer la
vitesse approximative en moyenne par heure au long d’un voyage (jusqu’au plus grand
éventail de mesure du tachymètre qui est de 60 secondes.)
Si le chronograhe est démarré à la même heure de mesure, et arrêté un kilomètre
après, la vitesse moyenne par heure peut être déterminée conformément à la position
de l’aiguille des secondes.
Si la voiture couvre la distance d’un kilomètre en 45 secondes, la vitesse moyenne par
heure au long du voyage sera de 80 km.
TACHYMÈTRE

En application de la réglementation sur les déchets des équipements électriques et
électroniques, les produits horlogers à quartz en fin de vie font l’objet dúne collecte
sélective en vue de leur traitement. Vous pouvez ainsi déposer nos produits horlogers
à quartz dans l’un de nos points de vente agréés, ainsi que dans tout point de collecte habilité. La
collecte sélective, le traitement, la valorisation et le recyclage contribuent à la sauvegarde de notre
environnement et à la protection de notre santé.
28 29
DEUTSCH
BETRIEBSANLEITUNG
STOPPUHR
ILM0S49
Displays und Knöpfe_______________________________________________________________________________________________________________________ 30
Einstellen der Uhrzeit ____________________________________________________________________________________________________________________ 31
Einstellen des Datums___________________________________________________________________________________________________________________ 31
Benutzen des Chronographen_____________________________________________________________________________________________________ 32
Chronograph Zurücksetzen (Inkl. nach Batterietausch)________________________________________________________ 33
Einstellungsmethode der Zeiger_________________________________________________________________________________________________ 34
Tachymeter _____________________________________________________________________________________________________________________________________ 35

30 31
ILM0S49 ILM0S49
Deutsch
31
DEUTSCH
30
DISPLAYS UND KNÖPFE EINSTELLEN DER UHRZEIT
EINSTELLEN DER DATUMS
1. Die Krone auf die 2. Position herausziehen, sodass der Sekundenzeiger auf der
NULL-Position stoppt.
2. Die Krone drehen, um die Stunden- und Minutenzeiger einzustellen.
3. Wenn die Krone in Synchronisierung mit einem Zeitsignal in die Normalposition
zurückgedrückt wird, beginnt der kleine Sekundenzeiger zu laufen.
1. Die Krone auf die 1. Position herausziehen.
2. Die Krone gegen den Uhrzeigersinn drehen, um das Datum einzustellen.
* Wenn das Datum zwischen den Uhrzeiten 21.00 und 01.00 Uhr eingestellt wird,
kann es sein, dass sich das Datum am nächsten Tag nicht verstellt.
3. Wenn das Datum eingestellt ist, die Krone in ihre Ausgangsposition drücken.
Druckknopf A
Druckknopf B
1. Klick
Position
2. Klick
Position
Stundenzeiger
24 Stunden
Kalender
Normale
Kronenposition
Chronograph
Minutenzeiger Minutenzeiger
Sekundenzeiger oder 1/20 Sek
Chronographzeiger
Chronograph
Sekundenzeiger

32 33
ILM0S49 ILM0S49
DeutschDEUTSCH
Dieser Chronograph ist in der Lage, die Zeit in 1/20 Sekunden bis max. 60 Minuten zu messen
und anzuzeigen. Der retrograde Sekundenzeiger des Chronographen 1/20(1/1) läuft nach dem
Start für 60 Sekunden und stoppt auf der NULL-Position.
[Zeitmessen mit dem Chronograph]
1. Druckknopf “B” drücken, um die Uhr in den Chronographenmodus umzuschalten.
Der Sekundenzeiger stoppt auf der NULL-Sekundenposition und wird zum 1/20(1/1)
Sekundenzeiger des Chronograph.
2. Der Chronograph kann immer durch Drücken des Druckknopfs “A” gestartet und
gestoppt werden. Der 1/20(1/1) Sekundenzeiger des Chronographen stoppt auf der
NULL-Sekundenposition 60 Sekunden nach dem Start. Wenn der Druckknopf “A” gedrückt
wird, um den Chronographen zu stoppen, läuft der 1/20(1/1) Sekundenzeiger des
Chronographen schnell weiter, um die gemessene Zeit anzuzeigen.
3. Durch Drücken des Druckknopfs “B” wird der Chronograph zurückgesetzt und alle Zeiger
kehren auf ihre NULL-Positionen zurück.
RÉGLAGE DE L’HEURE
BENUTZEN DES CHRONOGRAPHEN CHRONOGRAPH ZURÜCKSETZEN (INKL. NACH BATTERIETAUSCH)
Dieses Verfahren sollte verwendet werden, wenn der Sekundenzeiger des Chronographen
und der 1/20(1/1) Sekundenzeiger des Chronographen nicht auf die NULL-Position
zurückkehren, nachdem der Chronograph zurückgesetzt wurde und auch nachdem die
Batterie ausgetauscht wurde.
1. Die Krone auf die 2. Position herausziehen.
2. Den Druckknopf “A” drücken, um den Sekundenzeiger des Chronographen in der
Nullstellung einzustellen.
3. Den Druckknopf “B” drücken, um den 1/20 Sekundenzeiger des Chronographen in der
Nullstellung einzustellen.
* Die Zeiger des Chronographen können durch anhaltendes Drücken des Druckknopfs “A”
oder “B” schnell vorwärtsbewegt werden.
4. Wenn die Zeiger wieder auf der Nullstellung stehen, die Zeit erneut einstellen und die
Krone in ihre normale Position drücken.
5. Den Druckknopf “B” drücken, um zu überprüfen, dass die Sekundenzeiger des
Chronographen in die Nullstellung zurückgestellt werden.
* Die Krone nicht in die normale Position zurückdrücken, wenn der Sekundenzeiger des
Chronographen und 1/20 Sekundenzeiger des Chronographen auf die NULL-Position
zurückkehrt. Jeder Zeiger stoppt auf dem Weg, wenn die Krone in die normale Position
zurückgedrückt wird. Diese Positionen werden als NULL-Position erkannt.
RÜCKSTELLUNG STOPPZEITMESSUNG

34 35
ILM0S49 ILM0S49
DeutschDEUTSCH
Placez le module dans la boîte montrée comme la figure et positionnez l’aiguille de référence,
puis réglez les aiguilles conformément aux procédés suivants.
1. Krone bis zur Position der Zeiteinstellung herausziehen. (2. Klick Position)
2. Drehen Sie die Krone gegen den Uhrzeigersinn und stoppen Sie die Rechtsdrehung nach
den Datumsänderungen. Nachdem das Datum beginnt sich zu ändern, drehen Sie die
Krone langsam weiter.
3. Drücken Sie die Krone einen Schritt nach innen. Passen Sie auf, dass Sie die Krone nicht
drehen.
4. Stellen Sie den Referenz-, Stunden- und Minutenzeiger auf die 12 Uhr Position. Wenn die
Zeiger eingestellt werden, entfernen Sie die Gehäuserückseite und platzieren das Uhrwerk
im Werkhalter (Montage).
* Eine Demonstration des 1/20 Sekundenzeigers des Chronographen auf der aktuellen
Position (8h-4h) kann gemacht werden, wenn der Zeiger als NULL-Position auf 12 Uhr
eingestellt wird.
* Für eine Demonstration auf einer anderen Position, den 1/20 Sekundenzeiger des
Chronographen vor der RETROGRADEN STARTPOSITION auf 20 Skalenmarkierungen
(Skalierung) einstellen.
EINSTELLUNGSMETHODE DER ZEIGER
Der Tachymeter ist eine Vorrichtung, die die Geschwindigkeit eines Autos misst. Wenn
man weiß, wie viele Sekunden das Auto für 1 Kilometer benötigt, kann die ungefähre
Durchschnittsgeschwindigkeit pro Stunde während einer Reise gemessen werden (bis
zum max. messbaren Bereich des Tachymeters, der bei 60 Sekunden liegt.)
Wenn der Chronograph zur gleichen Zeit wie die Messung gestartet wird und nach 1
Kilometer gestoppt wird, kann die Durchschnittsgeschwindigkeit pro Stunde gemäß
der Position des Sekundenzeigers bestimmt werden. Wenn das Auto 1 Kilometer in 45
Sekunden zurücklegt, liegt die Durchschnittsgeschwindigkeit pro Stunde während der
Reise bei ca. 80 km/h.
TACHYMÈTRE

Gemäß den Bestimmungen über die Behandlung von Abfällen durch Elektronik- und
Elektro-Altgeräte sind Quarzuhrenprodukte, deren Lebensdauer abgelaufen
ist, selektiv zu sammeln, um sie dem Recycling zuzuführen. Sie können Ihre
Quarzuhrenprodukte daher in einer unserer Verkaufsstellen oder an einer
beliebigen Sammelstelle abgeben. Die selektive Sammlung, die Verarbeitung, die Bewertung
und das Recycling dieser Produkte ist ein Beitrag zum Umweltschutz und zum Schutz unserer
Gesundheit.
37
ITALIANO
MANUALE DI FUNZIONAMENTO
CRONOMETRO
ILM0S49
Indicazioni e pulsanti______________________________________________________________________________________________________________________ 38
Impostazione dell’ora_____________________________________________________________________________________________________________________ 39
Impostazione della data ________________________________________________________________________________________________________________ 39
Uso del cronografo ________________________________________________________________________________________________________________________ 40
Azzeramento del cronografo (anche dopo la sostituzione della pila)__________________________________ 41
Metodo di collocazione delle lancette ________________________________________________________________________________________ 42
Tachimetro ______________________________________________________________________________________________________________________________________ 43

38 39
ILM0S49 ILM0S49
DeutschITALIANO
INDICAZIONI E PULSANTI IMPOSTAZIONE DELL’ORA
IMPOSTAZIONE DELLA DATA
1. Estrarre la corona alla 2ª posizione in modo che la lancetta dei secondi si fermi sulla
posizione ZERO.
2. Girare la corona per impostare le lancette delle ore e dei minuti.
3. Quando la corona viene premuta indietro nella posizione normale, in sincronizzazione
con un segnale di tempo, la lancetta piccola dei secondi comincia a muoversi.
1. Estrarre la corona alla 1ª posizione.
2. Girare la corona in senso anti-orario per impostare la data.
* Se la data viene impostata tra le ore 21:00 e l’1:00, il giorno successivo la data
potrebbe non cambiare.
3. Dopo l’impostazione della data, premere la corona per farla tornare in posizione
normale.
Pulsante A
Pulsante B
Posizione 1º
scatto
Posizione 2º
scatto
Lancetta delle ore
24 ore
Calendario
Posizione
normale corona
Lancetta dei minuti
del cronografo Lancetta dei minuti
Lancetta dei secondi o lancetta
da 1/20 sec. cronografo
Lancetta dei secondi
del cronografo
This manual suits for next models
1
Table of contents
Languages:
Other Lotus Watch manuals

Lotus
Lotus Chronograph ILMJS00 User manual

Lotus
Lotus Chronograph Calendar ILMOS20 User manual

Lotus
Lotus Chronograph ILMOS30 User manual

Lotus
Lotus SMARTIME 50014 User manual

Lotus
Lotus Chronograph Calendar ILMOS10 User manual

Lotus
Lotus ILMGP50 User manual

Lotus
Lotus Multifunction ILM6P27/77 User manual

Lotus
Lotus ILMVX3T User manual

Lotus
Lotus ILM6S50 User manual

Lotus
Lotus Chronograph Calendar ILMOS10 User manual