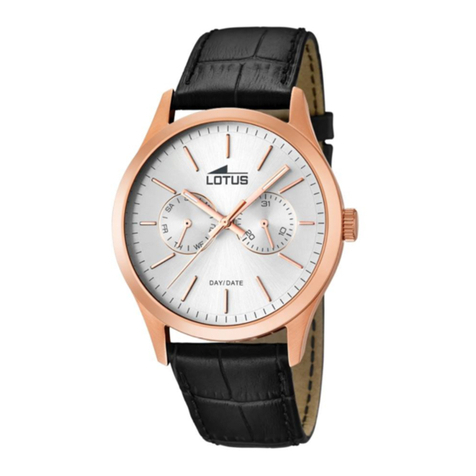
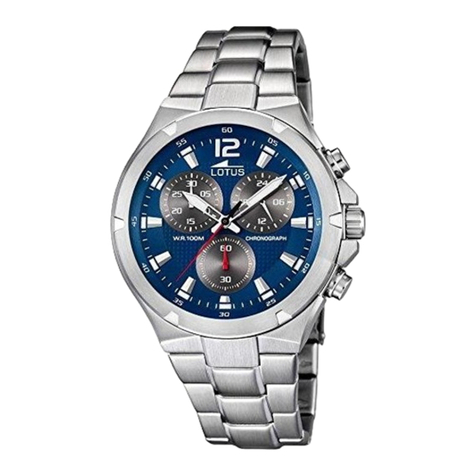
Lotus ILMYM92 User manual

CALENDAR
CHRONOGRAPH
MANUAL DE INSTRUCCIONES
INSTRUCTION MANUAL
MANUEL D’INSTRUCTION
BETRIEBSANLEITUNG
MANUALE DI FUNZIONAMENTO
ILMYM92

2
18
34
50
66
MANUAL DE INSTRUCCIONES
INSTRUCTION MANUAL
MANUEL D’INSTRUCTION
BETRIEBSANLEITUNG
MANUALE DI FUNZIONAMENTO
ILMYM92
CHRONOGRAPH

ILMYM92
HORA/CALENDARIO
Agujas de las horas, minutos y segundos pequeñas.
La fecha se indica en numerales.
CRONÓMETRO
Mide hasta 12 horas a incrementos de 1/20 de segundo.
Es posible medición de tiempo intermedio.
2
MANUAL DE INSTRUCCIONES / ESPAÑOL
CRONÓMETRO
3
Indicación y corona/botones
Ajuste de la hora y de la posición de las agujas del cronómetro
Ajuste de la fecha
Cronómetro
Taquímetro [para modelos con escala taquimétrica en la esfera]
Notas sobre el funcionamiento del reloj
Para mantener la calidad de su reloj
4
6
10
11
14
16
17
ILMYM92
ITALIANO ENGLISHFRANÇAISDEUTSCH ESPAÑOL

DESBLOQUEO DE LA CORONA:
1. Gire la corona hacia la izquierda hasta que
deje de girar.
2. La corona puede quitarse.
BLOQUEO DE LA CORONA:
1. Presione la corona de nuevo a la posición normal.
2. Gire la corona a la derecha mientras la
presiona ligeramente hasta que quede firme.
5
ILMYM92
CORONA ROSCADA [para modelos con corona roscada]
4
INDICACIÓN Y CORONA/BOTONESILMYM92
A
Aguja de los segundos
del CRONÓMETRO
B
Aguja de los minutos
del CRONÓMETRO
Aguja pequeña
de los segundos
Aguja de los minutos
a: Posición normal b: Primer chasquido c: Segundo chasquido
Aguja de las horas
a b c
Fecha
Aguja de las horas
del CRONÓMETRO
Aguja de 1/20
de segundo
del CRONÓMETRO
CORONA
ITALIANO ENGLISHFRANÇAISDEUTSCH ESPAÑOL

6
AJUSTE DE LA HORA Y DE LA POSICIÓN
DE LAS AGUJAS DEL CRONÓMETRO
ILMYM92
Este reloj está diseñado de tal forma que el ajuste de la hora y el ajuste de la posición de las
agujas del cronómetro se efectúan con la corona en la posición del segundo chasquido.
Una vez la corona se extrae hasta oír el segundo chasquido no se olvide de hacer los ajustes
de arriba.
CORONA:
Extraiga la corona hasta oír el segundo chasquido cuando la aguja de los segundos esté en
la posición de las 12.
7
ILMYM92
* Se recomienda que las agujas se ajusten a la hora unos minutos después de la hora
actual, teniendo en cuenta el tiempo requerido para ajustar la posición de las agujas
del cronómetro.
1) AJUSTE DE LA HORA
6
Aguja de los minutosAguja de las horas
Aguja pequeña de los segundos
2) AJUSTE DE LA POSICIÓN DE LAS AGUJAS DEL CRONÓMETRO
Si las agujas del CRONÓMETRO no están en la posición “0” siga el procedimiento de la
siguiente página para ajustarlas en la posición “0”.
Girela para ajustar la
aguja de las horas
y la de los minutos.
CORONA
ITALIANO ENGLISHFRANÇAISDEUTSCH ESPAÑOL

8
ILMYM92
6
A
B
Aguja de los
segundos del
CRONÓMETRO
Aguja de las horas
del
CRONÓMETRO
Aguja de 1/20
de segundo del
CRONÓMETRO
Aguja de los minutos
del CRONÓMETRO
La selección de la(s) aguja(s) puede hacerse en el siguiente orden pulsando el
botón A durante dos segundos.
PRESIONE DURANTE 2 SEGUNDOS PARA SELECCIONAR LA(S)
AGUJA(S) DEL CRONÓMETRO PARA AJUSTARLAS.
* La(s) aguja(s) seleccionada(s) giran un círculo completo.
Aguja de
1/20 de segundo
del CRONÓMETRO
Aguja de las
horas y minutos
del CRONÓMETRO
Aguja
de los segundos
del CRONÓMETRO
A
9
ILMYM92
PULSE REPETIDAMENTE PARA PONER LA(S) AGUJA(S) DEL
CRONÓMETRO SELECCIONADA(S) A LA POSICIÓN “0”.
B
CORONA
* La(s) aguja(s) se mueven rápidamente si el botón B se mantiene pulsado.
* Después de completar todos los ajustes, compruebe que las agujas de
las horas y minutos indican la hora actual en indicación de hora.
PRESIONE DE NUEVO HASTA LA POSICIÓN NORMAL DE
ACUERDO CON UNA SEÑAL HORARIA.
ITALIANO ENGLISHFRANÇAISDEUTSCH ESPAÑOL

10
AJUSTE DE LA FECHA ILMYM92
6
CORONA
Fecha
1. Tire de la corona hasta oír el primer
chasquido.
2. Girela hacia la derecha hasta que aparezca
la fecha deseada.
3. Presione de nuevo hasta la posición normal.
•Antes de ajustar la fecha, no se olvide de ajustar la hora principal.
11
CRONÓMETRO
ILMYM92
A
B
•El cronómetro puede medir hasta 12 horas en incrementos de 1/20 de segundo.
•Cuando la medición alcanza 12 horas, el cronómetro automáticamente deja de
contar.
Aguja de los segundos
del CRONÓMETRO
Aguja de 1/20
de segundo
del CRONÓMETRO
Aguja de los minutos
del CRONÓMETRO
Aguja de las horas del
CRONÓMETRO
Ej.: 2 horas, 30 minutos y 10,85 segundos
Inicio / Parada /
Reinicio
Reposición /
Tiempo intermedio /
Liberación de tiempo
intermedio
ITALIANO ENGLISHFRANÇAISDEUTSCH ESPAÑOL

12
ILMYM92
* Si las agujas del CRONÓMETRO no vuelven a la posición “0” cuando el cronómetro está
reajustado a “0”, siga el procedimiento en “'Fijación de la hora y ajuste de la posición de la
aguja del cronómetro”.
MOVIMIENTO DE LA AGUJA DE 1/20 DE SEGUNDO DEL CRONÓMETRO
• Después de poner en movimiento el cronómetro, la aguja de 1/20 de segundo del CRONÓMETRO
se mueve durante unos 10 minutos y automáticamente se para en la posición “0”.
• Cuando la medición se para o el tiempo intermedio se mide, se mueve para indicar los
1/20 segundos transcurridos.
• Después de ponerse en movimiento el cronómetro o liberarse el tiempo intermedio, la
aguja de 1/20 de segundo del CRONÓMETRO se mueve durante unos 10 minutos y
automáticamente se para.
• De la misma manera, si el cronómetro se para y se pone en movimiento repetidamente
o el tiempo intermedio se mide o se libera repetidamente, la aguja de 1/20 de segundo del
CRONÓMETRO se mueve durante unos 10 minutos y se para automáticamente.
• ANTES DE UTILIZAR EL CRONÓMETRO, NO SE OLVIDE DE COMPROBAR QUE LA CORONA
ESTÁ AJUSTADA EN LA POSICIÓN NORMAL Y QUE LAS AGUJAS DEL CRONÓMETRO ESTÁN
REAJUSTADAS EN LA POSICIÓN “0”.
13
ILMYM92
MEDICIÓN DE TIEMPO INTERMEDIO
MEDICIÓN DE DOS COMPETIDORES
A B B
A B B B B
INICIO INTERMEDIO
INICIO
LIBERACIÓN
INTERMEDIO
PARADA REPOSICIÓN
A B
REPOSICIÓN
TIEMPO FINAL
DEL PRIMER
COMPETIDOR
SEGUNDO
COMPETIDOR
TERMINA
TIEMPO FINAL
DEL SEGUNDO
COMPETIDOR
ITALIANO ENGLISHFRANÇAISDEUTSCH ESPAÑOL

14
TAQUÍMETRO [para modelos con escala taquimétrica en la esfera]
ILMYM92
La escala taquimétrica puede usarse sólo cuando el tiempo requerido es menor a 60
segundos.
Ej. 2: Si la distancia de medición se prolonga a 2 km/millas o se acorta a 0,5 km/millas
y la aguja de los segundos del CRONÓMETRO indica “90” en la escala taquimétrica:
[ Ej. 1 ] 1. Use el cronómetro para determinar
cuántos segundos tarda en recorrer
1 km o 1 milla.
2. La escala taquimétrica indicada por la
aguja de los segundos del
CRONÓMETRO da el promedio de la
velocidad por hora.
Para medir el promedio de la velocidad por hora de un vehículo
Aguja de los
segundos del
CRONÓMETRO:
40 segundos
Escala
taquimétrica:“90”
“90” (cifra de escala taquimétrica) x 1 (km o milla) = 90 km/h o mph
15
ILMYM92
Para medir el ritmo por hora de operación
[ Ej. 1 ] 1. Use el cronómetro para medir el
tiempo requerido para completar
1 trabajo.
2. La escala taquimétrica indicada
por la aguja de los segundos del
CRONÓMETRO da el número
promedio de trabajos llevados a
cabo por hora.
“180” (cifra de escala taquimétrica) x 1
trabajo = 180 trabajos/hora
“90” (cifra de escala taquimétrica) x 2 (km o millas) = 180 km/h o mph
“90” (cifra de escala taquimétrica) x 0,5 (km o milllas) = 45 km/h o mph
Aguja de los
segundos del
CRONÓMETRO:
20 segundos
Escala
taquimétrica:
“180”
Ej. 2: Si 15 trabajos se completan en 20 segundos:
“180” (cifra de escala taquimétrica) x 15 trabajos = 2700 trabajos/hora
ITALIANO ENGLISHFRANÇAISDEUTSCH ESPAÑOL

16
ILMYM92
NOTAS SOBRE EL FUNCIONAMIENTO DEL RELOJ
AJUSTE DE LA POSICIÓN DE LA AGUJA DEL CRONÓMETRO
• Cuando el cronómetro está o ha estado midiendo o está parado, las agujas del cronómetro
se repondrán a “0” si extrae la corona hasta oír el segundo chasquido.
AJUSTE DE LA HORA
• Al ajustar la aguja de las horas, no se olvide de comprobar que AM/PM esté ajustado
correctamente. El reloj está diseñado de tal forma que la fecha cambia una vez cada 24 horas.
• Al ajustar la aguja de los minutos, aváncela primero de 4 a 5 minutos después de la hora
deseada y luego retrocédala de nuevo al minuto exacto.
AJUSTE DE LA FECHA
• Es necesario ajustar la fecha al final de Febrero y de los meses de 30 días.
•No ajuste la fecha entre las 9:00 p.m. y la 1:00 a.m., puede que la fecha no cambie adecuadamente.
CRONÓMETRO
• El reinicio y la parada del cronómetro pueden repetirse pulsando el botón A.
• La medición y la liberación del tiempo intermedio puede repetirse pulsando el botón B.
PARA MANTENER LA CALIDAD DE SU RELOJ
MAGNETISMO
CHOQUES Y VIBRACIONES REVISIÓN PERIÓDICA
AGENTES QUÍMICOS
CUIDADO DE LA CAJA Y LA CADENA
PRECAUCIÓN RESPECTO A LA PELÍCULA
PROTECTORA DEL DORSO DE LA CAJA
Magnetismo intenso puede afectar
negativamente su reloj. Eviten el
contacto directo con objetos
magnéticos. La precisión vuelve a
ser normal al alejar el reloj del
campo magnético.
Las actividades comunes no
afectarán su reloj, pero cuide de no
dejarlo caer ni darle golpes contra
superficies duras, porque podría
dañarse.
Tenga cuidado de no exponer el
reloj a disolventes, mercurio,
pulverizadores cosméticos,
detergentes, adhesivos o pinturas,
de lo contrario la caja, el brazalete,
etc. pueden desteñirse, deteriorarse o
dañarse.
Para evitar la posible oxidación de
la caja y la cadena causada por el
polvo y la humedad, límpielos
periódicamente con un paño seco
y suave.
Se recomienda una revisión del reloj
cada 2 o 3 años. Haga que lo
verifique un AGENTE AUTORIZADO DE
FESTINA GROUP para asegurarse de
que la caja, la corona, los botones,
las juntas y el sello del cristal permanecen
intactos.
Si su reloj tiene una película
protectora y/o cinta adhesiva en
la parte posterior de la caja,
asegúrese de quitarlas antes de
usar su reloj.
17
ILMYM92
ITALIANO ENGLISHFRANÇAISDEUTSCH ESPAÑOL

En aplicación de la normativa sobre los desechos de equipos eléctricos y electrónicos, los productos
de relojería de cuarzo que se encuentran al final de su vida útil deben ser sometidos a una recogida
selectiva en vistas a su posterior tratamiento. También puede depositar nuestros productos de relojería
de cuarzo en uno de nuestros puntos de venta autorizados, así como en cualquier punto de recogida
habilitado. La recogida selectiva, el tratamiento, la valoración y el reciclaje contribuyen a la salvaguarda
de nuestro medio ambiente y a la protección de nuestra salud.
18
ILMYM92

TIME/CALENDAR
Hour, minute and small second hands.
Date displayed in numerals.
STOPWATCH
Measures up to 12 hours in 1/20 second increments.
Split time measurement.
20
ILMYM92
INSTRUCTION MANUAL / ENGLISH
CHRONOGRAPH
21
Display and crown/buttons
Setting the time and adjusting the stopwatch hand position
Setting the date
Stopwatch
Tachymeter [for models with tachymeter scale on the dial]
Notes on operating the watch
To preserve the quality of your watch
22
24
28
29
32
34
35
ILMYM92
ESPAÑOLITALIANO FRANÇAISDEUTSCH ENGLISH

22
DISPLAY AND CROWN/BUTTONS ILMYM92
A
STOPWATCH
second hand
B
STOPWATCH
minute hand
Small second
hand
Minute hand
a: Normal position b: First click c: Second click
Hour hand
a b c
Date
STOPWATCH
hour hand
STOPWATCH
1/20-second hand
CROWN
UNLOCKING THE CROWN
1. Turn Crown counterclockwise until you no
longer feel the threads turning.
2. Crown can be pulled out.
LOCKING THE CROWN
1. Push Crown back in to normal position.
2. Turn Crown clockwise while pressing it lightly
until tight.
23
ILMYM92
SCREW DOWN CROWN [for models with screw down crown]
ESPAÑOLITALIANO FRANÇAISDEUTSCH ENGLISH

25
ILMYM92
* It is recommended that the hands be set to the time a few minutes ahead of the
current time, taking into consideration the time required to adjust the STOPWATCH
hand position if necessary.
1) TIME SETTING
6
Minute handHour hand
Small second hand
2) STOPWATCH HAND POSITION ADJUSTMENT
If the STOPWATCH hands are not in the “0” position, follow the procedure below to set
them to the “0” position.
Turn to set the hour
and minute hands.
CROWN
24
SETTING THE TIME AND
ADJUSTING THE STOPWATCH HAND POSITION
ILMYM92
CROWN:
Pull out to second click when the second hand is at the 12 o’clock position.
This watch is so designed that time setting and stopwatch hand position adjustment are both
made with the crown at the second click position.
Once the crown is pulled out to the second click, be sure to make the above adjustments at the
same time.
ESPAÑOLITALIANO FRANÇAISDEUTSCH ENGLISH

27
ILMYM92
PRESS REPEATEDLY TO SET THE SELECTED STOPWATCH HAND(S)
TO THE “0” POSITION.
B
CROWN
* The hand(s) move(s) quickly if button B is kept pressed.
* After all the adjustments are completed, check that the hour and minute
hands for time display indicate the current time.
PUSH BACK IN TO NORMAL POSITION IN ACCORDANCE WITH
A TIME SIGNAL.
ILMYM92
6
A
B
STOPWATCH
second hand
STOPWATCH
hour hand
STOPWATCH
1/20-second hand
STOPWATCH
minute hand
Selection of the hand(s) to be adjusted can be made in the following order by
pressing button A for 2 seconds.
PRESS FOR 2 SECONDS TO SELECT THE STOPWATCH HAND(S) TO BE
ADJUSTED.
* The selected hand(s) turn(s) a full circle.
STOPWATCH
1/20-second hand
STOPWATCH
hour and
minute hands
STOPWATCH
second hand
A
26
ESPAÑOLITALIANO FRANÇAISDEUTSCH ENGLISH

28
SETTING THE DATE ILMYM92
6
CROWN
Date
1. Pull out to first click.
2. Turn clockwise until the desired date appears.
3. Push back in to normal position.
•Before setting the date, be sure to set the time.
29
STOPWATCH
ILMYM92
A
B
• The stopwatch can measure up to 12 hours in 1/20-second increments.
•When the measurement reaches 12 hours, the stopwatch automatically stops
counting.
STOPWATCH
second hand
STOPWATCH
1/20-second hand
STOPWATCH
minute hand
STOPWATCH
hour hand
Ex.: 2 hours, 30 minutes and 10.85 seconds
Start / Stop /
Restart
Reset /
Split /Split release
ESPAÑOLITALIANO FRANÇAISDEUTSCH ENGLISH

30
ILMYM92
* If the STOPWATCH hands do not return to the “0” position when the stopwatch is reset
to “0”, follow the procedure in “Setting the time and adjusting the stopwatch hand position”.
MOVEMENT OF THE STOPWATCH 1/20-SECOND HAND
• After the stopwatch is started, the STOPWATCH 1/20-second hand moves for about 10
minutes and automatically stops at the “0” position.
• When the measurement is stopped or split time is measured, it moves to indicate the
elapsed 1/20 seconds.
• After the stopwatch is restarted or split time is released, the STOPWATCH 1/20-second
hand moves for about 10 minutes and stops automatically.
• In the same manner, if the stopwatch is stopped and restarted repeatedly or split time is
measured and released repeatedly, the STOPWATCH 1/20-second hand moves for about
10 minutes and stops automatically.
• BEFORE USING THE STOPWATCH, BE SURE TO CHECK THAT THE CROWN IS SET AT THE
NORMAL POSITION AND THAT THE STOPWATCH HANDS ARE RESET TO THE “0” POSITION.
31
ILMYM92
SPLIT TIME MEASUREMENT
MEASUREMENT OF TWO COMPETITORS
A B B
A B B B B
START SPLIT
START
SPLIT
RELEASE
STOP RESET
A B
RESET
FINISH TIME
OF 1ST
COMPETITOR
2ND
COMPETITOR
FINISHES
FINISH TIME
OF 1ST
COMPETITOR
ESPAÑOLITALIANO FRANÇAISDEUTSCH ENGLISH

32
TACHYMETER [for models with tachymeter scale on the dial]
ILMYM92
Tachymeter scale can be used only when the time required is less than 60 seconds.
Ex. 2: If the measuring distance is extended to 2 km or miles or shortened to 0.5 km or
miles and STOPWATCH second hand indicates “90” on tachymeter scale:
[ Ex. 1 ] 1. Use the stopwatch to determine
how many seconds it takes to go 1
km or 1 mile.
2. Tachymeter scale indicated by
STOPWATCH second hand gives
the average speed per hour.
To measure the hourly average speed of a vehicle
STOPWATCH
second hand:
40 seconds
Tachymeter
scale: “90”
“90” (tachymeter scale figure) x 1 (km or mile) = 90 km/h or mph
33
ILMYM92
To measure the hourly rate of operation
[ Ex. 1 ] 1. Use the stopwatch to measure
the time required to complete 1 job.
2. Tachymeter scale indicated by
STOPWATCH second hand gives
the average number of jobs
accomplished per hour.
“180” (tachymeter scale figure) x 1 job
= 180 jobs/hour
“90” (tachymeter scale figure) x 2 (km or mile) = 180 km/h or mph
“90” (tachymeter scale figure) x 0.5 (km or mile) = 45 km/h or mph
STOPWATCH
second hand:
20 seconds
Tachymeter
scale: “180”
Ex. 2: If 15 jobs are completed in 20 seconds:
“180” (tachymeter scale figure) x 15 jobs = 2700 jobs/hour
ESPAÑOLITALIANO FRANÇAISDEUTSCH ENGLISH

34
ILMYM92
NOTES ON OPERATING THE WATCH
ADJUSTING THE STOPWATCH HAND POSITION
• When the stopwatch is or has been measuring or is stopped, if the crown is pulled out to the
second click, it will automatically reset the STOPWATCH hands to “0”.
TIME SETTING
• When setting the hour hand, be sure to check that AM/PM is correctly set. The watch is so
designed that the date changes once in 24 hours.
• When setting the minute hand, first advance it 4 to 5 minutes ahead of the desired time and
then turn it back to the exact minute.
SETTING THE DATE
• It is necessary to adjust the date at the end of February and 30-day months.
•Do not set the date between 9:00 p.m. and 1:00 a.m. Otherwise, the date may not change
properly.
STOPWATCH
• Restart and stop of the stopwatch can be repeated by pressing button A.
• Measurement and release of split time can be repeated by pressing button B.
Your watch will be adversely
affected by strong magnetism.
Keep it away from close contact
with magnetic objects.
Light activities will not affect your
watch, but be careful not to drop
your watch or hit it against hard
surfaces, as this may cause
damage.
Be careful not to expose the watch to
solvents, mercury, cosmetic spray,
detergents, adhesives or paints.
Otherwise, the case, bracelet, etc. may
become discolored, deteriorated or
damaged.
To prevent possible rusting of the
case and bracelet caused by dust,
moisture and perspiration, wipe
them periodically with a soft dry
cloth.
It is recommended that the watch be
checked once every 2 to 3 years.
Have your watch checked by an
AUTHORIZED FESTINA GROUP DEALER
to ensure that the case, crown,
buttons, gasket and crystal seal remain intact.
If your watch has a protective film
and/or a sticker on the case back,
be sure to peel them off before
using your watch.
35
ILMYM92
TO PRESERVE THE QUALITY OF YOUR WATCH
MAGNETISM
SHOCKS & VIBRATION PERIODIC CHECK
CHEMICALS
CARE OF CASE AND BRACELET
PRECAUTION REGARDING
CASE BACK PROTECTIVE FILM
ESPAÑOLITALIANO FRANÇAISDEUTSCH ENGLISH

By virtue of the regulations pursuant to the handling of waste products deriving from
electronic and electrical equipment, end of lifecycle watch making products must be
selectively collected for processing. You may therefore dispose of your quartz watch making
products at any of our retail outlets or any other authorized collection point. The selective
collection, processing, rating and recycling of these products helps contribute to safeguarding
the environment and protecting our health.
36
ILMYM92
Table of contents
Languages:
Other Lotus Watch manuals

Lotus
Lotus 50010 User manual

Lotus
Lotus ILMGP50 User manual
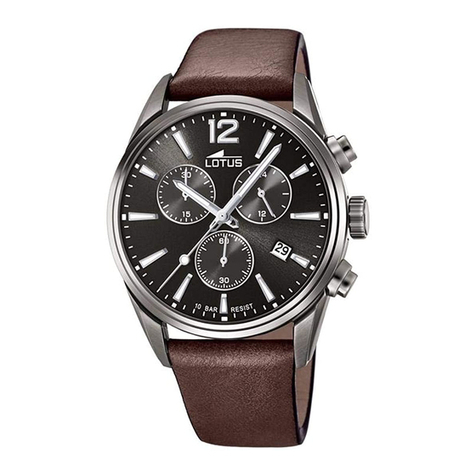
Lotus
Lotus ILMAS10 User manual

Lotus
Lotus Chronograph Calendar ILMJS20/55 User manual

Lotus
Lotus 50010 User manual

Lotus
Lotus Chronograph Calendar ILMOS20 User manual

Lotus
Lotus ILM6P24 User manual
Lotus
Lotus SMARTIME 50006 User manual

Lotus
Lotus 50000 User manual

Lotus
Lotus Multifunction ILM6P27/77 User manual

Lotus
Lotus ILM6P29/79 User manual

Lotus
Lotus ILM6P23/73 User manual

Lotus
Lotus SMARTIME 50015 User manual
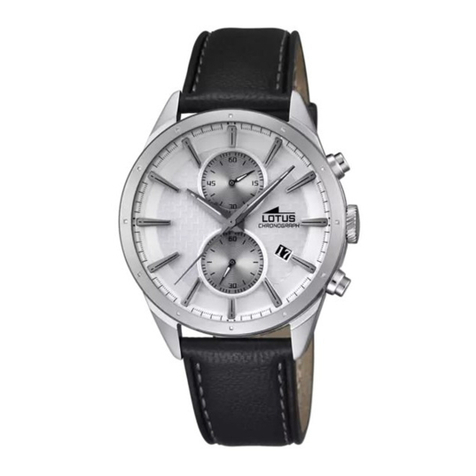
Lotus
Lotus SMARTIME 50006 User manual
Lotus
Lotus HYBRID User manual

Lotus
Lotus Chronograph ILMJS00 User manual
Lotus
Lotus ILMOS11 User manual

Lotus
Lotus ILM6S50 User manual

Lotus
Lotus ILMFS01 User manual
Lotus
Lotus ILM3510 User manual