manuals.online logo
Brands
  1. Home
  2. •
  3. Brands
  4. •
  5. LOWE'S
  6. •
  7. Landscape Lighting
  8. •
  9. LOWE'S GPP011a-K2-AA-C1 User manual

LOWE'S GPP011a-K2-AA-C1 User manual

Model / Modelo: GPP011a-K2-AA-C1
Item / Ítem: 0695631
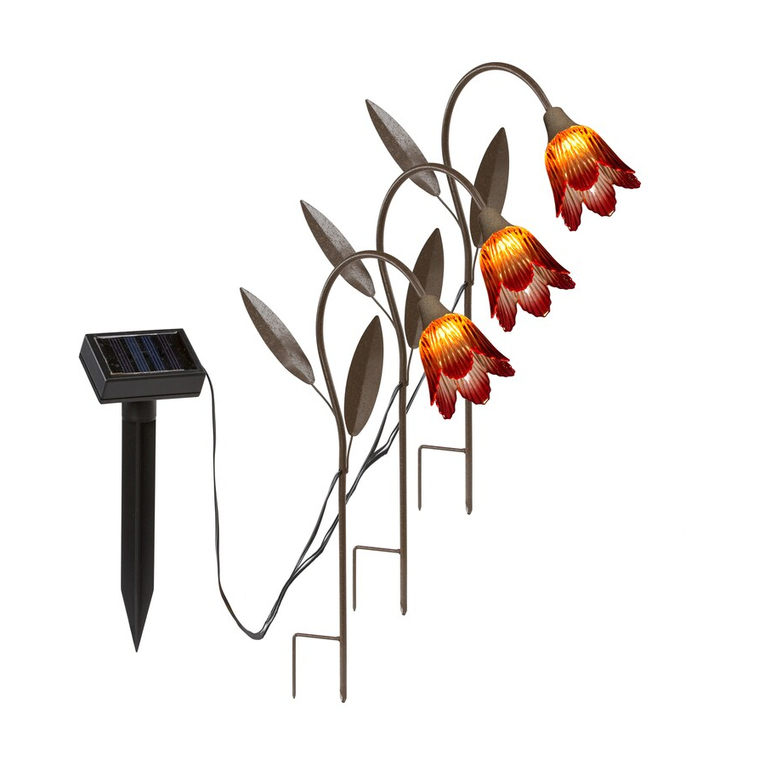
SOLAR GLASS FLOWER
FLOR VIDRIO SOLAR
Aach your receipt here / Adjunta tu recibo aquí
Serial number / Número de serie:
Purchase date / Fecha de compra:
Quesons, problems or missing parts? / ¿Preguntas, problemas, piezas faltantes?
Before returning to your retailer, call our customer service department at 1-866-897-
2098, 6:30 a.m.-3:30 p.m., EST, Monday-Friday.
Antes de devolverlo al establecimiento, póngase en contacto con nuestro servicio al
cliente llamando al 1-866-897-2098, de lunes a viernes entre las 6 30 y las 15 30, hora
del este.
Package contents / Contenido del paquete
Troubleshoong / Resolución de problemas
If your solar light does not turn on at night or its nightly run me is short, it may be caused by one of the following condions:
1. The baery is not fully charged. Make sure the solar panel is located in an area where it can receive the maximum amount
of full and direct sunlight every day. If the solar panel does not receive enough sunlight during any given day (e.g. due to
cloudy or overcast weather condions), it will recharge the next sunny day and resume normal operaon. Keeping the
solar panel clean is equally important to ensure the maximum charging performance.
2. The solar light is installed close to other light sources, which may keep the solar light from turning on at night
automacally. To solve the problem, relocate the xture or eliminate other light sources.
3. The baery is reaching the end of its useful life and needs to be replaced.
Si la luz solar no se enciende a la noche o su funcionamiento nocturno es muy breve, el movo puede ser una de las condiciones
que se presentan a connuación:
1. La batería no está cargada por completo. Asegúrese de que la luz solar esté ubicada en un área donde pueda recibir
la máxima candad de luz solar directa y completa todos los días. Si la luz solar no recibe la candad suciente de luz
solar durante un día (por ejemplo, debido a que hay muchas nubes), se recargará el próximo día soleado y reanudará su
funcionamiento normal. La limpieza del panel solar es igual de importante para garanzar el máximo rendimiento de la
carga.
2. La luz solar está instalada cerca de otras fuentes de luz, que pueden impedir que la luz solar se encienda automácamente
a la noche. Para solucionar este problema, busque una nueva ubicación para el disposivo o elimine las demás fuentes de
luz.
3. La batería está alcanzando el n de su vida úl y debe reemplazarse.
Warranty / Garana
The manufacturer warrants this product to be free of defects in material and workmanship for one (1) year from date of original
purchase. The manufacturer agrees to repair or replace the defecve product, at its own opon. This warranty does not
include any costs associated with the physical installaon, removal or return of the product. This warranty only extends to the
original purchaser and is not transferable or assignable to subsequent purchasers. No warranty work will be provided under this
warranty without reasonable proof of purchase. Please call us at 1-866-897-2098 to receive your warranty service.
This warranty does not extend to the following: (1) LED bulbs or baeries (2) defects caused by and resulng from misuse,
neglect, accident or improper operaon, maintenance and storage, disassembly of parts (3) surface scratches or weathering
as this is considered normal wear (4) any other failure not related to defects in materials and workmanship. There are no other
warranes except those stated above. Some states do not allow the exclusion or limitaon of special or consequenal damages
or allow limitaons on how long an implied warranty lasts, so the above limitaon may not apply to you. This warranty gives
you specic legal rights, and you may have other rights that vary from state to state.
El fabricante garanza que este producto está libre de defectos en materiales y mano de obra por un período de un (1) año a
parr de la fecha de compra. El fabricante se reserva el derecho de reparar el producto o reemplazarlo por otro igual o similar.
La garana no incluye ningún costo relacionado con la instalación, eliminación o devolución de este producto. Esta garana
se exende sólo al comprador original del producto y no es asignable ni transferible a ningún otro comprador o usuario nal
subsecuentes. No se aceptará solicitud de servicio bajo esta garana sin un comprobante razonable de la compra. Por favor
llámanos al 1-866-897-2098 para recibir nuestro servicio de garana.
Esta garana no se aplica a: (1) baterías o bombillos LED (2) Defectos ocasionados por maltrato, negligencia, accidente u
operación, mantenimiento y almacenamiento inadecuado (3) arañazos en la supercie o intemperie ya que esto se considera
desgaste normal (4) Cualquier otra falla que no esté relacionada con los materiales y la mano de obra. No hay otras garanas
excepto las ya mencionadas. Algunos estados no admiten la exclusión o limitación de responsabilidad por daños fortuitos o
consecuentes, en cuyo caso la limitación anterior podría no aplicarse. Esta garana otorga derechos legales especícos y es
posible que tengas otros derechos, los cuales pueden variar de estado a estado.
1X glass ower / or vidrio
1X pole with solar panel / tubo con panel solar
1X ground spike / estaca para erra
Replacement parts list / Lista de piezas de repuesto
For replacement parts, call our customer service department at 1-866-897-2098.
Para obtener piezas de repuesto, llama a nuestro departamento de servicio al cliente al 1-866-897-2098.
Part / Pieza Part # / Parte # Descripon / Descripción Quanty
A GPP011a-K2-AA Glass ower / Flor vidrio 1
B GSH-K2-BK Pole with solar panel /
Tubo con panel solar
1
C GS-BK-POLE Pole / Tubo 1
DBP021-BK Ground spike / Estaca para erra 1
E BT-NC-AA-300 Solar rechargeable baery /
Batería recargable solar
1
Safety informaon / Información de seguridad
Please read and understand this enre manual before aempng to assemble, operate or install the product.
CAUTION
• This product contains nickel-cadmium baery. Baery must be recycled or disposed of properly.
• This lighng xture contains lead, a chemical known to the state of California to cause cancer, birth defects and other
reproducve harm. Wash hands aer installing, handling, cleaning or otherwise touching this light xture.
Lee y enende todo el manual antes de intentar armar, operar o instalar el producto.
PRECAUCIÓN
• Este producto conene una batería de níquel-cadmio. La batería debe ser reciclada o desechada de manera apropiada.
• Esta luminaria conene plomo, un compuesto químico conocido por el estado de California como causante de cáncer,
defectos de nacimiento u otros daños reproducvos. Lavarse las manos después de instalar, manejar, limpiar o tocar esta
luminaria.
Preparaon / Preparación
Before beginning assembly of product, make sure all parts are present. Compare parts with package contents list. If any part is
missing or damaged, do not aempt to assemble, install or operate the product.
Esmated Assembly Time: 6 minutes
No tools required for assembly.
Antes de empezar a armar este producto, asegúrate que todas las piezas estén presentes. Compara las piezas con la lista de
contenido del paquete. Si alguna pieza falta o está dañada, no intentes armar, instalar u operar el producto.
Tiempo esmado de montaje: 6 minutos
No se requieren herramientas para la instalación.
Assembly instrucons / Instrucciones de montaje
1. (Fig. 1) At the boom of pole with solar panel (B), push the switch to posion “ON”.
2. (Fig. 2) Twist and secure the glass bird (A) to the pole with solar panel (B).Then, aach it
to the ground spike (C). Push the assembly into the ground.
CAUTION: DO NOT use a hammer.
For ground with hard soil, to prevent breaking the ground spike, use trowel to loosen the
soil rst.
1. (Fig. 1) En la parte inferior del tubo con panel solar (B), presiona el interruptor a la
posición “ON”.
2. (FIg. 2) Enrosca y asegura el pájaro de vidrio (A) al tubo con panel solar (B). Luego, únelo la punta a
erra (C). Presiona el montaje en la erra.
PRECAUCIÓN: NO USAR un marllo.
En los casos donde el suelo es muy duro, ulice una pala para primero ablandar el suelo y evitar así
que se rompa el estaca para erra.
Charging the baery / Cargar la batería
This solar light is shipped with the switch in the “OFF” posion. Before using the light, locate the power
switch on the boom of pole with solar panel and switch it to the “ON” posion. Allow the light to run
at least 8-12 complete charging and discharging cycles to reach baeries’ maximum capacity.
Esta lámpara solar se entrega con el interruptor en la posición de apagado “OFF”. Antes de usar
la lámpara, coloca el interruptor de corriente en la parte inferior del tubo con panel solar y pon el
interruptor en la posición “ON.” Deja que la lámpara funcione al menos de 8-12 ciclos de carga y
descarga completa para alcanzar la máxima capacidad de la batería.
Replacing the baery / Reemplazar la batería
The included rechargeable baeries will usually last two years. Replace baeries only when you noce
the performance of the solar light is weaker than its normal operaon in the rst year.
To replace the baery, take apart the light assembly. At the boom of pole with solar panel, remove
the screws and the baery compartment cover. Replace the old baery with a fresh 1.2 V AA Ni-Cd
solar rechargeable baery. Note: A minimum capacity of 300 mAh is required. Replace the baery
compartment cover and screws.
BATTERIES MUST BE RECYCLED OR DISPOSED OF PROPERLY. Do not disassemble, short circuit or
expose to re or high temperature. Recycle baery according to local, state and naonal regulaons.
Do not ingest. Baeries should be inserted correctly (+/-). Baeries should be replaced immediately
when end of life has reached.
Para reemplazar la batería, desarma la lámpara . En la parte inferior del tubo con panel solar, elimina
los tornillos y la tapa del comparmiento de la batería. Reemplaza la batería con una nueva batería
recargable solar 1.2 V AA Ni-Cd. Nota: Se requiere una capacidad mínima de 300 mAh. Vuelve a poner
la tapa del comparmento de la batería y los tornillos.
Las baterías recargables incluidas duran dos años normalmente. Reemplaza las baterías sólo cuando
veas que el rendimiento de la lámpara solar es más débil que en su operación normal en el primer año.
LAS BATERÍAS DEBEN SER RECICLADAS O DESECHADAS DE MANERA APROPIADA. No desarmar,
provocar un cortocircuito o exponer al fuego o a altas temperaturas. Las baterías deben insertarse
correctamente (+/-). Reciclar la batería conforme a las normas locales, estatales, y nacionales. No
ingerir. Al nalizar la vida úl de las baterías, estas deben reemplazarse de inmediato.
Winter ps / Consejos para el invierno
Keep debris and snow o the solar panel to allow the baeries to recharge. If lights have been covered by snow for a long me,
allow baeries to recharge in full, direct sunlight for at least 10-12 hours so that they maintain maximum capacity.
Mantén el panel solar libre de suciedad y nieve para permir que las baterías se recarguen. Si las luces han sido cubiertas con
nieve por mucho empo, deja que las baterías se recarguen completamente, con luz solar directa por al menos 10-12 horas
para que puedan mantener su máxima capacidad.
A
A
C
C
B
B
B
B
B
D
D
E

This manual suits for next models

1

Other LOWE'S Landscape Lighting manuals

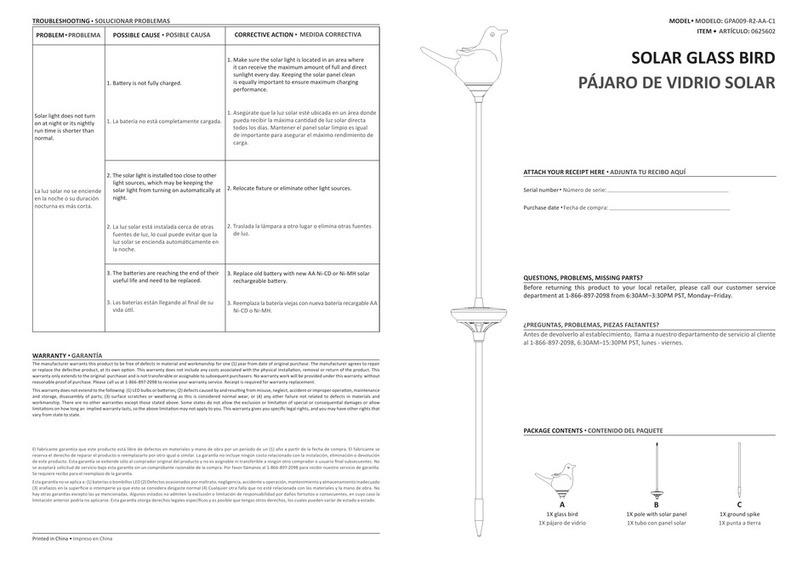
LOWE'S SOLAR GLASS BIRD GPA009-R2-AA-C1 User manual

LOWE'S

LOWE'S SOLAR GLASS BIRD GPA009-R2-AA-C1 User manual

LOWE'S MSP002-R0-AA-PK3 User manual

LOWE'S

LOWE'S MSP002-R0-AA-PK3 User manual

Popular Landscape Lighting manuals by other brands

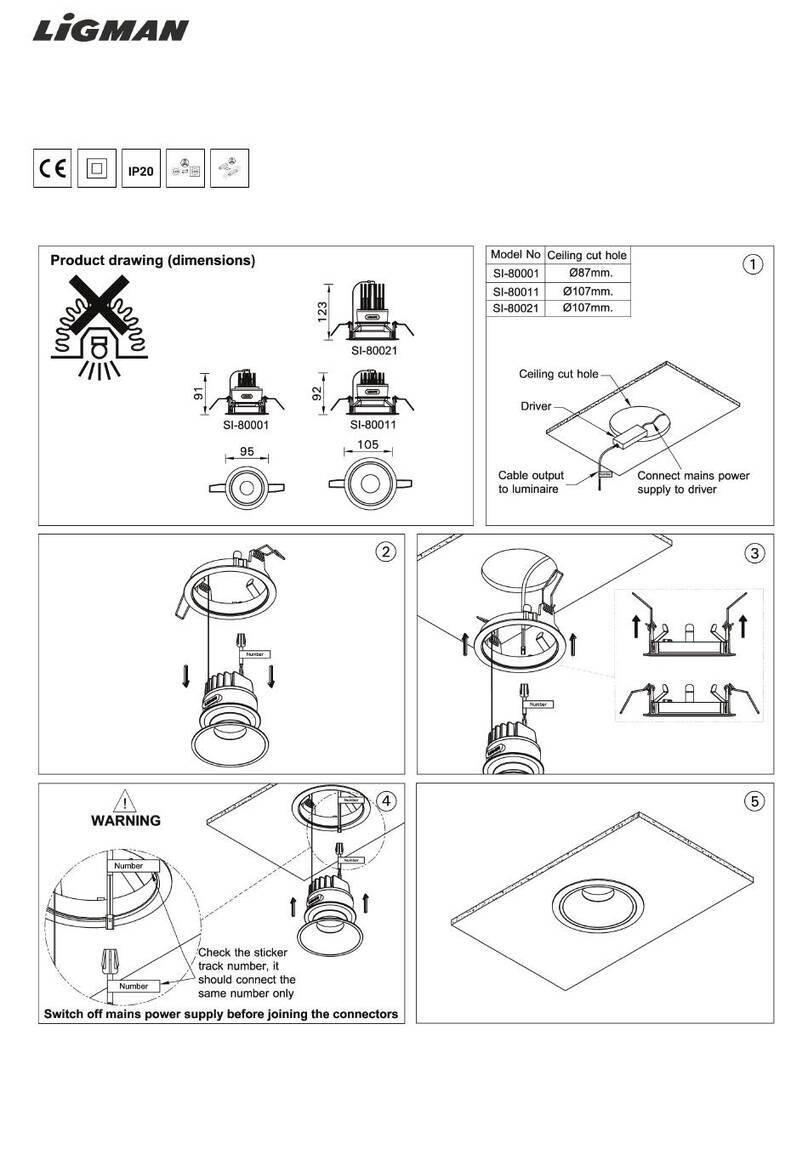
LIGMAN TEXAS 3 installation manual

LIGMAN

LIGMAN TEXAS 3 installation manual

Malibu Boats LT11 Assembling & installation instructions

Malibu Boats

Malibu Boats LT11 Assembling & installation instructions

KLIK LEDpod 50 installation instructions

KLIK

KLIK LEDpod 50 installation instructions

Malibu Boats CL905 instructions

Malibu Boats

Malibu Boats CL905 instructions

B-K lighting Denali Series installation instructions

B-K lighting

B-K lighting Denali Series installation instructions

GE StayBright 72232 Assembly instructions

GE

GE StayBright 72232 Assembly instructions

AMP Lighting VAL-91 Series Installation & maintenance guide

AMP Lighting

AMP Lighting VAL-91 Series Installation & maintenance guide

Tapetum TTSGLWW1W Instruction Manual For Assembly and Use

Tapetum

Tapetum TTSGLWW1W Instruction Manual For Assembly and Use

Brinkmann Solar Gallery owner's manual

Brinkmann

Brinkmann Solar Gallery owner's manual

GLITZHOME Mid Century Modern Oversized Faux Terrazzo Assembly instruction

GLITZHOME

GLITZHOME Mid Century Modern Oversized Faux Terrazzo Assembly instruction

Wooshin Press WSSeagull user guide

Wooshin Press

Wooshin Press WSSeagull user guide

Volt VFL-4027 installation instructions

Volt

Volt VFL-4027 installation instructions

LIGMAN VIE-80004 installation manual

LIGMAN

LIGMAN VIE-80004 installation manual

Volt VHS-6720-X-BBZ-R1 installation instructions

Volt

Volt VHS-6720-X-BBZ-R1 installation instructions

WAC Lighting Accent 5011 Installation instruction

WAC Lighting

WAC Lighting Accent 5011 Installation instruction

iGuzzini Light Up Earth E127 manual

iGuzzini

iGuzzini Light Up Earth E127 manual

Jaclyn Smith 10 LED SQUARE LANTERN SOLAR STRING LIGHTS owner's manual

Jaclyn Smith

Jaclyn Smith 10 LED SQUARE LANTERN SOLAR STRING LIGHTS owner's manual

AMP Lighting VariantPro AAL-1028-0-B-BZ Installation & maintenance guide

AMP Lighting

AMP Lighting VariantPro AAL-1028-0-B-BZ Installation & maintenance guide

manuals.online logo
manuals.online logoBrands
  • About & Mission
  • Contact us
  • Privacy Policy
  • Terms and Conditions

Copyright 2025 Manuals.Online. All Rights Reserved.