Lucznik Laura 555 User manual
USER MANUAL

Important safety instructions
Please read the following instructions before using the machine.
When using an electrical appliance, basic safety precautions should
always be followed, including the following:
1. Read the manual carefully before using the machine.
2. The manual should be kept close to the machine. If the machine is passed on to a third party, it must be
handed over together with the instructions.
3. The machine may only be used in a dry place.
4. Never leave the machine unattended in the presence of children or elderly people, as they may not be
aware of the risks associated with its use.
5. The device may be used by children from 8 years of age and people with reduced physical, sensory or
mental abilities or without experience or knowledge in this field, provided this is done under supervision
or they are instructed to use the device safely and understand the danger associated with it.
6. Children must not play with the machine.
7. Children must not clean or maintain the machine without adult supervision.
8. When preparing for work (changing the needle, threading the thread, changing the presser foot, etc.),
always turn off the machine.
9. Immediately after using the machine or before carrying out maintenance (cleaning and oiling), always
disconnect the machine from the power supply.
10. Do not start the machine if it gets wet.
11. Never pull on the cord. Always hold the plug when disconnecting the machine from the power supply.
12. In the event of damage or failure of the LED lamp, it may only be replaced by an authorized service
center.
13. Never put any objects on the machine's pedal (foot controller).
14. If the ventilation openings are blocked, the machine must not be used. Make sure that neither the
vents nor the pedal are covered with dust, lint, or clippings.
15. The machine may only be used with the regulator included with the machine or purchased at an
authorized service point.
16. The loudness of the correct operation of the machine should be less than 75 dB (A).
SAVE THESE INSTRUCTIONS
Any repairs should be performed by an authorized service center.
This product is intended for home use

SEWING MACHINES
IMPORTER: ASPA Electro Sp. z o. o. ul. Miechowskiego 1, 51-162
Wrocław
tel: +48 71 32 73 138
In case of any problems, please
contact us in writing or by phone:
CENTRAL SERVICE: ASPA Electro Sp. z o. o.
ul. Lubelska 89/95, 26-600 Radom
tel. 048 384 00 13, fax 048 384 00 26
We wish you satisfaction with the use of our products

MAIN PARTS
1. Thread tension dial
2. Foot pressure regulator
3. Thread take-up lever
4. Thread cutter
5. Footer
6. Needle plate
7. Sewing table and accessory box
8. Bobbin stopper
9. Stitch length dial
10. Stitch width dial
11. Stitch display
12. Reverse sewing lever
13. Automatic threader (optional)
14. Upper thread guide
15. Presser foot lever
16. Handle
17. Bobbin spindle
18. Thread spindle
19. Handwheel
20. Pattern selection dial
21. Power switch
22. Power socket
23. Bobbin thread guide

ACCESSORIES
Standard accessories 1
a. Universal foot
b. Zipper foot
c. 4-step buttonhole foot
d. Embroidery plate
e. Quilting guide
f. Buttonhole cutter/brush
g. Oil bottle
h. Needles (x3)
i. Bobbins (x3)
j. Screwdriver (small)
k. Screwdriver (large)
l. Screwdriver (L)
Optional equipment 2
m. Foot for sewing buttons
n. Blind stitch foot
o. Double needle
p. Darning foot
q. Shirring foot
r. Foot for sewing in string
s. Walking foot
t. Darning / hemming foot
u. Quilting foot
v. Quilting guide

Hold the snap-in sewing table horizontal, and
push it in the direction of the arrow (1)
The inside of the snap-in sewing table can be
utilized as an accessory box.
To open, lift up at the point of the arrow (2)
FITTING THE SPAN-IN SEWING TABLE
Caution:
Always make sure that the machine is unplugged from the power source and the main switch
is on „O” when the machine is not in use and before inserting or removing parts.
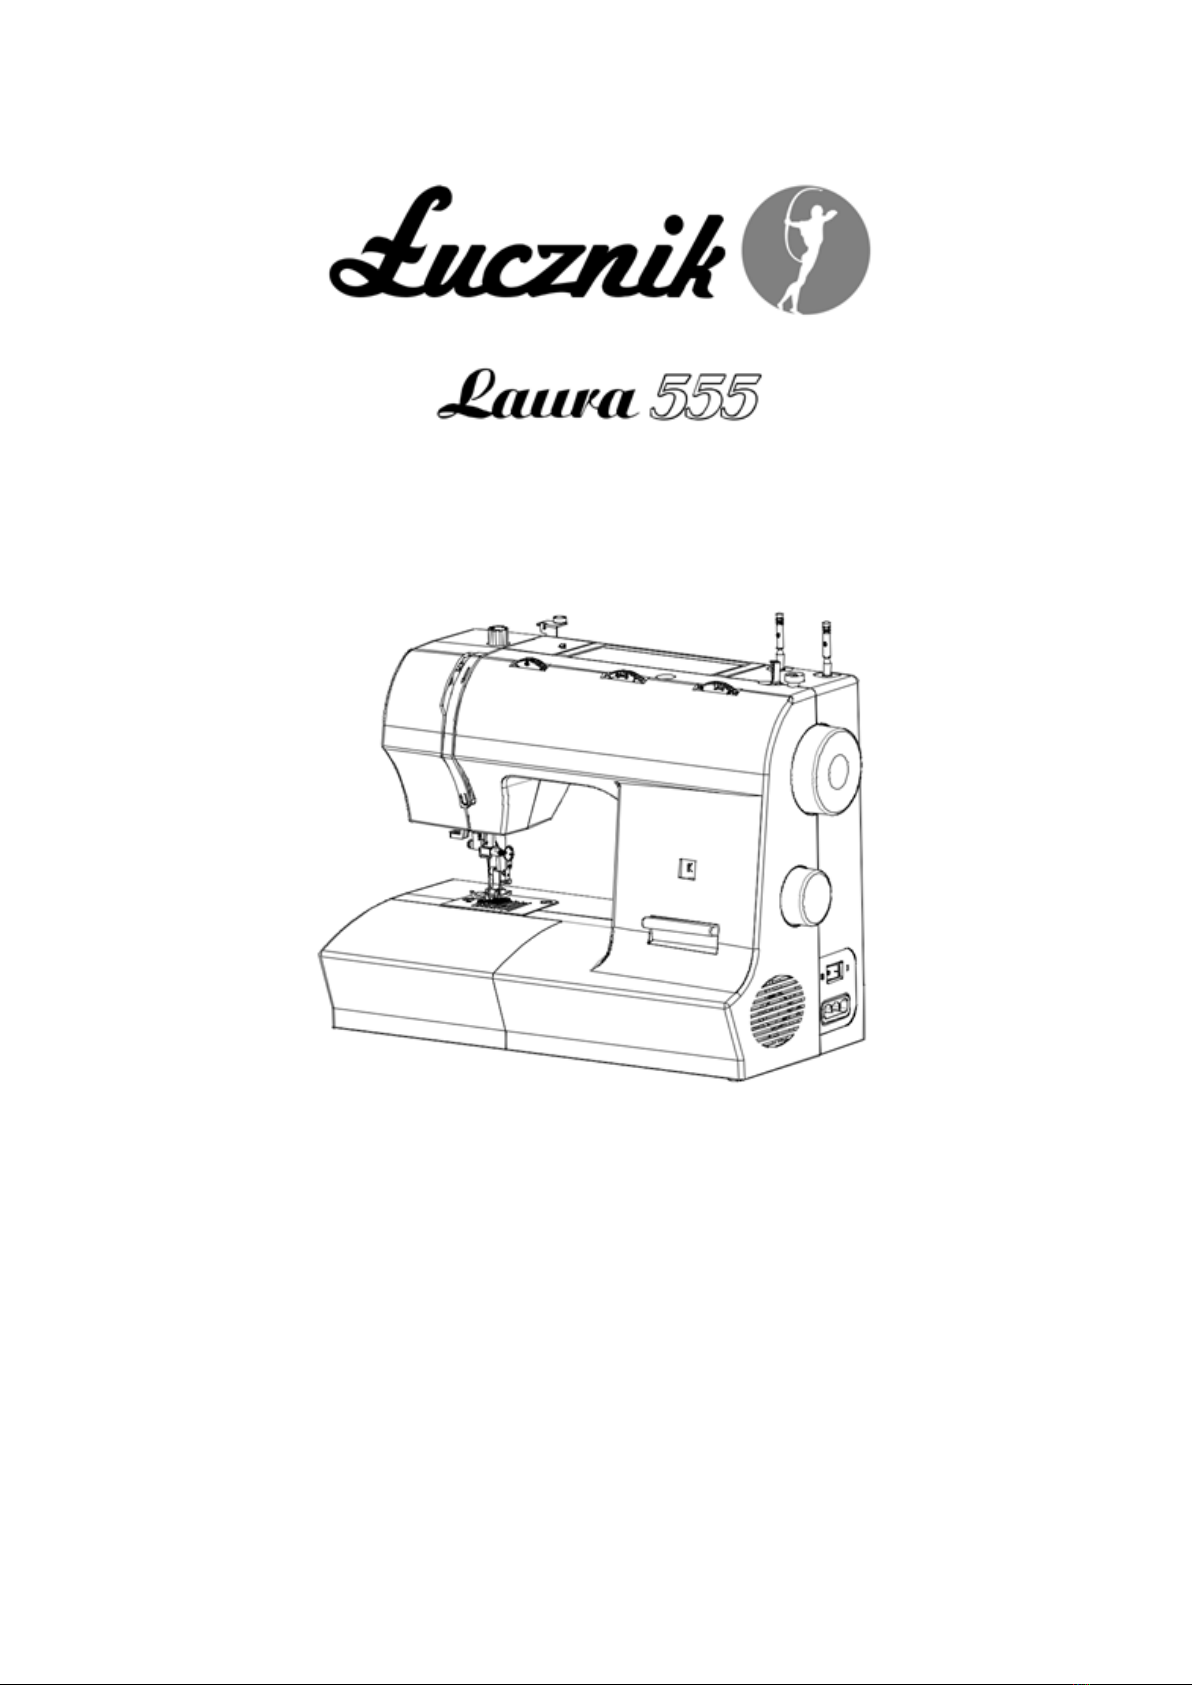
This machine is equipped with a polarized plug which must be used with an appropriate
electrical outlet.
Connect the machine to a power source as illustrated. The power switch is located above the
terminal box. Your machine will not operate unless the switch is on “I”.
The sewing light turns on automatically when the main switch is on “I”.
To start the machine, press the foot control. The speed of the machine is regulated by the
amount of pressure exerted on the foot control.
Attention:
Consult a qualified electrician if in doubt as to connect the machine to the power source.
Unplug the power cord when the machine is not in use.
CONNECTING THE SEWING MACHINE TO THE POWER SOURCE
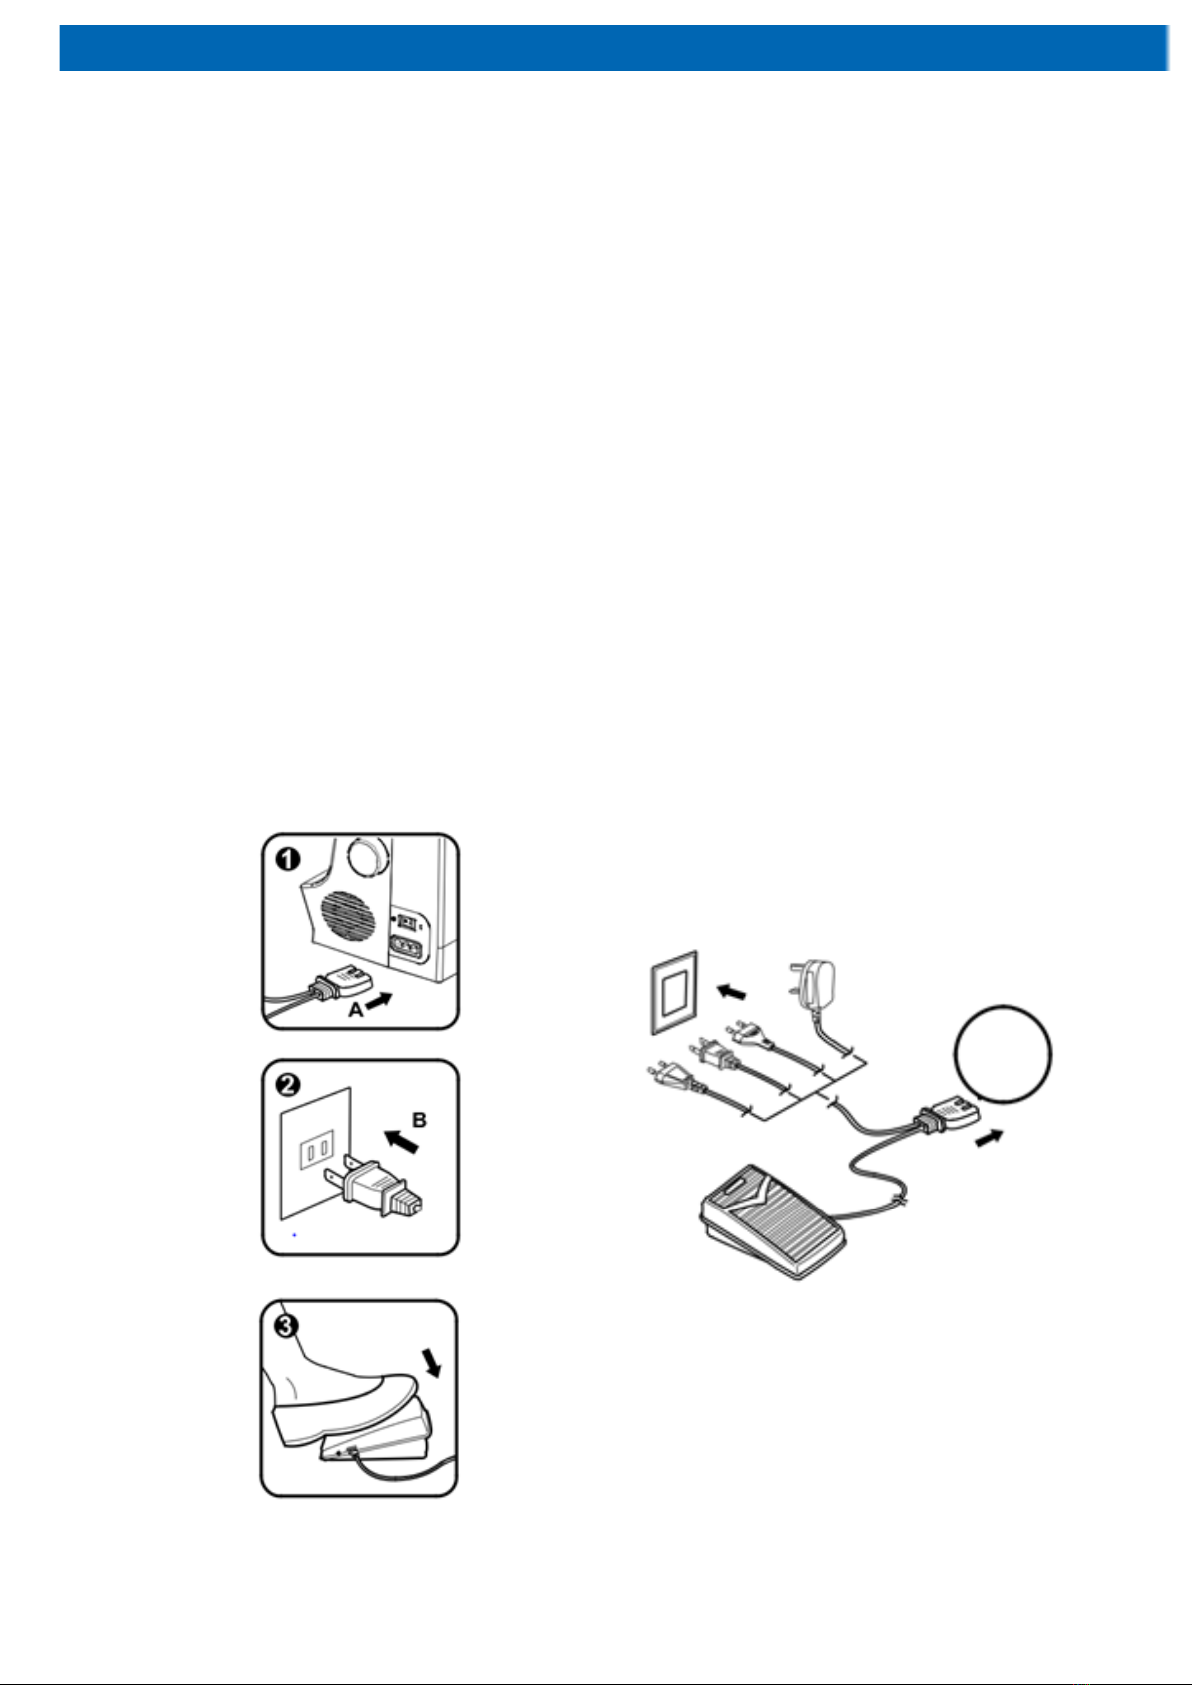
When sewing several layers or thick fabrics, the
presser foot can be raised to the second pressure
level, which makes it easier to work.
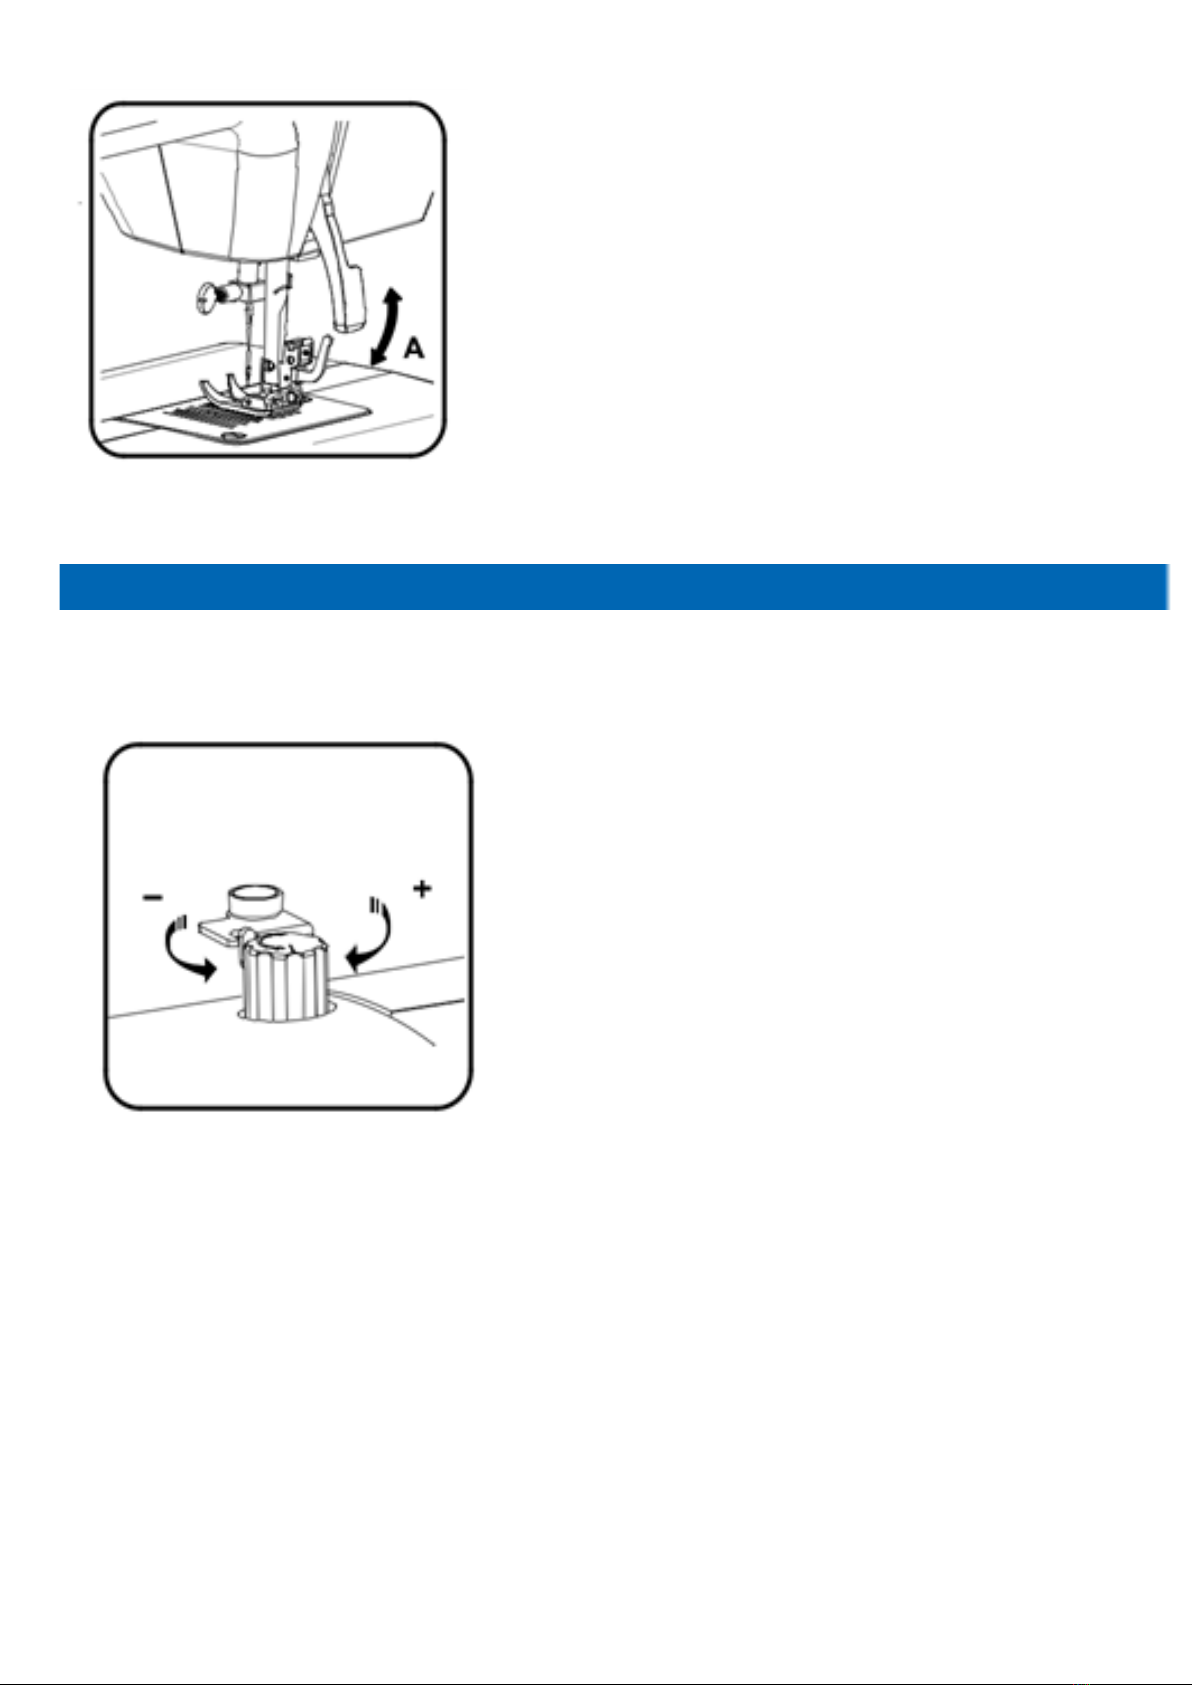
ADJUSTMENT OF THE FOOT PRESSURE
The presser foot pressure is factory set and does
not require special adjustment for a specific type of
fabric (light or heavier).
However, if necessary, you can adjust the presser
foot pressure by turning the presser foot pressure
adjuster as shown in the image on the left.
When sewing with very thin fabrics, reduce the
pressure by turning the regulator counterclockwise,
and for heavy and thick fabrics - increase the
pressure by turning the regulator clockwise
Attention:
Turn the power switch to “O” before carrying out any of the operations below.
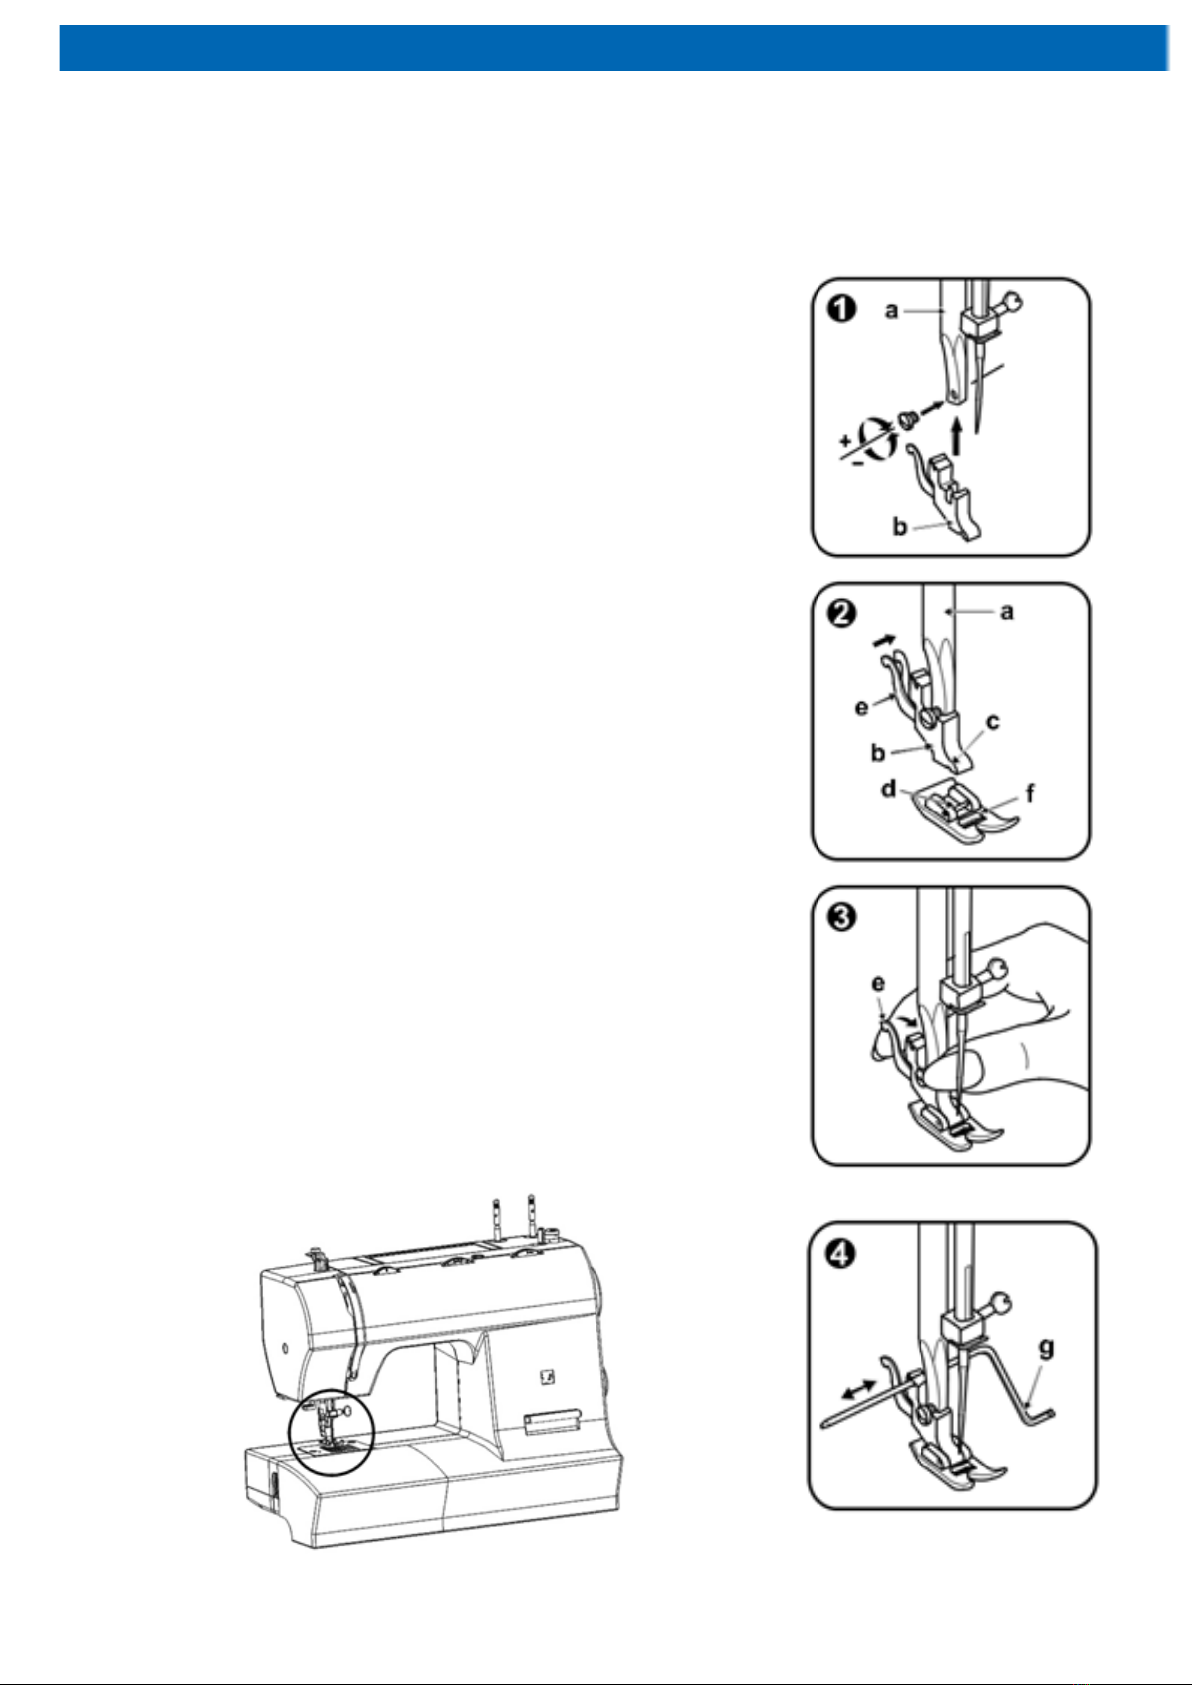
ATTACHING THE PRESSER FOOT HOLDER
Raise the needle to its highest position and raise
the presser foot lever. Attach the presser foot
holder (b) to the presser foot bar (a) Pic.1
Attaching the presser foot:
Lower the presser foot holder (b) until the cut-out
(c) is directly above the pin (d) Pic.2
Lower the presser foot holder (b) and the presser
foot (f) will engage automatically.
Removing the presser foot:
Raise the presser foot.
Release the pressure foot by raising lever (e)
located at the back of the foot holder. Pic 3.
Attaching the seam guide:
Attach the seam guide (g) in the slot as illustrated.
Adjust the distance as required for herms, pleats,
etc. Pic. 4

Place an empty bobbin on the bobbin winder spindle.
Take the thread from the spool through the bobbin winder tension disc. (1)
Wind the thread a few times by hand around the empty bobbin in a clockwise direction. Push
the bobbin to the right towards the bobbin winding position. (2)
Press the foot control gently. The bobbin will stop winding when it is full. Push the bobbin to
the left to “sewing position” and remove it.
Please Note:
When the bobbin winder spindle is in “bobbin winding” position, the machine will not sew and
the handwheel will not turn. To start sewing, push the bobbin winder spindle to the left
(sewing position).
WINDING THE BOBBIN
Table of contents
Other Lucznik Sewing Machine manuals


