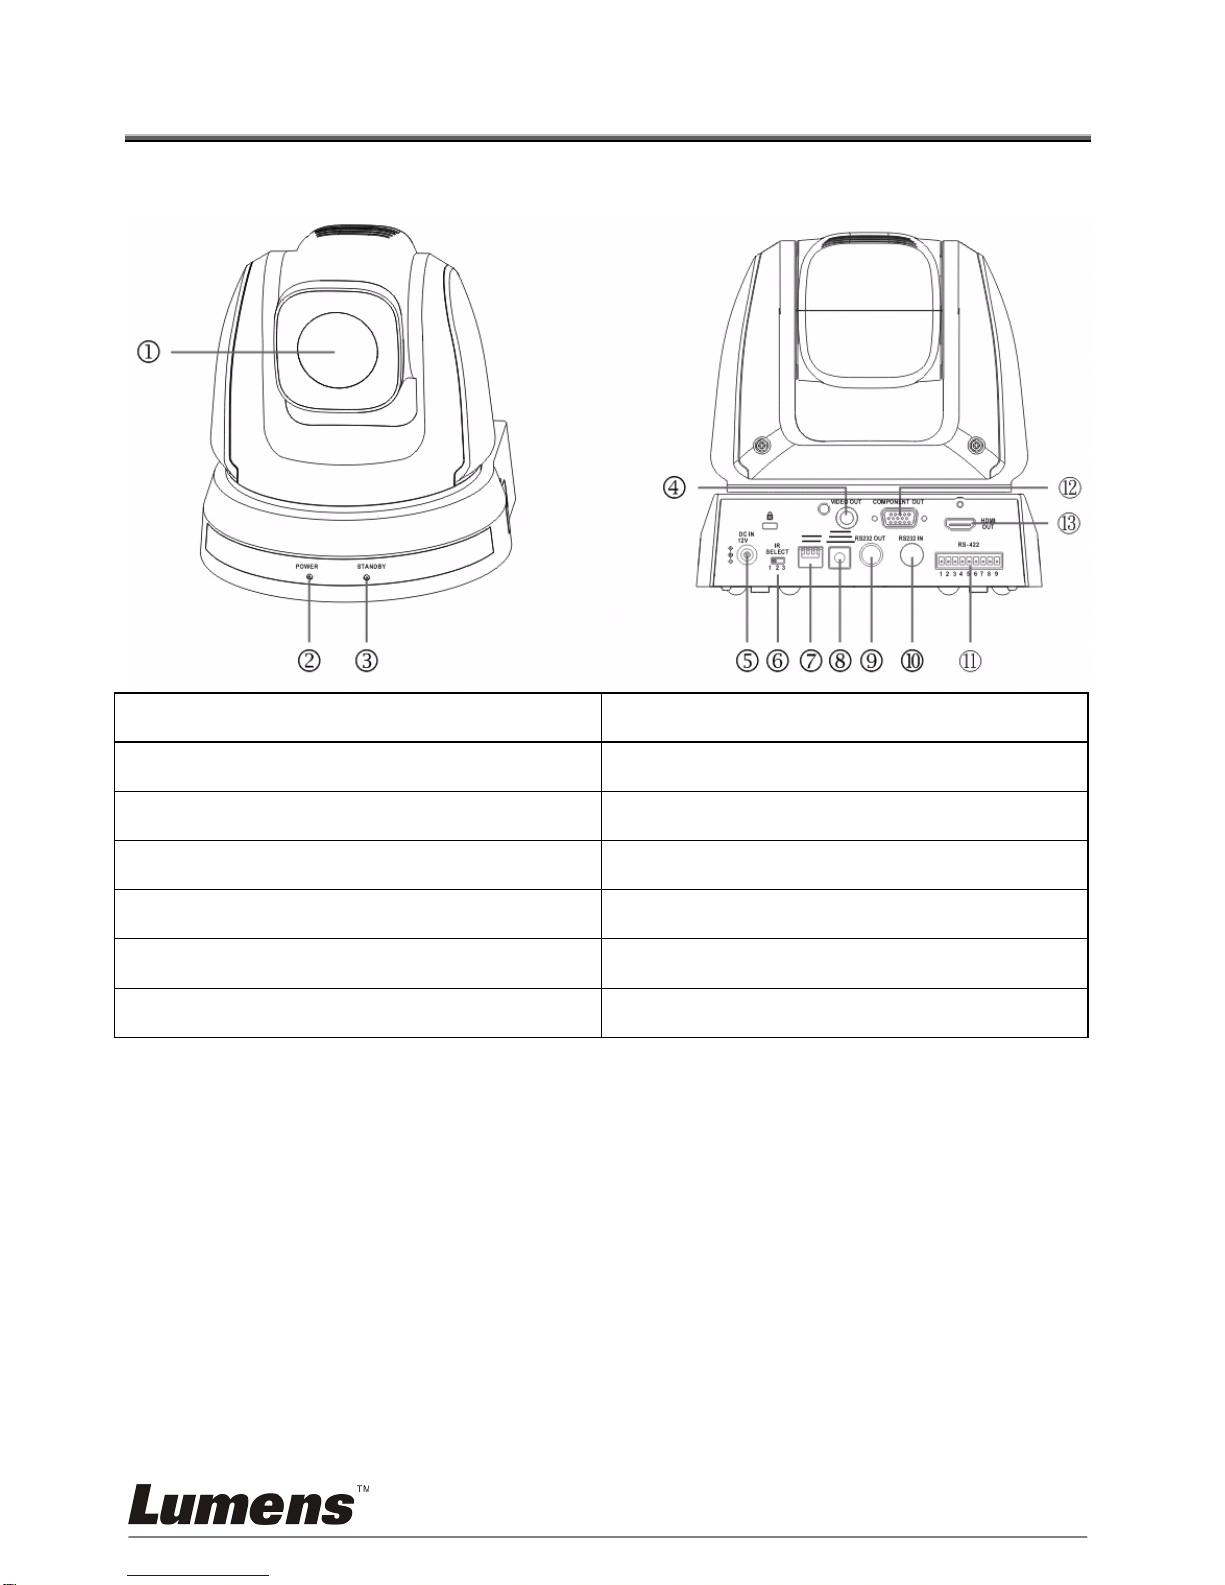
Chapter 1 Safety Instructions
Always follow these safety instructions when setting up and using the HD
Camera:
1. Use attachments only as recommended.
2. Use the type of power source indicated on the HD Camera. If you are not
sure of the type of power available, consult your distributor or local electricity
company for advice.
3. Always take the following precautions when handling the plug. Failure to do
so may result in sparks or fire.
Ensure the plug is free of dust before inserting it into a socket.
Ensure that the plug is inserted into the socket securely.
4. Do not overload wall sockets, extensions leads or multi-way plug boards as
this may cause fire or electric shock.
5. Do not place the HD Camera where the cord can be stepped on as this may
result in fraying or damage to the lead or the plug.
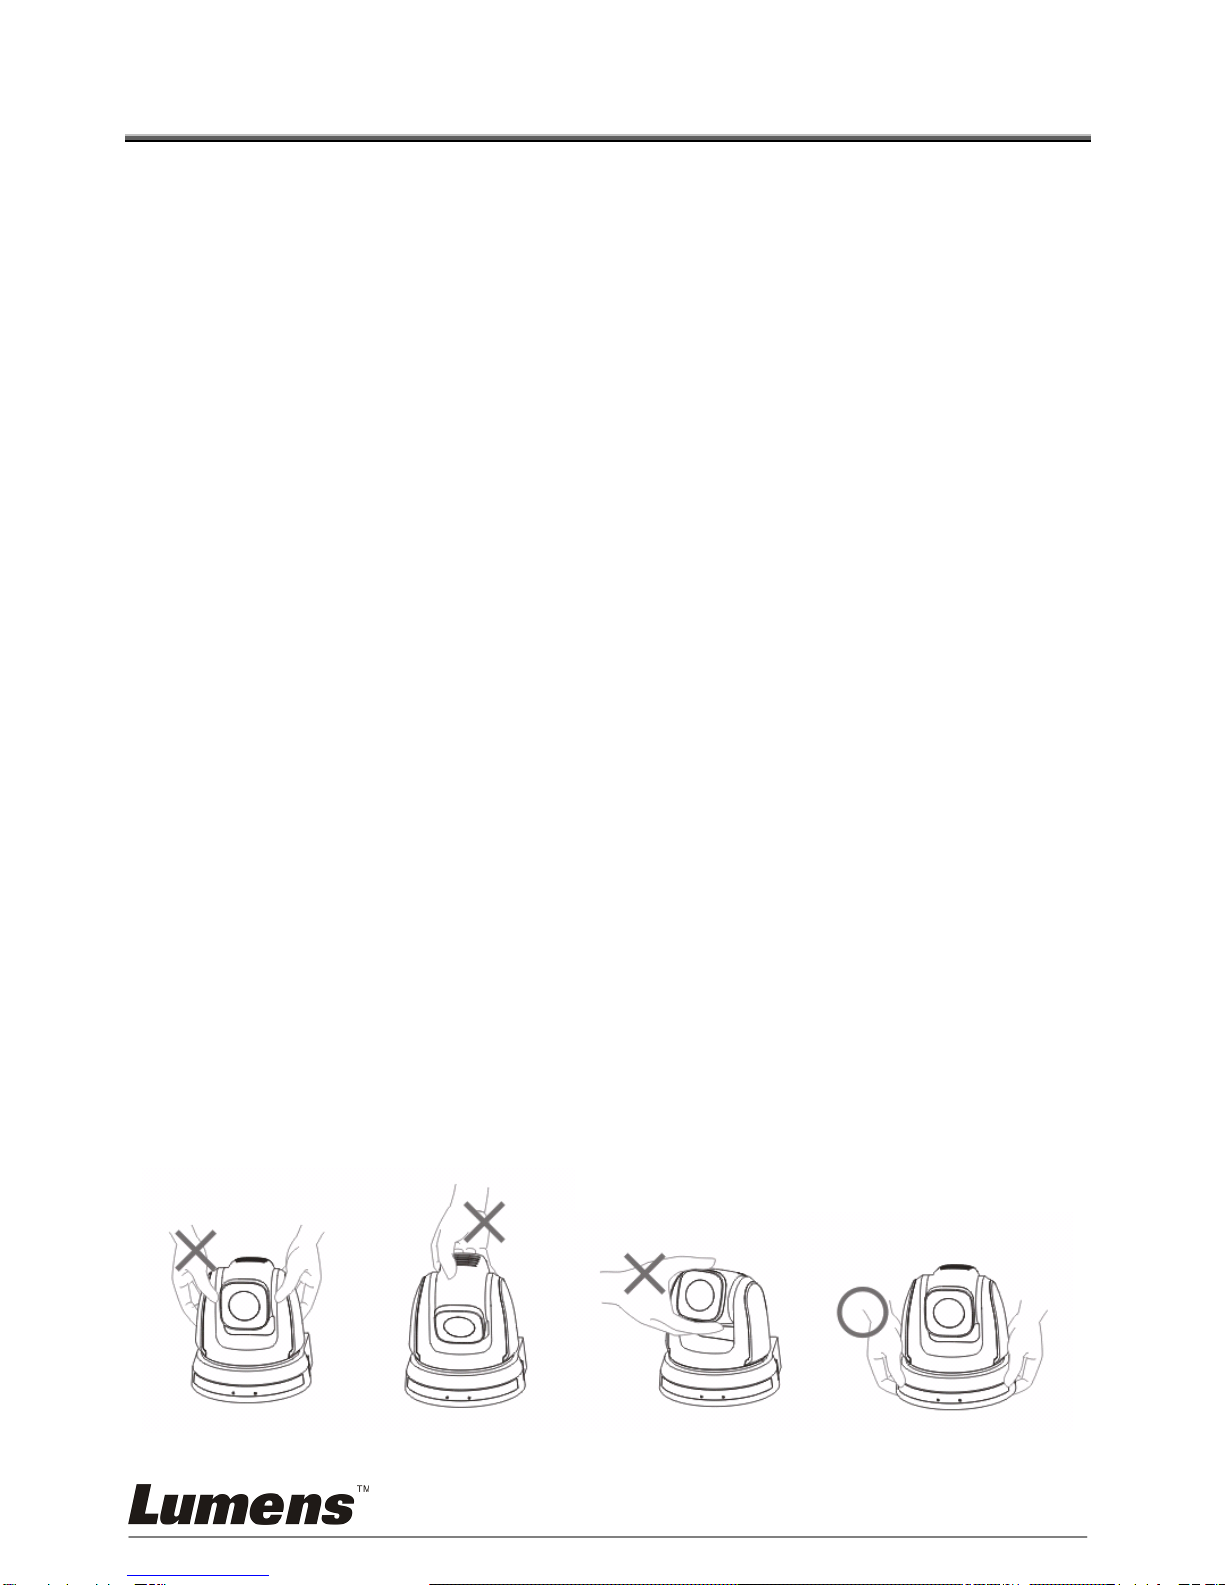
6. Do not block the slots and openings in the case of HD Camera. They provide
ventilation and prevent the HD Camera from overheating. Do not place the
HD Camera on the soft surface of sofas, carpets or others.
7. Never push objects of any kind through cabinet slots. Never allow liquid of
any kind to spill into the HD Camera.
8. Except as specifically instructed in this User Manual, do not attempt to
operate this product by yourself. Opening or removing covers may expose
you to dangerous voltages and other hazards. Refer all servicing to licensed
service personnel.
9. Unplug the HD Camera during thunderstorms or if it is not going to be used
for an extended period. Do not place the HD Camera or remote control on
top of heat-emitting equipment or heated objects such as a car, etc.
10. Unplug the HD Camera from the wall outlet and refer servicing to licensed
service personnel when the following situations happen:
If the power cable or plug becomes damaged or frayed.
If the camera is wet with liquid, rain or water.
<Note> Using an incorrect battery type in the remote control may result in
breakdown. Follow your country’s instructions on how to dispose of used
batteries.