Installation Instructions DualGig-2.5 20200506 4
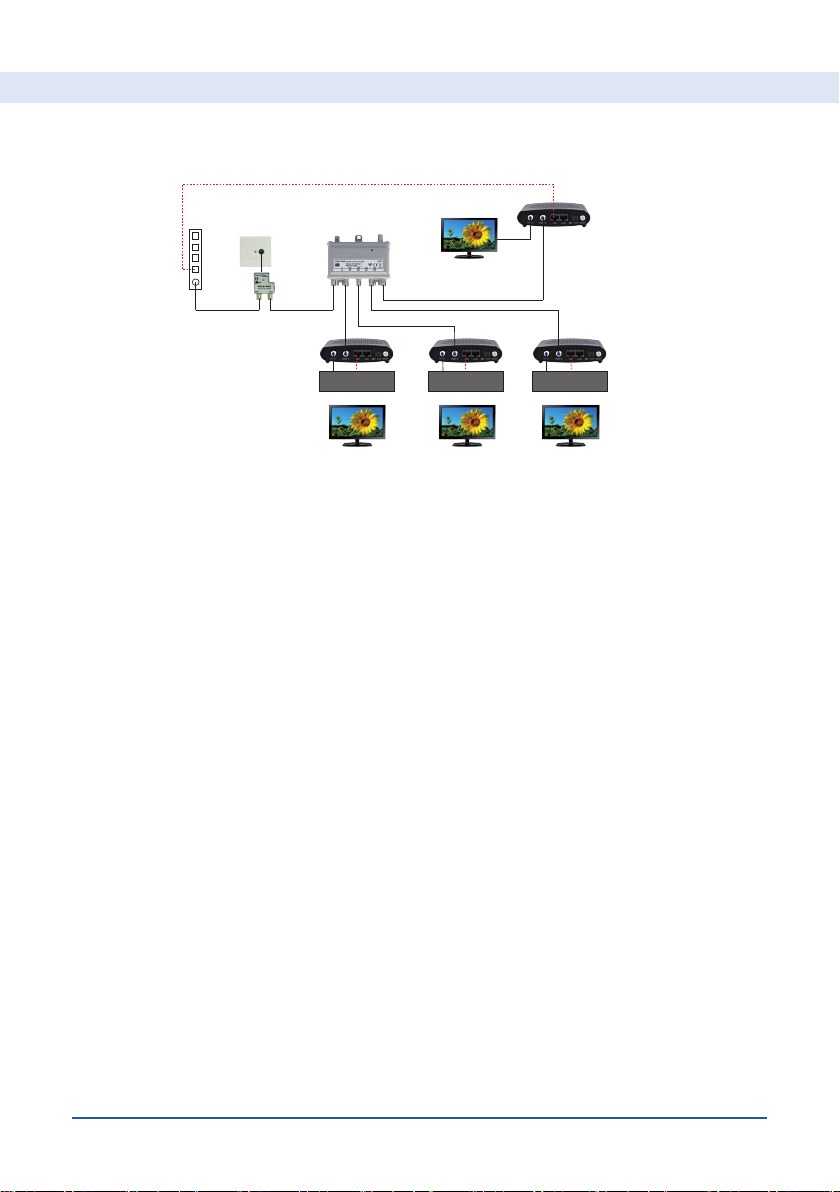
What is MoCA®
In short, MoCA® is connecting internet devices via the (existing) coax net-
work.
MoCA® adapters ensure that the (existing) coax cable is suitable for watching
TV and at the same time an Ethernet connection is made between your cable
modem and your network equipment. This is possible because separate fre-
quencies are used for the TV and the internet, so that no mutual interference
occurs.
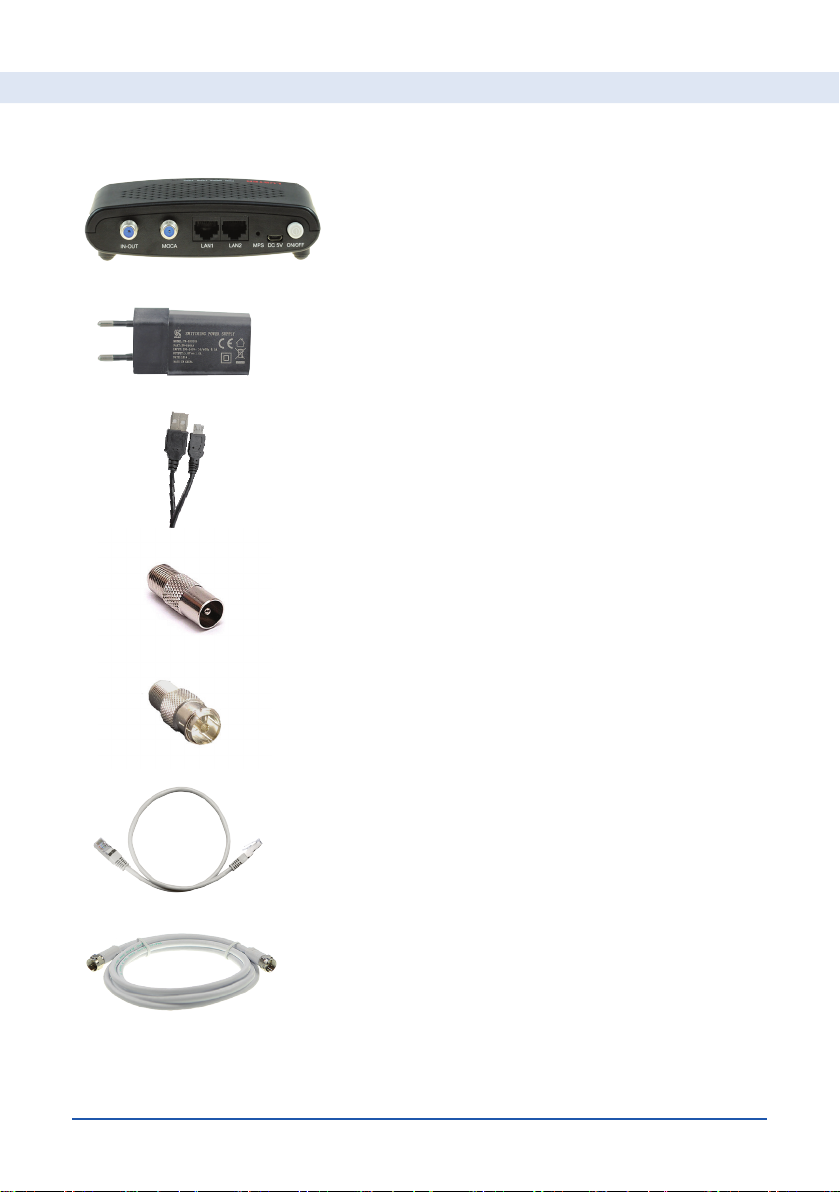
What do you need for the MoCA® connection
For a network with MoCA® adapters you need at least 2 MoCA® adapters.
The 1st MoCA® adapter is connected to your cable modem. The 2nd MoCA®
adapter is connected to your Media box via the coax network.
Here we describe how to connect 2 MoCA® adapters in a coax network and
how to test the connection.
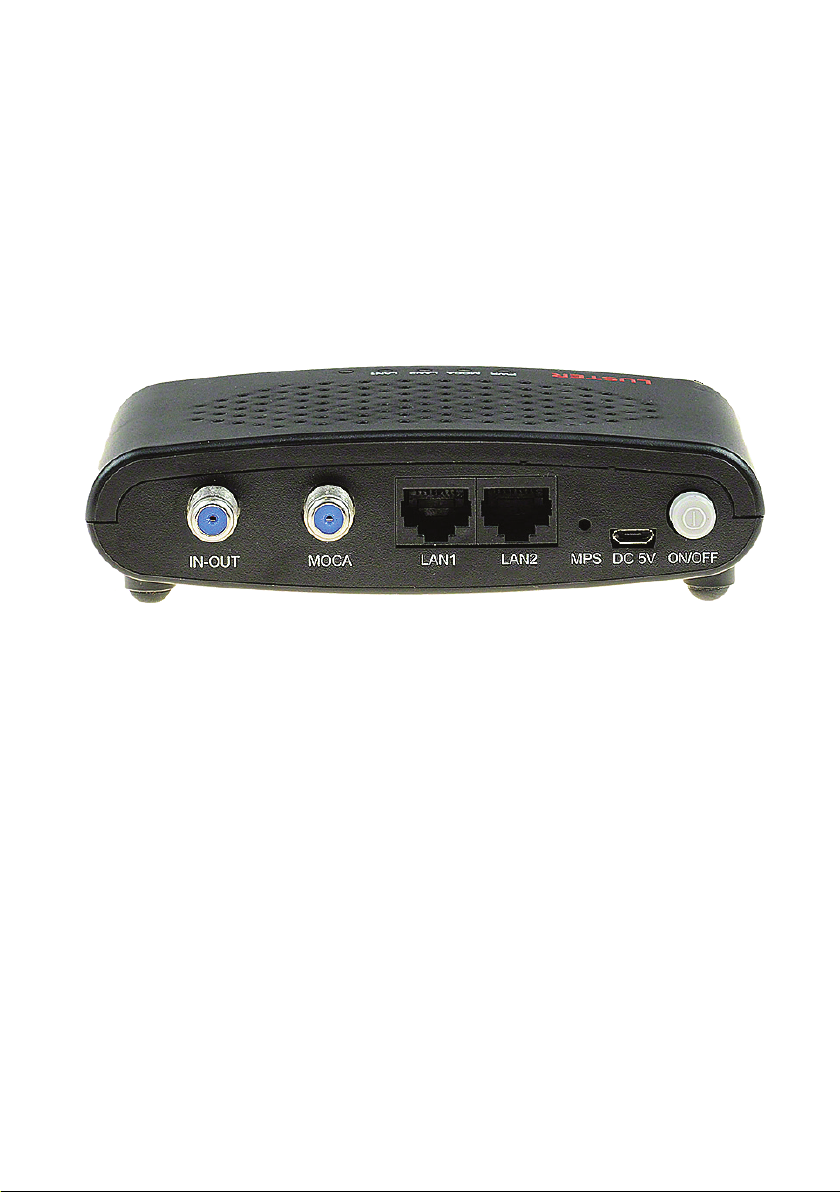
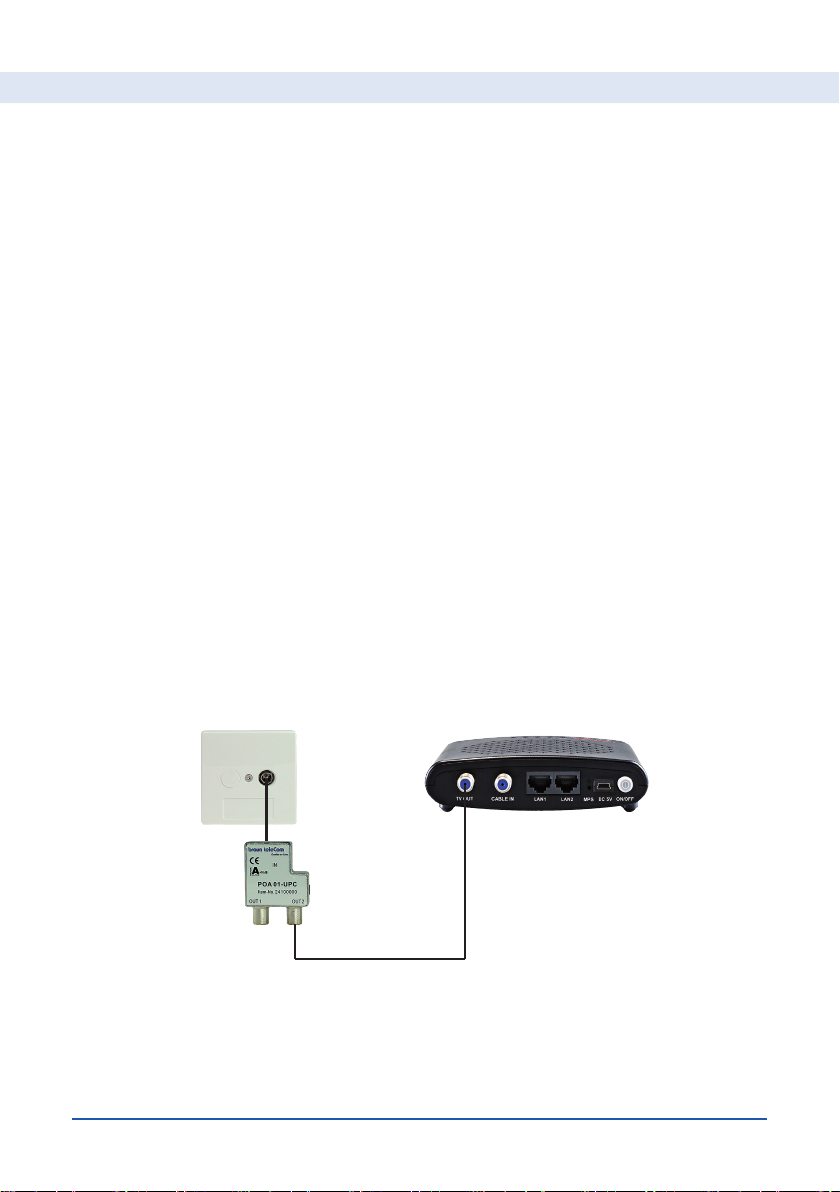
Mouting your 1st MoCA® adapter (to your cable modem)
• Connect a coaxial connection cable between the output of the splitter
mounted on the Isolator and the “IN OUT” connector of the MoCA® adapt-
er.
• Connect one of the available LAN ports of your cable modem to the LAN1
or LAN2 port of the 1st MoCA® adapter with a network cable.
For Subscribers connected to a Coax network