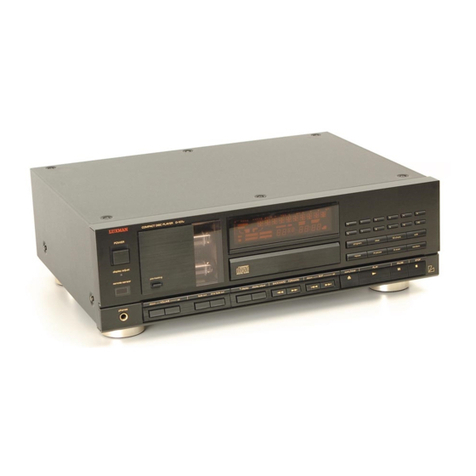
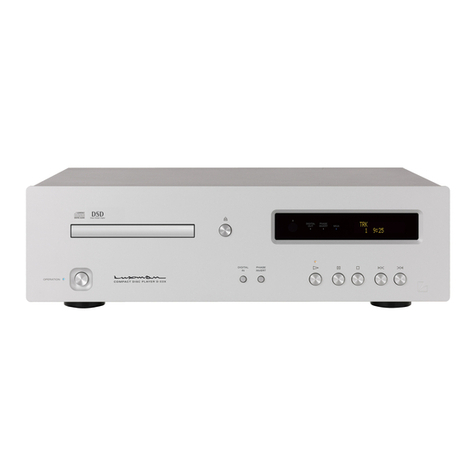
Luxman D-07X User manual

SUPER AUDIO CD PLAYER
D-07X


SUPER AUDIO CD PLAYER D-07X
Contents
Precautions ············································································································· 1
Features of This Unit································································································ 3
Compatible Discs ···································································································· 7
Before Use ·············································································································· 8
Names and Functions···························································································· 11
Connections ·········································································································· 19
How to Play Back Discs ························································································ 23
Stop/pause the Playback······················································································· 25
Skip/Fast-forward/Rewind ····················································································· 27
Direct search/repeat playback ··············································································· 29
Program Playback ································································································· 31
Random playback/disc information/zoom······························································ 33
Detailed Settings ··································································································· 35
Block Diagram······································································································· 41
Specifications ········································································································ 42
Before Asking for Repair Service············································································ 43

1
Precautions
DO NOT move this unit during playback.
During playback, the disc is rotating at high speed. Do not try
to lift or move this unit as the disc may be damaged. Other-
wise, the disc may be damaged.
When moving this unit
You must remove the disc and close the disc tray when mov-
ing this unit. Then, press the OPERATION button, and after
“-STANDBY-” on the display window turns off, unplug the
power cord from the AC outlet. If the unit is moved with a disc
remaining inside, this can cause a malfunction.
Installation location
Install this unit in a location where good ventilation and heat
radiation are assured.
Especially, installation of this unit where direct sunlight is
present, where the temperature rises excessively high such
as close to a heater, or where it is humid or dusty may cause
a malfunction even if heat is efficiently released.
Therefore, do not install this unit in such places.
Note:
For heat dispersal, do not install this equipment in a confined
space such as a book shelf or similar unit.
* Note
Wall
*
**
• Choose a stable place near the stereo system that is to be
used in combination with this unit.
• Do not install this unit near a television or color monitor.
Keep this unit away from magnetically sensitive devices
such as cassette decks.
• Install this unit on a level surface.
Avoid the following locations for
installation
• Locations exposed to direct sunlight
• Locations subject to humidity and which lack ventilation
• Locations that are extremely hot or cold
• Locations which experience strong vibration
• Dusty locations
• Locations subject to oil, steam, and heat (such as kitchens)
Do not cover.
Do not cover or place any items or other units on top of this unit.
Avoid sources of heat
Do not place this unit on top of any device as an amplifier that
may emit heat. If the unit is installed on a rack install the unit
below the rack where the amplifier is installed so as to avoid
heat emission from the amplifier and other audio devices.
Notice when this unit is installed in a rack
with glass doors
While the glass doors are closed, do not open the disc tray
by pressing the open/close (u) button of the remote control.
Disc tray performance will be blocked, and that may result in
a malfunction.
Notice when this unit is installed in a rack
with glass doors
While the glass doors are closed, do not open the disc tray
by pressing the open/close (u) button of the remote control.
Disc tray performance will be blocked, and that may result in
a malfunction.
Turn off this unit when it is not used.
Depending on the condition of radio waves emitted during
television broadcasting, interference fringes may appear on
the television monitor, but that is not a malfunction. In such a
case, turn off the unit. There may also be a case where noises
are heard on the radio due to radio wave interference.
Condensation
In winter, be careful when carrying this unit from a cold place
to a warm place or if the room temperature where this unit is
installed is suddenly raised by a heater. The unit interior oper-
ating mechanism and lens may collect condensation. Under
such conditions, this unit will not work normally and playback
may be impossible. This depends on the amount of conden-
sation. If the unit is turned on and left untouched for one to
two hours, the operating temperature of this unit will dry any
condensation.
Condensation can occur even in summer if this unit is directly
exposed to cool air from an air conditioner. In such a case,
the installation location should be changed.
Batteries
Warning: Batteries used for the remote control shall not be
exposed to excessive heat such as sunshine, fire or the like.
2
SUPER AUDIO CD PLAYER D-07X
How to handle discs
• Do not use any deficient disc (cracked, warped, etc.).
• Do not damage the signal surface of the disc or make it
dirty.
• Do not place paper or a stickers on the disc. Such awk-
ward handling can warp the disc and playback may be-
come impossible. In many cases, rental discs carry labels
and glue may leak from under the label. Before use, check
that the disc is free from leaking glue or the like.
• Do not play two discs in a stack.
• Some discs with a printable surface, so-called “printable
CD-Rs”, easily stick to the mechanism which holds the CD
during playback. Please do not use such discs as it may
become impossible to eject the disc or cause a failure of
the unit.
How to store discs
• Always put your discs in a case. Store them vertically
where high temperature, high humidity, and direct expo-
sure to sunlight are not prevalent. Places with extremely
low temperature should also be avoided.
• Read the caution notes carefully that are attached to discs.
Disc cleaning
• If a disc is dirty from fingerprints or dust, this may affect
sound quality. Lightly wipe the disc with soft cloth, from the
inside to outer edge. (Don’t wipe it with a circular motion.)
• Do not use a volatile chemicals such as benzine or thinners.
Record spray, anti-static agents, and other such cleaners
must not be used either.
• If a disc seems to be very dirty, dip soft cloth in water, wring
it well, wipe away the dirt and finally remove the moisture
with dry cloth.
Specifically designed discs
This unit cannot play discs with specifically designed shapes
such as heart-shaped or hexagonal discs. Never use such
discs as they can cause malfunctions.
Lens cleaning
If the lens gets dusty, discs may skip during playback. Please
read “After-sales Services and Quality Assurance” and ask
us for cleaning. Do not use any commercial cleaning discs
available because they may damage the lens.
Notice on handling optical digital cables
• Do not fold the cables. For storage, wind each cable into a
coil about 15 cm in diameter or larger.
• For connection, insert the cable connectors firmly into the
terminals of this unit and the other device.
• Only use 3 meter long cables or shorter.
• When the cable connectors get dusty, wipe the dust away
with a dry soft cloth before inserting into the terminals.
Cleaning
• Usually, wipe the unit with a dry soft cloth. When the dirt is
hard to remove, dip a soft cloth in detergent diluted 5 or 6
times with water, wring it well, and remove contaminants.
Then, remove the moisture with dry cloth.
• Do not use a solvent like alcohol, benzine, thinner, or pes-
ticide because such a substance can damage the exterior.
In addition, do not let this unit contact rubber or plastic
foam for a long time. That may damage the cabinet surface
of the unit.
• Before cleaning, unplug the power cable from the AC outlet.
Safety caution
Caution
This unit is heavy. Be careful when unpacking, carrying, and
installation.

3
Features of This Unit
LxDTM improved — Luxman original Disc
Transport Mechanism —
The side frame that is firmly integrated into the transport
mechanism has a highly rigid structure, which extends from
the front and rear, and also adopts SSB (Stabilized Support
Block).
The aluminum die-cast disc tray also helps to control vibra-
tion and resonance. The disc tray opens and closes via a QLL
(Quiet Linear Loader), ensuring quiet, smooth operation.
Analog circuitry
This unit has an independent monaural operational D/A con-
verter on the right and left sides. Then, the high-quality dis-
crete buffer circuit with fully balanced configuration reduces
the impedance in the differential output of these converters.
This circuit drives the integrated amplifier and control amplifier
that are connected to the next stage in a powerful manner.
BD34301EKV manufactured by ROHM Co.,
Ltd. equipped
This unit features ROHM’s BD34301EKV DAC chips in inde-
pendent left and right dual monaural configuration.
USB input 768kHz/32-bit supported
The B-type USB input terminal makes it possible to input dig-
ital audio signals from a PC or Mac with a sampling frequency
of up to 768kHz and 32-bit quantization.
USB input supports DSD
DSD formatted data can be read from PC or Mac, or the like.
Samplingfrequenciesof2.8MHz/5.6MHz/11.2MHz/22.4MHz
are supported.
Asynchronous communication supported
The USB input’s low jitter characteristics have been achieved
by a dedicated DSP chip using asynchronous communica-
tion and PLL.
MQA (Master Quality Authenticated)
MQA is an award-winning British technology that delivers the
sound of the original master recording.
The master MQA file is fully authenticated and is small enough
to stream or download.
Visit www.mqa.co.uk for further information.
This unit includes MQA technology, which enables you to play
back MQA audio files and streams from all digital inputs, deliv-
ering the sound of the original master recording. The product
also supports MQA-CD playback. The built-in MQA decoder
will automatically restore the high-resolution signal heard in
the studio and confirm it, using the authentication signature.
―― 2-channel-specific
Super Audio CD/CD Compatible Player

4
SUPER AUDIO CD PLAYER D-07X
Ultra-low phase noise crystal oscillator
This unit uses an extremely low noise oscillator in the vicinity
of the oscillating frequency.
This oscillator provides accurate clocking with less jitter.
Disc layer switchover function
By pressing a switch on the main unit or remote control, the
listener can alternate between the CD layer and the HD layer
of a Hybrid Super Audio CD.
Zoom function
When the ZOOM button is pressed on the remote control, en-
larged track number and time information can be displayed.
4 playback modes
Playback mode can be selected from regular, programmed,
random, and repeat playback modes.
*1 Mac and macOS are trademarks of Apple Inc., registered in the U.S.
and other countries.
*2 Windows is a registered trademark of Microsoft Corporation in the
United States and/or other countries.
*3 DSD is a trademark.
*4 Sound Wave Logo is a registered trade mark of MQA Limited. ©2018
*5 MQA is a registered trade mark of MQA Limited. ©2018
*6 MQA-CD is a registered trade mark of MQA Limited. ©2017
*7 The described company names and product names are trademarks
or registered trademarks of each company.

5
Features of This Unit
Digital input terminals
This unit is equipped with a coaxial input terminal and an op-
tical input terminal. It is compatible with S/PDIF formated sig-
nals between 44.1 kHz and 192 kHz.
Low jitter digital inputs (S/PDIF) have been achieved by using
Burr-Brown PCM9211 PLL chips.
Digital audio signals from other audio devices are played back
with significantly improved audio quality.
DD converter function
Signals encoded at 192 kHz/24 bit or less, including USB
input, are digitally reproduced over S/PDIF.
Last memory function
Built-in flash memory can memorize settings such as digital
input, Super Audio CD/CD, digital filter, etc.
Dimmer function
The display brightness can be adjusted with 4 brightness levels.
Digital output OFF
The digital audio output can be deactivated to improve the
quality of the analog audio output.
Analog output terminals
The terminals consist of a gold-plated RCA output terminal
and an XLR terminal manufactured by Neutrik.
Analog output phase switching
Both balanced output and unbalanced output are phase
switchable.
Original technologies
Our traditional, non-angled circuitry, OFC internal wiring, and
original custom-made components are used throughout the
unit.

6
SUPER AUDIO CD PLAYER D-07X
Cast-iron insulators
For stability and support, this product features cast iron feet
with vibration reducing density gradient.
Remote control (RD-29)
The remote control is encased in aluminum. Tactile switches
will satisfy users with a light key touch.
Highly stable power supply
The unit’s highly stable power supply circuitry features a
large capacity OI-core-type power transformer with 9 custom
designed 3,300 μF blocking capacitors.
Schottky barrier diodes
By using Schottky diodes, manufactured by KYOCERA
Corporation, this unit achieves very high DC conversion
efficiency in the power rectifier circuitry and much less
switching noise.
LUXMAN’s original OFC wiring
Our original OFC cable, with non-plated core wire, is used for
internal wiring to achieve smooth signal transmission.

7
Compatible Discs
Types of discs that can be played
The following marks are printed on disc labels, packages, or
CD jackets.
Marks for types of discs this unit can play back
SACD
CD-RCD CD-RW
This unit can play back 8 cm CDs without using an adapter.
Do not use an adapter for 8 cm CDs.
• CD-R/CD-RW discs that have been written by a recorder
or PC may not be played back (due to characteristics of
discs, scratches, dirt on discs, dirt on the lens of the unit,
condensation, etc.).
• Discs written by a PC may not be played back depending
on the application settings or environment. Write the discs
in a proper format. (Refer to the distributor of application
for details.)
• Time information may not be displayed when an unfinal-
ized CD-R/CD-RW disc is played back.
• Refer to the precautions for discs for details on how to
handle CD-R/CD-R discs.
Super Audio CD
— 3 types of disks —
• Single-layer CD
This is a disc which has a single Super
Audio CD layer.
• Dual-layer CD
This is a CD which has a dual Super
Audio CD layer that supports long
recording times.
• Hybrid-layer CD
This is a CD which has both a standard
CD layer and Super Audio CD layer.
When the disc is played back on a
Super Audio CD player, it is possible
to enjoy improved sounds quality from
the HD layer. When the disc is played
back on an existing CD player, it is only
possible to play back sounds from the
CD layer.
HD layer: Super Audio CD layer
CD layer: Existing CD layer
HD layer provides the following:
・2-channel stereo area
・Multi-channel area
・Extra data area
(For future expansion)
HD layer
HD layer
HD layer
CD layer
HD layer
Dummy layer
HD layer

8
SUPER AUDIO CD PLAYER D-07X
Before Use
Comparison of Super Audio CDs with CDs
Item Super Audio CD CD
Disc diameter (cm) 12 12
Disc thickness (mm) 1.2 1.2
Coding method 1-bit direct stream digital (DSD) 16-bit linear PCM
Sampling frequency 2.8224 MHz (64 times to CDs) 44.1 kHz
Maximum recordable time 109 minutes for 2ch only. 60 to 70 minutes for 2-channel
stereo area + multi-channel area *1
74 minutes
Number of channels 2, 3, 3.1, 4, 4.1, 5, 5.1 2
Maximum number of tracks 255 99
Maximum number of indexes 255 99
Playback frequency range DC to 100 kHz 5 to 20 kHz
Dynamic range *2120 dB or more (audible range) 96 dB
*1 This is the maximum recordable time for a single-layer CD. Depending on the compression rate of DST (Direct Stream Transfer)*3, the
maximum recordable time may vary.
*2 Theoretical value
*3 Lossless compression method that applies a variable bit rate for DSD signals. The method has been developed, focused on the DSD
signal characteristics.

9
Before Use
Check the accessories
Whilst unpacking, check if the following accessories are
included.
• Power cable
• Remote control (RD-29)
• Two “AAA” batteries
• Safety cautions
• Owner’s Manual (This document)
How to Use the Remote Control
Insert batteries into the remote control
1. Remove the battery cover on the rear of the remote control.
Put your finger on the battery cover claw and slide the cover
downward to remove the cover.
2. Put 2 AAA batteries in the battery case as shown in the
illustration on the battery case paying attention to the battery
polarity ((+) and (–)).
3. In the reverse order of battery cover removal, put the battery
cover back to the opening of the remote control and slide the
cover upward until it clicks.
• Do not use a combination of new and old batteries together.
• There may be a case in which the voltages are different between
two batteries even though they are the same size. Do not use
batteries of different types together.
• If the remote control is not used for a long time (more than 1
month), the batteries shall be removed from the case. If battery
fluid is leaking, wipe away the liquid from the case before insert-
ing new batteries.
• To discard exhausted batteries, follow the instructions from your
local authority.
Claw

10
SUPER AUDIO CD PLAYER D-07X
Remote control’s range
To use the remote control, aim it at the remote control infra-
red receiver on the front panel of main unit. The effective dis-
tance is approx. 5 m from the main unit and at 30 ° to either
side of the remote control infrared receiver.
Do not expose the remote control infrared receiver to direct
sunlight or strong light sources. That may cause a malfunction.
30°30°
Effective distance:
approx. 5 meters

11
Names and Functions
1. Operation button (OPERATION)
Turns this unit from the standby state to operation state.
When the main power switch on the rear panel is turned
ON/STANDBY to set this unit to the standby state and this
switch is turned on, this unit is set to the operation state.
2. Operation indicator (OPERATION)
Blinks during warm-up when the operation button is turned
on and lights up when the operation state is activated af-
terward.
3. Disc tray
When inserting or removing a disc, this tray is opened or
closed by pressing the open/close button ( ).
4. Open/close button ( )
Opens or closes the disc tray.
5. Remote control infrared receiver (R)
Receives signals from the accessory remote control.
6. Display window
Displays the operation status of this unit.
This display is composed of 6 indicators and display tube.
7. Digital input selection button
(DIGITAL IN)
Press this button when using the unit as a D/A converter.
Switchover is performed among coaxial, optical, USB, and
internal player.
8. Digital output selection button
(DIGITAL OUT )
Press this button to turn the digital audio output on or off.
Each time the button is pressed, the output can be turned
on or off. The digital audio output cannot be used when
playing back the HD layer of Super Audio CD.
9. Super Audio CD/CD selection button
(SACD/CD)
When playing back a Hybrid Super Audio CD, this button
should be pressed to switch between the CD playback layer
and the HD (or SACD) layer.
Front panel
127 8 9 10 11 13 14 15 16
62 1 53 4

12
SUPER AUDIO CD PLAYER D-07X
10. Phase invert button (PHASE INVERT)
The phase of the analog output on the rear panel can be in-
verted for both the balanced output and unbalanced output.
This setting is stored on the flash memory even when the
power is turned off.
Every time this button is pressed, the balanced phase
changes as follows: NORMAL →INVERT →NORMAL →
INVERT →…
[Phase Normal]
1. GROUND
2. COLD (–)
3. HOT (+)
[Phase Inverted]
1. GROUND
2. HOT (+)
3. COLD (–)
11. Play button ( )
Plays back a disc.
12. Play indicator
Lights up while a disc is being played back. Blinks while
playback is being paused.
13. Pause button ( )
When this button is pressed during playback, the playback
stops. When this button is pressed again, the playback
starts again. During pause, the play indicator blinks.
14. Stop button ( )
Stops playback.
15. Previous button ( )
When this button is pressed once, the playback returns to
the beginning of current track. When this button is pressed
twice, playback returns to the beginning of the previous
track.
16. Next button ( )
When this button is pressed, the playback jumps to the be-
ginning of next track.

13
Names and Functions
1. Remote control infrared receiver (R)
Receives the infrared signals from the remote control.
2. Digital output indicator (DIGITAL OUT)
Lights up when the digital audio output is ON.
This indicator does not light up when playing back the HD
layer of Super Audio CD because the digital audio signal
cannot be output.
3. Super Audio CD/CD indicator
(SACD/CD)
SACD indicator lights up when playing back the HD (or
SACD) layer of Hybrid Super Audio CD
CD indicator lights up when playing back the CD layer of
Hybrid Super Audio CD.
4. Phase invert indicator (PHASE INVERT)
Lights up when the analog output phase is inverted, which
is caused by pressing the phase invert selector.
[Off (Phase Normal)]
1. GROUND
2. COLD (–)
3. HOT (+)
[On (Phase Inverted)]
1. GROUND
2. HOT (+)
3. COLD (–)
5. Track number (TRK)
“TRK” is displayed above, and the track number is dis-
played below during playback.
6. Time display mode
The display shows different playback time modes. “REM” is
displayed indicating the remaining time of the current track.
“T-REM” is displayed indicating the total remaining time of
disc. This display area does not light up when showing the
elapsed time of a track.
7. Standby indicator (STANDBY)
Lights up when this unit is in the standby state.
8. MQA indicator (MQA)
Lights up while an MQA-CD, an MQA file or stream is being
played back
[Off]
It is not an MQA source
[Green Light]
It is indicating that the unit is decoding and playing an
MQA stream or file and denotes provenance to en-
sure that the sound is identical to that of the source
material.
[Blue Light]
It is indicating the unit is playing an MQA Studio file,
which has either been approved in the studio by the
artist/producer or has been verified by the copyright
owner.
[Magenta Light]
It confirms that the product is receiving an MQA
stream or file. This delivers the final unfold of the MQA
file and displays the original sample rate.
Display window
7 8 9 10 11
13 42 65

14
SUPER AUDIO CD PLAYER D-07X
9. Playback mode
“RD” is displayed during random playback. “PG” is dis-
played during program playback. This display area does not
light up during regular playback.
10. Time
Displays the elapsed time of current track, remaining time
of current track, or remaining time of disc. Time display is
switched over according to time display mode.
11. Repeat mode
Displays the mode for repeat playback. There are two types
of repeat playback: track repeat (T-REP) and all repeat
(A-REP).

15
Names and Functions
1. Operation button (OPERATION)
Turns this unit to the operating state after turning off the
standby indicator at the standby state. Pressing this button
again at the operating state turns the unit to the standby
state.
2. Digital input selection button
(DIGITAL IN)
Press this button when using the unit as a D/A converter.
Switchover is performed among coaxial, optical, USB, and
internal player.
3. Digital output selection button
(DIGITAL OUT )
Turns on/off the digital output (COAX/OPT).
4. Analog FIR filter selection button
(FILTER DSD)
This button changes the analog FIR filter while a Super
Audio CD (HD layer) or a DSD file is being played back.
Select a filter depending on your taste. The sound quality
can be changed by engaging one of 2 different filters, D-1
and D-2.
Pressing this button displays the current setting data (D-1 or
D-2) on the display window.
Pressing this button again while the filter selection is dis-
played displays the next filter selection.
Pressing the enter button (ENTER) while the setting data is
displayed confirms the filter setting.
If the enter button is not pressed, the filter will not be en-
gaged.
Remote control
1
2
3
5
7
8
9
10
6
4
13
14
15
16
17
18
19
20
21
22
11
12

16
SUPER AUDIO CD PLAYER D-07X
5. Program button (PROGRAM)
Programs the track numbers to play back in a desired order.
6. Numeric keys (1, 2, 3, 4, 5, 6, 7, 8, 9, 0)
These keys are pressed to specify the track numbers for
direct search or playback order programming.
7. Clear button (CLEAR)
Cancels the program settings.
8. Previous button ( )
Pushing this button returns playback to the beginning of the
track. When this button is pressed twice, playback returns
to the beginning of the previous track.
9. Rewind button ( )
When this button is pressed during playback, the track will
rewind until the button is released.
10. Time display button (TIME)
This button adjusts the time display mode between the
elapsed time of the current track, remaining time of the cur-
rent track, or remaining time of disc.
11. Open/close button ( )
Opens or closes the disc tray.
12. Dimmer button (DIMMER)
Adjusts the brightness of the main unit display. The bright-
ness can be adjusted in 4 steps from off, through two dim
levels, to normal.
13. Super Audio CD/CD selection button
(SACD/CD)
When playing back a Hybrid Super Audio CD, this button
is pressed to switch playback between the HD (or SACD)
layer and the CD layer.
14. Repeat button (REPEAT)
Pushing this button will enable repeat playback of the se-
lected track or the whole disc. There are two types of repeat
playback: track repeat (T-REP) and all repeat (A-REP).
15. Random button (RANDOM)
This button is pressed to perform random playback.
16. Enter button (ENTER)
Executes the set or selected items.
17. Play button ( )
Plays back a disc.
18. Next button ( )
When this button is pressed, the playback jumps to the be-
ginning of next track.
19. Pause button ( )
When this button is pressed during playback, the playback
stops. When this button is pressed again, the playback
starts again. During pause, the play indicator blinks.
20. Fast-forward button ( )
When this button is pressed during playback, the track will
be fast-forwarded until the button is released.
21. Zoom button (ZOOM)
When this button is pressed during playback, the track
number and time are displayed in an enlarged manner.
22. Stop button ( )
Stops playback.

17
Names and Functions
1. Balanced analog output terminals
(BAL LINE)
Use these XLR output terminals to output balanced audio
signals from this unit.
Connect these terminals to the balanced inputs of a unit
such as a preamplifier using balanced XLR cables.
The output phase can be switched with the analog output
phase selection button (PHASE INVERT) on the front panel.
The following table shows the unit’s XLR output terminals
pin configuration:
[Phase Normal]
1. GROUND
2. COLD (–)
3. HOT (+)
[Phase Inverted]
1. GROUND
2. HOT (+)
3. COLD (–)
2. Unbalanced analog output terminals
(LINE)
The RCA output terminals to provide unbalanced playback
signals of this unit
Connect these terminals to the unbalanced inputs of a unit
such as an integrated amplifier with a RCA cable.
The output phase can be switched with the analog output
phase selection button (PHASE INVERT) on the front panel.
3. Control input terminal (CONTROL IN)
Connects a LUXMAN’s device with a control output termi-
nal using a commercially available 3.5-mm monaural mini-
jack cable. This connection enables the infrared receiver
circuit of the connected device to receive signals from the
remote control supplied with this unit and the remote con-
trol to operate the device, too. (The infrared receiver of this
unit will not function.)
4. Control output terminal
(CONTROL OUT)
Connects a LUXMAN’s device with a control input terminal
using a commercially available 3.5-mm monaural mini-jack
cable. This connection enables the infrared receiver of this
unit to receive signals from the remote control of the con-
nected device and the remote control to operate this unit,
too. (The infrared receiver of the device whose input is con-
nected will not function.)
5. Trigger input terminal (TRIGGER IN)
Trigger input terminal to be connected to a control amplifier,
power amplifier and other devices that have a trigger output
terminal. If the main power button is set to ON/STANDBY
and this unit is turned to standby, this unit can be turned
to operating or standby in conjunction with the operation
button of a connected device. When the main power button
is set to OFF, this unit does not operate in conjunction with
other devices.
Rear panel
1 2
3 4 5 6 8 9 107 1211
Table of contents
Other Luxman CD Player manuals

Luxman
Luxman D-N150 User manual

Luxman
Luxman D-08 User manual

Luxman
Luxman D-38u User manual

Luxman
Luxman DZ-112 User manual

Luxman
Luxman D-N100 User manual

Luxman
Luxman D-10X User manual

Luxman
Luxman D-06u User manual

Luxman
Luxman D-05 User manual

Luxman
Luxman D-380 User manual

Luxman
Luxman D-03X User manual