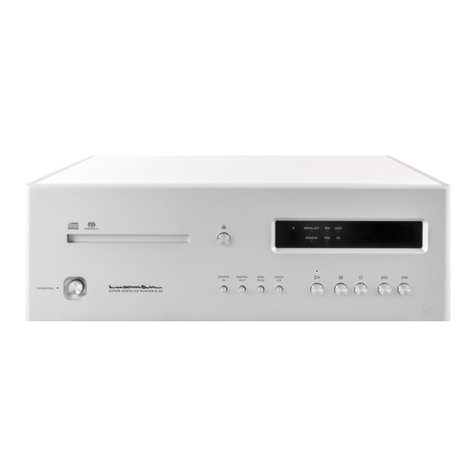
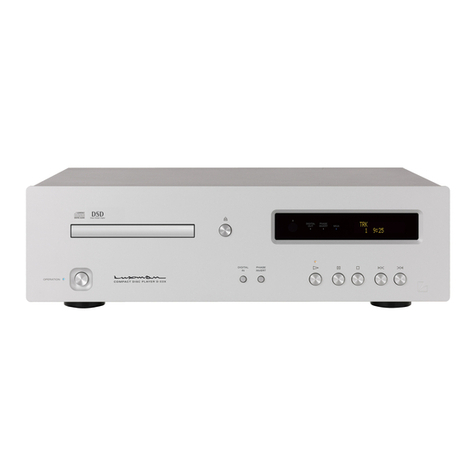
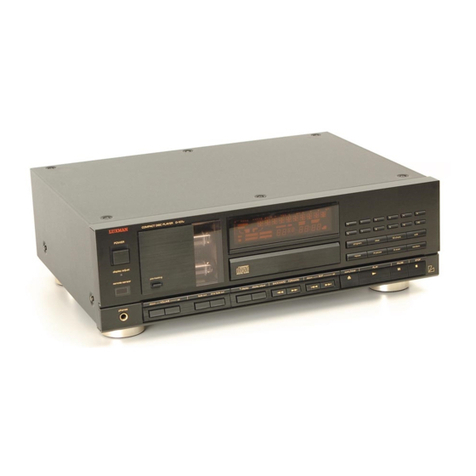
Luxman D-N100 User manual

Owner`s Manual
COMPACT DISC PLAYER
D-N100

2
Contents
Precautions ..................................................................................................................................3
Names and Functions of Parts.....................................................................................................4
Connections .................................................................................................................................8
Operation .....................................................................................................................................9
Specifications.............................................................................................................................10
Troubleshooting .........................................................................................................................11

3
Precautions
Installation location
This unit should be installed
where there is no vibration from
the outside and where ventilation
and heat dissipation are sufficient.
Do not install where the tempera-
ture is abnormally high such as in
direct sunlight or where it is dusty
or humid because this could result
in damage to this unit despite
proper heat radiation. Do not
install this unit where it will inter-
fere with driving the car.
Do not move this unit during
playback.
During playback, the disc is rotat-
ing at high speed. Do not try to lift
or move this unit as the disc may
be damaged.
When moving this unit, you must
remove the disc and close the
disc tray. If the unit is moved with
a disc remaining inside, this can
cause a malfunction.
Dew condensation
In winter, be careful when carrying
this unit from a cold place to a
warm place or if the room temper-
ature is suddenly raised by a
heater or the like where this unit is
installed. The unit interior (operat-
ing blocks and lens) will have dew
condensation on it. In such a con-
dition, this unit cannot work nor-
mally and playback is impossible.
This depends on the state of dew
condensation, but you will be able
to enjoy the music if the unit is left
untouched for one to two hours
after it has been turned on and
the temperature of this unit is
maintained at room temperature
until the condensation dries. Even
in summer, dew condensation can
occur if this unit is directly
exposed to cool air from an air
conditioner. In such a case, the
installation place should be
changed.
How to handle discs
• Do not use any deficient discs
(with cracks, warp, etc.).
• Do not damage the signal sur-
face of the disc or make it dirty.
• Do not place paper or a sticker on
the disc. Such awkward handling
can warp the disc and playback
may become impossible.
• Do not play with two discs in a
stack.
■ Storage
• Always put your discs in a case.
Store them vertically where high
temperature, high humidity, and
direct exposure to sunlight are
not prevalent. Places with
extremely low temperature
should also be avoided.
• Read the caution notes carefully
that are attached to discs.
■ Disc cleaning
• If a disc is dirty from fingerprints
or dusty, the sound quality may
be lowered. Lightly wipe the disc
with soft cloth, from the inside to
outer periphery. (Don’t wipe it
along the circumference.)
• Do not use a volatile chemical
such as benzine or thinner.
Record spray, anti-static agents,
and other such materials cannot
be used either.
• Where the disc seems to be very
dirty, dip soft cloth in water, wring
it well, and remove contaminants.
Lastly, remove the moisture with
dry cloth.
■ Disc in a specific shape
This unit cannot accept discs in
specific shapes (heart-shaped,
hexagonal, etc.) for playback.
Never use such discs as they can
cause malfunctions.
■ Types of discs that can be
played
This unit can play CDs designed
exclusively for music only. These
CDs have the compact disc mark.
This unit does not play MP3 or
other formats. For a CD-R where
a music CD has been recorded
with a recorder or a personal
computer, playback can fail
according to the application set-
ting or the quality of the CD-R.
Lens cleaning
If the lens is dusty, sound skips
may take place. Please ask us for
cleaning. Do not use any cleaning
discs available on the market
because they may hurt the lens.
Batteries
Caution:
Batteries used for remote con-
troller shall not be exposed to
excessive heat such as sunshine,
fire or the like.
Repair and adjustments
When repair and adjustments are
needed, please ask the store
where you bought the unit.
Cleaning
For cleaning, use a piece of soft
cloth to wipe the unit such as
cleaning cloth available on the
market.
If the unit has become very dirty,
remove the dirt with soft cloth
absorbing a small amount of neu-
tral detergent, and then wipe the
unit with dry cloth. Do not use a
solvent like benzine or thinner
because such a substance can
often damage the exterior.
123456
78
4
Names and Functions of Parts
1. Operation switch
(OPERATION)
This is a switch to turn the power
supply ON/OFF. When the I/O
terminals are connected, turn off
this switch immediately.
2. Power indicator
When the main switch of the
rear panel is turned ON, it is lit
light yellow to indicate that this
unit is on standby. When the
operation switch of the front
panel is turned ON in this state,
it is lit bright yellow to indicate
that this unit is ready-to-work.
3. Remote control infrared
receiver (R)
This is a sensor to receive sig-
nals from the accessory remote
control.
Do not place anything in front of
the sensor.
4. Skip button (s, d)
These buttons are used to skip
forward or backward by track on
the disc according to the direc-
tion and how many times the
button is pressed. The music will
start at the beginning of the
selection.
5. Play/pause button (5/y)
This button is used to start play-
back. When it is pressed in the
middle of playback, the audio
will pause.
6. Stop/open button (3/u)
This button opens and closes
the disc tray and stops playback.
Each time the button is pressed
when music is not playing, the
disc tray opens or closes. When
this button is pressed in the mid-
dle of playback, playback stops.
When it is pressed once more,
the disc tray opens.
7. Display
The display shows if there is a
disc in the unit, what operation
the unit is performing, lapse of
time/residual time, and other
such functional information.
8. Disc tray
This tray accommodates a disc.
The tray opens when the
stop/open button (3/u) is
pressed and a disc is not play-
ing. Close the tray by pressing
the stop/open button (3/u)
again after a disc has been
placed in the tray.
Front panel

5
Names and Functions of Parts
9. Operation switch ( )
This is a power ON/OFF button.
10. Direct music select but-
tons (1 - 9, 0)
This is a playback button to use
by specifying the music number
directly. When specifying the
tenth or later music selection,
press the 10s digit button first
and then the unit digit button
within two seconds. (Example:
For playback by designating the
12th music selection, press “1”
and then “2” within two sec-
onds.)
11. Stop button (3)
This button stops playback.
12. Open/close button (u)
This button opens and closes
the disc tray. Each time this but-
ton is pressed, the disc tray is
opened or closed.
13. Play/pause button (5/y)
This button starts playback.
When pressed in the middle of
playback, of the disc pauses.
14. Skip buttons (s, d)
These buttons are used to skip
forward or backward by track.
According to how many times
the button is pressed, the music
skips to the beginning of the
selected track.
15. Search buttons (1, 2)
These are the Fast
Forward/Rewind button for the
music being played. When the
button is released, ordinary
playback resumes.
16. Time button (TIME)
Each time this button is pressed
during playback, the display
changes between [how long the
music has been playing], [time
left for the music being played],
and [total playing time on the
disc].
17. CD mute button
(CD MUTE)
This button is used for tempo-
rary muting of the audio output
from this unit. When this button
is pressed again, sound
resumes.
Irrespective of the mute button
being pushed, the disc contin-
ues to play.
18. Scan button (SCAN)
This button is used for introduc-
tion playback for all music on the
disc. When this button is
pressed, the leading part of
each music track is played for
ten seconds and this continues
for all music on the disc. This
stops when the leading part of
the last music track has been
played.
19. Recall button (RECALL)
This button is used to recall the
previously played music.
20. Display button (DISPLAY)
This button is used to adjust the
brightness of the main unit dis-
play. Each time this button is
pressed, the brightness
changes between three levels.
21. A-B button
This button is used for the
repeated playback of tracks on a
disc within a specified range.
During playback, the button is
pressed once where the range
starts. When this button is
pressed again where the range
stops, this repeated playback is
performed within the range
specified.
When this button is pressed
again (for the third time) during
the repeated playback, repeated
playback is canceled and regu-
lar playback resumes.
This function is not available
while playback is suspended.
12
14
18
9
11
15
17
13
16
21
20
19
10
Remote controller (RA-N1)

6
Names and Functions of Parts
22. Repeat button (REPEAT)
This button is used for repeated
playback of a specific track or
disc.
When this button is pressed in
the middle of playback, the
music being played at that time
is then played once more (again
and again). When this button is
pressed again, the entire disc
then played once more (again
and again).
When this button is pressed
again (for the third time) during
the repeated playback, repeated
playback is canceled and regu-
lar playback resumes.
This function is not available
while playback is suspended.
23. Random button (RANDOM)
This button replays the music on
a disc at random. Playback is
stopped after all tracks are fin-
ished.
When this button is pressed
again, regular playback
resumes.
24. Program button (PROG)
This button is used to replay the
music of a disc in your favorite
order.
For detailed information about
programming, refer to Page 9.
25. Amp volume button
(AMP VOLUME, UP, DOWN)
This button is used to control the
volume of the corresponding
amplifier.
26. Amp mute button (MUTE)
This button is used to mute the
corresponding amplifier. When
this button is pressed again, the
sound is heard again.
As of May 2007, the AMP vol-
ume control with the aid of a
remote control is applicable to
the pre-main amplifier SQ-N100.
Remote control
The remote control can be used by
pointing it at the remote control
infrared receiver of this unit. It
should be used within the range
shown in the illustration.
[Replacement of batteries]
1. Put your finger on the battery
cover claw located behind the
remote control. The battery
cover can be opened by sliding
it downwards.
2. Put 2 pieces of AAA batteries in
the battery case shown in the
illustration.
3. Close the battery cover.
* When the batteries start to
lose power, the effective dis-
tance becomes shorter or the
unit does not function even
though the switch is pressed.
The batteries should be
replaced with new ones.
* If the remote control is not
used for a long time, the bat-
teries should be removed from
the case.
25
24
23
22
26
Remote controller (RA-N1)
30°30°
Effective distance
about 5m

7
Names and Functions of Parts
2831
2729
30
Rear panel
27. Analog output terminal
(ANALOG OUT)
This output terminal generates
audio output in analog mode.
28. Digital (optical) output ter-
minal (DIGITAL OUT, OPT)
This output terminal generates
digital audio output of the optical
type.
29. Digital (coaxial) output ter-
minal (DIGITAL OUT, COAX)
This output terminal generates
digital audio output of the coaxi-
al type.
30. Main switch (MAIN SW)
This is the main power ON/OFF
switch. When this power is not
turned on, it is impossible to use
the operation switch at the front
panel.
31. AC inlet (AC IN)
The accessory power cable is
connected. The power should
be obtained from a outlet.

8
Connections
Before Making Connections
Before connecting other devices,
connect the jack side of the acces-
sory power cable to the AC inlet of
this unit.
When connecting, turn off the
operation switch of this unit and
the power supplies of auxiliary
devices to prevent unexpected
accidents that may be caused by
noise.
Connecting the Power Supply
Use an accessory AC power cable
and insert the AC plug in a outlet
on the wall in the room where the
unit will be installed.
Connection to the amplifier
(analog output)
Connect the analog output termi-
nals to the line input terminals
(CD, LINE, etc.) of the amplifier
through two pin-plug cables of R
and L.
When connecting, do not confuse
the right and left connections.
Connecting to the amplifier
(digital output)
The digital output should be
applied to the digital input terminal
of a D/A converter or an amplifier
through the applicable cable.
AMPLIFIER
To digital input terminal of D/A converter, etc.

9
Operation
Before operation
1. Confirm that the connections
are correct. (Normal playback
cannot be achieved with wrong
connections for R and L.)
2. Turn the main switch (MAIN
SW) of the rear panel ON.
3. Turn the operation switch
(OPERATION) of the front
panel ON.
Move the volume control of the
amplifier to the minimum posi-
tion at the time of operation
ON/OFF.
How to insert and play a com-
pact disc (CD)
1. Press the open/close button
(3/uof the main unit or the u
button of the remote control) to
open the disc tray.
2. Put a compact disc (CD) on the
tray with the label facing
upwards.
3. Press the open/close button to
close the disc tray.
* When the compact disc (CD) is
set, the disc information is read
out and the total number of
music tracks and the total play-
back time are displayed.
Regular playback
When the play/pause button (5/y)
is pressed after disc insertion,
playback starts with the first music
track on the disc.
After the last music track is played,
playback stops automatically.
Program playback
Using a remote control, it is possi-
ble to play music on the disc in
your favorite order.
1. When the program button
(PROG) is pressed during stop-
page, “00 P-00” is indicated on
the display. The two-digit figure
before “P” indicates the track
being selected and the two-digit
figure after “P” indicates the
total number of tracks already
selected.
2. Press a numerical button (1 - 9,
0) to select music to program.
3. When the program button
(PROG) is pressed, the select-
ed music and the order are
saved and the programmed
numeral is indicated in the dis-
play.
4. Repeat steps 2 - 3 to select
another music track. A maxi-
mum of 30 music tracks can be
programmed.
5. When the play/pause button
(5/y) is pressed, programmed
playback starts and music is
played in the edited order.
6. When the “0” button is pressed
while editing, the contents are
automatically deleted.
7. When the contents of editing
have to be changed, press the
program button (PROG) for the
required times while playback is
stopped until already edited
program is displayed. Editing is
finished when the contents are
changed and the program but-
ton (PROG) is pressed.
Other playback methods
For playback methods other than
the regular method, refer to the
functional descriptions about the
respective buttons on pages 5 to
6.

10
Specifications
Applicable disc Compact disc digital audio
Number of quantization bits 16 bits
Sampling Frequency 44.1KHz
Number of channels 2 (stereo)
Frequency response DC to 20 kHz
Total harmonic distortion 0.005% or less (1 kHz)
Dynamic range 95dB or more
S/N ratio 92dB or more
Output level 2V
Digital output Optical (TOS-LINK), coaxial (RCA)
Programmed performance 30 music tracks (max.)
Power consumption 15W, 0.1W (standby)
Power supply AC230V (50Hz)
Accessories Remote controller, power cable, Owner’s Manual,
Safety cautions, 2 pieces of AAA batteries
Dimensions 297W X 75H X 210 (224) D mm
(I/O terminals in brackets, including operating knobs)
Weight 4.0kg
* Design and specifications are subject to change without notice.

11
Troubleshooting
If you encounter a problem during use, check the following checklist and instruction
manuals of the other components before suspecting a fault and sending your unit in
for repairs.
No power is sup-
plied even though
the operation switch
is pressed ON.
•The power plug is disconnected from
the wall outlet, or it is not completely
inserted.
•The power plug is disconnected from
the AC inlet, or it is not inserted com-
pletely.
•Insert the power plug in the wall out-
let completely.
•Insert the power plug in the AC inlet
completely.
Problem Cause Solution
Playback cannot be
performed, the
sound skips, or the
disc tray comes out.
Playback is possi-
ble, but no sound is
generated from
both right and left
channels.
No sound comes
out on one side.
The remote control
cannot be operated.
•The remote control is operated devi-
ating from the specified operating
range.
•The remote control battery has
drained out.
•Operate the remote control within
the specified operating range.
•Replace the remote control battery
with a new one.
•Make cable connections correctly.
•The connecting cable is not connect-
ed on one side only.
•Put the compact disc in the tray with
the label facing upwards.
•Set the disc on the disk tray correctly.
•Clean the disc to remove dirt.
•Remove dew condensation from the
interior of this unit.
•Be sure the unit is in an environment
where it will not be exposed to vibra-
tion.
•Install this unit parallel to the ground.
•The compact disc is inserted back-
wards.
•The disc is set in the disk tray incor-
rectly.
•The disc is dirty.
•The interior of this unit suffers from
dew condensation.
•Vibration is applied to this unit.
•This unit is installed at an angle.
•The CD mute mode is on.
•The volume control knob of the
amplifier is set at the minimum
sound level.
•The input selector of the amplifier is
not set in the playback source posi-
tion.
•Cable connections are incomplete.
•Press the CD MUTE button of the
remote control to cancel the mute
mode.
•Turn the volume control of the ampli-
fier clockwise to increase the sound
volume.
•Set the input selector of the amplifier
in the playback source position.
•Make cable connections correctly.

LUXMAN CORPORATION, JAPAN AG00987C58A
Table of contents
Other Luxman CD Player manuals

Luxman
Luxman D-07X User manual

Luxman
Luxman D-N150 User manual

Luxman
Luxman D-10X User manual

Luxman
Luxman D-380 User manual

Luxman
Luxman D-103 User manual

Luxman
Luxman D-05 User manual

Luxman
Luxman D-03X User manual

Luxman
Luxman DZ-112 User manual

Luxman
Luxman D-107u User manual

Luxman
Luxman D-06u User manual