manuals.online logo
Brands
  1. Home
  2. •
  3. Brands
  4. •
  5. LW Scientific
  6. •
  7. Microscope
  8. •
  9. LW Scientific Mi5 User manual

LW Scientific Mi5 User manual

P. 770.270.1394 F. 770.270.2389 865 Marathon Parkway Lawrenceville GA 30046P. 770.270.1394 F. 770.270.2389 865 Marathon Parkway Lawrenceville GA 30046
Instruction Manual
E Brightness Control
F Fine Focus
G On/Off Switch
(located on rear)
H Coarse Focus
I Focus Friction Control
J X/Y Axis Stage Controls
K Base Condenser
L Substage Abbe Condenser
M Substage Iris Diaphragm
N Stage
O Slide Holder
P Objectives
Q Nosepiece
R Eyepieces
S Eyepiece tube and
C-mount tube
(trinoc only)
A Diopter Adjustment
B Trinocular Head
C Light Port Slide
(trinoc only)
D Head Retention Screw
Model pictured:
Specifications
Maintenance
Mi5
I-4 infinity
Introduction
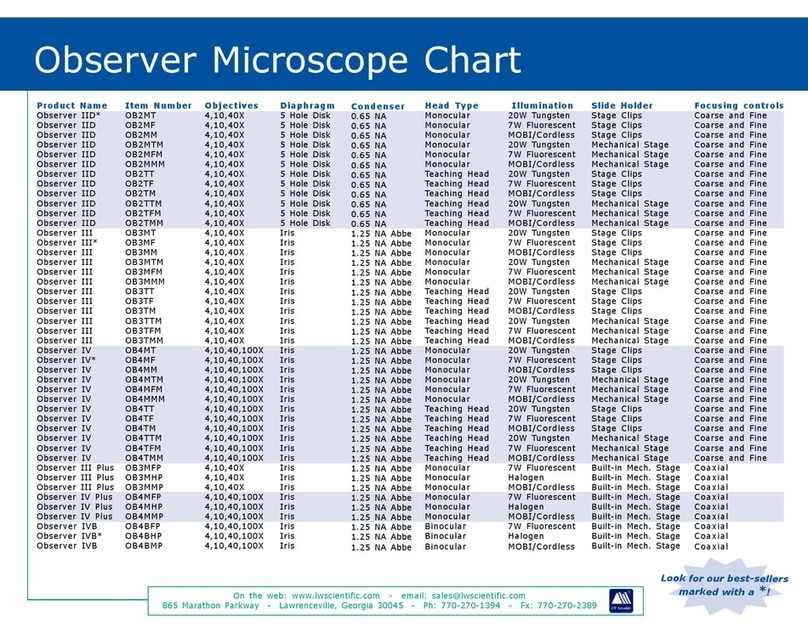
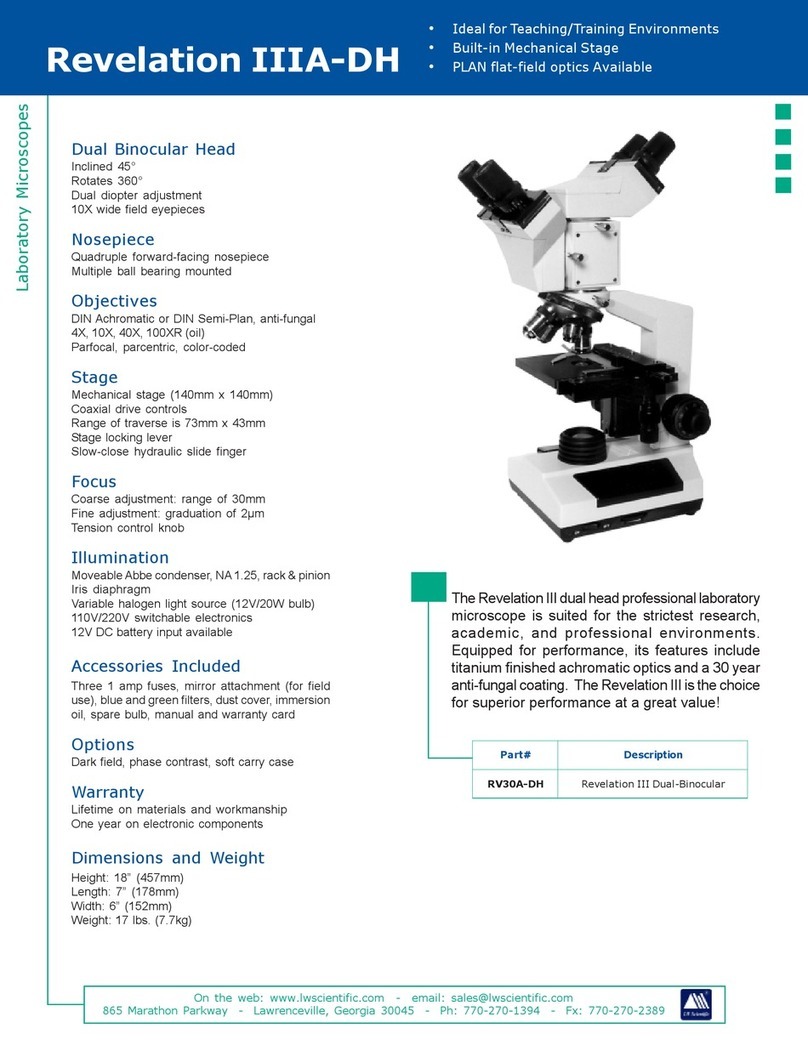
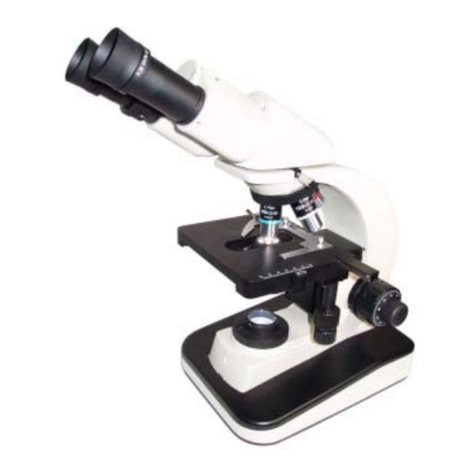
LW Scientific is proud to present our most advanced modular microscope to date! The Mi5 microscope features
exceptional optical quality with an infinity optical system. The ergonomic narrow design allows users to rest their arms flat
on the table and easily operate all controls. LED lighting produces “daylight” color, with a cool temperature and long
life. Comfort, durability, dependability, superior imaging, and a multitude of additions and upgrades make the Mi5 a
top-of-the line value for not only basic research and lab inspections, but also for the most discriminating lab technicians
and specialists. The Mi5 microscope is intended for use as a biological microscope in a professional environment in
accordance with the guidelines set forth in this operations manual.
Not all features available on all models -
see back page for model specifications.
2
4
5
3
1Always cover your microscope with the dust cover when not in use. When cleaning the lenses, use lens paper or a
cotton swab dipped in lens cleaning solution.
Excess oil should be cleaned off your 100x objective and stage at once. An alcohol pad is best for removing oil from
the stage and on the other metal parts, but is not recommended for use on the lenses. Use lens cleaning solution and
lens paper to clean off your objectives.
Dust in the nosepiece or ocular tubes should be blown out using filtered air. Canned air dusters work well for this job.
Whenever you remove an objective, we recommend that you place it back into the original plastic shipping vial until
ready to be placed back on the microscope. SCREW THE OBJECTIVE SECURELY INTO THE CAP OF THE HOLDER - DO NOT
DROP OBJECTIVE LOOSELY INTO CONTAINER.
To keep your microscope in top condition for years, LW Scientific recommends that you have the microscope
professionally serviced once a year.
Warning: The 40x and 60x objective are not sealed for oil immersion. Damage to the 40x and 60x objective due to oil
immersion is not covered under warranty.
Head
Binocular (Seidentopf), Trinoc available
Inclined 30°
Diopter adjustment +/-5
10X/20 High-Point super-wide eyepieces
Nosepiece
Reverse quintuple multiple ball bearing
Illumination
Simple Koehler Illumination
Moveable Abbe condenser, NA 1.25
Iris Diaphram
LED illumination
Variable light adjustment, 90-240V / 50-60Hz
automatic-switching power cord
Construction
Rugged alloy
Stage
Mechanical stage (135mm X 184mm)
Coaxial drive controls, metal rack & pinion
Range of traverse: 73mm x 43mm
Slow-close hydraulic slide finger
Acid and reagent resistant finish
Objectives
Infinity Plan objectives
4X, 10X, 20X, 40XR, 100XR (oil)
50X (oil) and 60x (dry) objectives are also available
Anti-fungal, parfocal, parcentric, color-coded
Adjustment Controls
Eyepiece: Interpupillary distance adjustment 50-75 mm
Stage Controls: Knobs allow movement of slide on X-Y axis
Etched vernier scales
Coarse Adjustment: Range of 22 mm
Fine Adjustment: Graduation of 2µm
Variable Light Adjustment
Dimensions and Weight
Height: 15.6” (396 mm)
Length: 16.5” (420 mm)
Width: 8.1” (206 mm)
Weight: Trinoc: 20.5 lbs.
Binoc: 20.0 lbs.
Size N.A. Mag. Field of View
4X 0.10 40X 5.0mm
10X 0.25 100X 2.0mm
20X 0.40 200X 1.0mm
40XR 0.65 400X 0.5mm
50XR 0.95 0.4mm500X
60XR 0.85 0.33mm600X
100XR 1.25 0.2mm1000X
Objectives: The following numbers are
based on use with 10x/20 eyepieces.
A
K
B
I
D
C
G
H
F
J
E
L
M
N
O
S
P
Q
R
50x oil and 60x dry
objectives
Phase and Dark Field Polarizing Modules
Working Distance
6.73mm
4.19mm
2.14mm
.45mm
.29mm
.21mm
.12mm
Mi5
Camera Attachments
Lumin
Epi-Module
MKT-7.5.3-L-070 | Rev 0
P. 770.270.1394 F. 770.270.2389 865 Marathon Parkway Lawrenceville GA 30046
Unpacking and Setup
Lamp Replacement
Assembly
Operation
LW Scientific packs each Mi5 Microscope with utmost care. Examine the
outer and inner containers for any visual damage. Retain all of the packing
material until you have examined and tested your new microscope. If there
is damage, please contact the shipping company, as our warranty does not
cover shipping damage. If you are uncertain who the shipper is, contact the distributor where you purchased the
microscope. Please retain all packaging material for future use. Carefully unpack** your Mi5 Microscope using the
following checklist for all the parts and accessories:
2
4
5
3
1Remove the body of the microscope and place it on a sturdy, dust-free surface. Remove/unscrew the plastic plugs in
the nosepiece. Install the objectives in such a way that when you turn the nosepiece clockwise, you are moving from
the 4x, to 10x to 20x to 40x and finally the 100x objective.
Remove the microscope head from the Styrofoam carton and pull off the protective covers from the eyepiece tubes
and head mount. Insert the head mount into the upper arm of the body. Once the head seats, then tighten the head
retention screw to secure the head in place. Note: Do not over-tighten.
Remove plastic covers and packing material covering the stage, the condenser and lower light assembly
Insert the 10x eyepieces.
Attach the power cord.
2
3
4
5
6
7
8
9
10
1Once you have assembled all the parts and allowed your microscope to come to room temperature, plug the power cord
into the appropriate AC outlet. Note: excess cold can fog lenses, cause lamp to fail, and all optics to “fog.” Be sure to allow
time for your scope to acclimate to room temperature.
Turn the light on using the black on/off switch on the rear of the scope. Next, adjust the light intensity using the brightness
control knob located on the right side of the scope.
In order to become acquainted with the controls, choose a specimen slide with which you are familiar. For example, an old
hematology slide or a commercially prepared slide. Place the slide into the slide holder by pushing back on the thumb
guard to open the slide finger. The slide finger closes slowly to eliminate the possibility of chipping the corner of your slide
when it closes.
Move the slide to the center of the stage, by turning the stage control knobs, located just below the stage. These knobs
allow you to move the slide on the X-Y axis (forward/backward and left/right).
The sub-stage iris should then be set to match the aperture of the objective for maximum resolution under each objective
power. There are numbers on the iris ring to show the correct setting for each objective power. You should begin with the 4x
or 10x objective. Only use the iris wide open when under the 100x oil objective. Closing down the iris on smaller objective
powers will improve resolution, contrast, and depth of field.
Once you are comfortably seated, look into the oculars and move the eyepiece tubes together or apart until you see only
one complete circle of light. You have now adjusted your interpupillary distance.
Using the 4x or 10x objectives and the coarse and fine adjustment knobs, bring the specimen into focus. Now, move the 40x
objective into place. You will feel a “clicking” action when the objective is seated properly. Again, adjust focus for best
image. You should also adjust the iris diaphragm (as listed above) for the best contrast and resolution.
Diopter Adjustment: Since you are using a binocular or trinocular microscope, you need to adjust for the normal difference in
vision between your two eyes. This is a simple but critical adjustment! First, make sure that the diopter adjustments on the
eyetubes are set to the midpoint of travel, with the “O” mark lined up with the white line near the bottom edge of the
eyetube. Close your left eye and look into the right eyepiece with your right eye. Adjust the fine focus to give you the best
image. Now close your right eye and look with your left eye into the left ocular. Using the diopter adjustment ring on the
ocular tube, adjust the focus until you see a clear, focused field. Now both eyes should see a perfectly focused image.
Friction Adjustment: With repeated use and wear, the stage may drift downward out of focus. If this happens, you need only
to tighten the friction control ring (located on the left side of the microscope between the coarse adjustment and the body
of the microscope). If the coarse focus is hard to turn, you may choose to loosen the friction adjustment.
Parfocality: All LW Scientific microscopes are manufactured to be parfocal – meaning that when you change objectives or
magnification, the specimen will remain very close to being in focus, with only a fine adjustment needed. To achieve the
best parfocality, make certain diopters are set at or near the "0" mark.
The LED bulb can be replaced by opening the bottom panel (large silver thumb screw). After opening the panel, unclip
the red and black wires by gently squeezing on the sides of the white connecter clip. Using a small screwdriver, remove
both screws on the LED bulb. Remove the bulb. Mount a replacement bulb. Replace and tighten the screws. Reconnect
the electronics by attaching the white connecter clip, and close the bottom panel. Tighten the silver thumb screw to
secure.
Power If you suspect faulty electronics, call LW Scientific’s technical service department at 800-726-7345.
INPUT: 90-240V / 50-60Hz automatic-switching
OUTPUT: Standard LED assembly.
1 - Microscope body
2 - 10x eyepieces
5 - Objectives 4X, 10X, 20X, 40XR,
100XR (oil)
1 - Power cord
1 - Immersion oil
1 - Dust cover
1 - Abbe condenser
2 - Rubber eye guards
2 - Fuses (2 Amp)
Warranty
The Mi5 is covered by a limited lifetime warranty on materials and workmanship, and a 1-year
warranty on electronics from date of purchase. If there is any indication of a problem, contact
LW Scientific. Operating the unit after noticing a problem could compound a simple problem
and cause an unneccessary expense to the owner. LW Scientific support staff will troubleshoot
problems over the phone, and attempt to solve problems in the most expedient manner. This may include sending parts
that can easily be installed by the user, or directing the user through a simple adjustment to the unit. Making repairs to the
unit without authorization from LW Scientific will void the warranty.
If the unit must be shipped in for repair, LW Scientific will issue a Return Merchandise Authorization (RMA) number. You will
need to provide the serial number and have either a warranty card on file at LW Scientific, or proof of purchase.
Box 1: Box 2: Box 3:
1 - Binocular head (Seidentopf style), optional
Trinoc
Other LW Scientific Microscope manuals

LW Scientific Revelation III LED User manual

LW Scientific

LW Scientific Revelation III LED User manual

LW Scientific Revelation III LED User manual

LW Scientific

LW Scientific Revelation III LED User manual

LW Scientific Revelation III LED User manual

LW Scientific

LW Scientific Revelation III LED User manual

LW Scientific i4 User manual

LW Scientific

LW Scientific i4 User manual

LW Scientific Advanced User manual

LW Scientific

LW Scientific Advanced User manual

LW Scientific Mi5 User manual

LW Scientific

LW Scientific Mi5 User manual

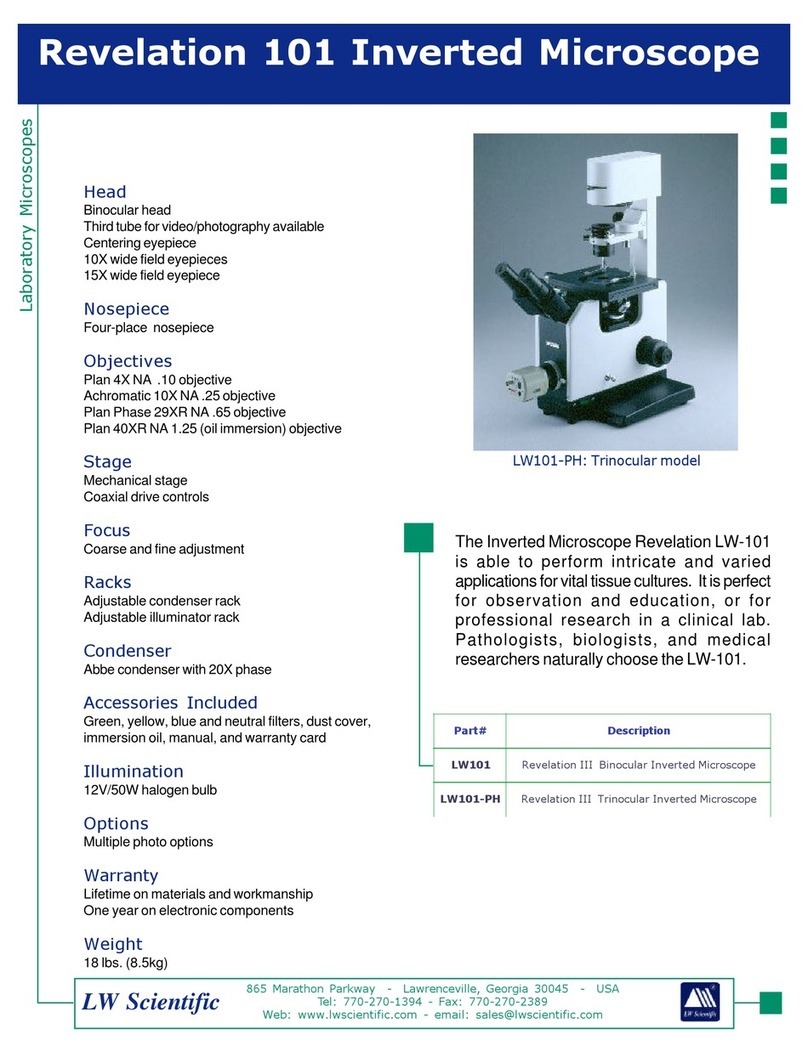
LW Scientific LW-101 User manual

LW Scientific

LW Scientific LW-101 User manual

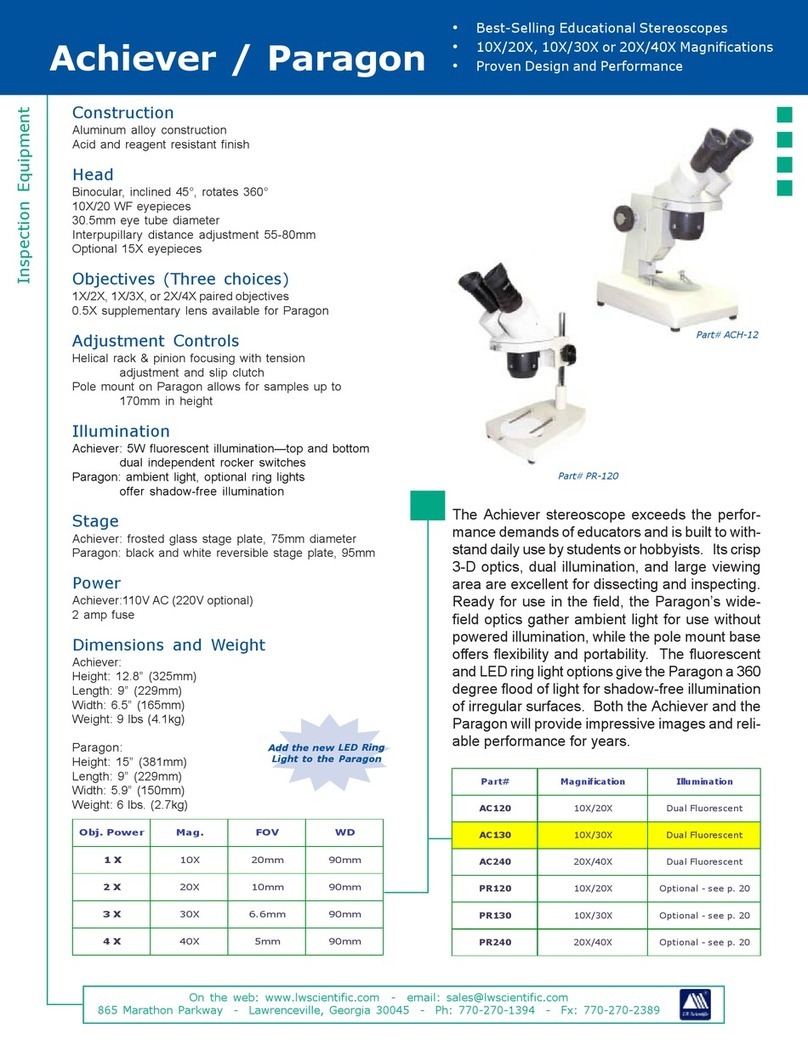
LW Scientific ACH-12 User manual

LW Scientific

LW Scientific ACH-12 User manual

LW Scientific Z4 User manual

LW Scientific

LW Scientific Z4 User manual

LW Scientific Revelation III LED User manual

LW Scientific

LW Scientific Revelation III LED User manual

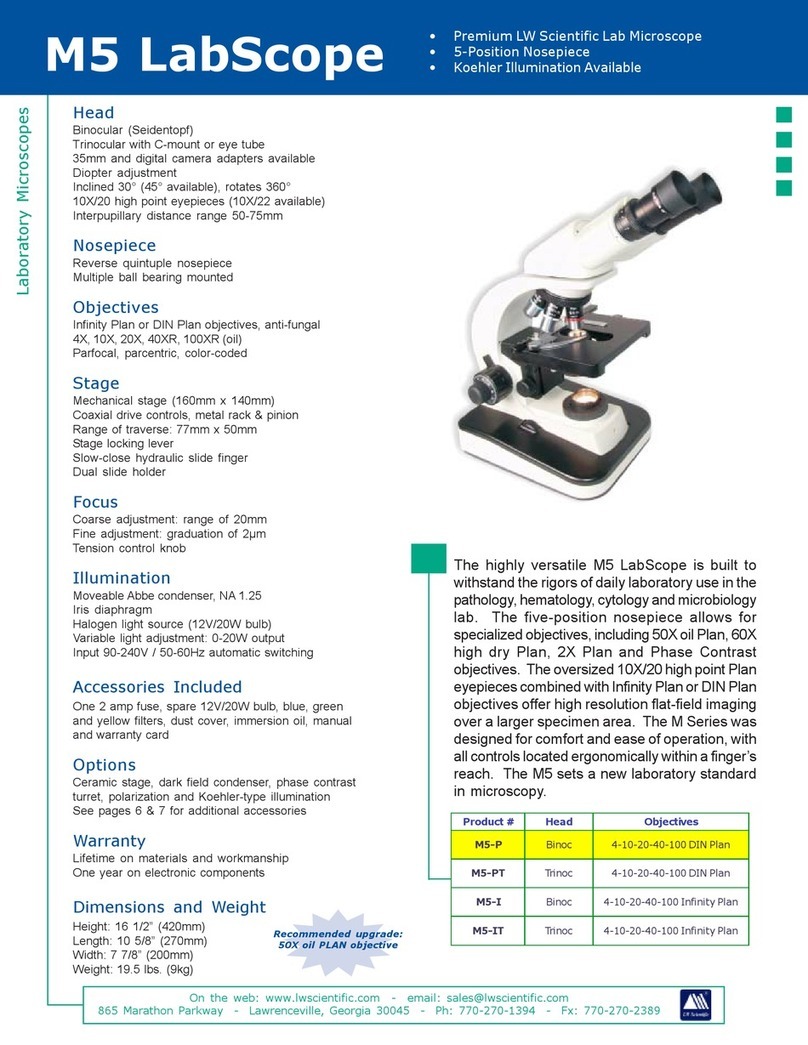
LW Scientific M5 LabScope User manual

LW Scientific

LW Scientific M5 LabScope User manual

LW Scientific VFA-12 User manual

LW Scientific

LW Scientific VFA-12 User manual

LW Scientific M1-BHP4 User manual

LW Scientific

LW Scientific M1-BHP4 User manual

LW Scientific Vision VIS12 User manual

LW Scientific

LW Scientific Vision VIS12 User manual

LW Scientific M2-P-RH User manual

LW Scientific

LW Scientific M2-P-RH User manual

LW Scientific M2-EP Owner's manual

LW Scientific

LW Scientific M2-EP Owner's manual

LW Scientific VS-1Z User manual

LW Scientific

LW Scientific VS-1Z User manual

LW Scientific PFA-12 User manual

LW Scientific

LW Scientific PFA-12 User manual

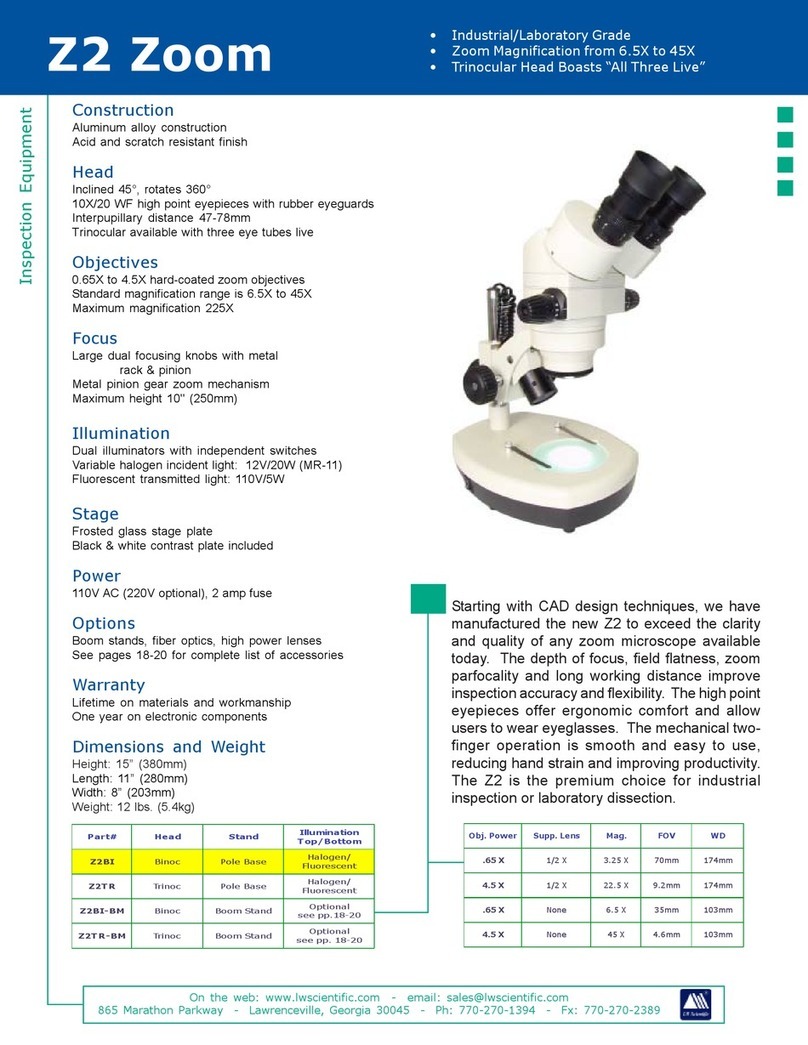
LW Scientific Z2BI User manual

LW Scientific

LW Scientific Z2BI User manual

LW Scientific MiniVID WiFi User manual

LW Scientific

LW Scientific MiniVID WiFi User manual

LW Scientific M2-P-SE User manual

LW Scientific

LW Scientific M2-P-SE User manual

LW Scientific OB2MF Owner's manual

LW Scientific

LW Scientific OB2MF Owner's manual

LW Scientific Advanced Scope OEM-SAF3 User manual

LW Scientific

LW Scientific Advanced Scope OEM-SAF3 User manual

LW Scientific Revelation III LED Owner's manual

LW Scientific

LW Scientific Revelation III LED Owner's manual

Popular Microscope manuals by other brands

Reflecta DigiMicroscope Professional user manual

Reflecta

Reflecta DigiMicroscope Professional user manual

Swift M2252DGL Series use and care manual

Swift

Swift M2252DGL Series use and care manual

Bresser National Geographic 9619742 operating instructions

Bresser

Bresser National Geographic 9619742 operating instructions

Bresser ERUDIT ICD instruction manual

Bresser

Bresser ERUDIT ICD instruction manual

Eli Ezer ESL-7800 Operation manual

Eli Ezer

Eli Ezer ESL-7800 Operation manual

Zuzi 250 Series user manual

Zuzi

Zuzi 250 Series user manual

Euromex bScope Fluo Supplementary instructions manual

Euromex

Euromex bScope Fluo Supplementary instructions manual

Optika LAB-1 instruction manual

Optika

Optika LAB-1 instruction manual

VWR avantor VisiScope 400 Series instruction manual

VWR

VWR avantor VisiScope 400 Series instruction manual

Lanoptik CE210T user manual

Lanoptik

Lanoptik CE210T user manual

Accu-Scope 3075  SERIES manual

Accu-Scope

Accu-Scope 3075 SERIES manual

premiere MS-01L user manual

premiere

premiere MS-01L user manual

TTS Tuff-Scope 2 user guide

TTS

TTS Tuff-Scope 2 user guide

Celestron 44121 instruction manual

Celestron

Celestron 44121 instruction manual

MshOt MF52-N user manual

MshOt

MshOt MF52-N user manual

LABSTAC MSC21-07 Operation manual

LABSTAC

LABSTAC MSC21-07 Operation manual

Nanolive 3D Cell Explorer-fluo user manual

Nanolive

Nanolive 3D Cell Explorer-fluo user manual

National 104-CLED instructions

National

National 104-CLED instructions

manuals.online logo
manuals.online logoBrands
  • About & Mission
  • Contact us
  • Privacy Policy
  • Terms and Conditions

Copyright 2025 Manuals.Online. All Rights Reserved.