manuals.online logo
Brands
  1. Home
  2. •
  3. Brands
  4. •
  5. M-Audio
  6. •
  7. Amplifier
  8. •
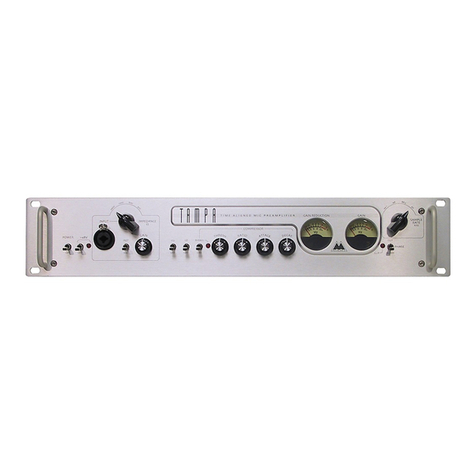
  9. M-Audio TAMPA User manual

M-Audio TAMPA User manual

M-AUDIO TAMPA - QUICKSTART GUIDE
Getting the Most from Your TAMPA
Thank you for purchasing TAMPA. TAMPA’s design and sound are unlike any other
preamp/compressor you’ve used. Please take a moment to read the following manual
supplement in order to get the most from your new studio tool.
TAMPA Design Goals
One of the “Holy Grails” of audio electronics is the ability to simulate the harmonically
rich “warm” or “natural” sound of tubes with more affordable solid-state electronics.
Most attempts to emulate or model the tube sound fail to take into consideration all of
the qualities that give tubes their characteristic sound. In designing TAMPA, we
conducted extensive research into why people perceive tubes as being so pleasing to
the ear. We also took into consideration that fact that the sonic coloration inherent in
tubes is not always desirable. The result is a design that focuses on natural sound
rather than strict tube emulation. TAMPA can deliver results that range from
transparency to warm coloration similar to that associated with tubes—providing for
more flexibility than you’ll find in other preamps.
Working with TAMPA is a unique experience. At modest gain settings, TAMPA is
extremely transparent. That means that you really hear the true nature and quality of
what you connect to its input. (Many people have never really heard what their mics
and instruments truly sound like because the devices are always colored by the
preamp and other circuitry.) And, as you’ll see, you can easily add more “warmth” to
the sound using higher gain settings. Here, too, the natural-sounding coloration TAMPA
adds to the signal has a unique sonic quality. So don’t be surprised if your mics and
other gear sound different through TAMPA.
About Temporal Harmonic Alignment
In nature, all sounds are comprised of a fundamental frequency along with a series of
harmonics. The frequencies of those harmonics and how their amplitudes change over
time give the sound source its unique sonic signature. In natural sound sources such
as strings, drumheads and vocals chords, harmonics share a characteristic temporal
relationship to the fundamental.
Virtually all electronic circuits generate additional harmonics not present in the source
signal. In that way, every electronic device changes the sonic signature of the signal
passing through it. That change can be quantified according to two different properties:
the amplitude of the additional harmonics and their temporal relationship to the
fundamental.
The amplitude of the induced harmonics is typically measured in THD or total harmonic
distortion. In general, today’s solid-state electronics exhibit very low THD. The sound of
solid state is often described as “muddy” in lower frequencies and “harsh” in higher
frequencies, however, because the harmonics generated rarely exhibit the temporal
Let’s look at a simple scenario where TAMPA’s output is connected to an analog mixer.
(This discussion also applies to recorders and sound cards that have input gain controls
in either hardware or software.) If you want a “warm” sound, you’ll want to drive
TAMPA’s internal signal level fairly high. That means that you’re looking for hot signal
levels approaching or even surpassing 0VU on the OUTPUT LEVEL METER. You can
accomplish this by turning TAMPA’s GAIN up and optionally engaging the +20dB switch
on the input stage. (The CLIP indicator light comes on at +26dBu, approximately 4dB
below the actual digital clipping level of 30.5dB. Basically, you can drive the OUTPUT
LEVEL METER as hot as you want as long as you don’t hear anything offensive.) If the
signal level overloads your mixer input, engaging the 20dB PAD at TAMPA’s output will
likely bring it back down to a useable range. You’ll find that there’s an interactive
process in setting TAMPA’s GAIN and your mixer’s input attenuation.
If, on the other hand, you want a more neutral or transparent sound from TAMPA,
reduce the gain by about 10 to 20 dB. Be careful to maintain enough gain that you still
have an acceptable signal level at the mixer. You’ll probably want to keep the +20dB
switch in the preamp stage off unless you’re not getting much of a reading at all on the
OUTPUT LEVEL METER. Similarly, you’ll likely want to keep the 20dB PAD disengaged on
the output stage so that your mixer receives a strong enough signal. Here, too, adjust
TAMPA’s GAIN control and your mixer’s input gain to achieve the desired balance of
tonality and signal level.
Compression adds another variable, as it has the effect of reducing gain. In general, the
solution lies in continuing to interactively adjust TAMPA’s GAIN and your mixer’s input
attenuation in order to achieve the right combination of signal level and tone. When using
high compression settings, you may also need to disengage the 20dB PAD in order to get
more gain. (The compressor is capable of a total gain reduction of about 20dB.)
Since the 20dB PAD only affects TAMPA’s analog outs, it does not enter the equation if
you are running the preamp’s digital outputs directly into a digital recording device. Your
digital recording device might have gain controls that you can use interactively with
those of TAMPA. You can also add 6dB of gain to the digital signal by summing the
identical left and right signals coming from TAMPA’s digital outputs.
Conclusion
Treating TAMPA as the unique piece of gear that it is and familiarizing yourself with the
characteristics of its gain structure will result in many rewarding sessions. For more
information on setting TAMPA’s signal levels, please read your entire TAMPA manual.
TAMPA, simplified block-diagram:
The perception of warmth comes from a phenomenon called soft clipping, where
desirable distortion increases with internal signal level. As shown in the following
diagram, TAMPA’s soft clipping exhibits a non-linear property: The majority of the
increase in distortion only comes into play at the higher end of the gain range. TAMPA’s
OUTPUT LEVEL METER displays internal signal level and is therefore a good indicator of
soft clipping.
Input Matching
2400/1200/600/300
Select Balanced Preamp
Gain: 6dB - 40dB
80 Hz
Highpass
Phase
Reverse
Compression
Ratio Adjust
Attack
&
Release
Adjust
Antilog
Amplifier
Compression Meter
Logarithmic
Amplifer
Threshold
Adjust
Select
S/PDIF and
AES/EBU
Outputs
Clip LED
Dual Optical Servo
VCA
Attenuation:
0dB to 22.5dB
Buffer
Inverter
Gain: 6dB
A/D
Converter
Sample
Rate
Select
Phantom Power
Output Meter
Phone Input
XLR Input
X10
Gain: 20dB
20 dB
Pad
Compressor
On / Off
XLR & Phone
Outputs
Compressor Section
24-bit Digital Section
alignment found in nature. (The industry has only even had the technology to measure
this temporal distortion for the past decade or two.)
Tubes, on the other hand, induce harmonics that are temporally aligned with the
fundamental—at least in the mid-range where most featured content lives. (In the lows
and highs, tube harmonics are temporally misaligned just as with solid-state.) Further,
harmonics produced by tubes exhibit fairly high amplitude. That combination produces
the perception of “warm” tonality. Nonetheless, tube sound is colored as opposed to
transparent.
Conventional attempts to simulate tubes consider the amount of harmonics generated, but
not their timing. Unlike any other preamp—solid state or tube— TAMPA exhibits proper
harmonic temporal relationships at all frequencies. And because we’ve intentionally
designed TAMPA to have low THD, it does not necessarily have the same amplitude of
harmonics as does tube equipment. Instead, the design allows harmonic energy to vary
with signal level. The hotter the internal signal level, the greater the amplitude of the
harmonics and the perception of “warmth”. The result of this versatile design is sonic
transparency across the entire audio range with the ability to add warmth as desired.
About TAMPA’s Compressor
Most compressors, including many high-end models, exhibit very high distortion that
gives them a particular sonic signature. TAMPA’s compressor stage, on the other hand,
has very low distortion that further contributes to the unit’s transparent audio quality.
Inexpensive compressors utilize VCA technology exhibiting problematic distortion,
noise and accuracy. Most professional-class compressors utilize servo-controlled
optical resistor technology instead. While this design is quieter and more accurate, the
servo system used to stabilize the optical resistor introduces considerable distortion into
the optical device. TAMPA’s design avoids this by using a matched pair of optical
resistors. The servo system stabilizes one of the optical devices, yet audio is only
passed through the other optical device. This dual-optical servo design completely
eliminates the servo-induced distortion. As with the rest of TAMPA’s gain stages, this
means that you will experience a very transparent sound when using the compressor.
Setting TAMPA Properly
As we’ve established, TAMPA’s Temporal Harmonic Alignment is designed to do
something that no other preamp can do—deliver transparent sound. While that is its
primary design criterion, a sophisticated series of gain stages also yield the ability to add
tube-like “warmth” at higher signal levels. The real key to getting the results that you
want from TAMPA, therefore, is understanding how to use those gain stages—both
within TAMPA and in relation to your other gear. TAMPA’s meters and pads play a
significant role in this process.
TAMPA is capable of delivering up to 66dB of gain. As shown in the following block
diagram, TAMPA’s output gain is determined by the interaction of the GAIN control,
+20dB switch, compressor settings and (in the case of analog output) the 20dB PAD.

Other M-Audio Amplifier manuals

M-Audio Octane User manual

M-Audio

M-Audio Octane User manual

M-Audio Black Box User manual

M-Audio

M-Audio Black Box User manual

M-Audio Duo User manual

M-Audio

M-Audio Duo User manual

M-Audio DMP3 User manual

M-Audio

M-Audio DMP3 User manual

M-Audio Audio Buddy Dual Mic Preamp User manual

M-Audio

M-Audio Audio Buddy Dual Mic Preamp User manual

M-Audio TAMPA TAMPA-081602 User manual

M-Audio

M-Audio TAMPA TAMPA-081602 User manual

M-Audio Octane User manual

M-Audio

M-Audio Octane User manual

M-Audio Delta Audiophile AP2496 User manual

M-Audio

M-Audio Delta Audiophile AP2496 User manual

M-Audio Audio Buddy User manual

M-Audio

M-Audio Audio Buddy User manual

M-Audio DMP2 User manual

M-Audio

M-Audio DMP2 User manual

M-Audio Studiophile BX5a User manual

M-Audio

M-Audio Studiophile BX5a User manual

Popular Amplifier manuals by other brands

Analog way SMART BOOSTER SMB413 user manual

Analog way

Analog way SMART BOOSTER SMB413 user manual

Renkforce RF-4279930 operating instructions

Renkforce

Renkforce RF-4279930 operating instructions

Williams Sound Pocketalker Pro Pocketalker Pro Personal... user guide

Williams Sound

Williams Sound Pocketalker Pro Pocketalker Pro Personal... user guide

RME Audio 12Mic-D user guide

RME Audio

RME Audio 12Mic-D user guide

BMS BPA-10CC-7 Installation and operation manual

BMS

BMS BPA-10CC-7 Installation and operation manual

Schoeps VMS 5 U user manual

Schoeps

Schoeps VMS 5 U user manual

Sony PHA-1A reference guide

Sony

Sony PHA-1A reference guide

Niles VDA-6 operating instructions

Niles

Niles VDA-6 operating instructions

Plinius 9100 instruction manual

Plinius

Plinius 9100 instruction manual

AMT SS-20 quick start guide

AMT

AMT SS-20 quick start guide

NAD T 977 manual

NAD

NAD T 977 manual

Crunch Groundpounder GPX500 .2 user manual

Crunch

Crunch Groundpounder GPX500 .2 user manual

Elder Audio G-60 owner's manual

Elder Audio

Elder Audio G-60 owner's manual

PowerWave G3L-1929-160 Installation and service manual

PowerWave

PowerWave G3L-1929-160 Installation and service manual

AMX PLB-AMP8 Specifications

AMX

AMX PLB-AMP8 Specifications

Altinex DA1904SX user guide

Altinex

Altinex DA1904SX user guide

Crown CTs 4200 Operation manual

Crown

Crown CTs 4200 Operation manual

Cary Audio Design SLI-80 owner's manual

Cary Audio Design

Cary Audio Design SLI-80 owner's manual

manuals.online logo
manuals.online logoBrands
  • About & Mission
  • Contact us
  • Privacy Policy
  • Terms and Conditions

Copyright 2025 Manuals.Online. All Rights Reserved.