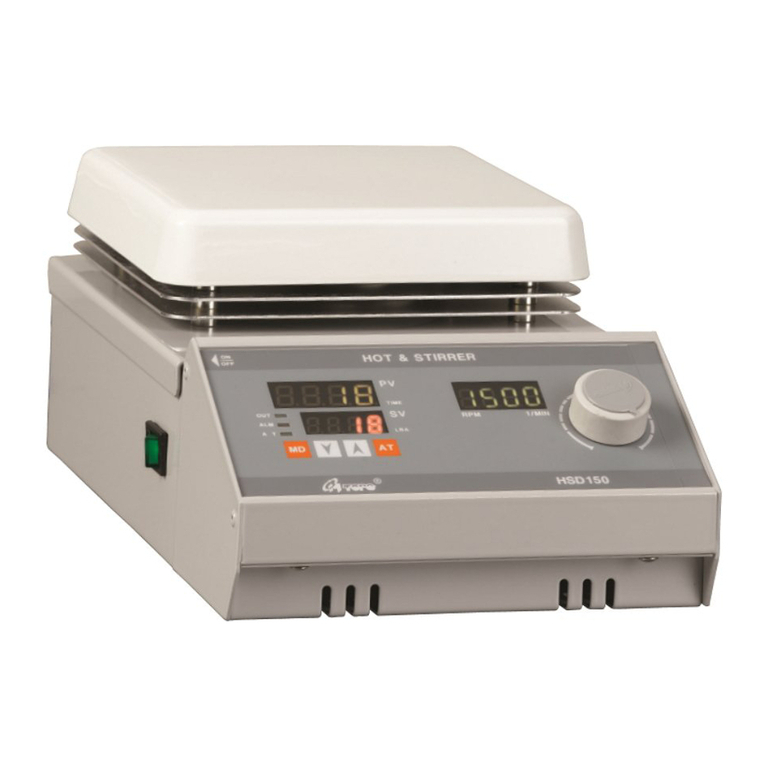
M Tops DMB-1 User manual

Tel:82-31-866-3808
Fax:82-31-866-3810
Tel : 82-2-2277-3811,3812
Fax : 82-2-2277-3813
General Information
Unpack your item carefully and inspect for damage and report such damage or missing parts to your supplier
right away.
Read your instruction manual carafully. Take time to save time while working with you item.
Make sure that every user has read and understood the instruction manual.
Please store the instruction manual in a place easily accessible to every user.
Safety Information
Please comply with all safety and accident-prevention regulations as in force for laboratory work!
Use extra care when working with flammable substance; refer to safety data sheets.
When connecting your item with your local power supply, please make sure your item is designed for your local supply voltage;
Turn your power switch OFF whenever the item is not used, or before disconnecting the plug.
Use extra care when working in the vicinity of flammable and explosive substances. Motor are non-sparking type, however,
the item itself is not explosion proof.
Please do not connect your instrument without a protective ground outlet.
Your item requires a solid stand.
Warning
To avoid electrical shock, always:
1. Use a properly grounded electrical outlet of correct voltage and current handling capacity.
2. Disconnectfrom power supply before servicing.
To avoid personal injury:
1. Do not use in the presence of flammable or combustible materials; fire or explosion may result.
This item contains components which may ignite such materials.
2. Keep the item clean. Use non-abrasive cleaner. Alkali spills, hydrofluoric acid spills or phophoric acid spills may damage
the item and lead to thermal failure. Unplug unit and remove spills promptly. Do not immerse unit for cleaning.
3. Do not remove or modify grounded power plug. Use only properly grounded outlets to avoid shoch hazard.
Not rated for use in hazardous atmospheres.
4.Use appropriate hand and eye protection when handling hazardous chemicals.
5. Do not use in highly corrosive atmospheres; corrosive fumes and spill may damage your item and internal components,
Caution
Space instrument 12 inches away from combustible materials under any conditions.
Digital
Mantle,Analog
Mantle,Rota Mantle
Hotplate
#691-4,Duckkye-dong,Yangju-
si,Kyounggi-do 482-850
REPUBLIC OF KOREA
go by data plate on the item.
Digital Stirrer
Analog stirrer
DMB-1
DMB-2
DMB-3
MANUAL
Thank you very much for selecting Mi-sung products.
For your safety,please read the following before using.
Temp controller
Heating Tape
Hot plate
Seoul Office
Head Office
Main products

1. Specifications
2.Functional Description(TIC)
7) LBA Control lamp: It will be on when Control Loop Disconnection alarm appears.
8) Mode set key: Press it more than 2sec., the system will be changed to parameter set.
9) Down key(remainning time display key):Press it, set value decreases; Press more than 2sec, set
value decreases consecutively. Press it for several sec. during timer ON, remaining time will be
flickered.
10) Up key(Time ON/OFF key): If you press it, the set value goes up one by one; if you pres it more
than 2sec, the set value goes up consecutively. If you press it during controlling, you can turn on/off
the timer.
11) Auto Tuning Key: After parameter set, press AT more than 2sec., AT lamp(5times) will be
flickered and calculating PID automatically.
1) Displays processing value(PV) : Displays processing value in controlling and each kind of
parameters in parameter set
2) Displays set value and parameter set(SV) : Displays set value in controlling and parameter value in
parameter set. Press key No.9, then displays the remaining time.
3) Lamp of output control(OUT)
4) Warning lamp of highest and lowest(ALM)
5) Auto-tuning lamp(AT) :Press key No.11, then it starts PID auto-tuning with flikering of the lamp
and the lamp turns off when it is finish.
6) Timer lamp: Press No.10 key of the Timer during controlling, then lamp will be flickered. After a
set time, the light will be on; at a time, tENd will be appeared on SV. To back to the initial stage,
press Up key more than 2 sec.
Electrical supply
AC220V 50/60㎐ or AC110V 50/60㎐
Weight (㎏)
2.1
2.8
3.5
Internal
Stainless steel
Dimensions
186 x 232 x 120mm
242 x 256 x 120mm
322 x 256 x 120mm
MODEL
Dry block heater
DMB-1
DMB-2
Controller
Digital PID auto-tuning
Timer
Material
Block
Anodizing Aluminum
DMB-3
Type
1
2
3
Temperature
Range
Ambient +5℃ ~ 200℃
Accuracy
±0.5℃
99hr 59min
Heater power
250W
350W
450W
PV
SV
AT
ALM
OUT
MD
AT
3
4
9
5
8
2
7
11
10
1
6

3. How to set parameter
1) Parameter Set
A. After completing parameter set , press the MODE key longer than 2sec.; you can finish parameter set.
PV displays current temperature, SV displays set temperature; then, controlling begins.
B. Press AT key more than 2sec, then the modulating system process automatically Auto-Tuning.
624
156
1248
※Use auto-tuning in case on big difference
on the temperature.
※Constant value could be changed on auto-
tuning.
120 x 120
1.0
531
133
1062
12
PASS
Manufacturer Moder
Plate size
P
I
d
LbA
10
InS
Input value
Possible to set a 0.1℃-unit withing -100.0℃~100.0℃
range.
0.0 or 1.0
11
LOC
Set data lock
LOCK -> Preventing from changing set value
oFF
d
Derivative time
Possible to set a 1sec-unit within 0~2500sec.range.
9
LbA
Control loop
break alarm
Possible to set a 1sec-unit withing 0~9998sec.range.
6
P
Proportional
band
Possible to set a 0.1% unit within 0.1~999.8% range.
Automaticall
y set for
Auto Tuning
7
I
Intergral time
Possible to set a 1sec-unit within 5~9998 sec. range.
8
5
ALL
Low alarm
It sets the lowest alarm limit.
0
It is absolute value)
----
4
ALH
High alarm
It sets the heighest Alarm limit.
0
(It is absolute value)
- Up key can modulate ON/OFF.
The Timer begins working after current temp reaches
set temp. After a set time reaches, it stops ending
Control output . *The TIMER does not work in case of
'0 set'.
3
ALS
Alarm mode set
9 Alarm modes display in picture form. You can set
appropriate alarm mode by using up/down keys.
See Alarm mode variables. (option)
1
SV
Set Value
Set of the temperature required
30
2
tIm
Control ending
Time set
* H.m display->Hours,Minutes Unit:00H01m~99H59m
0
If you press the MODE key at this stage more than 2sec, parameter set is available.
If you press the MODE key, kinds of parameter will be changed one by one.
(See the following table.)
No.
Symbol
Setting Date
Description
Initial value
Turned on, then PV displays current temp.; SV displays a set valve.
on -> Impossible to change parameter set
oFF -> Possible to change parameter set
150 x 150
0.8

4. How to use
To use temp. controller
1-1.Connect the sesor on No.17 terminal of the rear side(Use external sesor)
1-2.If sensor is connected on No.17 terminal on the rear side, take it out and use internal sensor.
2.Connect No. 15 of the rear side with an electric outlet and switch on the instrument by No.14 of the rear side..
3.Press No. 8 key of the front side, then the parameter to set temperature will be appeared.
To use Timer
1.Press No.8 key on the front side for 2seconds, then the parameter to set temperature will be appeared.
Minimum 1 minute(0001) to Maximum 99hr59min.(9959)
2.After setting of time, press No. 8 key on the front side, then it return to the initia condition.
3.Press No.10 key on the front side for 2 seconds on timer run, then No. 6 lamp will be switched on and off.
In case that time is not setted, it does not run.
4.Press No. 10 key for 2seconds on timer run, then it stop to run..
5.Press No. 9 key for 2 seconds, then the temperature display shows the remaining time.
Press No. 9 key again for 2 seconds, then the temperature display shows setting value.
1.Use without auto-tuning but do it in case of a big temperature difference.
2.Press No.11 key, then it starts with switching on and off.
3.Temperature error could be happened on auto-tuning but it is controlled correctly when auto-tuning is finished..
4.Temperature go higher than the setting value first time but it is returned to normal condition immediately.
(Over-shoot condition)
5.In case that temperature goes down, it is differ as per the charater of the liquid and the ambient condition.
6.Be careful so that the contents are overflowed from the vessel. It makes the malfunction and damage
of the instrument.
7.In case that the replacement of the sensor or the switch of internal and external sensor are needed,
switch off the power and make it.Ifit is madeunder power ON,it cause a wrong operation.
tlm
Set the time using No. 9 and 10 key.
30
0
6.In case that the set of time is finished, "tENd" is showed and press No.10key to back to the initial condition.
Su
Press No.9 (downturn) and No.10 (upward) to set the required temperature.
30
4. After setting of the temeprature, press No.8 key on the front side for 2 seconds, then the temperature controller
runs on initial condition.
Su
Prees No. 8 key again.
1
2
8
13
6
9 1 1
5
15
1
16.Sensor S/W
12
14
Front Panel Rear Panel

To use Speed controller
1.Turn No.13 dial on the rear side to set the required speed.(No.12)
Note:
1)Speed is controlled from 100 to 1500 rpm by the dial.
(Turn the dial clockwise, then speedis increased 10 by 10 rpm, and turn the dial counter clockwise,
then speed is decreased 10 by 10 rpm)
2)To stop the speed, turn the dial counter clockwise till the end.
3)Set the required speed by dial, then it will arrive at the setting value in a few second and keep the
constant speed by arithmetic logic unit. (Smooth start function)
4)In initial operating, if the motor does not run, give the motor output fast and make it run until speed
is arrive at 10rpm so that the motor runs.
※ When "Err" are shown on display
① Check if the temperature sensor is coneected corretly.
② Check if the wire of the temperature sensor is not down.
③ Check if the tempereture sensor is broken.
④ Check the position of sensor in the sensor switch, internal or external sensor.
( It is same situation with No.1 case )
[] If you have any other questions, contact Misung or Misung authorized distributor in your country.
This manual suits for next models
2
Table of contents
Other M Tops Cooktop manuals