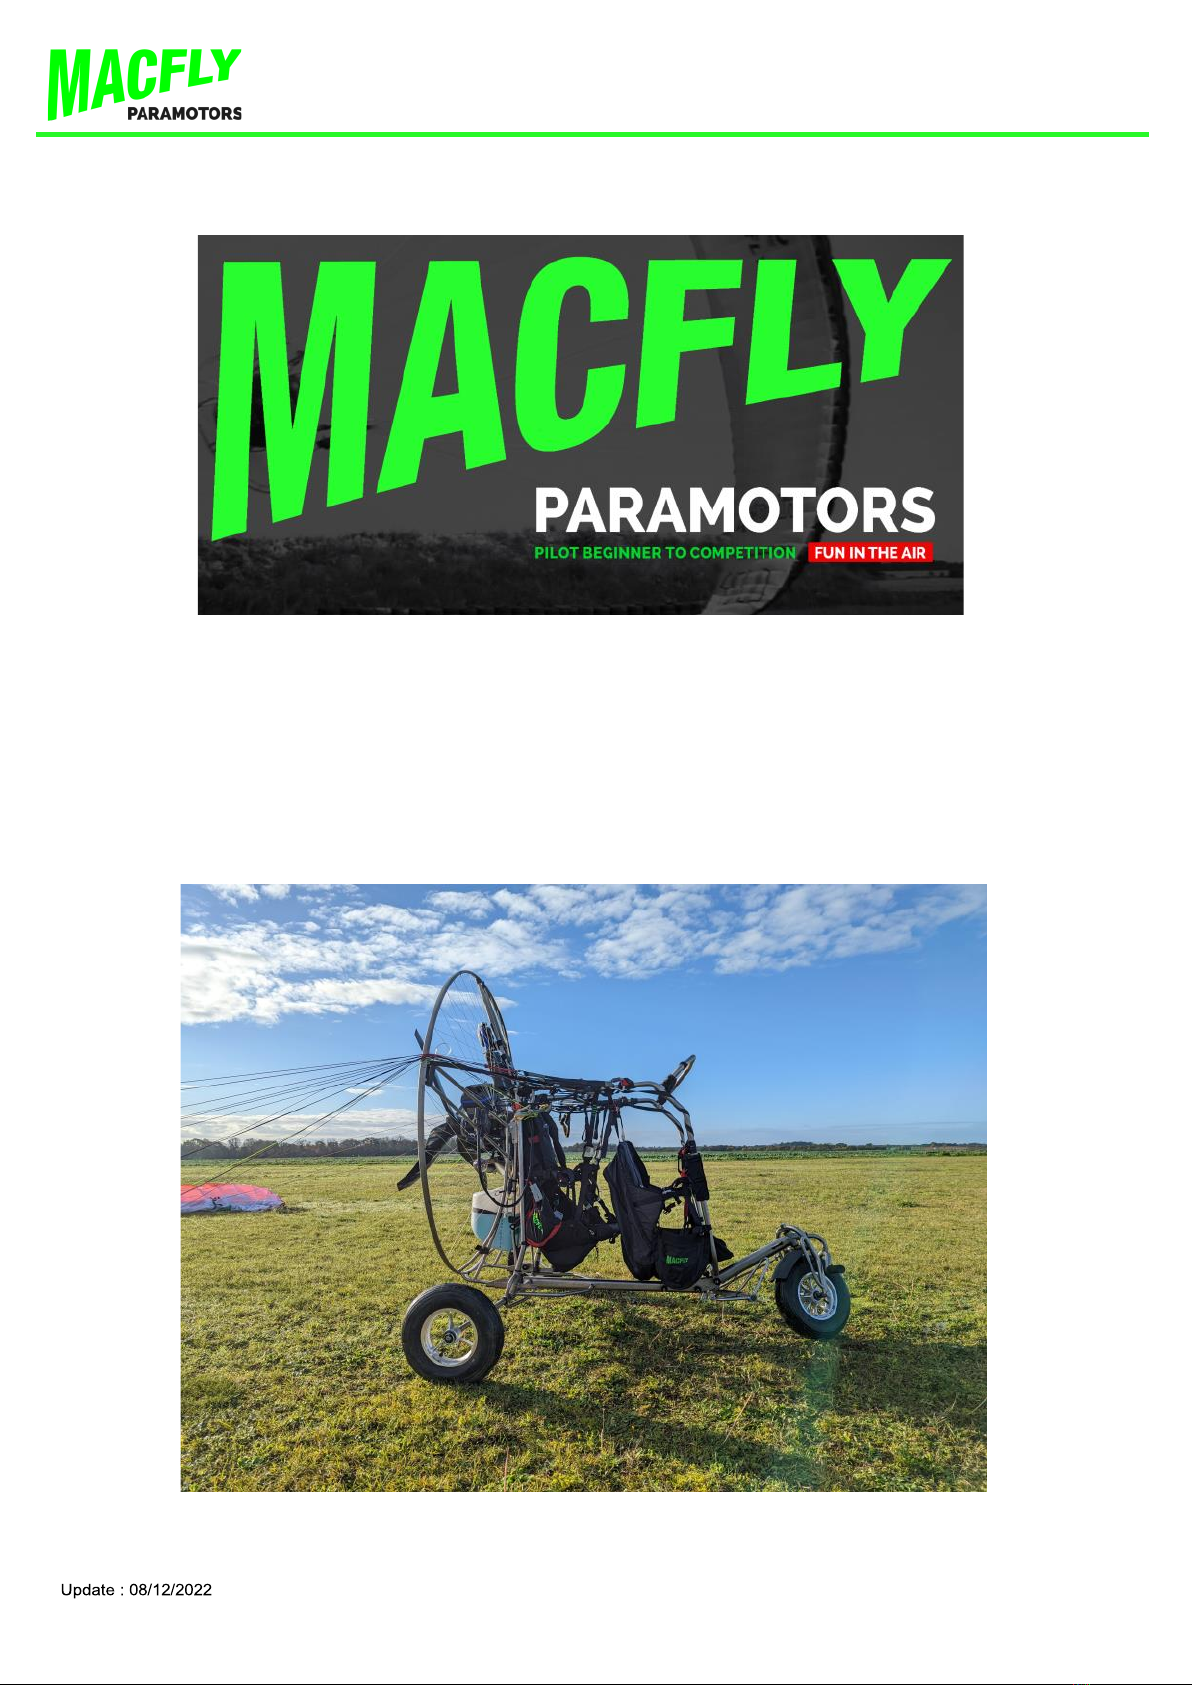
MACFLY PARAMOTORS TRIKE TANDEM User manual

1
USER MANUAL
MACFLY TRIKE TANDEM User manual

2
USER MANUAL
Congratulations on the purchase of your TRIKE TANDEM MACFLY.
This Trike is the result of 25 years of experience in the paramotor discipline,
both in national and international competition, as well as on the field in school training with stu-
dents of all sizes and all experiences.
Our frames and Trikes are constantly evolving to provide the best equipment nowadays.
It is very important that you read this manual before using your trike tandem for the first time. The
manual will help you get the most out of your equipment, it will give you information on its design
as well as advice and tips on how to use it and keep it in good condition for as long as possible.
We hope you will find the same pleasure in flying with our machines, that we have had to expe-
rience them during these years
Good flights!
The MACFLY team

3
USER MANUAL
Table of contents :
1 - Caution / Regulations
1.1 - Licence certificate and insurances
1.2 - Identification / registration
1.3 - Wing connection
1.4 - Specifics of use
2 - Technical characteristics of the MACFLY Trike
3 - Trike tandem assembly
4 - Trike tandem / Frame assembly
5 - Setting up the tandem rescue / Storage
6 - Adjustments
7 - Pre-flight checks
8 - Starting the engine
9 - Check list / Vital actions

4
USER MANUAL
1 – Caution / Regulations 1/2
The training curriculum is quite flexible in most countries, and the ways of teaching the
quite different disciplines from one training center to another.
The specific regulations in each country must be carefully studied before flying, it is for this reason that the
company Macfly does not engage its responsibility in the event of an accident on a bad use of the GMP, and
we strongly advise you to follow the recommendations of this manual.
WARNING : MACFLY recognizes that there are risks associated with handling and flying a
paramotor.
By purchasing and using this product, the user acknowledges, accepts, and assumes all risks associated with
its use.
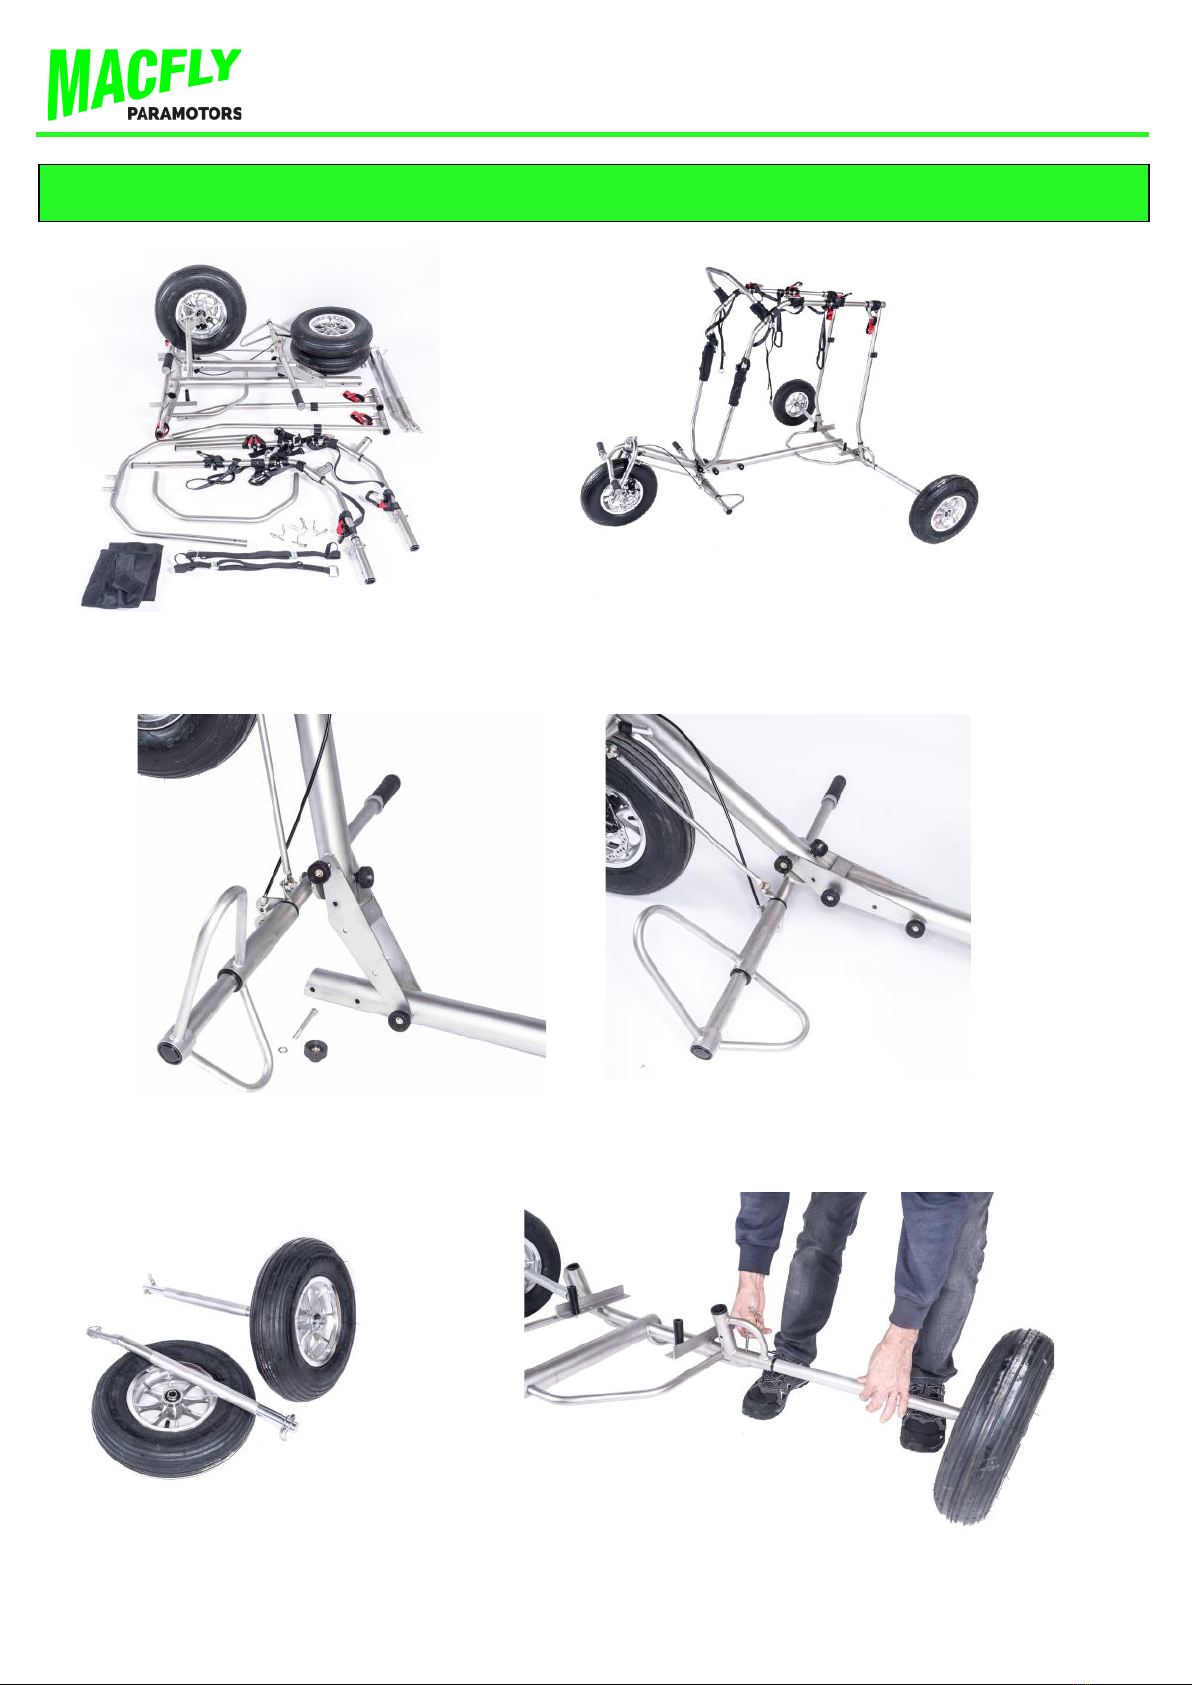
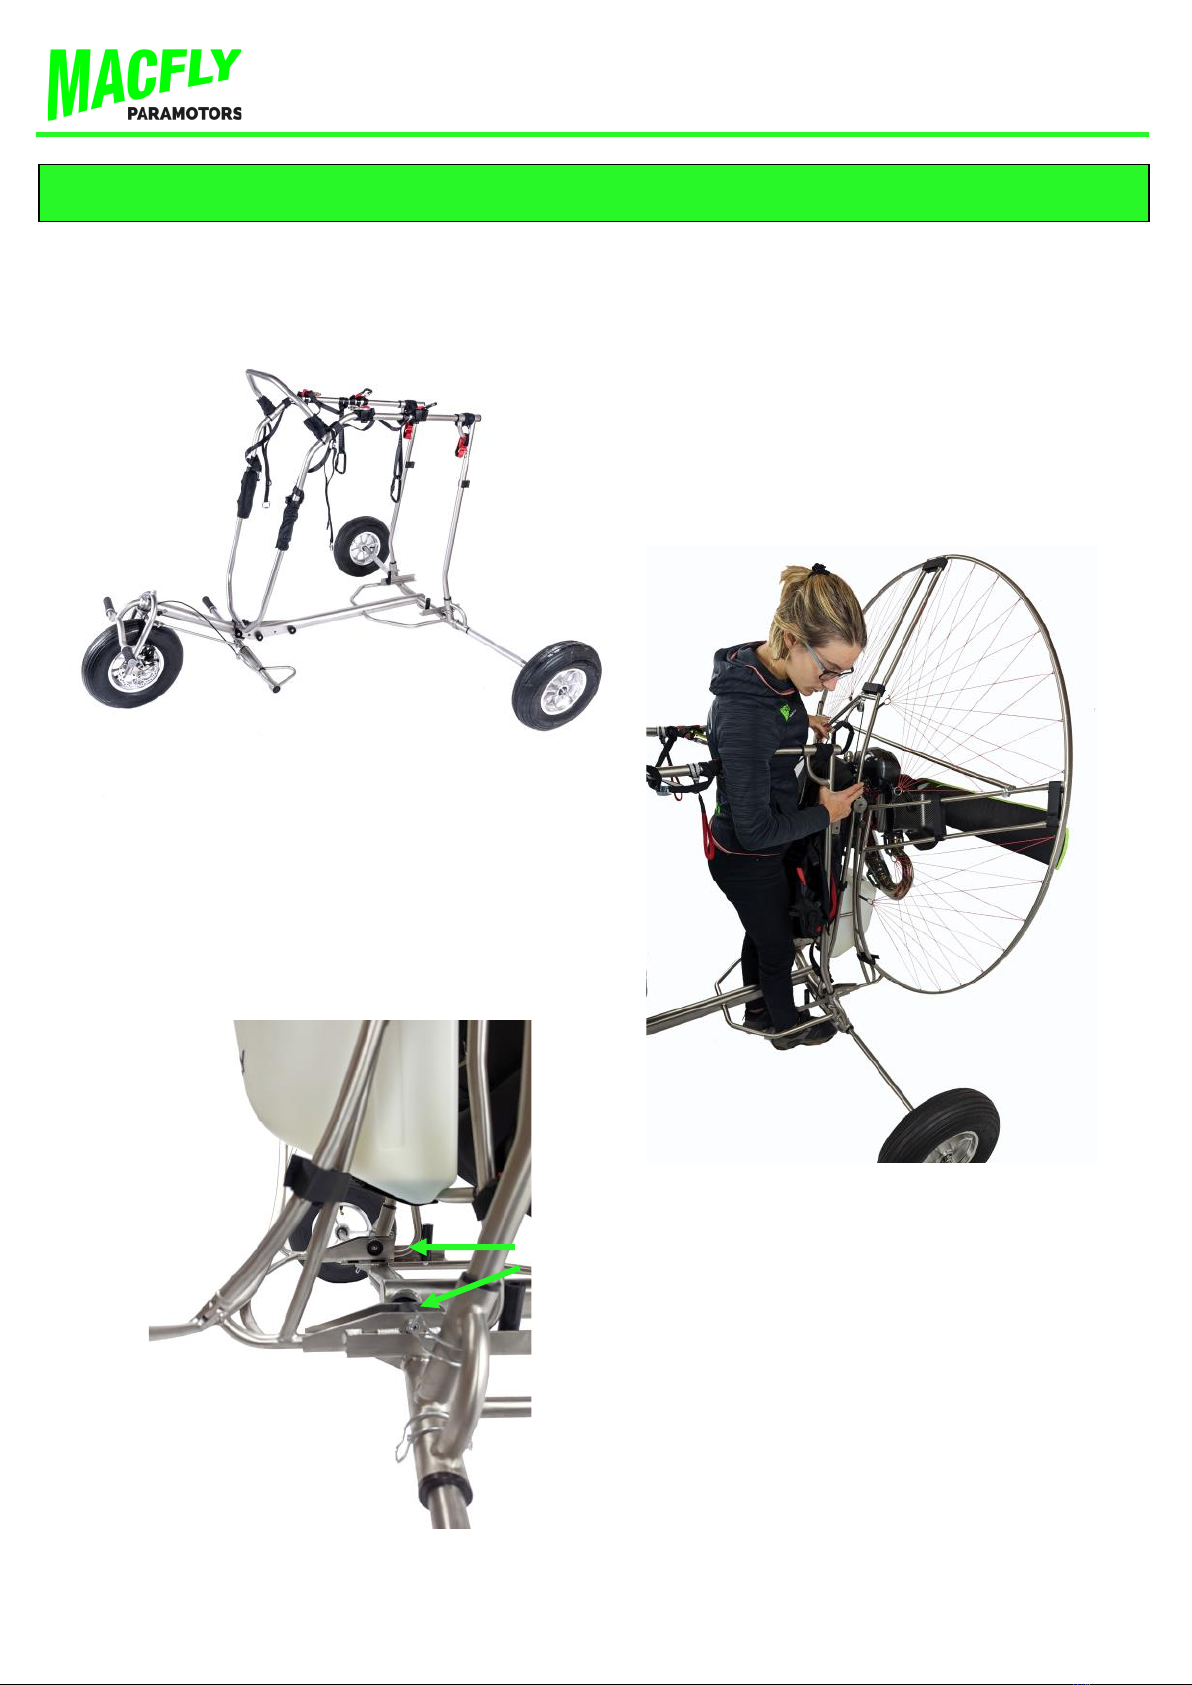
This Trike Tandem has been designed for MACFLY paramotors, foot take-off. Associated with the Trike it allows
a take-off in trolley in solo or in tandem.
Flight and ground tests have been carried out during years with this Trike and the MACFLY paramotor,
It has not been designed for use with another brand of frame not suitable for the Trike which can be dangerous
depending on the configuration,
Improper use and/or poor maintenance of your equipment increases these risks.
Macfly paramotors are suitable for qualified pilots as well as in training. Under no circumstances can the manu-
facturer, importer or sellers be held responsible about the use of this product.
We advise you to do your training in competent schools
Continue to train regularly to follow the evolution of our sport, driving techniques and equipment
Your equipment must not have been modified in any way and must be in good condition and regularly reviewed
A pre-flight inspection of all your equipment - and this before each flight - is essential. Never try to fly with
equipment that is damaged or not suitable for your experience.
Always fly equipped with a helmet, suitable shoes and gloves
Absolutely avoid flying in rain, snow, in strong winds, in turbulent conditions and in clouds.

5
USER MANUAL
1 – Caution / Regulations 2/2
1.1 Licence certificate and insurances
Depending on the country and state, the paramotor may or may not be subject to specific regulations. The
passage of a patent, or a license specific to each country must be obtained before flying with your GMP. Simi-
larly, some countries require compulsory insurance.
All pilots must demonstrate that they have the required level of training and experience and must - depending
on the country - have taken out at least civil liability insurance.
1.2 Identification/ registration
In some countries or states, the paramotor is considered as a means of transport, or even a vehicle, and it re-
quires an identification or a specific registration.
Get some information at your ministry or federation before flying with your paramotor
1.3 Wing connection
There are different types of wings more or less adapted to the practice of paramotoring.
Some haven’t been designed specifically for this sport but rather for paragliding.
Ask for the manufacturer’s advice before trying a non-validated assembly.
Check the compatibility with powered paragliding in the user manual.
1.4 Specificities of use
The Trike Tandem must be used with a motorization and a wing of the paragliding type and of design for the
paramotor. Sufficiently sized to support the weight of the Total Flying Weight assembly = Equipped Pilot +
Tandem Trike + Paramotor + weight of the wing + Passenger if this is the case.
WARNING : For the safety of the pilot and passenger if already installed, the Trike should not be used for tra-
veling and power taxiing at high speeds over ground without being connected to a wing, as the speeds of evo-
lution have not been tested for this.
It is imperative to associate the Trike with the wing, because this allows the weight of the Trike, the engine,
and the pilot to be taken care of from 15-20 km/h.

6
USER MANUAL
2 - Technical characteristics of the MACFLY Trike
Dimensions
Width 173cm
Length 185cm
Height 168 cm (138 cm cage version) / Height 178 cm (150 cm cage version)
Frame
Manufactured in titanium tubes of different sections, microblasted finish. The round tube was chosen for
its aesthetics and aerodynamics.
The suspension is made of very resistant titanium round VT22
Wheels
Stainless steel bearing, aluminum rims 3 spokes 400 x 100 mm
Weight (total with passenger seat)
27,5 Kg
Frame fixing
12 Secure Peguet pins with stretch cover and velcro straps
3 Stainless steel screws with fluted knobs
3 Peguet pins for fixing the wheels
2 Safety buckle straps with claw for attaching the frame to the trike
2 Stainless steel screws with fluted knobs + spacer for the lower fixing of the chassis to the trike
2 Spacers for fixing the chassis to the carriage using the screws of the arms
Fixing of the wing
2 Loops with aluminum carabiners (solo flight)
2 Loops with steel carabiners (tandem flight)
4 Pre-adjusted aluminum rings for fixing the solo or tandem wing
2 Safety straps between passenger, pilot and wing
2 Lines supports for cage
Miscellaneous equipment
1 Disc brake for the front wheel with mounting bracket
1 Passenger seat
2 Adjustable straps for cage reinforcement

7
USER MANUAL
3 - Trike tandem assembly 1/3
Unfold the front part and secure with the screw and its fluted knobs
Wheels assembly

8
USER MANUAL
Installation of protective covers on all the pins
Connect the 2 uprights with the top arch.
Lock properly with the pins, put on the protec-
tive covers to finish
Then connect the 2 uprights with the U-
shaped piece.
Lock properly with the pins, put on the protec-
tive covers to finish
3 - Trike tandem assembly 2/3

9
USER MANUAL
2/ Fit together these 2 uprights on the back of the trike
3/ Fix the front part with the screw and
the fluted knob
Complete the assembly by fixing the 2 rear tubes using the
pins, at the top and bottom
1/ Position the 2 end vertical uprights
4 - Assemblage du Trike Macfly avec le GMP 1/53 - Trike tandem assembly 3/3
WARNING
These uprights must be
inserted as far as they will
go.
When installing the pins, it
must be checked that
these pins fit into the hole
provided for this purpose
(the risk would be not to fit
the uprights sufficiently,
and to install the pins in a
vacuum)

10
USER MANUAL
4 - Trike tandem / Frame assembly 1/4
The trike is ready to receive the frame with Paramotor
Now position the clips to lock the bottom of the frame to the
trike thanks to the screws with grooved buttons provided for
this purpose.

11
USER MANUAL
FIXATION OF FRAME/ TRIKE —WITHOUT ARMS
4 - Trike tandem / Frame assembly 2/4
Dismantle the arms of your paramotor, then pair the end uprights of the Trike to the frame by inserting the
spacer provided for this purpose
For 150 cm frames the hole will be the top one
For 138 cm frames the hole will be the bottom one (like the example below)
It is recommended to change this kit (Screw + Spring + Washer + Nut) every 100 flight hours or every 2
years.
FIXATION FRAME Ø 150 cm
FIXATION FRAME Ø 138 cm
FIXATION FRAME Ø 150 cm
FIXATION FRAME Ø 138 cm
WARNING : The self-locking Nylstop nut is for single use only, and must be replaced after each disassembly

12
USER MANUAL
ATTACHING THE PILOT HARNESS
- To the Trike :
Connect the automatic carabiners to the harness on its lower part (photo below) and with the strap which
joins the carriage in the upper part
4 - Trike tandem / Frame assembly 3/4
- To the frame :
See your MACFLY user manual:
hps://www.macyparamotors.com/wa_les/manuel%20macy%20en.pdf
WARNING : It is recommended by the harness manufacturer to change the carabiners every 5 years or after 500
hours of use.
Have your harness fully checked every year, examining:
The straps (no excessive wear, no incipient breakage, no annoying folds)
Buckles and carabiners (no micro cracks, functioning OK)

13
USER MANUAL
FIXATION OF THE PASSENGER HARNESS
Install the passenger harness and check the passenger / pilot safety strap
Position and adjust the cage reinforcement straps, and position the lines supports on the paramotor cage
4 - Trike tandem / Frame assembly 4/4

14
USER MANUAL
Stockage
5 - Setting up the tandem rescue / Storage 1/2
Remove the side pocket of the harness, side opposite the gas handle
Install and zip the container with rescue instead
Forward the rescue risers along the straps of the harness, then along the upper tubes of the frame, and one of
the risers along the front arch.
Then hook the rescue links on the strap provided for this purpose, in the same place as the tandem carabiners.
Close the carabiners and ensure that it remains in a vertical position (direction intended for maximum resis-
tance), and its opening upwards.
Lock the carabiners with an O-ring or tape -refer to the rescue parachute user manual-.
WARNING : This example is valid for the installation of a tandem rescue with tandem use.
It is imperative to visualize that in the event of an emergency extraction, the risers must be able to disengage
easily and quickly from their constraints, so they must pass over and outside each element of the trike, never un-
der it.
Contact a professional to have the assembly assembled and checked.

15
USER MANUAL
Avoid running the engine on blended gasoline that is more than one month old.
If this is the case, empty the old mixture and replace it with recent fuel.
We advise you to disconnect the battery from the paramotor if you have one, as well as the spark plug suppres-
sor when you move or store the paramotor.
Finish by channeling the risers outside of each element of the trike so that in the event of extraction nothing
interferes with the proper functioning of the rescue
In green below, the path of the tandem rescue risers..
5 - Setting up the tandem rescue / Storage 2/2
Storage

16
USER MANUAL
6 – Adjustments
The assembly is complete, you can install your wing on the steel carabiners provided for tandem flight at
the front of the Trike, and at the rear for solo flight.
Standard adjustments are made in the
workshop, but you must make ad-
justments adapted to your weight on the
gantry before undertaking your first
flight.
We recommend that you perform seve-
ral solo flights to get to grips with your
Trike Tandem before undertaking tan-
dem flights,
Tandem flights must be carried out after
obtaining your qualification and pilot li-
cense with passenger carry validated by
an instructor, and with a competent
school
Do not forget to take out insurance for
the tandem flight, which is compulsory in
some countries.
ATTACH FOR
SOLO FLIGHTS
ATTACH FOR
TANDEM FLIGHTS
SOLO 45 Kg 80 Kg 95 Kg
ADJUSTMENT OF RINGS ACCORDING TO WEIGHT (Solo / Passenger weight)

17
USER MANUAL
7 – Pre-flight checks 1/2
Harness
- Closed pockets (pilot pockets also)
- Condition of the straps
- High harness/lower harness bindings
- Closure of the rescue container and passage of the straps, fixing
- Verification and control of the planchette
Frame
- Not deformed, sufficient propeller passage between
the cage and the propeller ends
- Check the tightness of the arms
- Interlocking of the cages
- Velcro fasteners
- State and tension of the net
- Shackle and starter pulley check
- Fixation of engine silent blocks
Trike
- Not distorted
- Interlocking and fixing of the pins in place and secu-
red with the stretch covers and Velcro strips
- Master carabiners in place for solo or tandem flight
- Pilot and passenger harness well fixed
- Free front wheel travel
- Operation of the front wheel brakes
- Verification of the fixing of the frame to the trike
WARNING : We strongly recommend a careful and thorough pre-flight before each flight. In case of suspicion of
an anomaly, however small, DO NOT FLY WITH IT, contact your dealer.
Each engine is different in use and maintenance. Follow the recommendations of the engine manufacturers con-
cerning the mechanical parts (manuals available and updated on the websites of each engine manufacturer)
See videos on the website : https://www.macflyparamotors.com/trikes_en.html#wa-anchor-top

18
USER MANUAL
7 – Pre-flight checks 2/2
Engine
(follow the fuel circuit)
- Set the electric starter to OFF if the engine is fitted with one
- Check the fuel level, add more if necessary
- Check the general condition of the tank
- Check the attachment of the tank to the frame
- Tighten the tank cap sufficiently to prevent possible leaks.
- Condition of the hoses, no leaks, away from hot parts
- Carburetor and air box well fixed, unobstructed, secure and condition of the rubber flanges not cracked
- Well fitted interference suppressor, screwed spark plug
- Verification of the ignition coil attachment + condition of the electrical terminals
- Verification that there are no leaks in the engine block (no traces of oil seepage)
- Engine cover fixing
- Exhaust and silencer, no cracks, no leaks, spring tension, silent blocks in good condition
- Reducer check: No play in the screws, no excessive seepage at the decompression valve
- Propeller, axe screw, no play or suspicious noise on its shafts, general condition and in particular of the leading
edge
- Check the gas control: maximum travel, and which returns well and frankly to the initial position
- Check the fixing of the pulley and the condition of the starter rope. Without pulling on it so as not to start involun-
tarily
- Pilot's state of fatigue and attention: no illness, no particular state of nervousness, no emotional loss

19
USER MANUAL
8 – Starting the engine
When cold, turn choke to “ON” position
(depending on engine model)
WARNING: Do not fire the starter unless the gas handle is in the correct position, with the stop
button clearly and immediately accessible.
Once the engine has started, you can turn
the choke to the "OFF" position after a few
seconds.
Do not take off with the choke in the
"ON" position!
It is not necessary to carry out a full gas heating, in order to minimize the risks of accident as much as
possible.
The purpose of this manipulation is to identify any engine anomalies (noise, vibration).
Each engine has its "little character", learn to tame it to start it at best.
WARNING : never to raise it in RPM without a propeller, this would damage the engine.
Place the left hand as shown in the photo holding vertical and the gas grip as
noted.
No gas power on the first attempts to start.
Pay particular attention to the position of your thumb in relation to the stop button.
The thumb should not be stuck by the han-
dle strap.
Do not shoot the starter without having the
handle in the right position, with the stop
button clearly and immediately accessible.

20
USER MANUAL
9 – Check list / Vital actions
You are ready to take off, a last check is necessary to not forget anything:
Windsock visible from the place of inflation
Check wing, risers, lines.
Engine start after environment check
- Legs, ventral, pectoral and helmet attached (driver + passenger)
- Main links closed, and choice of solo or tandem link well suited
- Front risers in hand, no twists
- Hand brakes, no knots and direct passage through the pulley
- Radio, volume and frequency set
- Last engine warm-up avoiding blowing the sail or sucking up a line
- Current weather and aerology, wind strength and direction
- Clearance of airspace in front and behind
- Inflation with engine between 30 and 40% gaz power to mount the wing
GOOD FLIGHTS!
Table of contents
Other MACFLY Aircraft manuals
Popular Aircraft manuals by other brands

Diamond
Diamond DA20-C1 Operating procedures

Independence paragliding
Independence paragliding STRIKER manual

Diamond Aircraft
Diamond Aircraft DV 20 KATANA 100 Flight manual

Grumman American
Grumman American GA-7 COUGAR 1987 Pilot operating handbook

MAC PARA
MAC PARA Elan Light user manual

Cessna
Cessna A150M Pilot operating handbook