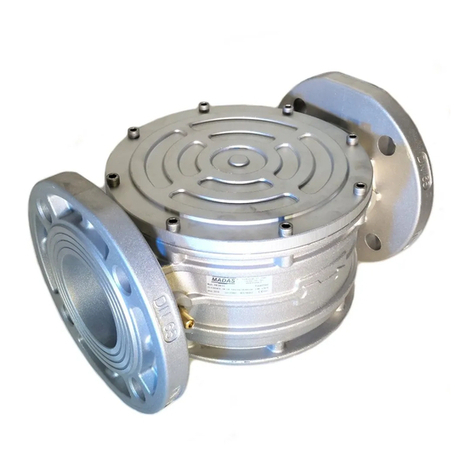
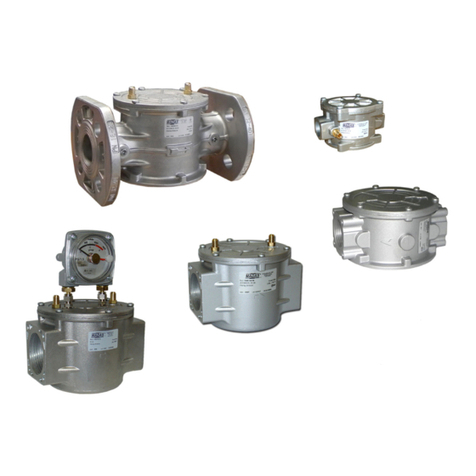
Madas DH65-150 User manual

FMMadas Technical Manual - 6|6.3 - REV. 0 of 1th Oct 2018
1.0 GENERAL INFORMATION
This manual shows you how to safely install, operate and use the device.
The instructions for use ALWAYS need to be available in the facility where the device is installed.
ATTENTION: installation/maintenance needs to be carried out by qualified staff (as explained in
section 1.3) by using suitable personal protective equipment (PPE).
For any information pertaining to installation/maintenance or in case of problems that cannot be solved with the instructions,
contact the manufacturer by using the address and phone numbers provided on the last page.
1.1 DESCRIPTION
A device that retains dust particles conveyed by the gas and protects the elements in danger (burners, counters, boilers,
pressure regulators, etc.) from rapid clogging.
IT consists of a filter cartridge made of washable synthetic material and can be entirely removed for full inspection, cleaning
and/or replacement.
It can be supplied equipped with:
•pressure test nipples and/or connections to control the pressure and/or differential pressure.
•cap or drain valve for condensation drainage.
•clogging indicator differential pressure gauge installation set-up;
•pressure gauge already installed.
Reference standards: EN 126 – EN 13611.
1.2 KEY TO SYMBOLS
ATTENTION: Attention
is drawn to the technical
details intended for
qualified staff.
DANGER:
Failure to observe this may
cause damage to tangible goods, injury
to people and/or pets.
DANGER: Failure to
observe this may cause
damage to tangible
goods.
1.3 QUALIFIED STAFF
These are people who:
•Are familiar with product installation, assembly, start-up and maintenance;
•Know the regulations in force in the region or country pertaining to installation and safety;
•Have first-aid training.
1.4 USING NONORIGINAL SPARE PARTS
•To perform maintenance or change spare parts (e.g. filter element, O-ring, etc.) ONLY USE manufacturer-recommended
parts. Using different parts not only voids the product warranty, it could compromise correct operation of the device.
•The manufacturer is not liable for malfunctions caused by unauthorised tampering or use of non-original spare parts.
1.5 IMPROPER USE
•The product must only be used for the purpose it was built for.
•It is not allowed to use fluids other than those expressly stated.
•The technical data set forth on the rating plate must not, under any circumstances, be exceeded. The end user or installer
is in charge of implementing proper systems to protect the device, which ensure the maximum pressure indicated on the
rating plate is not exceeded.
•The manufacturer is not responsible for any damage caused by improper use of the device.

FM Madas Technical Manual - 6|6.3 - REV. 0 of 1th Oct 2018
2.0 TECHNICAL DATA
• Use : non-aggressive gases of the three families (dry gases)
• Ambient temperature (TS) : -40 ÷ +70°C
• Maximum operating pressure : 2 or 6 bar (see product label)
• Mechanical strength : Group 2 (according to EN 13611)
• Flanged connections that can be
coupled to PN 16 flanges
:
(DN 65 - DN 80 - DN 100 - DN 125 - DN 150 - DN 200 - DN 250 - DN 300)
ISO 7005 / EN 1092-1
• ANSI 150 flanged connections
: on request
• Filter element* : Filtering 10-20-50 µm (see product label)
• In compliance with : (EU) Regulation 2016/426 (Appliances burning gaseous fuels)
PED Directive 2014/68/EU
* DN 125 - DN 150 - DN 200 - DN 250 - DN 300 only 10 µm
3.0 COMMISSIONING THE DEVICE
3.1 OPERATIONS PRIOR TO INSTALLATION
•It is necessary to close the gas upstream of the device prior to installation;
• Make sure that the line pressure DOES NOT EXCEED the maximum pressure declared on the product label;
•Protective caps (if any) must be removed prior to installation;
•Device pipes and insides must be clear of any foreign bodies;
• Make sure the inlet and outlet counter-flanges are perfectly coaxial and parallel in order to prevent unnecessary mechanical
stress to the body. Also calculate the space to insert the seal gasket;
• With regard to tightening operations, equip yourself with one or two calibrated torque wrenches or other controlled locking tools;
•Consider the clearance requirements to replace the filter element;
•With outdoor installation, it is advisable to install a protective roof to prevent rain from oxidising or damaging parts of the
device.
•According to the plant geometry, check the risk of an explosive mixture arising inside the piping;
•If the filter is installed near other devices or as part of an assembly, compatibility between the filter and these
devices must be evaluated beforehand;
•Provide a protection against impacts or accidental contacts if the device is accessible to unqualified personnel.
3.2 INSTALLATION (see example in 3.4)
•Assemble the device by flanging it, with the due seals, onto the plant with pipes whose flanges are consistent with the
connection being attached. The gaskets must be free from defects and must be centred between the flanges;
•If, after installing the gaskets, there is still an excessive space in between, do not try to reduce said gap by excessively
tightening the bolts of the device;
•The arrow, shown on the body (3) of the device, needs to be pointing towards the application;
•Insert the relative washers inside the bolts in order to prevent damage to the flanges during tightening;
•When tightening, be careful not to “pinch” or damage the gasket;

FMMadas Technical Manual - 6|6.3 - REV. 0 of 1th Oct 2018
•Tighten the nuts or bolts gradually, in a “cross” pattern (see the example below);
•Tighten them, first by 30%, then by 60% and finally 100% of the maximum torque (see the table below according to EN
13611);
Diameter DN 65 DN 80 DN 100 DN 125 DN 150
> DN 150
Max. torque (N.m)
50 50 80 160 160 160
•Tighten each nut and bolt again clockwise at least once, until the maximum torque has been achieved uniformly;
• The filter can be installed in any position as long as the arrow, indicated on the body (3) of the appliance, faces the application;
•During installation, avoid debris or metal residues from getting into the device;
•To guarantee mechanical tension-free assembly, we recommend using compensating joints, which also
adjust to the pipe’s thermal expansion;
•If the device is to be installed in a ramp, it is the installer’s responsibility to provide suitable or correctly sized supports
to hold and secure the assembly. Never, for any reason whatsoever, leave the weight of the ramp resting only on the
connections (threaded or flanged) of the individual devices;
•In any case, following installation, check the tightness of the plant;
ĂƉƉůŝĐĂƟŽŶ
! "
# $ % ! " &
#$ '
ŶŽŶͲŚĂnjĂƌĚŽƵƐǀĞŶƟůĂƚĞĚnjŽŶĞΎ
( ) * ( + , - . + / / 0
1 2 3
3.4 GENERIC EXAMPLE OF AN INSTALLATION
1. M16/RM N.C. Manual reset solenoid valve
2. SM Jerk ON/OFF valve
3. FM gas filter
4. OPSO series MVB/1 MAX shut-off valve
5. RG/2MC pressure regulator
6. MVS/1 relief valve
7. Pressure gauge and relative button
8. Vent valve
9. Ball valve
10. Gas detector
11. SM remote jerk ON/OFF valve lever control
12. Expansion joint/anti-vibration mount

4 5
FM Madas Technical Manual - 6|6.3 - REV. 0 of 1th Oct 2018
4.0 FIRST STARTUP
•Before start-up, make sure that all the instructions on the rating plate, including the direction of flow, are observed;
•After having gradually pressurised the system, check the tightness and operation of the filter.
4.1 - RECOMMENDED PERIODIC CHECKS
•Use a suitable calibration tool to ensure the bolts are tightened as indicated in 3.2;
•Check the tightness of the flanged/threaded connections on the system;
•Check the tightness and operation/efficiency of the filter;
The final user or installer is responsible for defining the frequency of these checks based on the severity of the service conditions.
5.0 MAINTENANCE
•Before carrying out any dismantling operation on the device, make sure that there is no pressurised gas inside.
REPLACING THE FILTER ELEMENT (2)
•Remove the cover (1) by loosening the fastening screws (5);
•Extract the filter element and check its conditions. Blow it and clean it and, if necessary, replace it.
•Reassemble it in its initial position, checking that it is placed between the special guides (4) (see fig. 1-2-3);
•Check the conditions of the sealing O-ring (6) of the cover (1), and replace it if necessary (recommended);
•Make sure the O-ring (6) of the cover (1) is inside the provided groove;
• Reassemble the cover and secure it in its original position, being very careful not to “pinch” or damage the O-ring during tightening;
•Tighten the screws (5) gradually, following a “cross” pattern, until the torque (tolerance -15%) indicated in the table below
is reached. Use a calibrated torque wrench to do this.
•Check the body/cover seal.
Screw M5 M6 M8 M10 M12
Galvanised
Stainless
Steel
Galvanised
Stainless
Steel
Galvanised
Stainless
Steel
Galvanised
Stainless
Steel
Galvanised
Stainless
Steel
Max. torque (N.m) 6 4.5 10 7.5 25 18.5 49.5 37 84.5 63.5
6.0 TRANSPORT, STORAGE AND DISPOSAL
• During transport the material needs to be handled with care, avoiding any impact or vibrations to the device;
• If the product has any surface treatments (ex. painting, cataphoresis, etc.) it must not be damaged during transport;
• The transport and storage temperatures must observe the values provided on the rating plate;
• If the device is not installed immediately after delivery it must be correctly placed in storage in a dry and clean place;
• In humid facilities, it is necessary to use driers or heating to avoid condensation.
• At the end of its service life, the product is to be disposed of in compliance with the legislation in force in the country where
this operation is performed.

4 6
FMMadas Technical Manual - 6|6.3 - REV. 0 of 1th Oct 2018
7.0 WARRANTY
The warranty conditions agreed with the manufacturer at the time of the supply apply.
For damage caused by:
•Improper use of the device;
•Failure to observe the requirements described in this document;
•Failure to observe the regulations pertaining to installation;
•Tampering, modification and use of non-original spare parts;
are not covered by the rights of the warranty or compensation for damage.
The warranty also excludes maintenance work, the assembly of devices of other manufacturers, making changes to the device
and natural wear.
8.0 RATING PLATE DATA
The rating plate data (see example provided here) includes the following:
• Manufacturer’s name/logo and address (possible distributor name/logo)
• Mod.: = device name/model followed
by the connection diameter
• CE-51AR1070 = certification pin number
• EN 126 = Product reference regulation
• P. max = Maximum pressure at which product operation is guaranteed
• PS = Allowable maximum pressure
• Filtering = Filtering
• TS = Temperature range within which product operation is guaranteed
• = Compliance with (EU) Regulation 2016/426 followed by Notified Body No.
• = In compliance with PED directive followed by the no. of the Notified Body
• year = Year of manufacture
• Lot = Product serial number (see explanation below)
• U1812 = Lot issued in year 2018 in the 12th week
• 7634 = progressive job order number for the indicated year
• 00001 = progressive number referring to the quantity of the lot
9.0 FILTER SIZING EXAMPLE
Usage data
Qn= 1210 [Nm3/h] Methane
Pi= 1.2 [bar]
To use the diagram, you have to convert the usage
data to the diagram conditions (P1=0) and vice versa.
Conversion to the flow rate at the diagram conditions:
Choosing the filter diameter:
• Identify the Qdflow rate on the Gas line used and go up with a vertical line until you cross the straight line for the selected diameter
(see example diagram on page 32);
• From this newly identified point, move left until you cross the graph axis and read the ΔPd
Converting the ΔPd measured on the diagram at the system conditions:
Qd[Nm3/h] = = = 550 [m3/h]
Qn [Nm3/h] 1210 [Nm3/h]
Pi+ 1 [bar] 1.2 + 1 [bar]
Maximum flow rates in m3/h of methane gas considering a max flow speed through the pipes of 20 m/s
DN 65 DN 80 DN 100 DN 125 DN 150 DN 200 DN 250 DN 300
244 m3/h 370 m3/h 578 m3/h 903 m3/h 1300 m3/h 2312 m3/h 3613 m3/h 5203 m3/h
ΔPr[mbar] = ΔPd[mbar] x (Pi+ 1) [bar] = 6.5 [mbar] x (1.2 + 1) [bar] = 14.3 [mbar]
• Follow the same procedure in the diagrams on pages 32 and 33 to calculate the pressure drop of the filters to the various
filtering points (50 µm -20 µm -10 µm).
KEY
Qn: Usage flow rate [Nm3/h]
Qd: Flow rate at the diagram conditions [m3/h]
Pi: System pressure
ΔPd: ΔP measured on the diagram
ΔPr: ΔP normalised to the system condition
P1 : Diagram tracing pressure
7 8 9 : ; < 7 = > ? @ @
A B C D E F G E @ H @ C B >E? I J : K L M N J O N I P L Q
< R S T U Q R V W ; E@ K R X Q 8 V Y O ; C Z @ [ H @ \ A
]
U L Q ; ? @ E ^ _ 8 T ; ` E ^ E ? H I a Z b @@@@E
ccde
c f g h

4 i
FM Madas Technical Manual - 6|6.3 - REV. 0 of 1th Oct 2018
10.0 DIFFERENTIAL PRESSURE GAUGE CLOGGING INDICATOR
10.1 - DESCRIPTION
The differential pressure gauge used to point the clogging degree of the cartridge filters.
It is equipped of adjust maximum index (red arrow) able to supply the best ΔP value occurred.
Can be supplied already mounted (as in figure 5 and 6) or as accessory to be mounted later.
Generally it is supplied mounted on filters as the picture and stated fig. 5, namely:
•arrow on the filter body left to right;
•readable dial frontally;
•+ mark on the back left
It is possible to supply it even as stated in in fig. 6 (reverse type “R”), namely:
•arrow on the filter body left to right;
•readable dial from the back;
•+ mark on the left (in this case the marks + and – are specified with proper labels).
Both versions can be supplied with a built in proximity sensor too to transmit a maximum differential pressure signal from
remote ( “S” type).
The sensore is normally open type and supplies a signal when the ΔP pointer reaches 100 mbar point.
Different settings on request.
10.2 - INSTALLATION
If the differential pressure gauge is supplied as accessory it is necessary to close the gas before installation.
We suggest the pressure gauge installation on filters with premounting connections then with 2 G 1/8 threaded holes (distance
between them 55 mm) already present on the cover (see cover picture and fig. 5 and 6).
If the filter do not have this premounting connections you must do a connection as show in fig. 7 using pipes and/or connections
having matching threads with the connection to be connected and suitable for gas use.
The filter on which the pressure gauge have to be mount must be equipe at least with an inlet and outlet pressure test point.
After mounting make a working and a leak test.
Once the filter is mounted (see related instruction sheet) before the plant start up reset the red arrow.
Check the ΔP with new filter and with flow in the plant.
Replace the cartridge when the differential pressure is doubled comparing the original value obtained with new filter.
10.3 - TECHNICAL DATA
•Gauge P. max: 20 bar
•Standard maximum ΔP: 150 mbar (different ΔP on request)
•Environment temperature: -40 ÷ +60 °C
Proximity sensor features
•Maximum voltage: 30 Vdc
•Maximum power: 100 mA
•Protection degree: IP55
•Protection way: EEx ia IIC T6
•Cable length: 2 m
Table of contents
Other Madas Water Filtration System manuals
Popular Water Filtration System manuals by other brands

Hydrofarm
Hydrofarm Three Stage Reverse Osmosis instruction manual

Everpure
Everpure EV9607-41 Specification sheet

Pentair
Pentair TRITON NEO operating manual

Watts Premier
Watts Premier CT-1 Installation, operation and maintenance manual

Frizzlife
Frizzlife PD600-TAM3 owner's manual

SunSun
SunSun CBG-500 Operation manual

SteriPEN
SteriPEN Emergency user manual

Koganei
Koganei iB-Cyclone iBSeries Handling Instructions and Precautions

Pool Technologie
Pool Technologie UNO LTE user manual

Weq
Weq CFW320-KFA Installation, configuration and operations guide

Evoqua
Evoqua CT Series Operation and maintenance manual

Millipore
Millipore milli-q user manual