AQVA Finland PURE2 Technical manual

FI
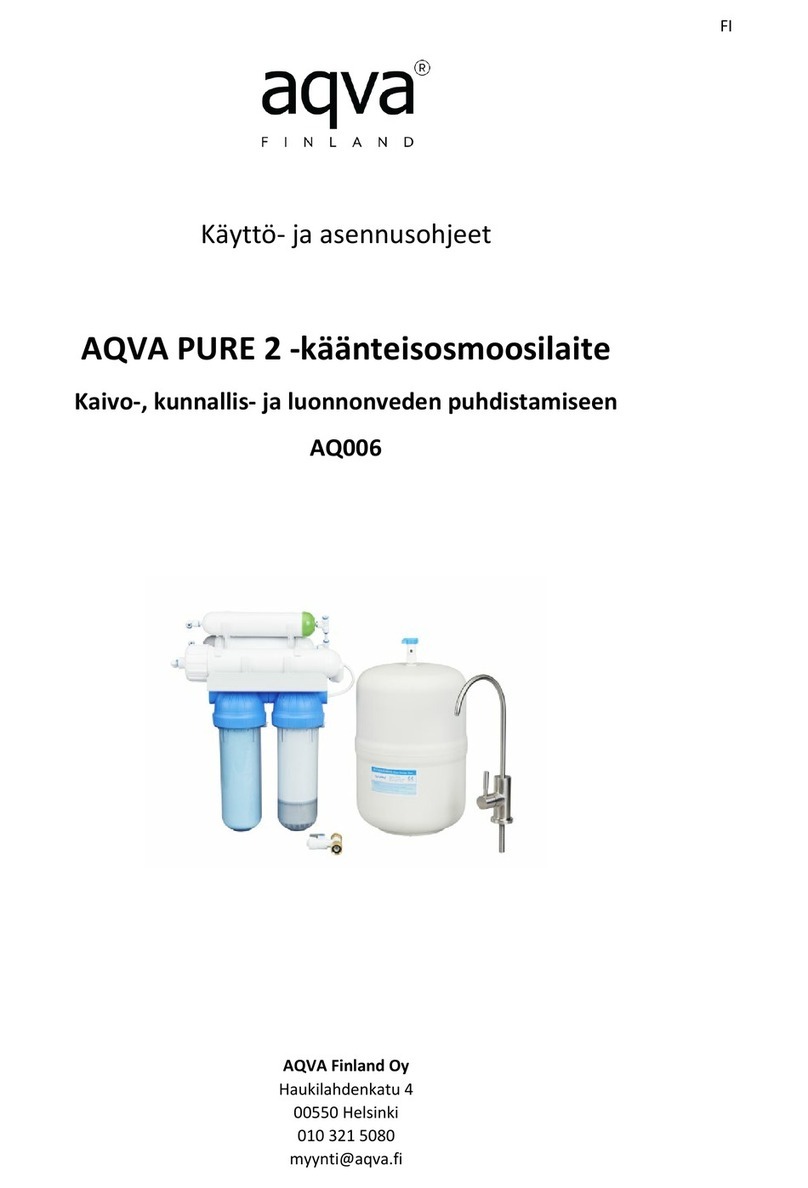
AQVA PURE2 -KÄÄNTEISOSMOOSILAITE
KAIVO-, KUNNALLIS- JA LUONNONVEDEN PUHDISTAMISEEN
KÄYTTÖ- JA ASENNUSOHJEET
Valmistuttaja
AQVA Finland Oy
Haukilahdenkatu 4
Helsinki, 00550
Puh. 010 321 5080
Vähentää epäpuhtauksia Luotettava ja turvallinen

Kuvaus
AQVA PURE2 toimii poistamalla epäpuhtaudet vedestä molekyylitasolla. Vedenpuhdistin on tarkoitettu
juomakelpoisen veden valmistukseen. Se puhdistaa veden mekaanisista lisistä, kolloidihiukkasista, orgaanisista
ja epäorgaanisista epäpuhtauksista, bakteereista ja viruksista. Vedenpuhdistin poistaa huonon maun ja hajun
sekä vähentää veden väriä. Sitä voidaan käyttää kunnan käsittelemän veden tai paikallisesta lähteestä peräisin
olevan veden (esim. luonnonlähde, kaivo jne.) puhdistamiseen.
Vedenpuhdistimen toiminta perustuu käänteiseen osmoosiin: ulkoisen paineen alaisena osmoottisen paineen
ylittyessä vesimolekyylit kulkevat puoliläpäisevän kalvon läpi, kun taas haitallisten aineiden molekyylit sekä
bakteerit ja virukset eivät läpäise kalvoa ja poistuvat järjestelmästä.
Tuote on helppo asentaa. Käytä LVI- tai putkiasennusliikkeen palveluita sen liittämiseen vesijohtoverkkoon ja
käyttöönottamiseen.
Käänteisosmoosin toimintaperiaate
Paineistettu
syöttövesi
Huuhteluvesi/
epäpuhtaudet
Vesimolekyylit/
puhdas vesi

Tekniset tiedot
-Suositeltu syöttöveden pH-arvo 6,5 – 8,5
-Suositeltu syöttöveden TDS-arvo alle 1500 mg/l (sähkönjohtavuutena noin 2350 µs/cm)
-Suositeltu syöttöveden kovuus alle 500 mg/l
-Suositeltu syöttöveden klooripitoisuus alle 0,5 mg/l
-Suositeltu syöttöveden rautapitoisuus alle 500 µg/l (jos korkeampi, suositellaan esisuodatusta)
-Suositeltu syöttöveden mangaanipitoisuus alle 100 µg/l (jos korkeampi, suositellaan esisuodatusta)
-Syöttöpaine 2 – 6 bar, jos paine on alle 3 bar voi puhtaan veden tuotto olla hidasta.
-Kalvopainesäiliön paine (kytkemättömänä) 0,4 – 0,6 bar.
-Suositeltu syöttöveden lämpötila +4…+35 °C
-Syöttöveden liittimen kierteet ½ tuumaa, ulkoinen ja sisäinen
-Suodatusyksikön mitat: leveys 380 mm, korkeus 450 mm, syvyys 140 mm
-Kalvopainesäiliön korkeus 430 mm ja halkaisija 270 mm
-Kalvopainesäiliön puhdasvesitilavuus 8 - 10 litraa, syöttöpaineen mukaan
-Puhdistetun veden tuottonopeus noin 3 desilitraa minuutissa. Verkoston vedenpaineella on vaikutusta.
Mitä suurempi paine, sitä suurempi tuottonopeus. Myös veden suolapitoisuudella (kloridi) ja
sähkönjohtavuudella on vaikutusta tuottonopeuteen. Mitä suurempi suolapitoisuus tai sähkönjohtavuus,
sitä pienempi tuottonopeus suhteessa paineeseen.
Pakkauksen sisältämät komponentit
1. Osmoosiyksikkö
2. Vesitankki
3. Osmoosikalvo
4.Puhdasvesihana
5. Koteloavain
6. Letkua
7. Vesitankin sulku
8. Liittimiä
9. Syöttöventtiili

Asennusohjeet
1. Laitteen kytkentä- ja toimintaperiaatekaavio
2. Lukitussokan käyttö ja letkujen liittäminen
Vedä lukitussokka (2) irti liittimestä (1). Työnnä putki (3) liittimeen. Se uppoaa noin 15mm syvyyteen. Vedä
putkea hieman ulospäin ja laita lukituspidike (2) takaisin. Varmista vetämällä, että putki (3) pysyy kiinni: älä
vedä yli 8 kgf voimalla. Voitte muuttaa letkujen pituutta, leikkaamalla terävällä mattoveitsellä haluamanne
pituuden. Leikkaaminen tehdään tasoa vasten ja suoraan.
Letkun tai tulpan irrottaminen (4),
Letkun poistoavain (4) ei kuulu toimitukseen, voitte
Letkun tai tulpan kiinnittäminen käyttää pientä ruuvimeisseliä tai painaa sormenpäällä.

3. Suodattimien asentaminen paikoilleen (laitteen rakenne voi poiketa kuvista)
Osmoosikalvo: Avaa suodatinpakkaus saksilla leikkaamalla päästä, jossa suodattimen keskiputkessa on
kaksi kumitiivistettä. Työnnä suodatin sisään suodatinkoteloon koskematta siihen paljain käsin. Kierrä
kotelon korkki käsin tiukalle loppuun asti. Liitä letku ja lukitussokka paikoilleen. Huomaa, että
osmoosikalvon keskiputken kumitiivisteet uppoavat kotelon pohjassa olevaan vastimin putken sisään.
Tämä voi vaatia hieman painamista käsin. Osmoosikalvoa voi painaa sisään päin keskiputkesta. Vanhan
osmoosikalvon voi hävittää polttokelpoisen sekajätteen mukana.
Esisuodattimet: Uudesta laitteesta suodatinkotelot aukeavat käsin kiertämällä, mutta jos laite on ollut
käytössä niin voi olla, että on tarpeen käyttää koteloavainta apuna. Sulje kotelot käsin kiertämällä ja tee
loppukiristäminen koteloavaimella.
Esisuodattimia on kaksi. Edestäpäin katsottuna vasemmanpuoleinen on aina valkoinen polypropyleenirulla
(hienosuodatin) ja oikeanpuoleinen on oletusarvoisesti aktiivihiili, mutta veden laadusta riippuen tätä
suodatinta voidaan vaihtaa tarpeen mukaan, esimerkiksi rautamangaanisuodattimeen tai
rikkivetysuodattimeen, mikäli halutaan esisuodattaa vettä jonkin tietyn epäpuhtauden osalta. Tämä voi
pidentää osmoosikalvon elinkaarta, mutta suodatetun veden laatuun se ei vaikuta. Veden laatu pysyy aina
erinomaisena osmoosipuhdistuksen jälkeen. Vanhat patruunat voidaan hävittää polttokelpoisen
sekajätteen mukana.
Jälkisuodattimet: Aktiivihiili ja mineralisointi. Mineralisointi lisää veteen pienen määrän kalsiumia ja
magnesiumia, aktiivihiili toimii yleisjälkisuodattimena. Nämä suodattimet vaihdetaan kokonaisina
patruunoina. Suodattimia ei saa auki. Suodattimet irrotetaan ja kiinnitetään letkuliittimestä. Huomaa
virtaussuunta ja suodattimen asento ennen vanhojen suodattimien irrottamista. Vanhat patruunat voidaan
hävittää polttokelpoisen sekajätteen mukana.

Yleiskuva AQVA PURE käänteisosmoosilaitteesta ja suodattimien sijoittelusta

4. Puhdasvesihanan asentaminen
-Poraa altaaseen (pöytään) 12 mm kokoinen reikä. Huomioi, että tason alla tulee olla riittävästi tilaa
sormimutterille ja sen kiristämiseen.
-Asenna hanan komponentit kuvan mukaisessa järjestyksessä.
-Kiristä letkuliitin käsin ja tee loppukiristys työkalulla. Huomaa, että liitin on muovia, jolloin liiallinen
kiristäminen voi rikkoa sen. Liittimen välissä on o-rengastiiviste, jonka tiiviiksi saaminen ei vaadi suurta
voimaa.
-Liitä letku letkuliittimeen.

5. Viemäriyhteen/satulaliittimen asentaminen
•Poistovesiputken liitäntä/viemäriyhteen asennus suositellaan asennettavan viemäriputkeen ennen
poistovesiletkua ja vesilukkoa (poistoputken liitäntä sopii kaikkiin viemäriputkiin, joiden sisäinen
läpimitta on 40 mm).
•Viemäröintiputki lähtee takaiskuventtiilistä (Flow 420).
•Poista suojakalvo tiivisteestä. Liimaa teippitiiviste liitännän sisäpuolelle. Tiivisteessä olevan reiän tulisi
vastata viemäriyhteessä olevaa reiän kohtaa.
•Kiinnitä liitin viemäriputkeen ja ruuvaa ruuvit kiinni. Ruuvit tulee kiristää yhtäläisesti, jotta liitännän
kaksi osaa pysyvät samalla tasolla.
•Poraa 7 mm kokoinen reikä liitännän liitäntäputken läpi.
•Aseta muovimutteri JG-putkeen (musta), aseta putki liitäntään ja ruuvaa mutteri kiinni.
Huomio! Varmista vielä, että liitäntäputki on riittävän syvällä, mutta ei kuitenkaan kiinni viemäriputken
takaseinässä ja tiukasti kiinni viemäriyhteessä, meluhaittojen ja muiden haittojen välttämiseksi.
6. Syöttövesiyhteen (haaroitin) ja sulkuventtiilin asentaminen
Syöttövesiyhde suositellaan asentamaan sulkuventtiilin taakse, esimerkiksi astianpesukoneliitännän väliin,
mikäli astianpesukone käyttää kylmää vettä ja on kytketty kylmävesilinjaan. Toinen vaihtoehto on kuvan
mukainen asennus kylmävesilinjaan.

7. Painevesitankin asentaminen
-Käytä PTFE- / teflonteippiä tiiveyden varmistamiseen.
-Painevesitankissa on sisällä kumikalvo, joka mahdollistaa paineistetun veden säilömisen siinä.
Kumikalvon vastapuolella on ilmanpainetta, joka voi vuosien saatossa vuotaa pois. Ilmanpaineen
katoamisen voit huomata puhdasvesitilavuuden pienenemisenä. Tässä tapauksessa voit lisätä
ilmanpainetta säiliön pohjassa olevan venttiilin kautta.
Käyttöohjeet
-Varmista kertaalleen vielä, että kaikki letkut menevät niille tarkoitettuihin liitoksiin
-Varmistakaa, että esisuodatinkotelot on kiristetty paikoilleen
-Sulje painevesitankin venttiili kääntämällä sen vipu poikittain (closed) letkun lähtösuuntaan
-Avaa puhdasvesihana
-Avaa vedensyöttöventtiili
-Laske vettä noin 20 minuutin ajan lavuaariin. Tänä aikana esisuodattimista poistuu ilma ja vesi voi olla
väriltään vaaleaa. Tämä on hienoa ilma-/vesiseosta. Tätä vaaleutta voi ilmetä satunnaisesti pari päivää
käyttöönoton jälkeenkin.
-Avaa painevesitankin sulkuventtiili
-Sulje puhdasvesihana
-Odota noin 1 tunti, jotta painevesitankki täyttyy.
-Avaa puhdasvesihana ja tyhjennä painevesitankki. Tankki on tyhjä, kun veden virtaama puhdasvesihanasta
heikkenee selvästi.
-Toista edellinen kaksi kertaa, jonka jälkeen painevesitankki ja vesikanavat on huuhdeltu.
-Tarkista ettei missään ilmene vesivuotoja
-Laite on valmis käyttöön

Yleistä ja tietoa ylläpidosta
-Vedensyöttö laitteelle tulee sulkea, kun sitä ei käytetä
-Esisuodattimet, jälkimineralisointi- ja jälkiaktiivihiilisuodattimet vaihdetaan kerran vuodessa ja
osmoosikalvo kerran kahdessa vuodessa. Jos veden laatu poikkeaa normaalista, on mahdollista, että
suodattimet tukkeutuvat nopeammin, jolloin veden tuotto hidastuu. Tällöin suodattimet tulee vaihtaa jo
aiemmin.
-Laite tuottaa puhdasta vettä välivesitankkiin noin nopeudella 3 dl minuutissa, kun verkoston syöttöpaine
on noin 3,5 bar. Mikäli veden kovuus tai esimerkiksi suolapitoisuus on kuitenkin koholla, on mahdollista,
että laitteen tuotto hidastuu tai jopa pysähtyy. Tällöin verkoston syöttöpaineen korotus voi auttaa.
-Puhdistetun veden laatua kannattaa seurata säännöllisesti, jolloin voidaan varmistua laitteen
oikeanlaisesta toiminnasta.
-Jos laitetta ei käytetä yli 2 viikkoon, on suositeltavaa laskea puhdasvesitankki kaksi kertaa tyhjäksi ja antaa
täyttyä uudelleen ennen käyttöä.
-Laite ei saa päästä jäätymään.
-Jos laite otetaan esim. mökiltä lämpimään talvikauden ajaksi, lasketaan laitteesta vedet ulos, irrotetaan
letkut ja tulpataan liittimet, käyttäen mukana tulevia värikoodattuja tulppia. Puhdasvesitankin venttiili
suljetaan, letkut ja hanan voi jättää paikoilleen.
-Uudelleen keväällä asennettaessa vaihdetaan esisuodattimet uusiin ja suoritetaan käyttöönottovaiheet
sekä tehdään vesitankin huuhtelu kahteen kertaan.
-Jos laitteella tehdään puhdasta vettä luonnonvesistöstä esim. järvestä, on suositeltavaa tehdä riittävä
esisuodatus jo käyttövesipumpulla, vähintään 1 µm tai 5 µm hienosuodattimella.
-Mikäli laite tuottaa vain huuhtelu- eli rejektivettä, mutta ei puhdasta, on verkoston syöttöpaine luultavasti
liian alhainen. Tällöin kannattaa tarkistaa, että etenkin pumpun alapaineraja on säädetty.
Vaihtosuodattimet:
-Osmoosikalvo, tuotekoodi: AQ060
-Esisuodattimet, tuotekoodeilla: AQMF5-M ja AQCB-M
-Jälkimineralisointi, tuotekoodilla: AQ006-PM
-Jälkiaktiivihiili, tuotekoodilla: AQ006-PC
Vaihtosuodattimet voitte löytää verkkokaupastamme valikoiden kautta tai käyttämällä pikahakukenttää
tuotekoodeilla.

AQVA PURE2 REVERSE OSMOSIS SYSTEM
FOR THE TREATMENT OF WELL, MUNICIPAL AND NATURAL WATERS
USE AND INSTALLATION GUIDE
Manufacturer
AQVA Finland Oy
Haukilahdenkatu 4
Helsinki, 00550
Tel. 010 321 5080
Reduces impurities Reliable and safe
EN

Description
AQVA PURE2 works by removing contaminants from water at molecular level. This water purifier is intended
for producing potable water. It cleans water from mechanical impurities, colloidal particles, organic and
inorganic contaminants, bacteria and viruses. PURE 2 also removes bad taste and odor and reduces the
possible color of water. It may be used for purifying both municipally treated water and water from a local
source (e.g. natural spring, well water, etc.)
The functioning of the water purifier is based on reverse osmosis: under external pressure, when the osmotic
pressure is exceeded, water molecules pass through a semipermeable membrane, while molecules of harmful
substances as well as bacteria and viruses cannot pass through the membrane and exit the system.
The product is easy to install. Use the services of a plumber or a plumbing shop for connecting and introducing
it to the water supply network.
Operating principle of reverse osmosis
Pressurized
feed water
Rinse water /
impurities
Water molecules /
pure water

Technical information
-Recommended feed water pH 6,5 – 8,5
-Recommended feed water TDS value less than 1500 mg/l (electrical conductivity approx. 2350 µs/cm)
-Recommended feed water hardness less than 500 mg/l
-Recommended chlorine content of feed water less than 0.5 mg/l
-Recommended iron content of feed water below 500 µg/l (if higher, pre-filtration is recommended)
-Recommended manganese content of feed water less than 100 µg/l (if higher, pre-filtration is
recommended)
-Supply pressure 2 - 6 bar, if the pressure is less than 3 bar, the production of clean water may be slow
-Diaphragm tank pressure (when unconnected) 0.4 - 0.6 bar
-Recommended feed water temperature + 4… + 35 ° C
-Feed water connector threads ½ inches, external and internal
-Dimensions of the filter unit: width 380 mm, height 450 mm, depth 140 mm
-Diaphragm pressure tank: height 430 mm and diameter 270 mm
-Diaphragm pressure tank clean water capacity: 8 - 10 liters, depending on supply pressure
-The production rate of purified water is about 3 deciliters per minute, depending on the water pressure
in the network. The higher the pressure, the higher the rate. The salinity (chloride) and electrical
conductivity of water also have an effect on the rate of yield. The higher the salinity or electrical
conductivity, the lower the production rate related to pressure.
Components included in the package
1. Osmosis unit
2. Water tank
3. Osmotic
membrane
4.Clean water tap
5. Casing key tool
6. Hose
7. Water tank
block
8. Connectors
9. Feed valve

Installation instructions
8. Diagram of device connection and operation
9. Use of the lock pin and connecting the hoses
Pull the locking pin (2) off the connector (1). Insert the hose (3) into the connector. It sinks to a depth of about
15 mm. Pull the hose out slightly and replace the locking pin (2). Pull to make sure that the hose (3) remains
closed: do not pull more than 8 kgF. You can change the length of the hoses by cutting them to the length
desired with a sharp carpet knife. Cutting should be done against a flat surface and in a direct line.
Detaching the hose or plug (4),
Hose removal key (4) not included in the delivery, you
Attaching the hose of plug may use a small screwdriver or press with fingertips.
Hot water line
Saddle connector
Mineralization
Activated carbon
Osmotic membrane
Pre-filters
Pressurized water tank
Cold water line

10. Installing the filters (the design of the device may differ from the pictures)
Osmotic membrane: Open the filter package with scissors by cutting the end with two rubber seals in the
center tube of the filter. Insert the filter into the filter case without touching it with bare hands. Screw the
case cap on by hand until it stops. Connect the hose and locking pin. Note that the rubber seals in the
center tube of the osmosis membrane sink into the tube at the bottom of the case. This may require a little
pressing by hand. The osmosis membrane can be pushed inwards by pressing the center tube. The old
osmosis membrane can be disposed of with combustible mixed waste.
Pre-filters: In case of a new device, the filter casings open by turning them manually, but if the device has
been in use, it may be necessary to use the casing key tool as an aid. Close the casings by hand by turning
and tighten with the casing key tool.
There are two pre-filters. When viewed from the front, the left side is always a white polypropylene roll
(fine filter) and the right side is activated carbon by default, but depending on the water quality, this filter
can be replaced as needed, for example to an iron manganese filter or a hydrogen sulphide filter if pre-
filtering a certain impurity from water is required. This can prolong the life of the osmotic membrane, but
it does not affect the quality of the filtered water. Water quality always remains excellent after osmosis
purification. Old cartridges can be disposed of with combustible mixed waste.
Post-filters: Activated carbon and mineralization. Mineralization adds a small amount of calcium and
magnesium to the water, activated carbon acts as a general-purpose post-filter. These filters are replaced
as complete cartridges. Filters must not be opened. The filters are removed and attached from the hose
connector. Note the flow direction and filter position before removing the old filters. Old cartridges can be
disposed of with combustible mixed waste.
Click off
Post-activated
Post-mineralization
Osmotic membrane
Osmotic membrane cap
¼” Hose
Open
Open

Overview of the AQVA PURE 2 reverse osmosis unit and the placement of filters
3-way splitter
Pre-filters, 2 pcs
Water
supply to
the unit
Osmotic membrane
Purified water
outlet
Post-filters, activated carbon and mineralization
Option for non-mineralized water
outlet
Diaphragm pressure tank
connector and seal
Tap

11. Installing a clean water tap
12. Drill a 12 mm hole in the basin (table). Note that there should be enough space under the level for
the finger nut and for tightening it.
13. Install the faucet components in the order shown in the picture.
14. Tighten the hose connector by hand and make the final tightening with a tool. Note that the
connector is made of plastic, so excessive tightening may break it. There is an o-ring seal between the
connector, which doesn’t require much force to tighten.
15. Connect the hose to the hose connector.
Hose connector
Finger Nut
Rubber seal
Table top
O-ring seal

16. Installing the sewer connection/saddle connector
17. It is recommended to install the sewer connection/drainpipe connection in the sewer pipe before the
drain hose and the water trap (the drain pipe connection is suitable for all sewer pipes with an internal
diameter of 40 mm).
18. The drainpipe begins from the non-return valve (Flow 420).
19. Remove the protective film from the seal. Glue the tape seal to the inside of the connection. The hole
in the seal should match the hole in the drain connection.
20. Attach the connector to the drainpipe and tighten the screws. The screws must be tightened evenly
so that the two parts of the connection remain at the same level.
21. Drill a 7 mm hole through the connection pipe of the connection.
22. Insert the plastic nut into the JG pipe (black), insert the pipe into the connection and tighten the nut.
Attention! Make sure that the connection pipe is deep enough, but not attached to the back wall of the
drainpipe and that it is firmly attached to the drain connection in order to avoid noise and other nuisances.
23. Installing the supply water connection (branch) and shut-off valve
24. It is recommended to install the supply water connection behind the shut-off valve, for example
between the dishwasher connection, if the dishwasher is used and connected to a cold water line.
Another option is the installation on the cold water line as shown.
Cold water line
1/2 ”splitter
1/2 ”splitter
Shut-off valve
PTFE/Teflon tape

25. Installing the pressure water tank
26. Use PTFE / Teflon tape to ensure tightness.
27. The pressurized water tank has a rubber membrane inside that allows pressurized water to be stored
in it. There is air pressure on the opposite side of the rubber membrane that can leak out over the
years. You can notice the loss of air pressure as a decrease in the volume of clean water. In this case,
you can increase the air pressure through the valve at the bottom of the tank.
Directions for use
-Once again, make sure that all hoses go to their respective connections
-Make sure that the pre-filter casings are tightened
-Close the valve of the pressurized water tank by turning its lever transversely (closed) in the
direction of the hose outlet
-Open the clean water tap
-Open the water supply valve
-Drain the water into the sink for about 20 minutes. During this time, air is removed from the pre-
filters and the water may be light in color. This is a fine air and water mixture. This light color may
occasionally occur a couple of days after introduction.
-Open the shut-off valve on the pressurized water tank
-Close the clean water tap
-Wait about 1 hour for the pressurized water tank to fill.
-Open the clean water tap and empty the pressure water tank. The tank is empty when the water
flow from the fresh water tap is clearly reduced.
-Repeat the previous twice, after which the pressure water tank and water channels have been
flushed.
-Make sure there are no water leaks anywhere
-The device is ready for use
Shut-off valve
PTFE/Teflon tape
Pressurized water tank (purified water)

General and maintenance information
-The water supply to the appliance must be switched off when not in use
-Pre-filters, post-mineralization and post-activated carbon filters are replaced once a year and the osmosis
membrane once every two years. If the water quality is abnormal, it is possible that the filters will clog
faster, resulting in a slower water output. In this case, the filters must be replaced earlier.
-The device produces clean water in the intermediate water tank at a rate of about 3 dl per minute when
the water supply network feed pressure is about 3.5 bar. However, if the hardness of the water or, for
example, the salinity is elevated, it is possible that the yield of the device will slow down or even stop. In
this case, increasing the supply pressure to the network can help.
-It is advisable to monitor the quality of the purified water regularly to ensure that the appliance is working
properly.
-If the appliance is not used for more than 2 weeks, it is recommended to empty the fresh water tank twice
and refill it before use.
-The appliance must not be allowed to freeze.
-If the device is taken to a warm place from the cottage during the winter season, for example, drain the
water from the appliance, disconnect the hoses and plug the connectors, using the supplied color-coded
plugs. Close the valve of the fresh water tank. The hoses and the tap can be left in place.
-When re-installing in the spring, the pre-filters are replaced with new ones and the commissioning steps
are performed and the water tank is flushed twice.
-If the device is used to make clean water from natural water, e.g. from a lake, it is recommended to do
sufficient pre-filtration already with a domestic water pump, using at least a fine filter of 1 µm or 5 µm.
-If the device only produces flushing or reject water, but not clean water, the supply pressure of the network
is probably too low. In this case, it is advisable to check that the lower pressure limit of the pump in
particular has been set.
Replacement filter:
-Osmotic membrane, product code: AQ060
-Prefilters, with product codes: AQMF5-M and AQCB-M
-Post-mineralization, with product code: AQ006-PM
-Post-activated carbon, with product code: AQ006-PC
You can find replacement filters in our online store via menus or by using the quick search field with product
codes.
Table of contents
Other AQVA Finland Water Filtration System manuals
Popular Water Filtration System manuals by other brands

North Star
North Star 7287506 Installation and operation manual
HST
HST WFS-1545 Original instructions
KIRAMI
KIRAMI Tubtainer 2 Instructions for use
Emerson
Emerson NL4-FLC Series RE-ASSEMBLY INSTRUCTIONS
Acuva
Acuva Arrow Series Owner's Product Manual
Miele
Miele DFKS-A-1 Operating and installation instructions


