manuals.online logo
Brands
  1. Home
  2. •
  3. Brands
  4. •
  5. Magma
  6. •
  7. Grill
  8. •
  9. Magma MARINE KETTLE 3 User manual

Magma MARINE KETTLE 3 User manual

This manual suits for next models

6

Other Magma Grill manuals

Magma A10-005 User manual

Magma

Magma A10-005 User manual

Magma Newport A10-918 User manual

Magma

Magma Newport A10-918 User manual

Magma A10-004 User manual

Magma

Magma A10-004 User manual

Magma 200SS User manual

Magma

Magma 200SS User manual

Magma A10-205 User manual

Magma

Magma A10-205 User manual

Magma Cabo User manual

Magma

Magma Cabo User manual

Magma A10-1218-2 User manual

Magma

Magma A10-1218-2 User manual

Magma A10-1225L User manual

Magma

Magma A10-1225L User manual

Magma Gourmet Monterey II A10-1225-2GS, Gourmet Monterey II... User manual

Magma

Magma Gourmet Monterey II A10-1225-2GS, Gourmet Monterey II... User manual

Magma Marine 2 Kettle A10-207 User manual

Magma

Magma Marine 2 Kettle A10-207 User manual

Magma Del Mar DM10-016LP User manual

Magma

Magma Del Mar DM10-016LP User manual

Magma CABO A10-703 User manual

Magma

Magma CABO A10-703 User manual

Magma A10-803 User manual

Magma

Magma A10-803 User manual

Magma Gourmet Series User manual

Magma

Magma Gourmet Series User manual

Magma Newport A10-918L User manual

Magma

Magma Newport A10-918L User manual

Magma Catalina II A10-1218-2GS User manual

Magma

Magma Catalina II A10-1218-2GS User manual

Magma Adventurer A10-603 User manual

Magma

Magma Adventurer A10-603 User manual

Magma ADVENTURER RV CAMPING Series User manual

Magma

Magma ADVENTURER RV CAMPING Series User manual

Magma Connoisseur Series User manual

Magma

Magma Connoisseur Series User manual

Magma CABO A10-703 User manual

Magma

Magma CABO A10-703 User manual

Magma Cabo A10-703C User manual

Magma

Magma Cabo A10-703C User manual

Magma Monterey A10-1225LS User manual

Magma

Magma Monterey A10-1225LS User manual

Magma Adventurer A10-603E User manual

Magma

Magma Adventurer A10-603E User manual

Magma Catalina II A10-1218-2 User manual

Magma

Magma Catalina II A10-1218-2 User manual

Popular Grill manuals by other brands

LMS BBQ08873P owner's manual

LMS

LMS BBQ08873P owner's manual

Cookworks LW-8010A Care & instruction manual

Cookworks

Cookworks LW-8010A Care & instruction manual

Campingaz CV Instructions for use

Campingaz

Campingaz CV Instructions for use

Metos XBL Series Installation and operation manual

Metos

Metos XBL Series Installation and operation manual

Fiesta ET34567 Use and care instructions

Fiesta

Fiesta ET34567 Use and care instructions

Mayer Barbecue BRENNA MKG-318A BASIC Assembly instructions

Mayer Barbecue

Mayer Barbecue BRENNA MKG-318A BASIC Assembly instructions

Landmann Avalon PTS Plus 5.1 Plus 12122 Assembly and operating manual

Landmann

Landmann Avalon PTS Plus 5.1 Plus 12122 Assembly and operating manual

Kenyon B70200 owner's manual

Kenyon

Kenyon B70200 owner's manual

Better Homes and Gardens GBC1486W owner's manual

Better Homes and Gardens

Better Homes and Gardens GBC1486W owner's manual

Orbegozo GR 2300 instruction manual

Orbegozo

Orbegozo GR 2300 instruction manual

bora PT11 Operating and installation instructions

bora

bora PT11 Operating and installation instructions

Klarstein 10031664 manual

Klarstein

Klarstein 10031664 manual

Garland MWE3W Installation and operation manual

Garland

Garland MWE3W Installation and operation manual

Char-Broil 463722714 Product guide

Char-Broil

Char-Broil 463722714 Product guide

MPM MOP-03 user manual

MPM

MPM MOP-03 user manual

Kenmore 415.16123800 Use and care guide

Kenmore

Kenmore 415.16123800 Use and care guide

Tucker Barbecues GTR Series Assembly, installation and operating instructions

Tucker Barbecues

Tucker Barbecues GTR Series Assembly, installation and operating instructions

Monogram ZGG540NCP1SS owner's manual

Monogram

Monogram ZGG540NCP1SS owner's manual

manuals.online logo
manuals.online logoBrands
  • About & Mission
  • Contact us
  • Privacy Policy
  • Terms and Conditions

Copyright 2025 Manuals.Online. All Rights Reserved.

IMPORTANT, Read These Instructions Carefully Before Use. Familiarize Yourself With the Appliance
Before Connecting It to Its Gas Container. Keep These Instructions for Future Reference.
®
MARINE KETTLE 3®GAS GRILL
A10-207-3 • A10-217-3 • A10-207-3-CSA • A10-217-3-CSA
A10-207-3-CE-2 • A10-217-3-CE-2
OWNER’S MANUAL
For questions regarding performance, assembly,
operation, parts, or returns, contact the experts at
MAGMA by calling (562) 627-0500
7:00 a.m. — 5:00 p.m. Pacific Time Monday thru Friday
or e-mail us at [email protected].
THIS PAGE INTENTIONALLY LEFT BLANK
READ ALL INSTRUCTIONS BEFORE OPERATING.
POUR VOTRE SÉCURITÉ
Que faire si vous sentez une odeur de gaz:
1. Ne pas tenter d’allumer d’appareils.
2. Éteindre toute flamme.
3. Couper l’alimentation en gaz à la source.
FOR YOUR SAFETY
If you smell gas:
1. Do not attempt to light appliance.
2. Extinguish any open flame.
3. Disconnect from fuel Supply.
POUR VOTRE SÉCURITÉ
Ne pas entreposer ni utiliser d’essence ni d’autres
vapeurs ou liquides inflammables à appareil.
FOR YOUR SAFETY
Do not store or use gasoline or other liquids with
flammable vapours in the vicinity of this or any other
appliance.
IMPORTANT SAFETY WARNINGS FOR US & CSA GRILL MODELS
DANGER MONOXYDE DE CARBONE
Cet appareil peut produire du
monoxyde de carbone, un gaz
inodore.
L’utilisation de cet appareil dans des
espaces clos peut entraîner la mort.
Ne jamais utiliser cet appareil dans
un espace clos comme un véhicule de
camping, une tente, une automobile
ou une maison.
DANGER CARBON MONOXIDE HAZARD
This appliance can produce carbon
monoxide which has no odor.
Using it in an enclosed space can kill
you.
Never use this appliance in an
enclosed space such as a camper,
tent, car or home.
• USE OUTDOORS ONLY.
• DO NOT USE THIS APPLIANCE INSIDE THE BOAT OR ANY ENCLOSED SPACE.
• GRILLS RADIATE HEAT. CLEARANCE FROM COMBUSTIBLES, 24" SIDES AND
BACK. NEVER USE UNDER AWNINGS, PATIO COVERS, ETC.
• USE PROPANE GAS ONLY. FUEL STORAGE SHOULD BE IN COMPLIANCE WITH THE AMERICAN BOAT AND
YACHT COUNCIL (ABYC) STANDARDS A-1 (9), MARINE LIQUIFIED PETROLEUM GAS (LPG) SYSTEMS.
• FOR NATURAL GAS APPLICATION CONTACT MAGMA.
• ALWAYS LIGHT GRILL WITH LID OPEN.
• NEVER LEAVE HOT GRILL UNATTENDED.
• DO NOT OVERHEAT GRILL, (SEE “OPERATING INSTRUCTIONS”, PAGE 9).
• ALWAYS TURN GRILL OFF AFTER USE.
• USE GLOVE OR HOT PAD WHEN HANDLING HOT GRILL.
• NEVER LEAVE GAS CYLINDERS AND REGULATOR CONNECTED WHEN STOWED.
• STORE GAS CYLINDERS IN WELL-VENTILATED AREA.
• DO NOT STORE GAS CYLINDERS INDOORS, IN DIRECT SUNLIGHT, BELOW DECKS ON
BOATS, OR IN LOCKERS NOT APPROVED FOR BUTANE OR PROPANE STORAGE.
• CAUTION: CHECK FOR GAS LEAKS EACH TIME CYLINDER IS CHANGED.
• NEVER CHECK FOR GAS LEAKS WITH A FLAME!
• DO NOT BLOCK, RESTRICT, OR OTHERWISE OBSTRUCT COMBUSTION OR VENTILATION AIR OPENINGS.
• DO NOT MODIFY THIS APPLIANCE.
• KEEP AREA CLEAR AND FREE FROM COMBUSTIBLE MATERIALS, GASOLINE,
AND OTHER FLAMMABLE VAPOURS AND LIQUIDS.
• CHECK THAT VALVE SEALING WASHER (A) IS IN PLACE AND IN GOOD CONDITION BEFORE
CONNECTING THE GAS CONTAINER. (NOT APPLICABLE TO CE-2 GRILL MODELS)
• INSTALL CANISTERS IN WELL-VENTILATED AREA AND AWAY FROM OPEN FLAME, HEAT
SOURCE OR SPARKS. KEEP AWAY FROM OTHER PEOPLE OR FLAMMABLE MATERIALS.
A
3
• USE OUTDOORS ONLY.
• DO NOT USE THIS APPLIANCE INSIDE THE BOAT OR ANY ENCLOSED SPACE.
• GRILL RADIATES HEAT, CLEARANCE FROM COMBUSTIBLES, 24" (61 CM) SIDE AND BACK, NEVER USE
UNDER AWNINGS, PATIO COVERS, ETC.
• CAUTION: ACCESSIBLE PARTS MAY BECOME VERY HOT. KEEP YOUNG CHILDREN AWAY FROM THE
APPLIANCE.
• NEVER LEAVE HOT GRILL UNATTENDED.
• USE GLOVE OR HOT PAD WHEN HANDLING HOT GRILL.
• INSTALL CANISTERS IN WELL-VENTILATED AREA AND AWAY FROM OPEN FLAME, HEAT SOURCE, OR
OTHER PEOPLE OR FLAMMABLE MATERIALS.
• CAUTION: CHECK FOR GAS LEAKS EACH TIME CYLINDER IS CHANGED.
• DO NOT USE APPLIANCE IF IT HAS DAMAGED OR WORN SEALS; DO NOT USE AN APPLIANCE WHICH IS
LEAKING, DAMAGED OR DOES NOT OPERATE PROPERLY.
• NEVER CHECK FOR GAS LEAKS WITH A FLAME!
• IF THERE IS A LEAK ON YOUR APPLIANCE (SMELL OF GAS), TAKE IT OUTSIDE IMMEDIATELY INTO A
WELL-VENTILATED, FLAME-FREE, LOCATION WHERE THE LEAK MAY BE DETECTED AND STOPPED. IF YOU
WISH TO CHECK FOR LEAKS ON YOUR APPLIANCE, DO IT OUTSIDE. DO NOT TRY TO DETECT LEAKS USING
A FLAME, USE SOAPY WATER.
• ALWAYS LIGHT GRILL WITH LID OPEN.
• DO NOT OVERHEAT GRILL, (SEE “OPERATING INSTRUCTIONS”, PAGE 9).
• DO NOT BLOCK, RESTRICT, OR OTHERWISE OBSTRUCT COMBUSTION OR VENTILATION AIR OPENINGS.
• APPLIANCE MUST BE OPERATED IN THE HORIZONTAL POSITION ONLY.
• DO NOT MODIFY THIS APPLIANCE.
• CHECK THAT BURNERS ARE EXTINGUISHED BEFORE DISCONNECTING THE GAS CONTAINER.
• ALWAYS TURN GRILL OFF AFTER USE.
• CHECK THAT THE GAS CARTRIDGE IS EMPTY BEFORE CHANGING IT (SHAKE TO HEAR THE NOISE MADE BY
THE LIQUID).
• NEVER LEAVE GAS CYLINDER (CONTAINER) OR VALVE/REGULATOR CONNECTED WHEN STORED.
• STORE GAS CYLINDERS IN WELL-VENTILATED AREA.
• DO NOT STORE GAS CYLINDERS INDOORS, IN DIRECT SUNLIGHT, BELOW DECKS ON BOATS, OR IN
LOCKERS NOT APPROVED FOR PROPANE OR BUTANE STORAGE.
• FOR MODELS A10-207-3-CE-2 AND A10-217-3-CE-2; USE PROPANE/BUTANE MIXED GAS (CAMPINGAZ®) IN
CYLINDERS CV-270, CV270 PLUS, CV-470 OR CV470 PLUS. GAS CONSUMPTION ON THESE CYLINDERS IS
0.2 kg/h.
• IT MAY BE HAZARDOUS TO ATTEMPT TO FIT OTHER TYPES OF GAS CONTAINERS.
IMPORTANT SAFETY WARNINGS FOR CE-2 GRILL MODELS
READ ALL INSTRUCTIONS BEFORE OPERATING.
4
CONTENTS
Each Magma®Gas Grill is individually fire tested before it leaves the factory.
For this reason, the burner on your grill may be slightly discolored.
SETTING UP YOUR GRILL
Mounts sold separately. See our website MagmaProducts.com for mounting options.
Grill Grate
Radiant Plate
Turbo Venturi
Tube Assembly
Grill Body
Dome
Tool
Needed
9/16"
Wrench
Not Included
1. Select and install appropriate Magma mount in your desired location. Prior to installing the
grill, check that mount does not easily move with a reasonable force applied.
2. Next, decide if gas control valve will be easier to access from the center right side or center left side of grill.
This will be based on your placement of the mount (See picture on front cover). Now, slide L-Bracket & Clamp
on to mount knurled rod so that the threaded flat L-portion of the L-Bracket points in that direction.
3. Adjust threaded flat surface of L-Bracket to level position and tighten firmly with 9/16" or adjustable wrench so that
L-Bracket & Clamp cannot be moved. NOTE: Level positioning is critical for even temperatures across the cooking surface.
4. Carefully hold the grill body, with the lid closed, and thread on to L-Bracket VERY TIGHT so that
grill does not unthread easily. Check that grill is tight and level prior to proceeding.
1. 4.
Level
Flat
Surface
3.2.
Match Light Holder
Included with CSA
Models Only
For US & CSA Models
Control Valve/
Regulator-Type 1
For CE-2 Models
Control Valve/
Regulator-Type 2
Indexing “L” Bracket
& Clamp Assembly
5
5. With grill body tightly attached to L-Bracket and taking care not to damage electrode, unthread burner 3 full revolutions
only. CAUTION: DO NOT UNTHREAD MORE THEN 3 REVOLUTIONS, AS GRILL MAY FALL OVERBOARD.
• Lift entire grill up to disengage from grease tray positioning pins (5a & 5b)
and rotate so lid operates freely in desired position (5c).
• Carefully lower back down (5d), making sure pins are re-engaged and rethreaded “burner” back 3
revolutions until tight. If burner does not turn 3 revolutions the pins are not engaged properly.
5.
Grease Tray
5a
Grease Tray Pins
Threaded
Burner Pipe
5b
5c 5d
6. Install radiant plate & dome over burner on fire pan ridge.
7. Install grill grate by rotating grate so that both grill grate tabs slide under the holding
clips (7a), locking grate and all internal components in correct position.
8. Insert the turbo venturi tube into the threaded pipe on the bottom of the grill body and firmly tighten the threaded nut
so nut doesn't turn while rotating the turbo venturi tube. NOTE: Turbo Venturi Tube should still rotate freely. Venturi
tube should be stowed with valve in a clean dry environment when not in use. (See “Stowing Tips”, Page 9) Before
each use, prior to inserting venturi tube, check that the threaded pipe is free of spider webs or other obstructions.
8.7a6. 7.
SETTING UP YOUR GRILL
6
US & CSA — CONTROL VALVE REGULATOR
A10-207-3 • A10-217-3
• Uses standard 1-lb. disposable propane canisters (DOT-39 NRC).
• Prior to installing valve, become familiar with the valve function and
graphics on valve knob. Never force the knob. Always turn or push
gently.
• Turn control valve to “LOCK” and install gas canister being careful not
to cross the threads. Check for leaks prior to use, by brushing soapy
water solution around threads and orifice hole checking for bubbles.
• Position valve with gas bottle as shown (A). Gently insert valve stem
into the turbo venturi tube. Rotate until valve stem key aligns with lock
detent allowing valve to fully insert. Rotate gas canister down (B).
CONNECTING FUEL SOURCE
OFF/
Lock ON
Align valve stem key to
valve chamber lock
detent and rotate
CE-2 — CONTROL VALVE REGULATOR
A10-207-3-CE-2 • A10-217-3-CE-2
A
B
Valve Stem Key
Lock Detent
High
Low
Medium
Indicator
Lock
Off
Unlock
Valve will feel loose and will rotate easily. Even though the valve feels loose, it is designed that way
and will not leak. The valve was designed to be loose fitting in order to allow safe, easy installation and
removal of the propane canister and so it easily swings without resistance to fit all applications.
7
USING GRILL WITH ON-BOARD LPG (PROPANE) SYSTEMS
• Magma On-Board LPG (Propane) Valves and LPG (Propane) Low Pressure Gas Grill Connection Kits allow
Magma Grills to be installed within a boats existing on-board, pre-regulated low pressure LPG (Propane)
system.
• Use only Magma Type 3 Low Pressure LPG (Propane) Valves.
See our Valve Application Guide at MagmaProducts.com for correct valve.
• In North America, use Magma A10-225 LPG 10' Gas Grill Connection Kit in conjunction with Type 3 Valve.
Outside North America check your local dealer for proper hose and fittings.
• A primary shutoff valve (supplied with Gas Grill Connection Kit) must be used with this control valve at point
of connection into your system. This allows shut off of gas supply to hose leading to grill.
• In Australia and New Zealand, LPG fuel systems must be installed by a certified gas technician.
Propane (LPG) Gas
Regulator
A10-225 LPG (Propane)
10' Gas Grill Conversion Kit
To other LPG
appliance
or use cap
Shut off
valve
Cylinder Valve
Gauge
Gas grill Type 3
Valve
Solenoid
Typical Boat and R.V. Application
Gently insert valve stem into venturi tube upside down until fully inserted and rotate as shown.
IMPORTANT!! • DO NOT CONNECT A HIGH-PRESSURE SUPPLY HOSE
FROM A NON-REGULATED TANK DIRECTLY TO GRILL.
Magma's grills are designed for use with small disposable propane canisters or with pre-regulated low-pressure
propane and optional low-pressure valves. Running high-pressure propane fuel supply lines on a boat is in
violation of American Boat & Yacht Council (ABYC) guidelines and is not considered a safe application.
Additionally, impurities found in larger refillable propane tanks may clog the small orifices in the high-pressure
control valve/regulator causing it to lose performance capabilities and eventually fail. Regulating these tanks to
1/2 PSI and using this pre-regulated propane with the correct low-pressure valve will ensure safe, efficient
performance of the grill.
8
OPERATING PROCEDURES
WARNING: Do not overheat grill. Magma grills do not require pre-heating. Stainless Steel loses anti-corrosive
characteristics when subjected to extreme heat. Most grilling is done on low temperature with the lid closed. If
medium or high heat is required, grill with lid open.
LIGHTING INSTRUCTIONS
• Open lid during lighting. • Depress knob & rotate counter-clockwise to the “HIGH” position.
• Push Electronic Pulse Igniter. • Visually confirm ignition. • Turn knob to adjust flame.
• If grill does not light, ensure that a burner electrode spark cap is directly above electrode.
• If the Electronic Pulse Igniter continues to fail to ignite the gas, (See MATCH LIGHTING INSTRUCTIONS).
NOTE: Electronic ignition comes equipped with battery pre-installed. Replace with “AAA” alkaline battery only.
MATCH LIGHTING INSTRUCTIONS
(Backup system allows use of grill until Electronic Pulse Igniter system is repaired.)
• Open lid during lighting.
• Place flame up to burner through the match light hole.
• Depress valve and turn counter-clockwise to the “High” position.
• Visually confirm ignition.
TO REDUCE FLARE-UP
• Trim excess fats from meat. • Reduce heat.
• Use non-oil based marinades. • Use water spray directly on flare-ups.
To help create your own Magma gourmet experience every time you grill,
please check these important critical points prior to lighting your grill.
• Mount is secure and grill does not move. • Electrode is clean and electronic ignition creates a spark.
• Grease tray and fire pan are clean from excess drippings to reduce flare up and ensure even air flow.
• Lid is correctly positioned to operate freely and is in best position for blocking the wind.
• Venturi tube, burner, threaded burner pipe and valve orifice are free of obstructions, such as spider webs.
• Radiant plate is positioned correctly. • Grill grate is in locked position under holding clips.
• Turbo Venturi Tube holding nut is tight & doesn't turn when rotating valve position.
• Valve is installed and locked into Turbo Venturi Tube properly. • Sufficient fuel is available.
COOKING TIPS
• The most common mistake when grilling is using too high of a heat setting. Grills become hotter as you cook,
so use moderate heat settings when cooking with lid closed.
• Always keep a water spray bottle handy for flare-ups and quick cooling if grill overheats.
• Coat the grill grate with vegetable or olive oil to prevent food from sticking.
STOWING TIPS
• Always disconnect the fuel canister from the valve prior to stowing.
• Stow the valve and Turbo Venturi Tube in a clean, dry area to protect from corrosion to valve and spider web
obstructions in venturi tube.
• Always stow by unthreading the entire grill from the L-Bracket. Do not remove the L-Bracket & Clamp unless
repositioning is necessary.
• Always store propane in a sealed propane storage locker that allows leakage to vent overboard or use
Magma A10-210 Propane Storage Tote. Never stow below decks.
Match Light Hole
9
MAINTENANCE
COMPLETE DISASSEMBLY FOR CLEANING (OR ACCESS TO ELECTRONIC PULSE IGNITER)
1. Remove entire grill body from L-Bracket of Mount.
2. Unthread and remove burner, fire pan and grease pan from outer bowl.
3. To inspect Electronic Pulse Igniter, remove single screw from inside of outer bowl to
release igniter box and carefully inspect for corrosion or loose wire connection.
4. To reassemble, reverse above steps and steps 5 through 8 (See “Setting Up Your Grill”, Page 6).
Stainless Steel, contrary to popular belief, can rust. Most commonly, deposits on the surface of the product will
trap moisture. It is this moisture that robs the stainless steel of oxygen. Oxygen is the element that reacts with the
stainless steel to form a protective layer of chrome oxide. Robbed of oxygen this reaction does not take place and
“crevice corrosion”, or “surface rusting”, occurs. To minimize this effect, thoroughly clean your grill with soap and
water, rinse with fresh water and dry. Avoid using products designed to clean stainless steel as most leave a residue
that may discolor when the grill is heated.
Additionally, stainless steel that is exposed to high heat will change color and texture over time. The “amber” color
of grill exterior and internal components is not a failure of the stainless steel and will not affect the product's operation.
When this happens, we recommend using “Magma Magic” Grill Restorer to remove the “amber” color and return grill
to its original luster. However, prolonged exposure to extreme high heat will cause chromium and nickel to “burn out”
of stainless steel. At this point stainless steel will become more susceptible to corrosion and will start to deteriorate.
We recommended replacement of internal components as they become seriously deteriorated.
We recommend thorough cleaning of all internal parts after each outing. It is important to disassemble the interior
components and remove any food residue. A soft “Scotch-Brite” pad or similar product may be used in this process.
For heavier burned-on stains we recommend “Easy-Off Oven & Grill Cleaner” followed by thorough washing with soap
and water, rinse with fresh water and dry. AVOID CONTACT OF OVEN CLEANER WITH CONTROL VALVE, IGNITER
ELECTRODE & WIRE, AND BOAT SURFACES. CAUTION: DO NOT USE ANY TYPE OF ABRASIVE PAD ON THE
EXTERIOR MIRROR FINISH AS IT WILL SCRATCH THE SURFACE. USE ONLY A SOFT COTTON CLOTH. We
recommend covering the grill between uses. Grill covers are available at Magma retailers or directly from Magma.
See our website, MagmaProducts.com. GRILL GRATES
Clean with brass wire brush while grill is warm. Use Oven & Grill cleaner for burnt-on residue. Wash with soapy water
and dry prior to storage. CERAMIC ELECTRODE
Located just beside the burner, it should be kept clean of grease and debris. Burner ground strap must be directly over
the electrode for proper operation, be careful not to damage the ceramic insulation or the wire.
CONTROL VALVE
All valves are set and tested at our factory. Do not attempt to adjust or disassemble the valve. Call Magma if you
suspect it is not adjusted properly. Clean valve with a cloth and remove any debris obstructing the orifice.
REPAIR/REPLACEMENT PARTS
All replacement parts are readily available at your Magma Retailers or directly from Magma. For a complete list of
replacement parts, see page 11, or visit our website MagmaProducts.com.
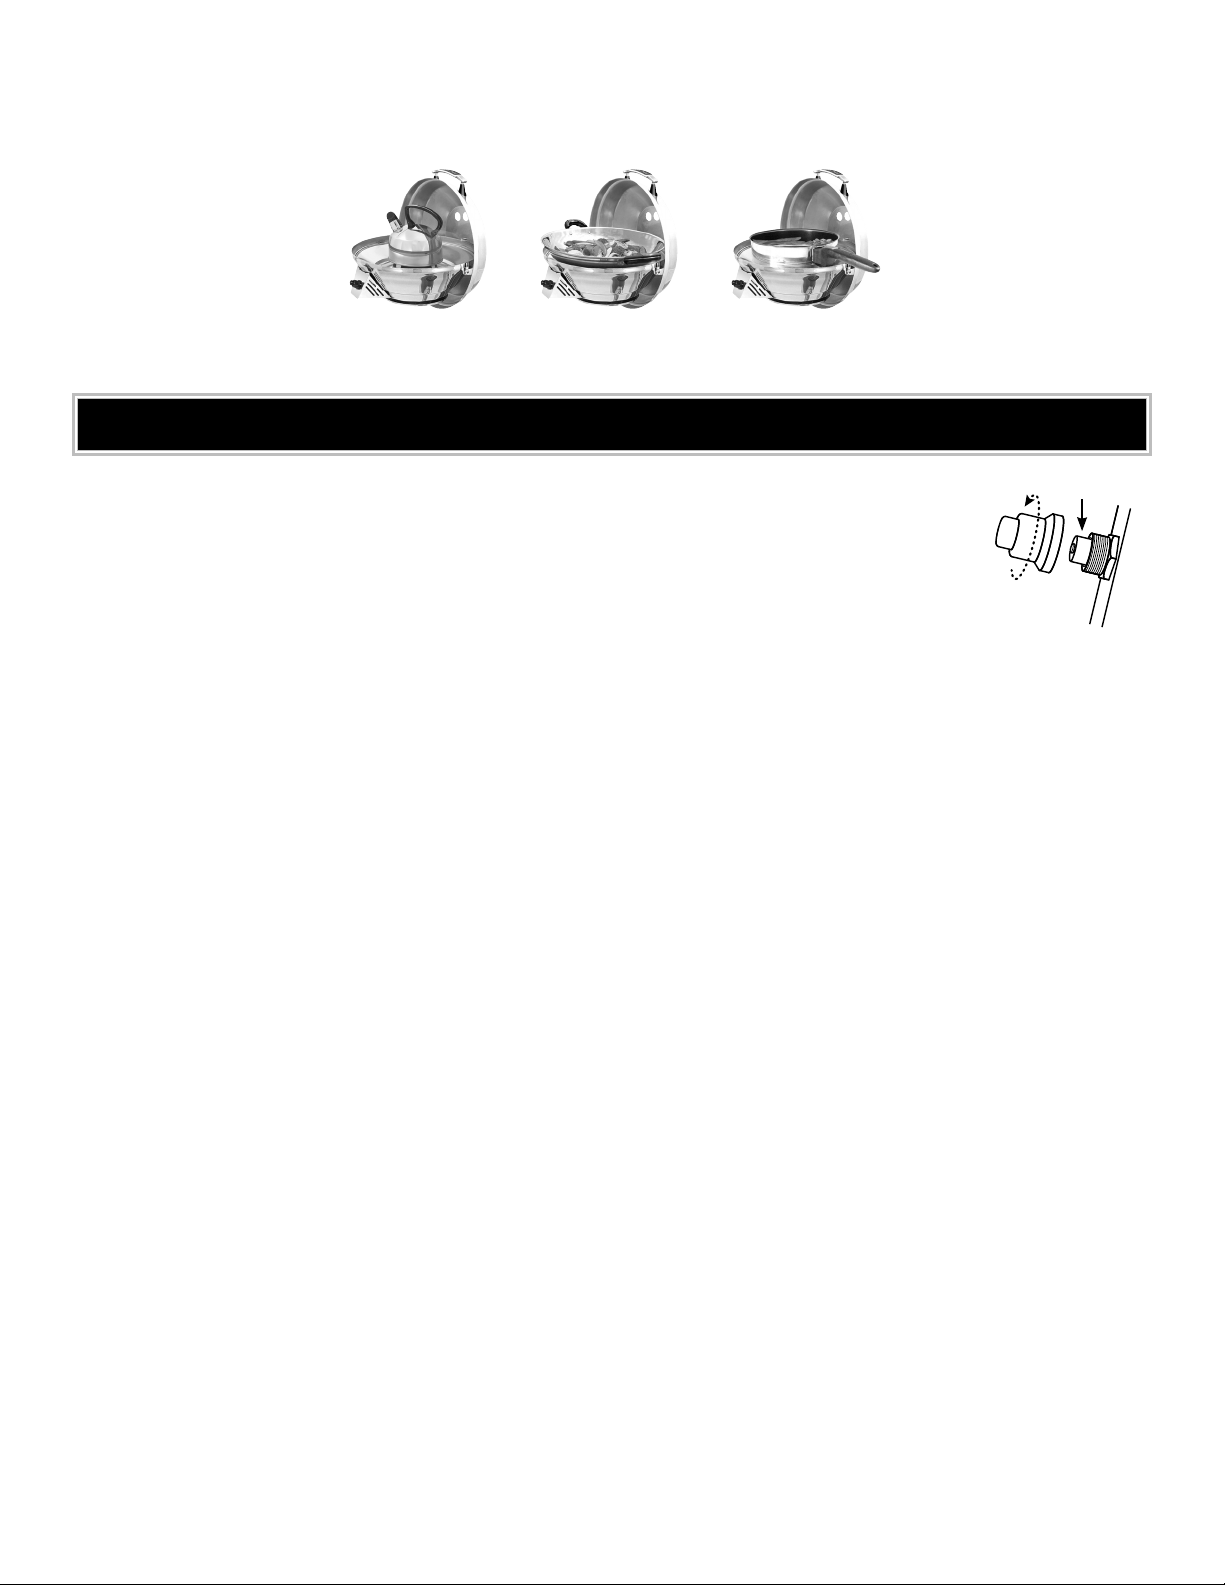
Battery
• For smaller pots/pans, place the cookware directly on the three tongs of the radiant plate.
• For larger pots/pans, including woks, invert the radiant plate and place the cookware directly on the radiant plate.
USING THE MARINE KETTLE AS A STOVE
Magma’s patented, unique design of the Marine Kettle allows it to be used as a conventional stove. This permits
you to fry, saute, boil, wok, etc. • Remove the grill grate. • Remove the radiant dome • Adjust flame to proper
cooking temperature.
10