2
Installer Warnings
Installation
This remote starter with keyless entry system is designed to be installed on fuel injected vehicles with an automatic
transmission ONLY.
• Never install this remote starter on a manual transmission vehicle.
• Some automatic transmission vehicles [mainly older GM vehicles with a purple starter wire] have a mechanical-type
park safety switch instead of an electrical safety switch. The mechanical type does not interrupt the starter circuit when
the transmission is any gear and does not offer the 100% level of safety required for remote starting purposes.
Therefore, our system should never be installed on any vehicle that uses a mechanical type park safety switch.
• Once you install this system, you must verify that the vehicle will not start in any forward or reverse gear. Regardless
of the type of vehicle.
• Read the owner’s manual for the operating and programming routine.
• Do not install any component near the brake, gas pedal or steering linkage.
• Some vehicles have a factory installed transponder immobilizer system that can severely complicate the installation.
There is a possibility that this system can not be installed on some immobilizer equipped vehicles.
• Most vehicles have an SRS air bag system. Use extreme care and do not probe any wires of the SRS system.
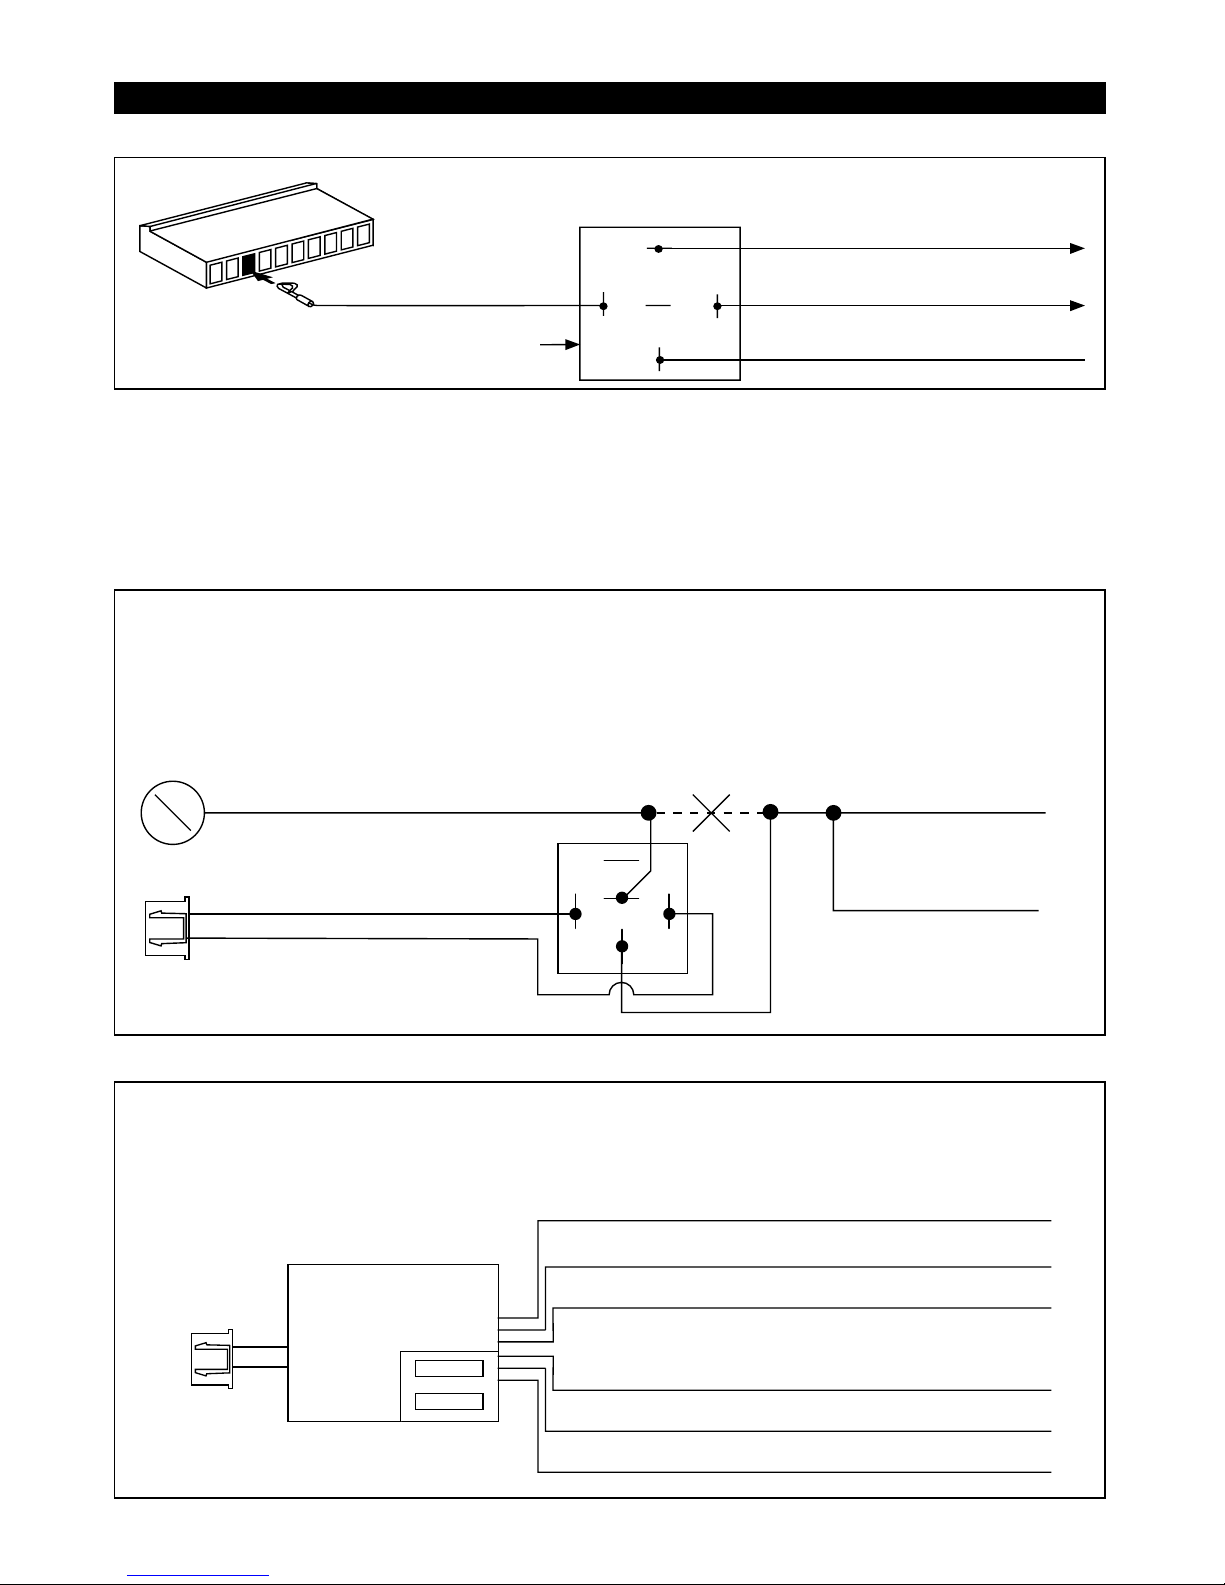
Hood Safety Switch
The supplied weatherproof mercury hood safety switch is a required component you must install to prevent bodily.
• The switch prevents operation of the remote starter when the hood is raised.
• The mercury hood safety switch should not require adjusting. It is internally pre-adjusted for a 25 degree tilt.
• The switch mounts on the underside of the hood. On normal installations, the switch can be mounted using the
supplied quick clip. Once the switch is mounted, the wires of the switch should be towards the firewall of the vehicle.
• Connect one wire to the blue wire on our 10 pin harness.
• Connect the other remaining wire to ground.
Windshield Receiver/Antenna
• The combination windshield receiver/antenna mounts on the windshield. [Inside]
• We suggest you mount it on the lower left or upper left-hand side of the windshield.
Warning! Do not mount in such a manner that it obstructs the driver's view.
• The receiver/antenna whip can be vertical or horizontal.
• Remove the protective tape backing.
• Carefully align the receiver/antenna and apply to windshield.
• Route the black connecting cable behind the trim and connect to receiver/antenna.
• Connect the other end to the control module.
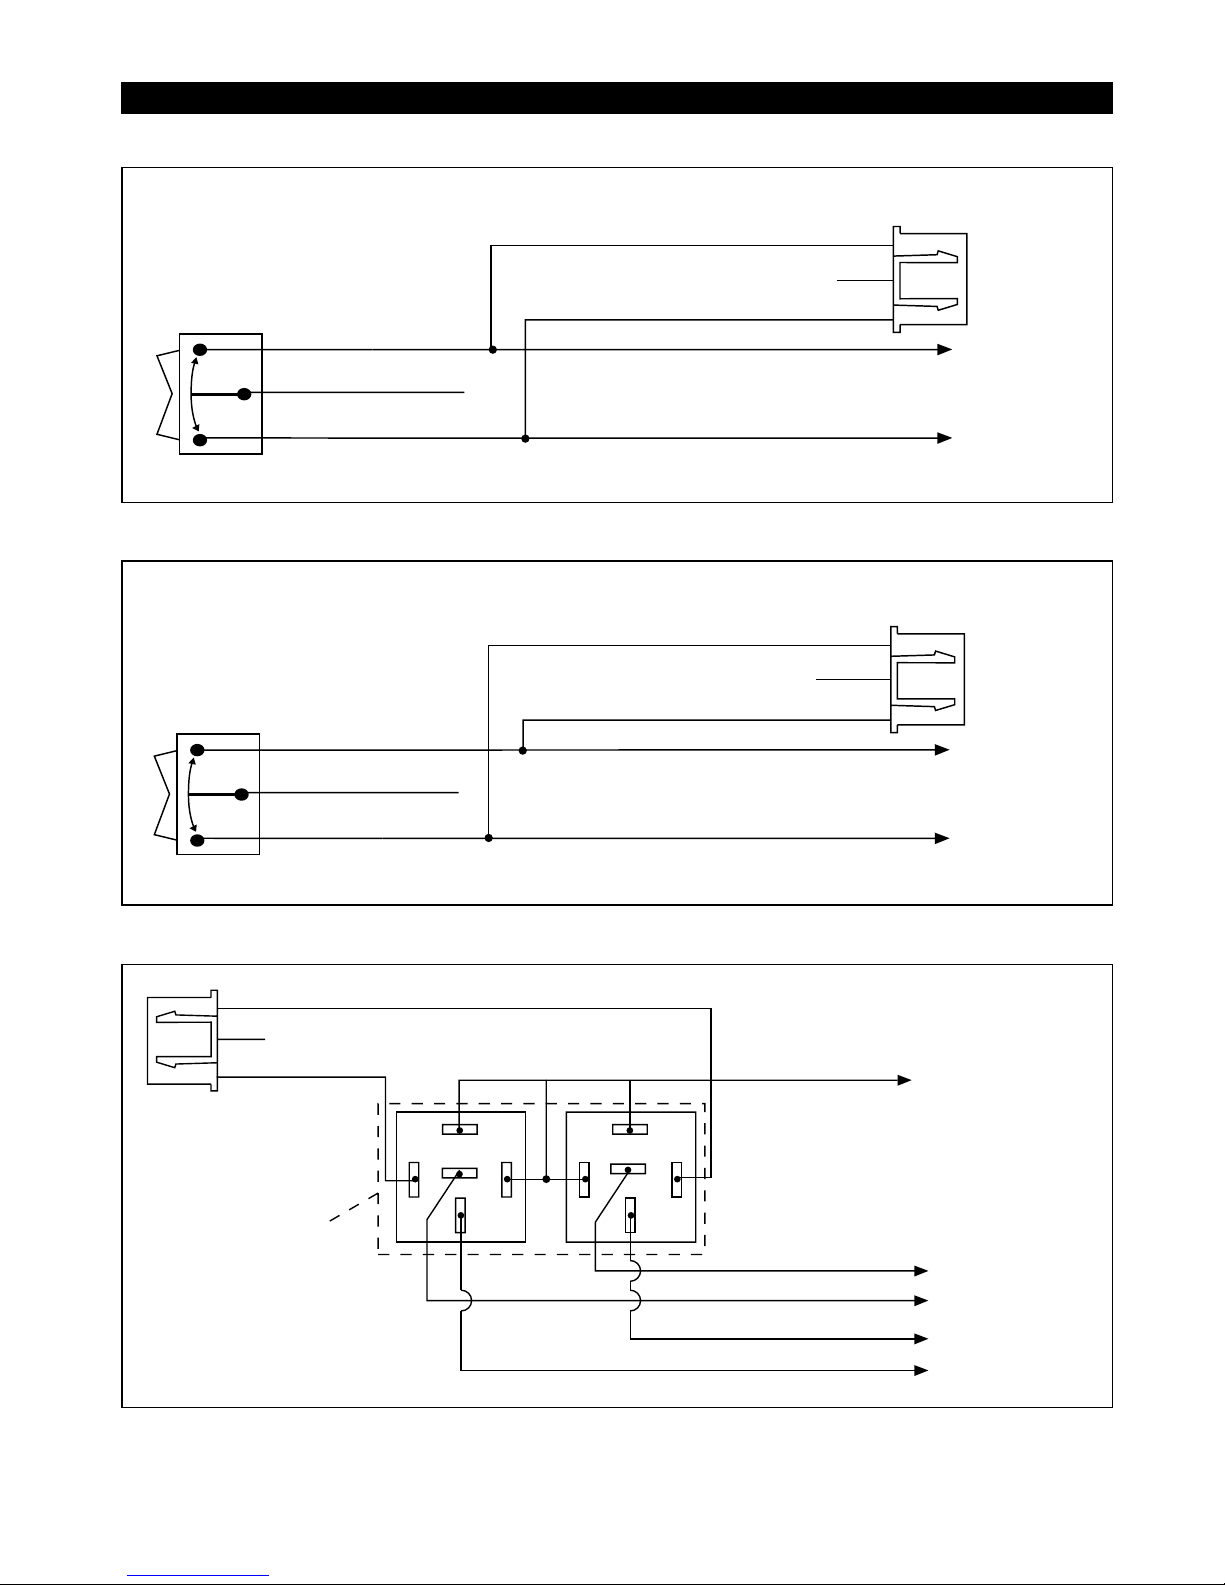
6-Pin White Connector: [ 7 Wire Power Harness]
The heavy power wire connections should be made close to the ignition switch. The heavy power wires supply power to
the vehicle ignition switch wires in the same sequence as the vehicles ignition switch does, when it's rotated. You must
probe and verify the vehicles wire circuits you are connecting too.
Orange wire: [Starter Output]
• Provides [+] 12 volts while cranking by remote control.
• Connect to the vehicle starter wire that goes hot in the start position.
Black Wire: [Ground Input]
• Supplies constant ground to the control module.
• Connect to bare metal on the vehicle.
Brown Wire: [Heater/AC Output]
• Provides [+] 12 volts after the engine starts running on remote control.
• Connect to the vehicle's ignition harness wire that goes hot only in the run position.
• Never connect the brown wire directly to the blower motor of the vehicle.